
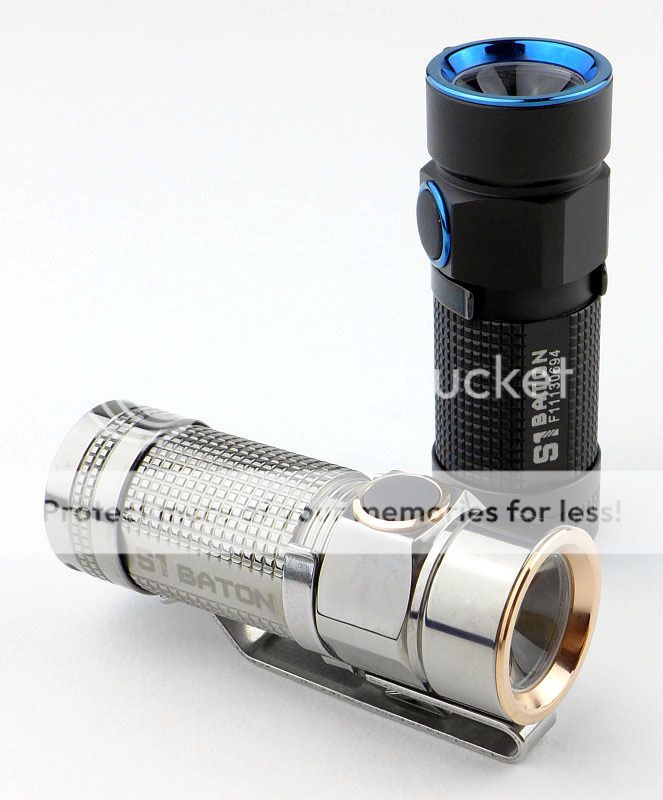
Olight's S1 is the smallest light they have ever produced with a side switch. Along with the standard aluminium edition, Olight have created quite a storm of interest by also releasing several different Special Editions with different emitters and materials such as Copper, Titanium as well as Gold-plated versions.
Taking a more detailed look at the S1 (standard Al edition):
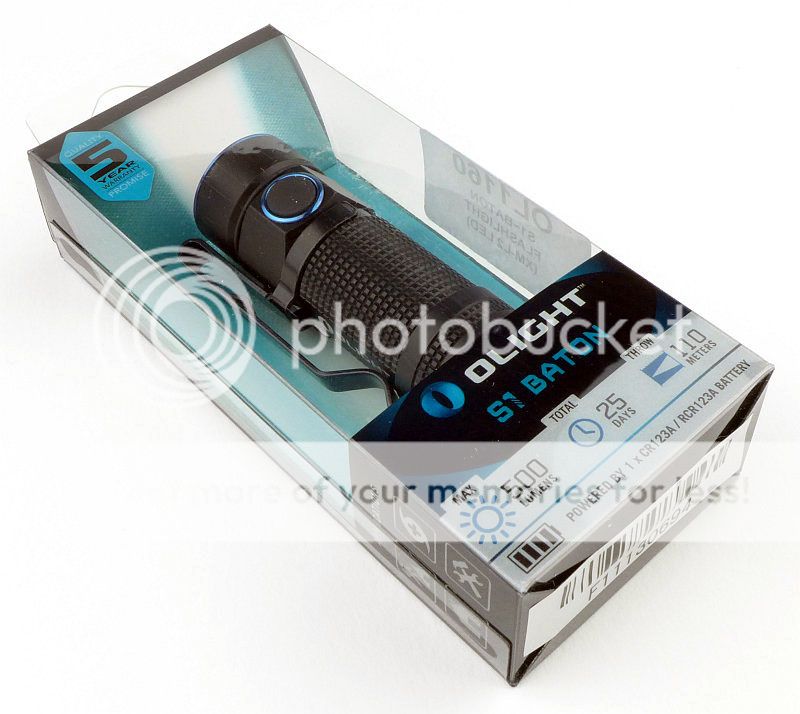
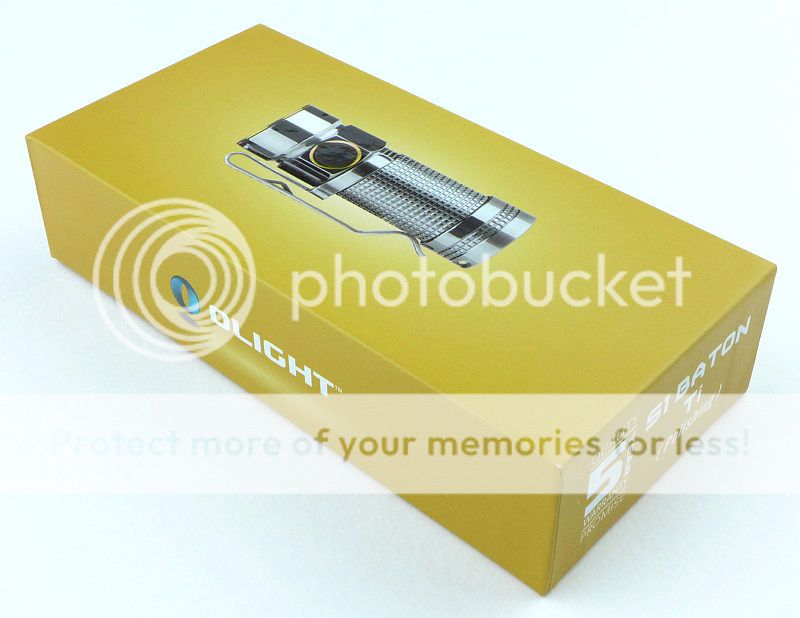
Olight's standard plastic box packaging displays the S1 nicely.
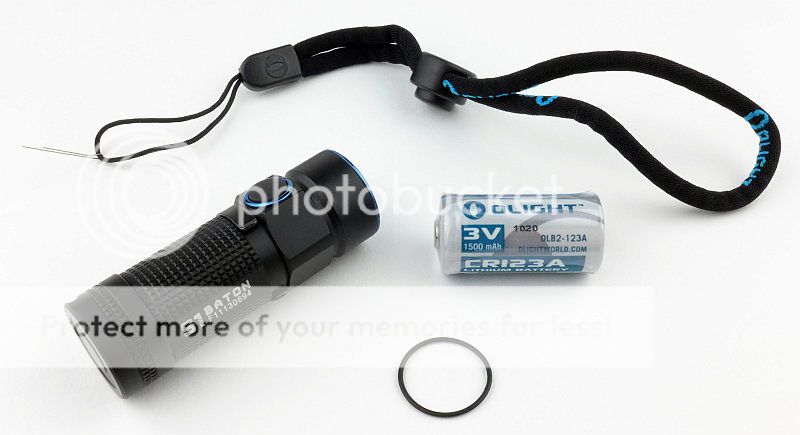
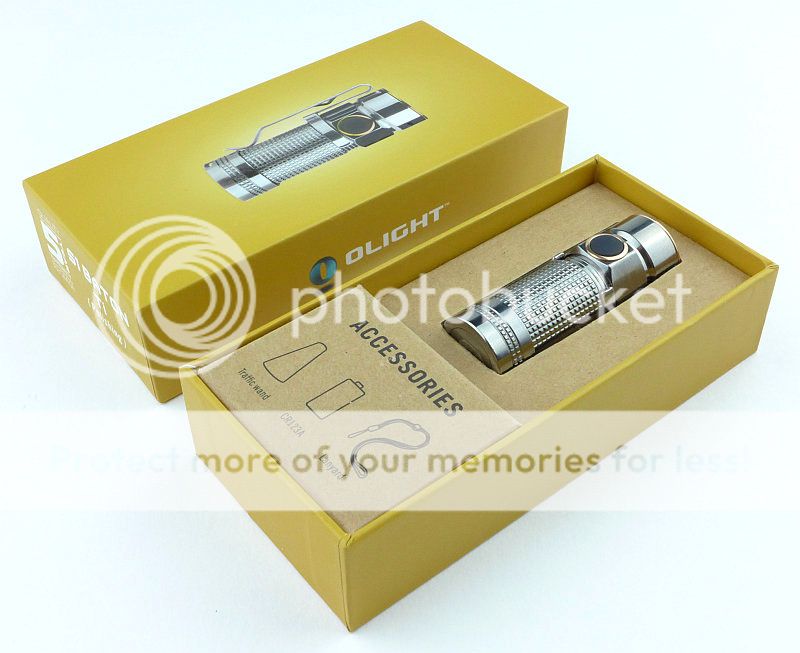
Inside the box is the S1, a CR123 cell, spare O-ring (which is actually used to hold the S1 in place) and a wrist lanyard. A really thoughtful feature is that the lanyard comes with a threading wire fitted to it to make it easy to fit to the S1.
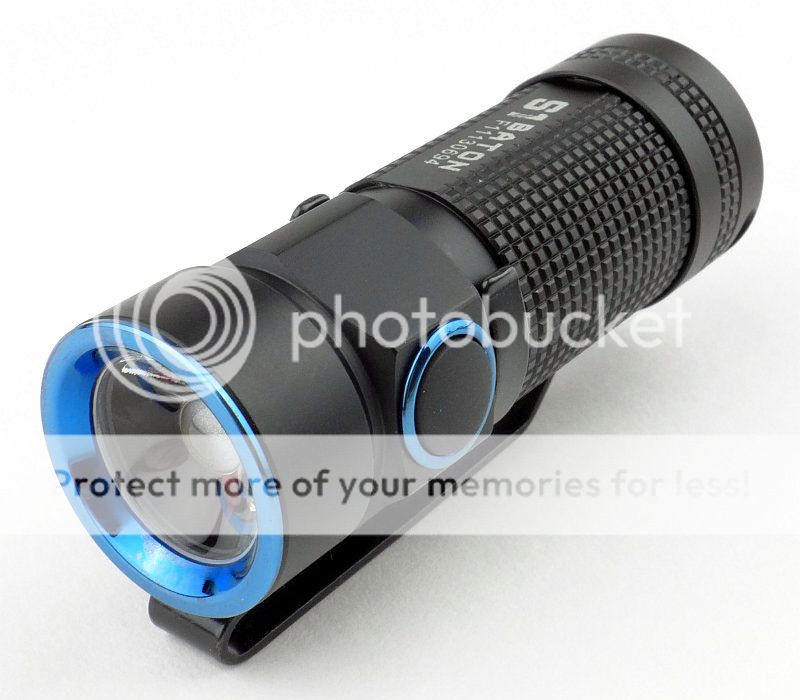
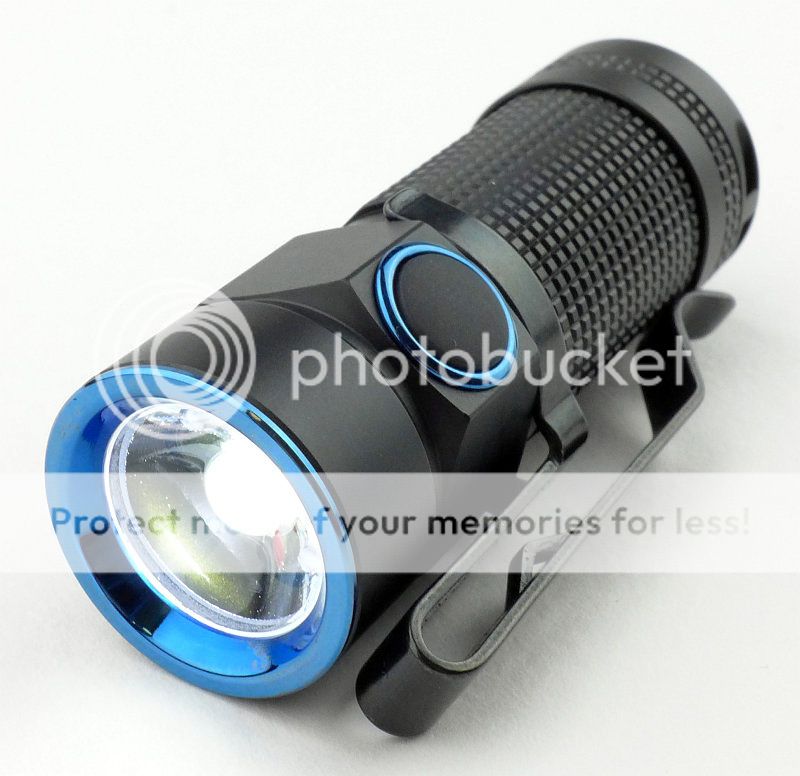
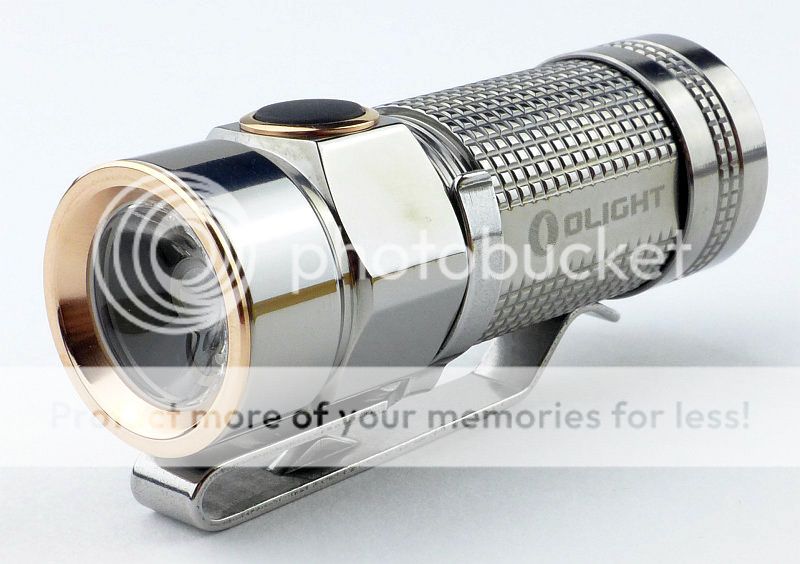
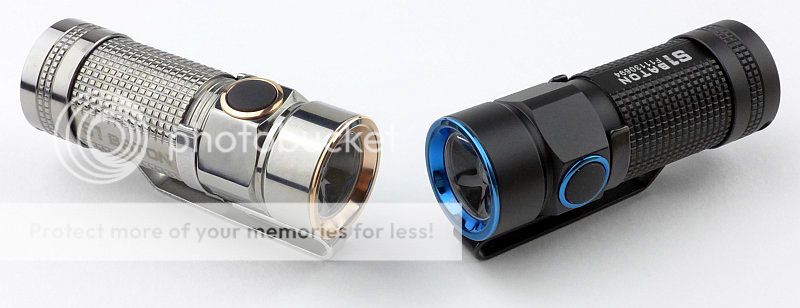
The S1 itself has a stylish two tone appearance with the bezel and switch rings in blue.
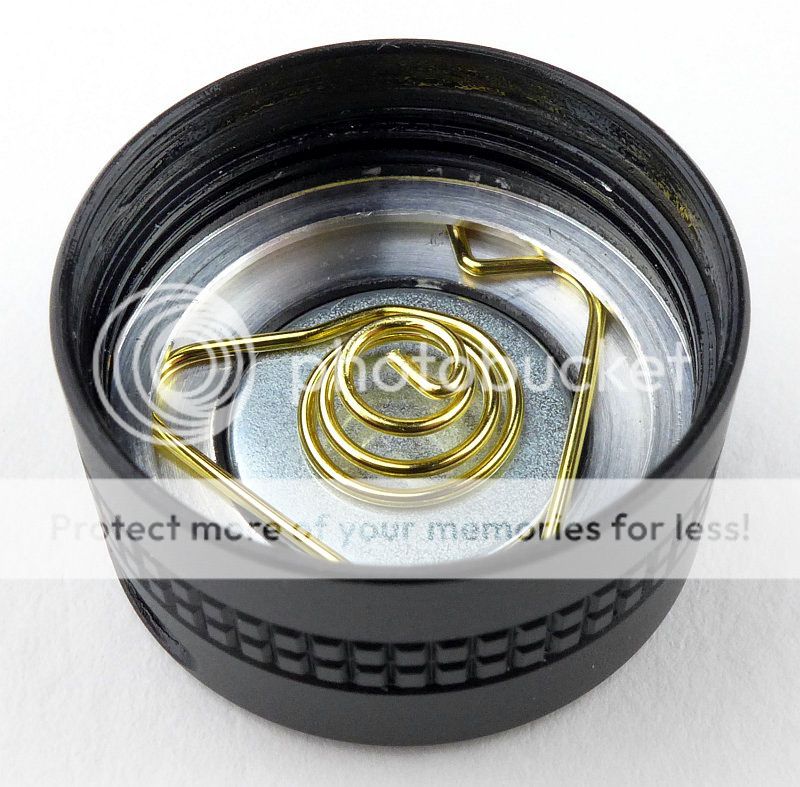
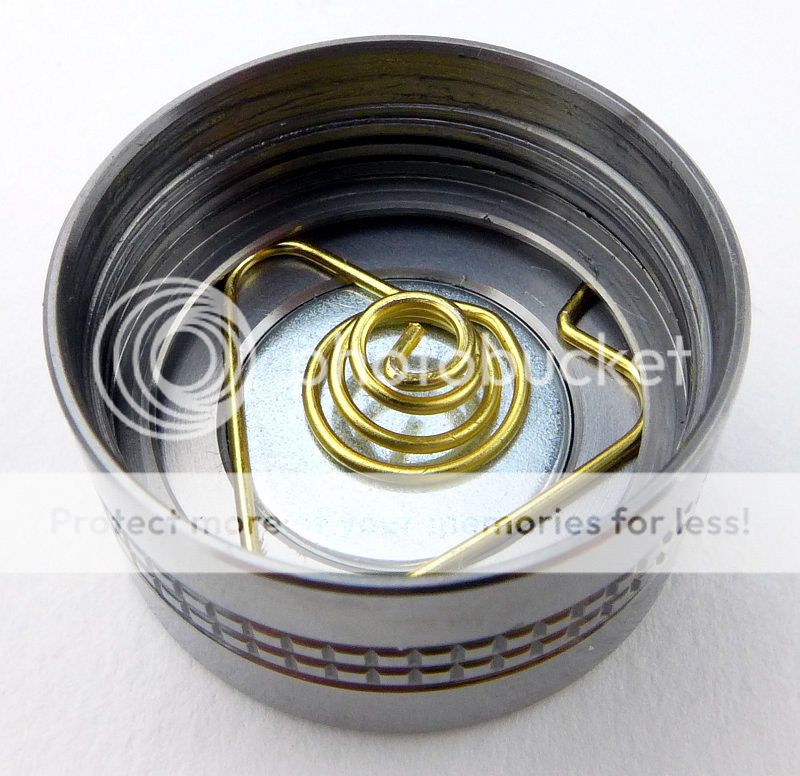
Keeping the size down, the tailcap is a very streamlined design. The spring clips into a slot and is used to hold the magnet in place. This makes it easy for the user to remove and replace the magnet.
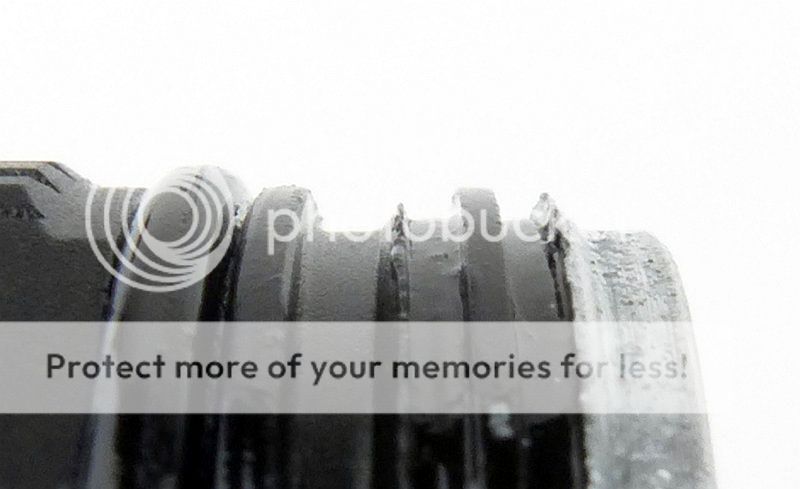
The threads are square cut and as the body is short, there are not many actual threads.
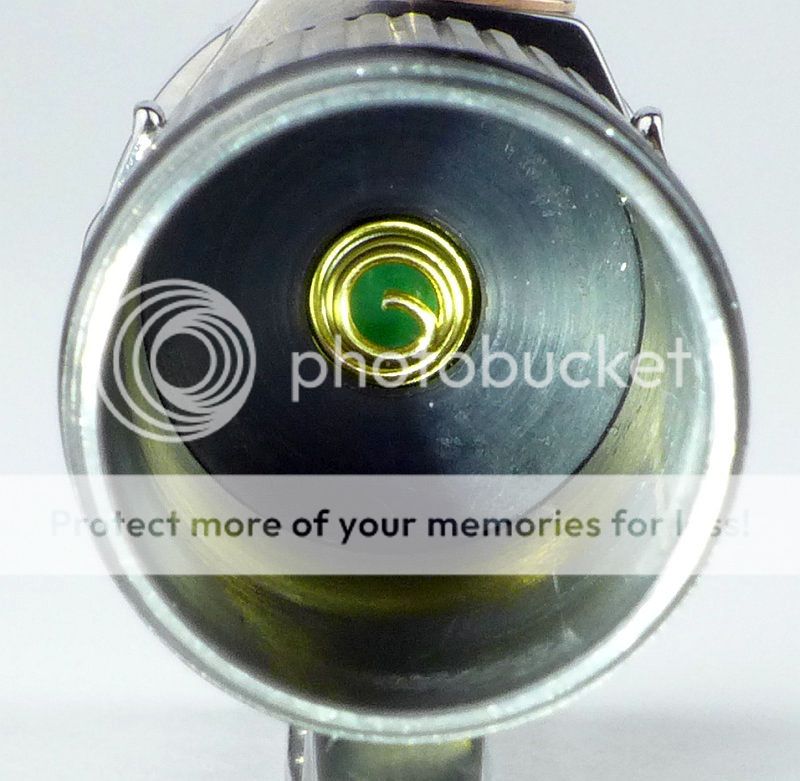
Peering inside there is another spring terminal and an anti-rattle closed-cell foam pad.
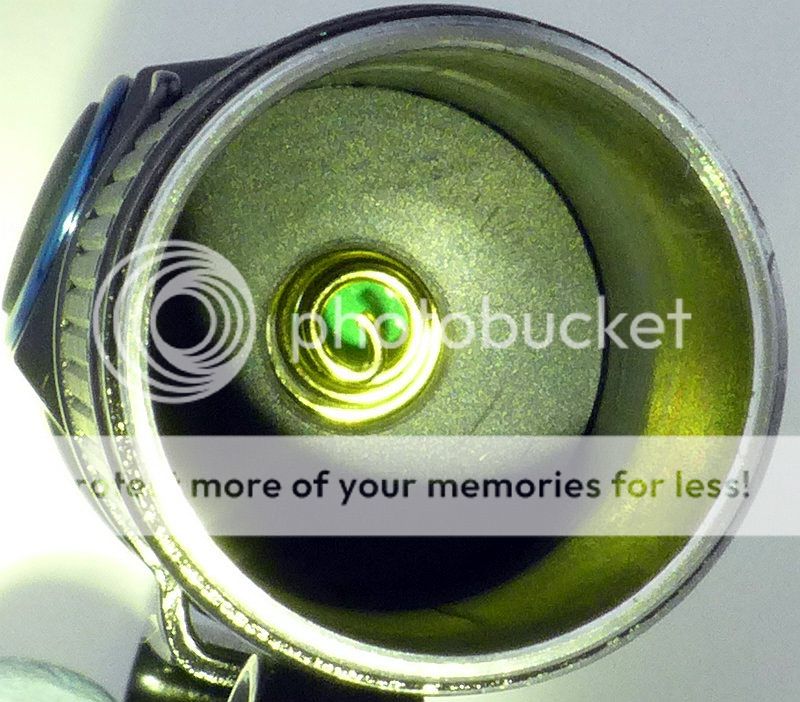
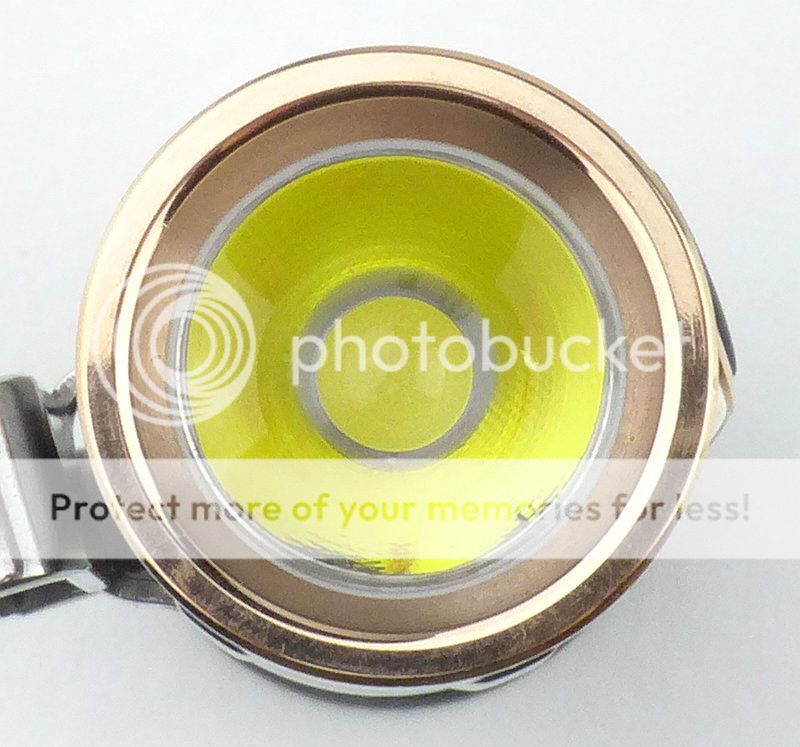
Looking dead-on, the S1 has a TIR optic and the actual LED cannot be seen.

In a less common format, the cell is inserted negative towards the head and this is clearly marked on the side of the S1.

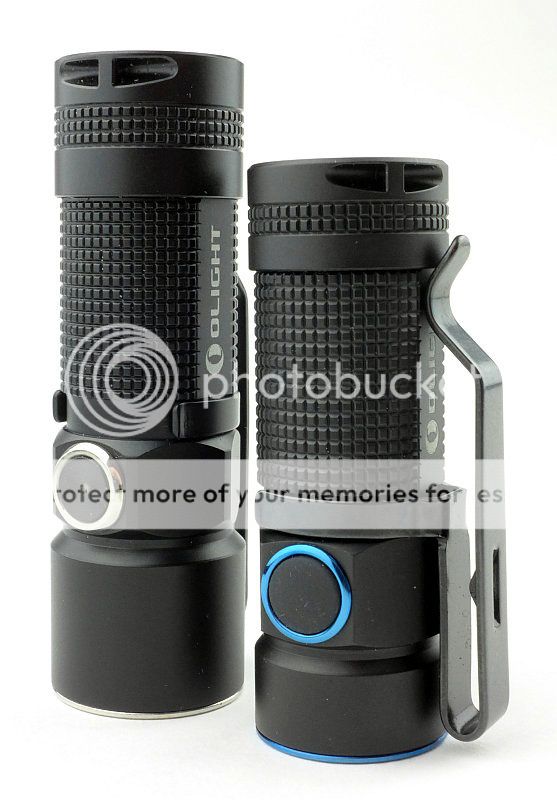
Just to give an idea of how compact this light is, here it is next to the already small Olight S10R (another RCR123 light).
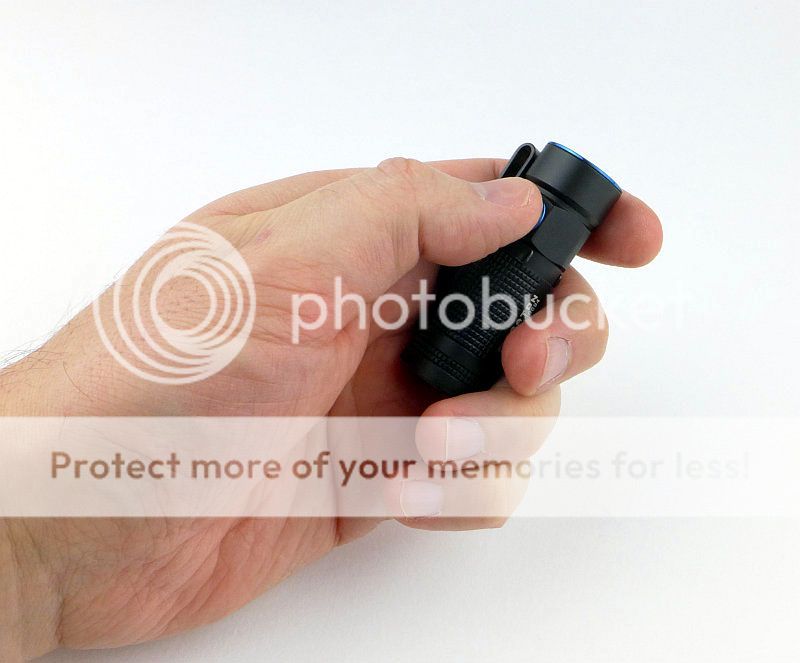
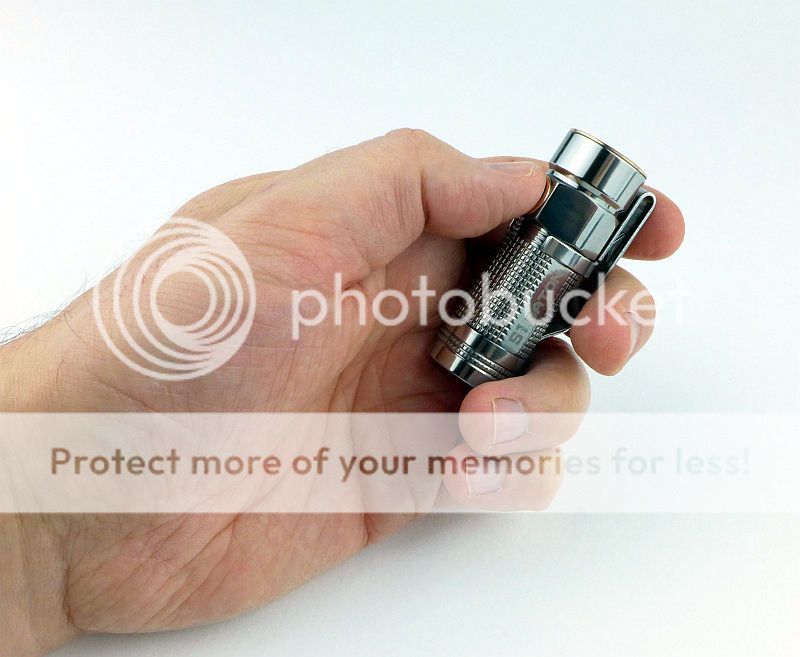
Also for scale here it is in my hand (I take XL gloves)
Before moving on to the Special Edition another quick look at those lovely blue PVD trims.
Taking a more detailed look at the S1 Special/Ti edition:
In keeping with its Special Edition status, the Ti S1 gets a different box.
Presentation is excellent.
Inside the box is the S1, a CR123 cell, diffuser, instructions and a wrist lanyard. A really thoughtful feature is that the lanyard comes with a threading wire fitted to it to make it easy to fit to the S1.

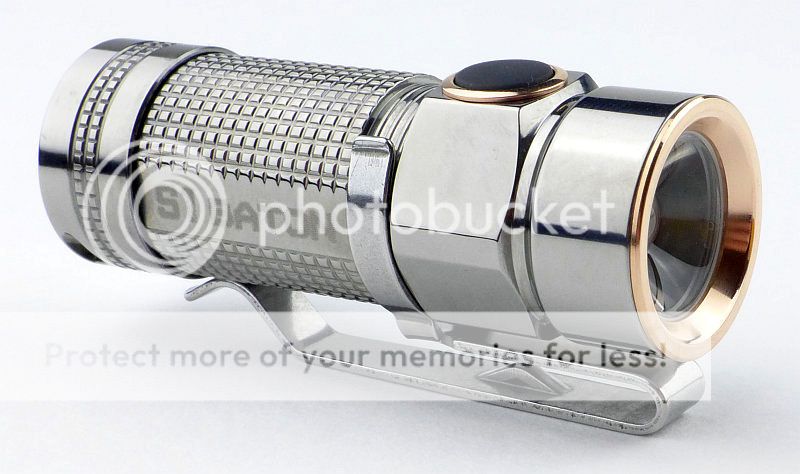
A glorious looking light.
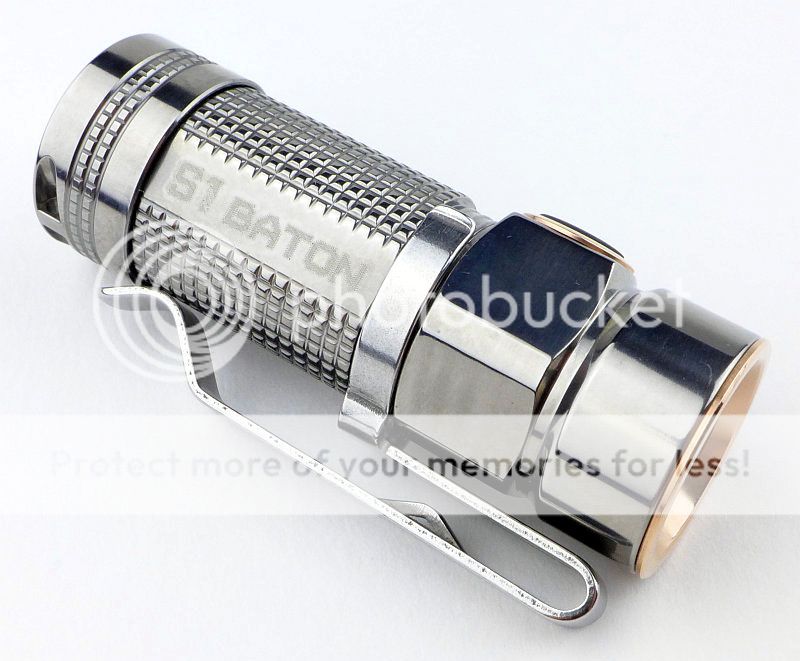
The clip is removable and reversible.
Construction of the tailcap is the same as the standard version with the terminal spring clipped into a groove and used to secure the magnet.
Square threads are used.

Looking inside the internals are the same as the standard version.
A Rose Gold plated bezel surrounds the TIR optic.
Without the diffuser fitted.
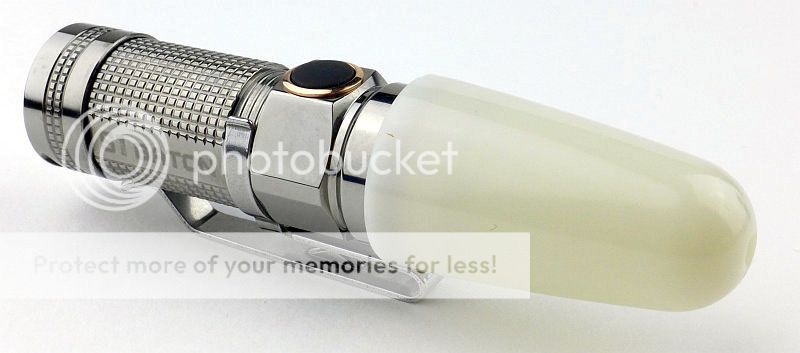
With the diffuser fitted.
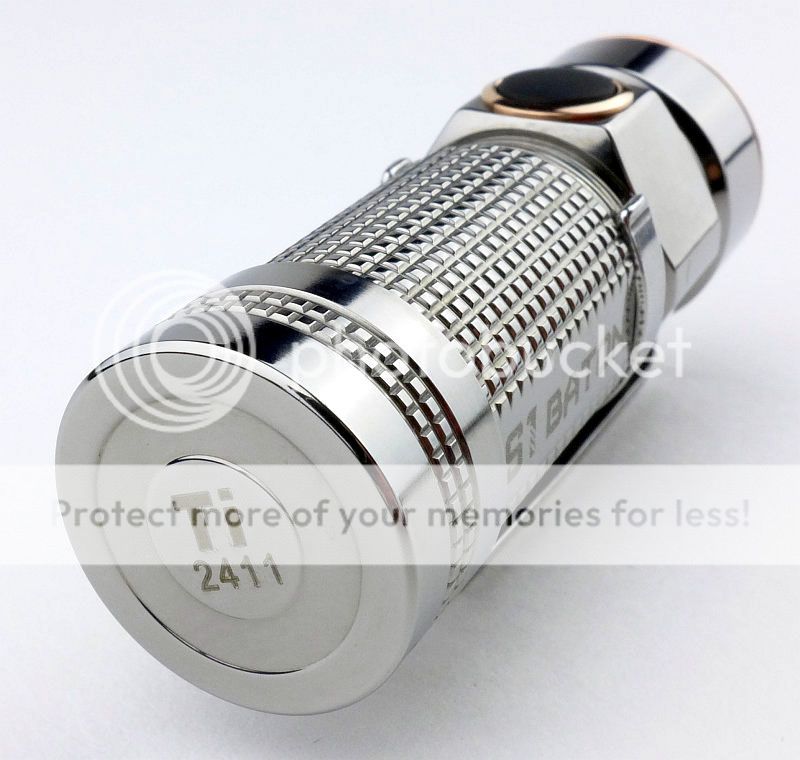
For the special editions they have the identifier 'Ti' and a serial number engraved on the tail-cap.
Small, Shiny and Ti, a winning combination.
The beam
Please be careful not to judge tint based on images you see on a computer screen. Unless properly calibrated, the screen itself will change the perceived tint.
The indoor beamshot is intended to give an idea of the beam shape/quality rather than tint. All beamshots are taken using daylight white balance. The woodwork (stairs and skirting) are painted Farrow & Ball "Off-White", and the walls are a light sandy colour called 'String' again by Farrow & Ball. I don't actually have a 'white wall' in the house to use for this, and the wife won't have one!
Starting indoors with the Standard S1. The wide hotspot transitions into a wide spill giving a great all round beam, and one that works really well for EDC tasks.

The main difference in the Special Ti Edition is...
...For the full set of beam-shots, please go to the Exclusive Content at Tactical Reviews, but remember to return to this forum to discuss the review.
Modes and User Interface:
The S1 has five output modes, High, Medium, Low, Moonlight and Strobe and a single click-switch on the side.
Basic ON/OFF operation is carried out with a single click of the side switch. The S1 will turn on to the last used standard mode (this does not include Moonlight or Strobe).
To change the brightness, while ON, press and hold the switch to cycle through Medium -] High -] Low -] Medium etc. Release the switch once you have the required output.
There are a few special functions:
Moonlight mode - from OFF, press and hold the switch for 1s until the Moon mode is activated.
Direct access to High - from OFF, double-click the switch.
Strobe - From ON, triple-click the switch.
Timer - From ON, double-click the side switch. The S1 will blink one or two times. Once means the 3 minute timer is activated, twice means the 9 minute timer is activated. To swap between 3 and 9 minutes timers, double-click the switch.
Timer mode means that the S1 will turn itself off after the specified time, and this can be started from any mode (including Strobe and Moonlight).
Batteries and output:
The S1 runs on either CR123 or RCR123.
To measure actual output, I built an integrating sphere. See here for more detail. The sensor registers visible light only (so Infra-Red and Ultra-Violet will not be measured).
Please note, all quoted lumen figures are from a DIY integrating sphere, and according to ANSI standards. Although every effort is made to give as accurate a result as possible, they should be taken as an estimate only. The results can be used to compare outputs in this review and others I have published.
For Detailed output measurements, please go to the Exclusive Content at Tactical Reviews, but remember to return to this forum to discuss the review.
* Beacon and Strobe output measurements are only estimates as the brief flashes make it difficult to capture the actual output value.
Peak Beam intensity of the S1 Al measured 3500 lx @1m giving a beam range of 118 m.
Peak Beam intensity of the S1 Ti measured 3000 lx @1m giving a beam range of 110 m.
There is parasitic drain but it is very low. For both the S1 Al and Ti, the drain was 1.1uA (145 years to drain a CR123 cell)
The trace here shows each of the S1 versions running on CR123 and on RCR123. The most distinctive difference is...
...For the runtime graph, please go to the Exclusive Content at Tactical Reviews, but remember to return to this forum to discuss the review.
Troubleshooting
This section is included to mention any minor niggles I come across during testing, in case the information helps anyone else.
No issues were encountered during testing.
As per the description of this section, this information is provided in case anyone else finds a similar 'issue' that might be fixed in the same way.
The Olight S1 in use
In reality there is little difference between these two versions in terms of practicality, except perhaps the neutral emitter in the Ti version. Of course the Ti version feels much more special and looks the part, as do any of the S1 special editions.
Regardless of special edition or not, the S1 is an excellent EDC light and won me round straight away. Easy and reliable access to Moon mode, direct access to High and memory of the last standard mode used, all tick the EDC boxes; all this and never forget its super compact size which makes it very easy to carry.
The built in timer is great for giving the light a 'sleep' mode so if you are camping or otherwise in need of a period of 'settling-in' before going to sleep, but not wanting to then have to turn a light off; it will turn itself off for you. Think of your own uses for this; I really like it even if I don't use the timer all that much.
Being able to pop out the tailcap spring and remove the magnet is a really clever design. Magnets are useful, but very often I get annoyed with them picking up this and that. Now I can choose to have the magnet or not.
Deciding between CR123 and RCR123 will be personal preference. For heavy users the guilt-free-lumens of RCR123 may be a better match, but check that runtime graph; a sudden cut-off might be a problem for some users. If it is a problem, stick to CR123, as for general light EDC use it will last a long time.
Thanks to the very low parasitic drain, you can be confident that leaving it loaded up with a CR123, the S1 will be ready to go when you need it, and you won't find it with a run-down cell. If you are super-paranoid, you can lock out the Standard version by unscrewing the tail-cap half a turn. You cannot lockout the Ti Special Edition like this as the threads are not coated.
Although a TIR lens was chosen for better control of the beam shape, it has the added benefit of being pretty much unbreakable. That beam is a general purpose beam which is well suited to closer range typical EDC uses.
Even though I'm use to it, I still have to think twice when putting a new cell in, the 'negative terminal towards the head' layout seems a strange choice when convention has the positive terminal towards the head. It does include all the relevant protection in case you get it wrong, but this seems an unnecessary unconventional touch.
The switch is quite low profile and without the clip often needs a bit of 'hunting' to find. The clip, which seems relatively large, can act as a guide for finding the button, and also helps stabilise the grip. The S1 is small enough that is can feel insecure to hold, especially when performing multi-clicks of the switch; the clip gives a little something extra to get hold of.
Small, good looking and full of useful modes that are easy to get at. It is no wonder the S1 is proving very popular.
Review Summary
---------------------------------------------------------------------------------------------------------------------
Author's Statement for Transparency and Disclosure
The test sample/s featured in this article have been provided for technical testing and review by the manufacturer. Test samples are retained by the reviewer following publication of the completed review for the purposes of long term testing and product comparisons.
All output figures and test results published in this review are the sole work of the reviewer, and are carried out independently and without bias. Test results are reported as found, with no embellishments or alteration. Though best endeavours are made to maintain the accuracy of test equipment, the accuracy of these results is not guaranteed and is subject to the test equipment functioning correctly.
----------------------------------------------------------------------------------------------------------------------
Taking a more detailed look at the S1 (standard Al edition):
Olight's standard plastic box packaging displays the S1 nicely.
Inside the box is the S1, a CR123 cell, spare O-ring (which is actually used to hold the S1 in place) and a wrist lanyard. A really thoughtful feature is that the lanyard comes with a threading wire fitted to it to make it easy to fit to the S1.
The S1 itself has a stylish two tone appearance with the bezel and switch rings in blue.
Keeping the size down, the tailcap is a very streamlined design. The spring clips into a slot and is used to hold the magnet in place. This makes it easy for the user to remove and replace the magnet.
The threads are square cut and as the body is short, there are not many actual threads.
Peering inside there is another spring terminal and an anti-rattle closed-cell foam pad.
Looking dead-on, the S1 has a TIR optic and the actual LED cannot be seen.
In a less common format, the cell is inserted negative towards the head and this is clearly marked on the side of the S1.
Just to give an idea of how compact this light is, here it is next to the already small Olight S10R (another RCR123 light).
Also for scale here it is in my hand (I take XL gloves)
Before moving on to the Special Edition another quick look at those lovely blue PVD trims.
Taking a more detailed look at the S1 Special/Ti edition:
In keeping with its Special Edition status, the Ti S1 gets a different box.
Presentation is excellent.
Inside the box is the S1, a CR123 cell, diffuser, instructions and a wrist lanyard. A really thoughtful feature is that the lanyard comes with a threading wire fitted to it to make it easy to fit to the S1.
A glorious looking light.
The clip is removable and reversible.
Construction of the tailcap is the same as the standard version with the terminal spring clipped into a groove and used to secure the magnet.
Square threads are used.
Looking inside the internals are the same as the standard version.
A Rose Gold plated bezel surrounds the TIR optic.
Without the diffuser fitted.
With the diffuser fitted.
For the special editions they have the identifier 'Ti' and a serial number engraved on the tail-cap.
Small, Shiny and Ti, a winning combination.
The beam
Please be careful not to judge tint based on images you see on a computer screen. Unless properly calibrated, the screen itself will change the perceived tint.
The indoor beamshot is intended to give an idea of the beam shape/quality rather than tint. All beamshots are taken using daylight white balance. The woodwork (stairs and skirting) are painted Farrow & Ball "Off-White", and the walls are a light sandy colour called 'String' again by Farrow & Ball. I don't actually have a 'white wall' in the house to use for this, and the wife won't have one!
Starting indoors with the Standard S1. The wide hotspot transitions into a wide spill giving a great all round beam, and one that works really well for EDC tasks.
The main difference in the Special Ti Edition is...
...For the full set of beam-shots, please go to the Exclusive Content at Tactical Reviews, but remember to return to this forum to discuss the review.
Modes and User Interface:
The S1 has five output modes, High, Medium, Low, Moonlight and Strobe and a single click-switch on the side.
Basic ON/OFF operation is carried out with a single click of the side switch. The S1 will turn on to the last used standard mode (this does not include Moonlight or Strobe).
To change the brightness, while ON, press and hold the switch to cycle through Medium -] High -] Low -] Medium etc. Release the switch once you have the required output.
There are a few special functions:
Moonlight mode - from OFF, press and hold the switch for 1s until the Moon mode is activated.
Direct access to High - from OFF, double-click the switch.
Strobe - From ON, triple-click the switch.
Timer - From ON, double-click the side switch. The S1 will blink one or two times. Once means the 3 minute timer is activated, twice means the 9 minute timer is activated. To swap between 3 and 9 minutes timers, double-click the switch.
Timer mode means that the S1 will turn itself off after the specified time, and this can be started from any mode (including Strobe and Moonlight).
Batteries and output:
The S1 runs on either CR123 or RCR123.
To measure actual output, I built an integrating sphere. See here for more detail. The sensor registers visible light only (so Infra-Red and Ultra-Violet will not be measured).
Please note, all quoted lumen figures are from a DIY integrating sphere, and according to ANSI standards. Although every effort is made to give as accurate a result as possible, they should be taken as an estimate only. The results can be used to compare outputs in this review and others I have published.
For Detailed output measurements, please go to the Exclusive Content at Tactical Reviews, but remember to return to this forum to discuss the review.
* Beacon and Strobe output measurements are only estimates as the brief flashes make it difficult to capture the actual output value.
Peak Beam intensity of the S1 Al measured 3500 lx @1m giving a beam range of 118 m.
Peak Beam intensity of the S1 Ti measured 3000 lx @1m giving a beam range of 110 m.
There is parasitic drain but it is very low. For both the S1 Al and Ti, the drain was 1.1uA (145 years to drain a CR123 cell)
The trace here shows each of the S1 versions running on CR123 and on RCR123. The most distinctive difference is...
...For the runtime graph, please go to the Exclusive Content at Tactical Reviews, but remember to return to this forum to discuss the review.
Troubleshooting
This section is included to mention any minor niggles I come across during testing, in case the information helps anyone else.
No issues were encountered during testing.
As per the description of this section, this information is provided in case anyone else finds a similar 'issue' that might be fixed in the same way.
The Olight S1 in use
In reality there is little difference between these two versions in terms of practicality, except perhaps the neutral emitter in the Ti version. Of course the Ti version feels much more special and looks the part, as do any of the S1 special editions.
Regardless of special edition or not, the S1 is an excellent EDC light and won me round straight away. Easy and reliable access to Moon mode, direct access to High and memory of the last standard mode used, all tick the EDC boxes; all this and never forget its super compact size which makes it very easy to carry.
The built in timer is great for giving the light a 'sleep' mode so if you are camping or otherwise in need of a period of 'settling-in' before going to sleep, but not wanting to then have to turn a light off; it will turn itself off for you. Think of your own uses for this; I really like it even if I don't use the timer all that much.
Being able to pop out the tailcap spring and remove the magnet is a really clever design. Magnets are useful, but very often I get annoyed with them picking up this and that. Now I can choose to have the magnet or not.
Deciding between CR123 and RCR123 will be personal preference. For heavy users the guilt-free-lumens of RCR123 may be a better match, but check that runtime graph; a sudden cut-off might be a problem for some users. If it is a problem, stick to CR123, as for general light EDC use it will last a long time.
Thanks to the very low parasitic drain, you can be confident that leaving it loaded up with a CR123, the S1 will be ready to go when you need it, and you won't find it with a run-down cell. If you are super-paranoid, you can lock out the Standard version by unscrewing the tail-cap half a turn. You cannot lockout the Ti Special Edition like this as the threads are not coated.
Although a TIR lens was chosen for better control of the beam shape, it has the added benefit of being pretty much unbreakable. That beam is a general purpose beam which is well suited to closer range typical EDC uses.
Even though I'm use to it, I still have to think twice when putting a new cell in, the 'negative terminal towards the head' layout seems a strange choice when convention has the positive terminal towards the head. It does include all the relevant protection in case you get it wrong, but this seems an unnecessary unconventional touch.
The switch is quite low profile and without the clip often needs a bit of 'hunting' to find. The clip, which seems relatively large, can act as a guide for finding the button, and also helps stabilise the grip. The S1 is small enough that is can feel insecure to hold, especially when performing multi-clicks of the switch; the clip gives a little something extra to get hold of.
Small, good looking and full of useful modes that are easy to get at. It is no wonder the S1 is proving very popular.
Review Summary
| _______________________________________________ | _______________________________________________ |
| Things I like | What doesn't work so well for me |
| _______________________________________________ | _______________________________________________ |
| Very compact. | Sudden cut-off when using RCR123. |
| Great UI and selection of modes. | Unconventional cell direction. |
| Takes CR123 or RCR123. | Special Edition version cannot be locked out. |
| Very low parasitic drain. | |
| User removable tail-cap magnet. | |
| 'Proper' Moon-Mode (with direct access). | |
| Timer mode. |