
There are lots of multi-led lights and lights with handles to make them easy to hold. There are also many lights using the popular 4x 18650 power source, and lights with ergonomically positioned controls. So what makes the Rustu R64S worth a look?
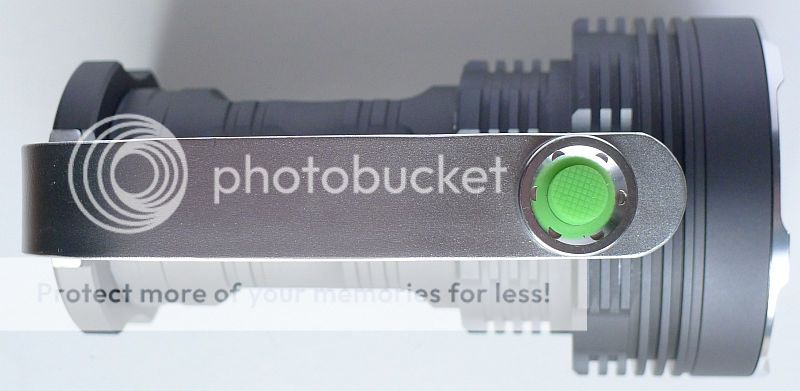
Unusually, the power switch that is conveniently located at the end of the handle, is not an electronic switch, but is a full make or break switch. So in the Rustu R64S you have the features of many similar lights and the ergonomic switch placement, but with no parasitic battery drain at all, so no need to lock-out the battery tube to prevent control circuit power drain.
It may seem a simple thing, and many electronic control circuits have very low or negligible parasitic drain, but there is a peace of mind in knowing that off means off.
Of course the next important question is how does it perform? Read on to find out.
Initial Impressions:
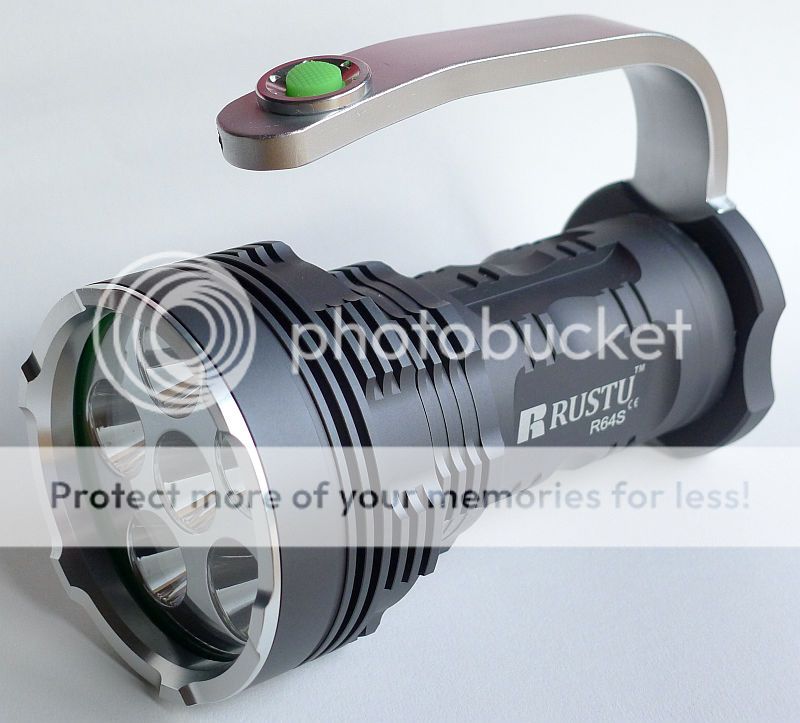
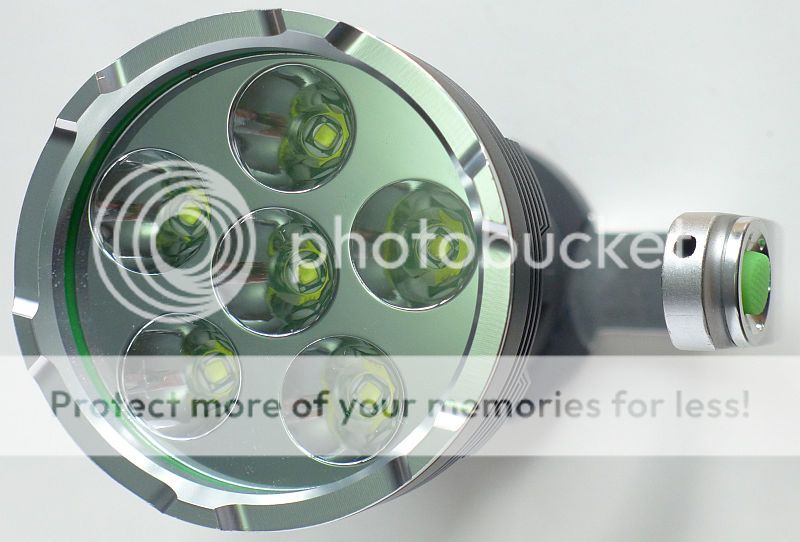
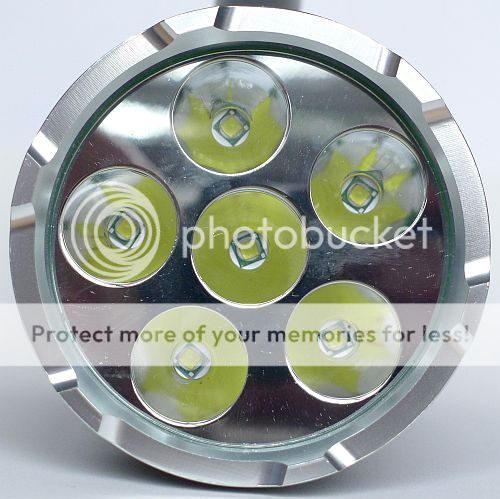
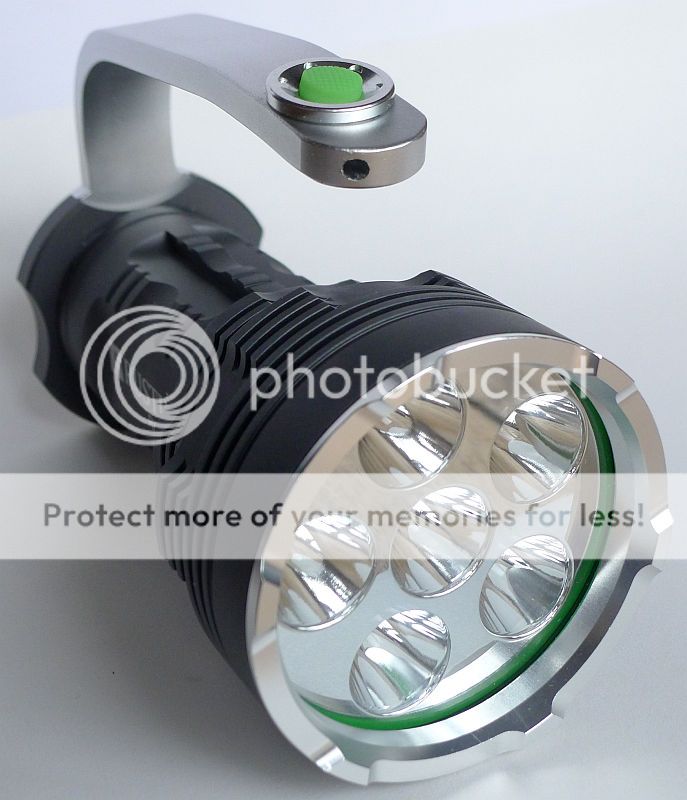
The large head of the R64S with it cluster of six individual separate reflectors for each LED has an old-school appeal as many of the early LED custom modifications of old incandescent lights used similar clusters of individual reflectors.
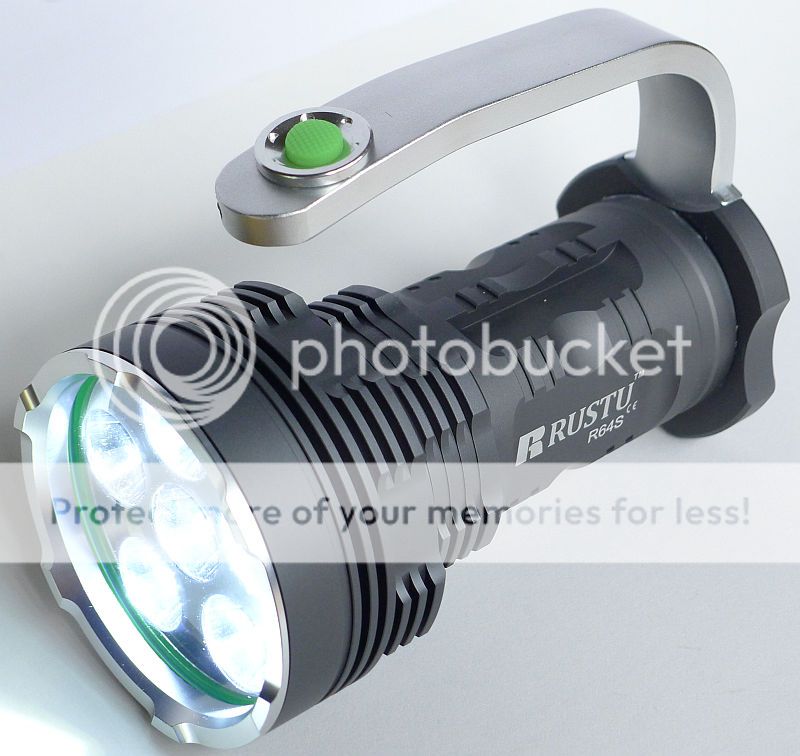
With the head being the size it is, it makes the 4x 18650 battery tube look very compact, or is it the head looking bulky? Either way, you won't be holding it by the battery tube thanks to the long comfortable handle sweeping up from the tail.
Somehow the actual size of the R64S seems irrelevant as when you use the handle it feels perfectly compact enough and neither too heavy nor too light (no fairy-tail quotes please).
For a light of this size, the switch itself somehow seems a little small to be switching the full power of 4 18650s, but this impression has not been borne out with any specific observations.
What is in the box:
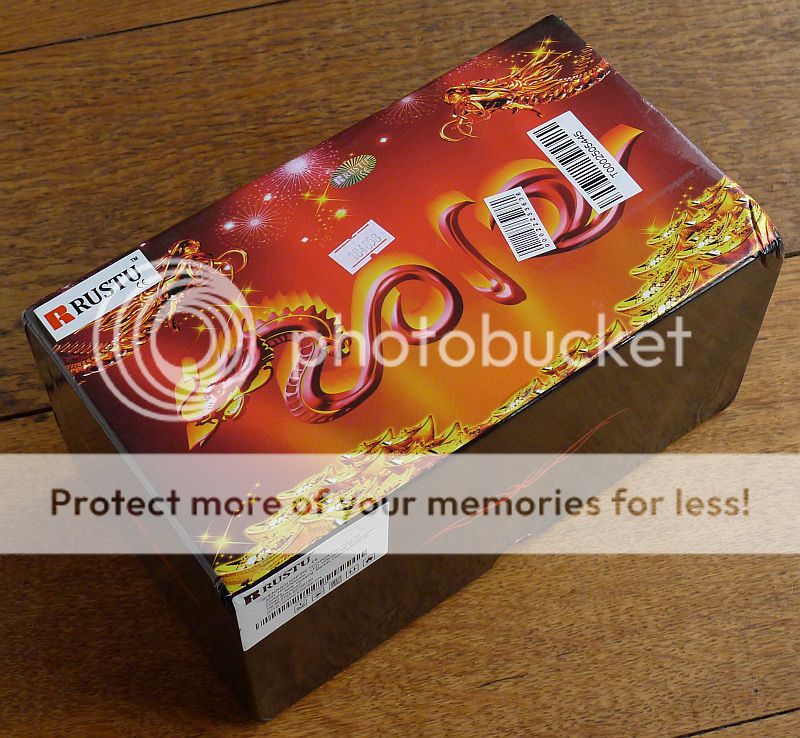
The styling of the image on the cardboard box leaves you with no doubt over the country of origin of this light. The box is very sturdy.
A closed cell foam liner protects the R64S.
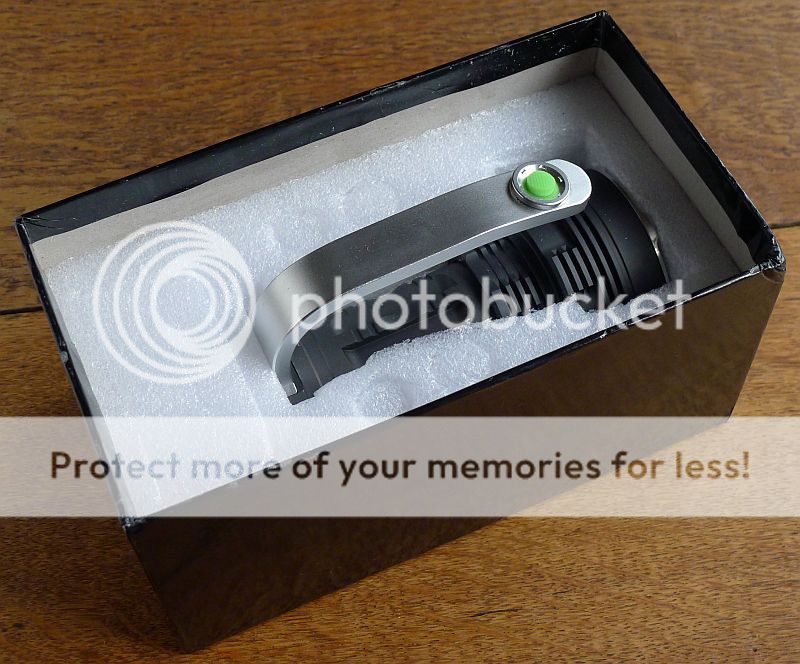
The only item in the box is the light itself. No spares or accessories are included.
Taking a closer look and looking inside:
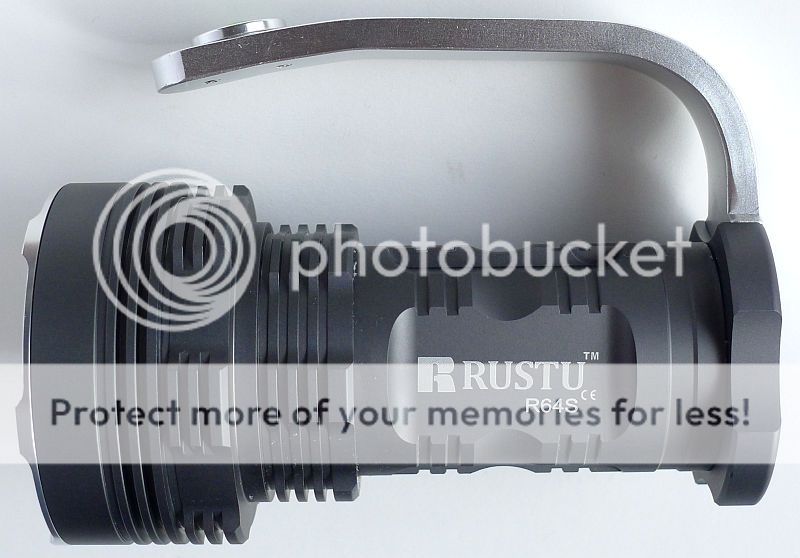
Overall the finish of the R64S is very good. Crisp edges and clean anodising.

The handle has a flush fit into the end of the battery tube. The flat surface of the tail allows for very stable tail standing.
The handle has a simple profile and is a good comfortable width.
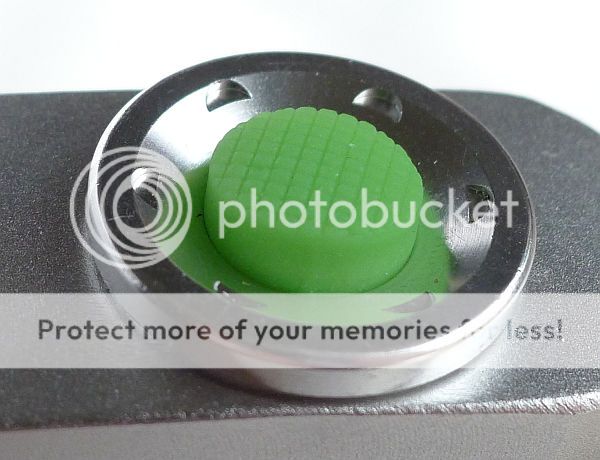
The switch cover is a glow in the dark rubber boot with raised retaining ring to help reduce accidental switching.
The individual reflectors are formed from a single moulded component.
A closer look at one of the individual reflectors.
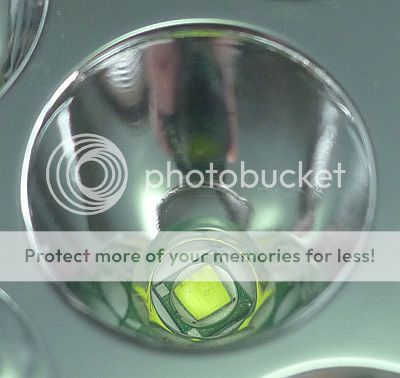
With the camera positioned at the focal point of the central reflector (showing as completely yellow) you can see the emitter's reflection in each of the surrounding reflectors is biased towards the centre.
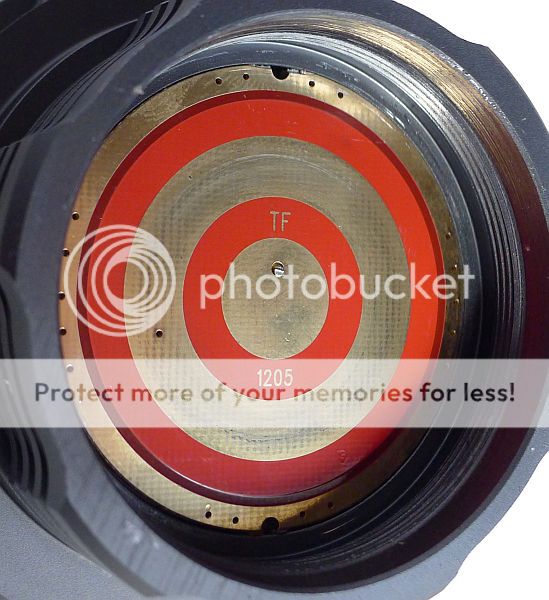
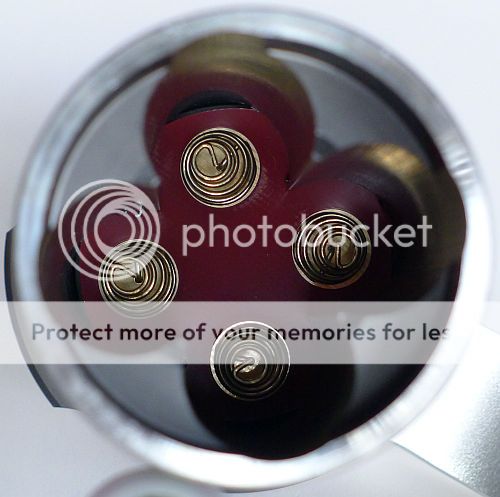
The contact surfaces in the light head. The battery positive terminals touch the gold ring contact. The central contact is not used as the negative terminal from the battery tube touches the outer-most gold ring.
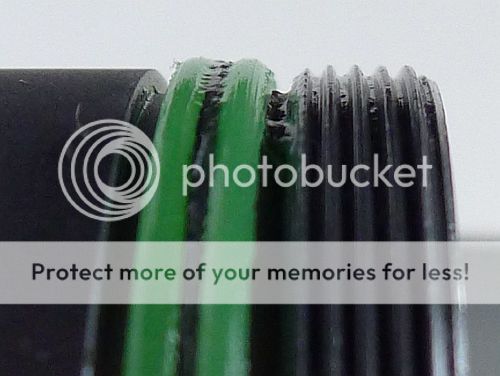
The threads are a standard profile and fully anodised. You will notice the double o-ring which is nicely greased. Unfortunately the o-rings don't seem to contact the head at all, meaning this light is not waterproof.
I was initially alerted to this as when removing and fitting the head, you expect to feel some extra resistance once the o-rings make contact. There is no such resistance, instead the turning force remaining constant until the battery tube is screwed all the way in. It either needs slightly thicker o-rings or the opening of the head needs to be smaller.
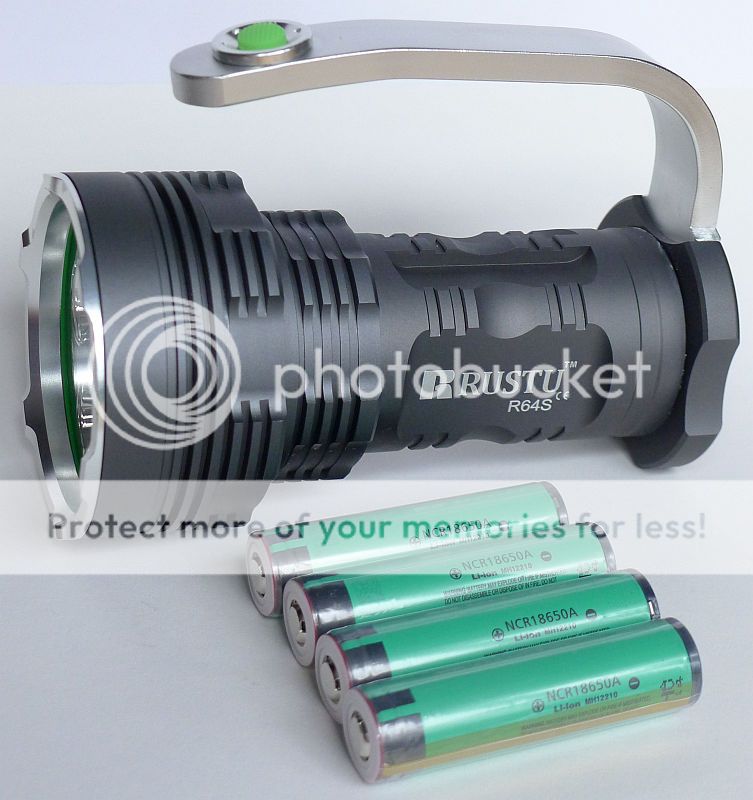
At the bottom of the battery tube are the four contact springs. They provide enough range of movement to accommodate the long protected Panasonic cells (DX SKU 121444) or shorter unprotected cells.
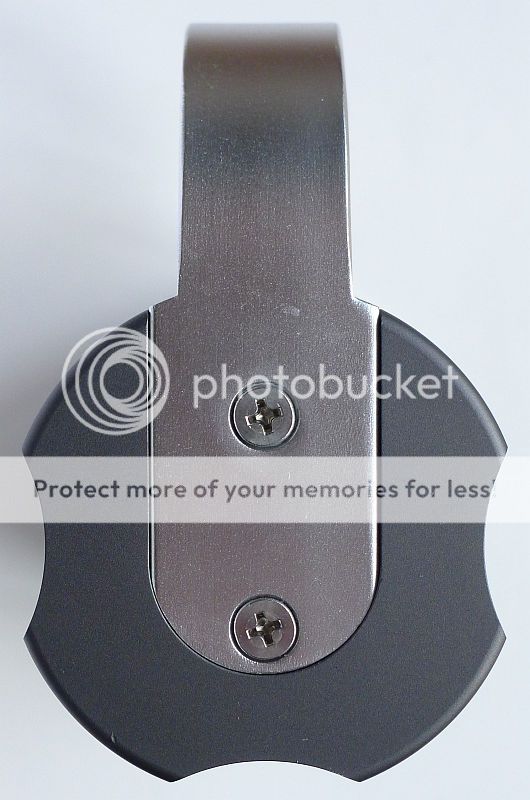
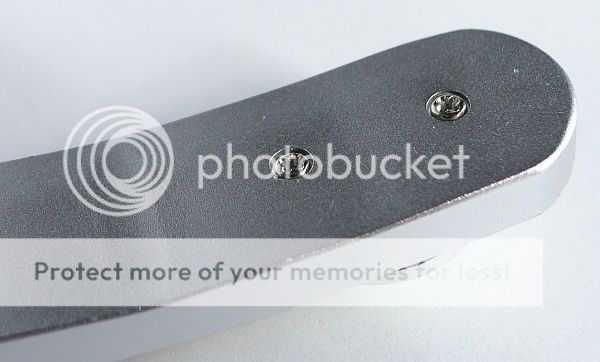
Directly underneath the main switch there are a couple of screws visible, presumably holding a circuit board or part of the switch in place.
Modes and User Interface:
The R64S has a very simple interface and 4 output modes > High > Medium > Low > Strobe >back to High etc.
The power switch is a reverse click switch and the R64S has memory (to switch on again in the last used mode).
To change mode, turn the light off and on again within 8s. This includes full switching off and on or a simple half press of the reverse click switch to momentarily turn it off.
One feature of the R64S is that the mode changing 'window' is a full 8s. This does mean that if you turn it off and then decide to turn it on again within 8s you will change mode.
Batteries and output:
The R64S can run on anything between 1 and 4 18650 Li-ion batteries.
Of course to get maximum output you need all four 18650s loaded up, but thanks to the design of the battery tube cut out, it will hold a single 18650 in place while you fit the battery tube. Useful to be able to use just one cell if needed, but I'd stick to the low mode.
To measure actual output, I built an integrating sphere. See here for more detail. The sensor registers visible light only (so Infra-Red and Ultra-Violet will not be measured).
Please note, all quoted lumen figures are from a DIY integrating sphere, and according to ANSI standards. Although every effort is made to give as accurate a result as possible, they should be taken as an estimate only. The results can be used to compare outputs in this review and others I have published.
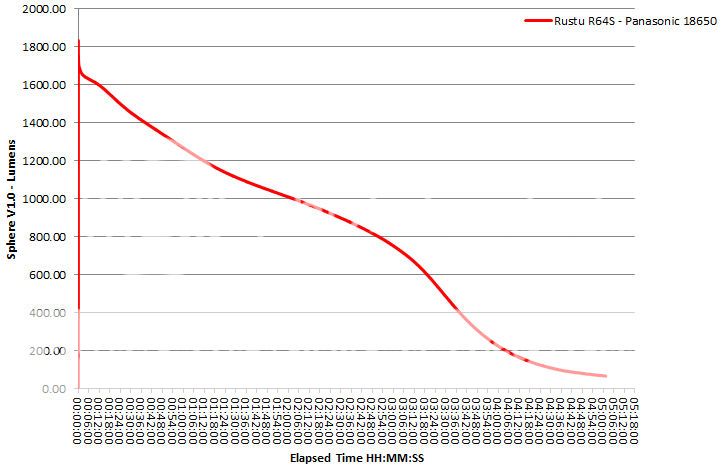
Due to the R64S having no apparent regulation, the output declines steadily, but is still approximately 800lm after 3 hours of constant operation.
The beam
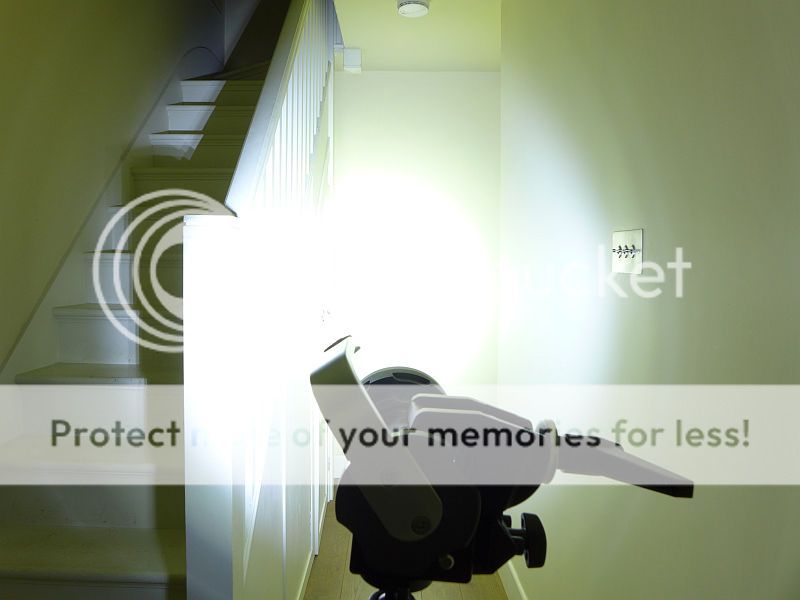
Starting off indoors the R64S's beam is very smooth especially considering the multi emitter head. This will be due to each emitter having a complete reflector rather than a reflector being merged with a neighbouring one. with a very even and round hotspot
In this exposure the raw power of the beam is overwhelming at indoor ranges.
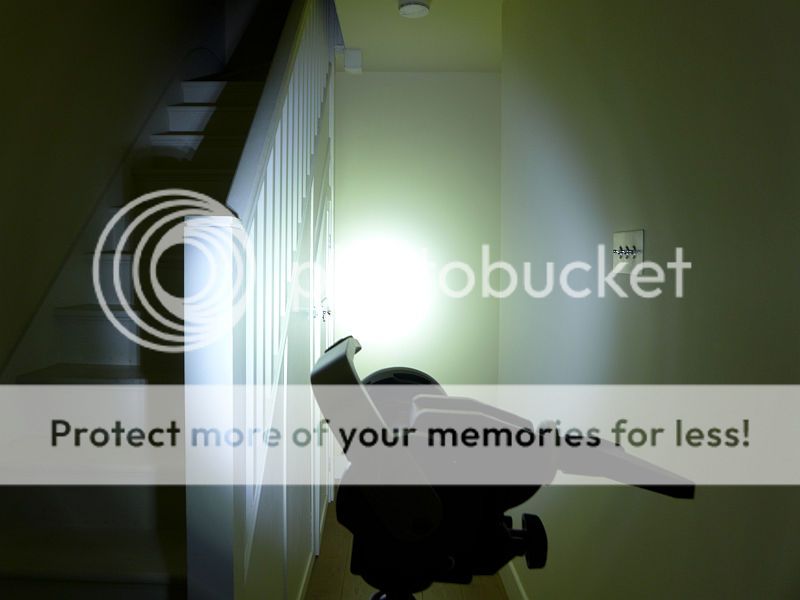
Reducing the exposure somewhat more clearly shows the smooth edged wide hotspot which give the R64S a reasonable range.
Before looking at the R64S outdoor beamshot, first a quick look at my frequently used reference light, the Fenix TK41.
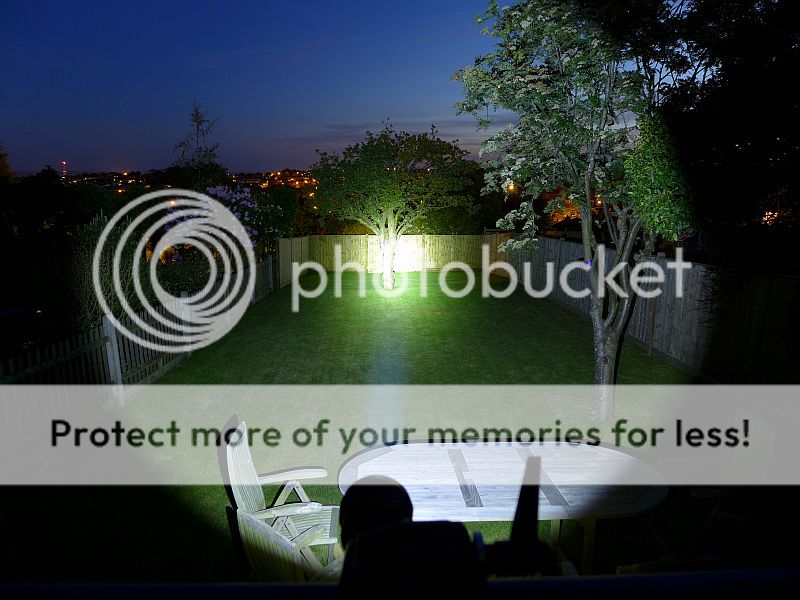
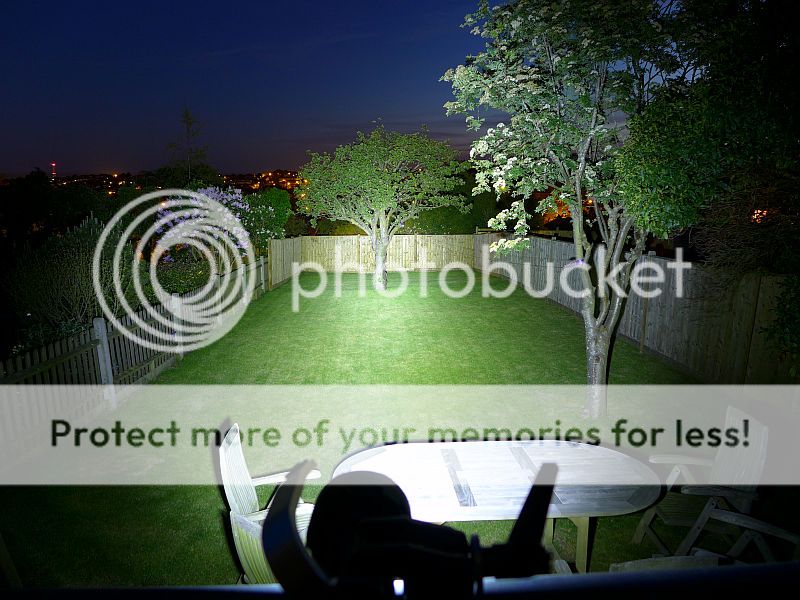
Switching to the R64S is like turning on a flood light.
What it is really like to use…
Power with comfort is the impression the R64S leaves me with. Using a light like this with a handle on top makes the true size of the light disappear. With the power switch falling directly under your thumb this is a very comfortable light to hold and operate.
Although the lack of regulation means you have an ever decreasing output, what this does do, is prevent any sudden loss of output, so you have plenty of warning that a battery change is due. The large head means the R64S easily runs on full output with no overheating issues.
Personally I'd prefer the low to be lower than 556lm, but thanks to the floody beam, this level is useful and does not seem overly bright.
I have found the 8s mode change timing a little annoying as quite frequently I will turn off a light and then decide I want another look straight away. If done within 8s, I end up changing mode. So not a big issue when you expect it.
The only real disappointment with the R64S is the lack of waterproofing due to the o-rings not touching the head. This could be easily remedied by Rustu by using slightly thicker o-rings, but for the end user it is not so easy to find a suitable replacement.
I must stress the ergonomic benefits of the handle and the switch position. There are a great many lights that need the user to either use their other hand, or to change hand position, to switch it on and off or change mode. The handle of the R64S makes it easy for hands of any size to hold it (and even still use that hand to hold something else) and the switch falls directly under your thumb. Your grip never needs to change.
As well as the benefits of the handle and switch, the choice of a full make-or-break switch means no parasitic drain and no worrying about picking up the light only to find the batteries have become discharged (assuming the cells are OK).
So as an easy to use and powerful value for money flood light, the R64S scores well, just don't get it wet.
Test samples provided by DX.com for review.
Unusually, the power switch that is conveniently located at the end of the handle, is not an electronic switch, but is a full make or break switch. So in the Rustu R64S you have the features of many similar lights and the ergonomic switch placement, but with no parasitic battery drain at all, so no need to lock-out the battery tube to prevent control circuit power drain.
It may seem a simple thing, and many electronic control circuits have very low or negligible parasitic drain, but there is a peace of mind in knowing that off means off.
Of course the next important question is how does it perform? Read on to find out.
Initial Impressions:
The large head of the R64S with it cluster of six individual separate reflectors for each LED has an old-school appeal as many of the early LED custom modifications of old incandescent lights used similar clusters of individual reflectors.
With the head being the size it is, it makes the 4x 18650 battery tube look very compact, or is it the head looking bulky? Either way, you won't be holding it by the battery tube thanks to the long comfortable handle sweeping up from the tail.
Somehow the actual size of the R64S seems irrelevant as when you use the handle it feels perfectly compact enough and neither too heavy nor too light (no fairy-tail quotes please).
For a light of this size, the switch itself somehow seems a little small to be switching the full power of 4 18650s, but this impression has not been borne out with any specific observations.
What is in the box:
The styling of the image on the cardboard box leaves you with no doubt over the country of origin of this light. The box is very sturdy.
A closed cell foam liner protects the R64S.
The only item in the box is the light itself. No spares or accessories are included.
Taking a closer look and looking inside:
Overall the finish of the R64S is very good. Crisp edges and clean anodising.
The handle has a flush fit into the end of the battery tube. The flat surface of the tail allows for very stable tail standing.
The handle has a simple profile and is a good comfortable width.
The switch cover is a glow in the dark rubber boot with raised retaining ring to help reduce accidental switching.
The individual reflectors are formed from a single moulded component.
A closer look at one of the individual reflectors.
With the camera positioned at the focal point of the central reflector (showing as completely yellow) you can see the emitter's reflection in each of the surrounding reflectors is biased towards the centre.
The contact surfaces in the light head. The battery positive terminals touch the gold ring contact. The central contact is not used as the negative terminal from the battery tube touches the outer-most gold ring.
The threads are a standard profile and fully anodised. You will notice the double o-ring which is nicely greased. Unfortunately the o-rings don't seem to contact the head at all, meaning this light is not waterproof.
I was initially alerted to this as when removing and fitting the head, you expect to feel some extra resistance once the o-rings make contact. There is no such resistance, instead the turning force remaining constant until the battery tube is screwed all the way in. It either needs slightly thicker o-rings or the opening of the head needs to be smaller.
At the bottom of the battery tube are the four contact springs. They provide enough range of movement to accommodate the long protected Panasonic cells (DX SKU 121444) or shorter unprotected cells.
Directly underneath the main switch there are a couple of screws visible, presumably holding a circuit board or part of the switch in place.
Modes and User Interface:
The R64S has a very simple interface and 4 output modes > High > Medium > Low > Strobe >back to High etc.
The power switch is a reverse click switch and the R64S has memory (to switch on again in the last used mode).
To change mode, turn the light off and on again within 8s. This includes full switching off and on or a simple half press of the reverse click switch to momentarily turn it off.
One feature of the R64S is that the mode changing 'window' is a full 8s. This does mean that if you turn it off and then decide to turn it on again within 8s you will change mode.
Batteries and output:
The R64S can run on anything between 1 and 4 18650 Li-ion batteries.
Of course to get maximum output you need all four 18650s loaded up, but thanks to the design of the battery tube cut out, it will hold a single 18650 in place while you fit the battery tube. Useful to be able to use just one cell if needed, but I'd stick to the low mode.
To measure actual output, I built an integrating sphere. See here for more detail. The sensor registers visible light only (so Infra-Red and Ultra-Violet will not be measured).
Please note, all quoted lumen figures are from a DIY integrating sphere, and according to ANSI standards. Although every effort is made to give as accurate a result as possible, they should be taken as an estimate only. The results can be used to compare outputs in this review and others I have published.
| Rustu R64S using Panasonic 3100 | I.S. measured ANSI output Lumens | PWM (or strobe) frequency (Hz) |
|---|---|---|
| High | 1738 | 0 |
| Medium | 912 | 208 (~50% 'on') |
| Low | 556 | 208 (~30% 'on') |
| Strobe | 993 | 8.1 |
Due to the R64S having no apparent regulation, the output declines steadily, but is still approximately 800lm after 3 hours of constant operation.
The beam
Starting off indoors the R64S's beam is very smooth especially considering the multi emitter head. This will be due to each emitter having a complete reflector rather than a reflector being merged with a neighbouring one. with a very even and round hotspot
In this exposure the raw power of the beam is overwhelming at indoor ranges.
Reducing the exposure somewhat more clearly shows the smooth edged wide hotspot which give the R64S a reasonable range.
Before looking at the R64S outdoor beamshot, first a quick look at my frequently used reference light, the Fenix TK41.
Switching to the R64S is like turning on a flood light.
What it is really like to use…
Power with comfort is the impression the R64S leaves me with. Using a light like this with a handle on top makes the true size of the light disappear. With the power switch falling directly under your thumb this is a very comfortable light to hold and operate.
Although the lack of regulation means you have an ever decreasing output, what this does do, is prevent any sudden loss of output, so you have plenty of warning that a battery change is due. The large head means the R64S easily runs on full output with no overheating issues.
Personally I'd prefer the low to be lower than 556lm, but thanks to the floody beam, this level is useful and does not seem overly bright.
I have found the 8s mode change timing a little annoying as quite frequently I will turn off a light and then decide I want another look straight away. If done within 8s, I end up changing mode. So not a big issue when you expect it.
The only real disappointment with the R64S is the lack of waterproofing due to the o-rings not touching the head. This could be easily remedied by Rustu by using slightly thicker o-rings, but for the end user it is not so easy to find a suitable replacement.
I must stress the ergonomic benefits of the handle and the switch position. There are a great many lights that need the user to either use their other hand, or to change hand position, to switch it on and off or change mode. The handle of the R64S makes it easy for hands of any size to hold it (and even still use that hand to hold something else) and the switch falls directly under your thumb. Your grip never needs to change.
As well as the benefits of the handle and switch, the choice of a full make-or-break switch means no parasitic drain and no worrying about picking up the light only to find the batteries have become discharged (assuming the cells are OK).
So as an easy to use and powerful value for money flood light, the R64S scores well, just don't get it wet.
Test samples provided by DX.com for review.
")