mdocod
Flashaholic
For starters.. let me thank the members who tipped me off to this...
Zespectre's thread: https://www.candlepowerforums.com/threads/110324
and
Lightlust's thread: https://www.candlepowerforums.com/threads/110345&highlight=lumen
and of cource, the page that those threads link to: http://www.instructables.com/ex/i/9129E65EFFBE102880EC001143E7E506/?ALLSTEPS
After having a little fun creating the animal you can see in my signature, I decided I wanted to do a perminant installation of additional lights onto my thor. The "$10 bike light" was perfect, and MR16 lamps (from track lighting) are 12V, so they could run off of the power already available (internal 12V 7AH SLA).... after doing some research on SLA batteries, I learned that they are VERY tolerant to extreme discharge rates, and for most 7AH batteries, 30-40 amps is within reach continuasly, up to 200 amps is possible with some 7AH SLAs for a few seconds without damage... As it is now, with both filaments on, with a fresh charge, It runs at about 17 amps. So I knew I had the power available to run more lights!
I did some minor research on MR16 lamps. Most MR16s, burn at about 3000K color temp, come in a veriety of wattages (~15-75W), and are available in different levels of focus (9 degree spot - 60 degree flood). If you wanted to repeat what I have done, I would recomend Solux lamps, they are available in color temps up to 4700K, and their spec pages list characteristics in overdrive up to 15V (suggesting that they are capable of handling a mod to increase the voltage as well). In an effort to save money, and have the lamps quickly to get the project under way, I went with Sylvania 20W "spot" lamps, sold in 3 packs at Lowes for $10 per pack. Not the nicest lamps, but the price and availability is nice. If I ever get the urge to uprgrade, i'll go with 35W, 4700K, Solux Spots.
some picts of these mr16s.

The assembly pretty much follows the directions for the "Bike light," with a few minor tweaks.
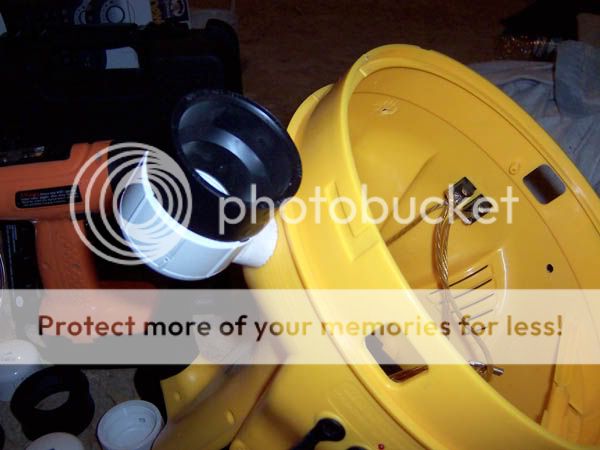
As you can see, the parts I chose are slightly different, but the result is the same idea: a PVC canaster for the MR16. I found that the "quick caps" were less expensive than the "no hub couplings" listed in the original project, and serve the same purpose. I used a different adapter (half the price of a "trap adapter") and came to essencially the same result. (had to use a larger pvc threaded cap though). Test the fitment of different components before purchasing... the rubber pieces are going to vary in thickness from brand to brand. The rubber caps I chose, fit loosely- and require the hoseclampt to make a snug fitment.

I decided to attatch 4 lamps to the thor. any more and the wiring would get pretty messy, any less and it just wouldn't look all that impressive. I used 14GA copper speaker wire for the project (same stuff I used to rewire the thor with).
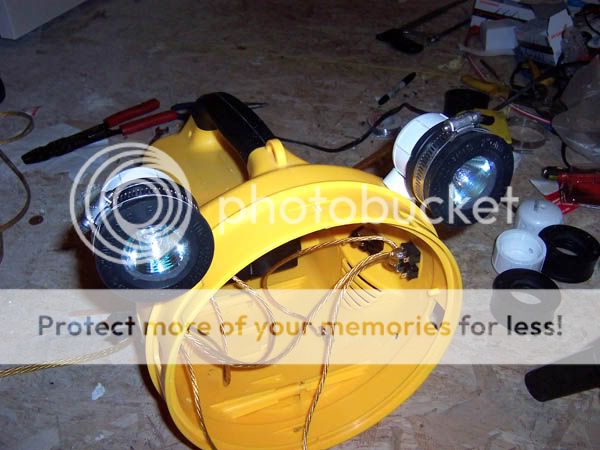
a look at the project in progess
I measured out positions and drilled holes in the thor to mount the PVC canisters to. I used a large washer on the inside to spread out the pressure (so as not to crack the thor body).

I used 1/2" lengths of 3/4" PVC as spacers between the body of the thor and the mr16 pvc canisters... Longer spacers should be used if you want to be able to attatch the large rubber boot to the thor again.
I couldn't find any MR16 sockets in town... (even visited a major electronics supply store). So I went with a brute force method....
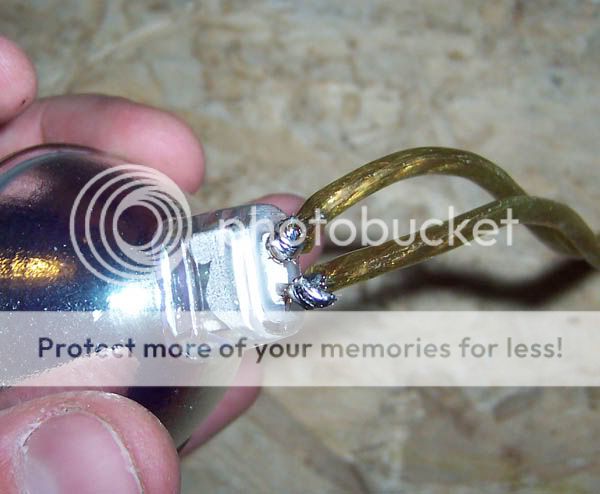
The advantage, is less resistance, the disadvantage, is the lengthy replacement proceedure... My soldering skills are pretty bad, so this was not easy for me at all: I bent the pins out a bit to make it easier to work with.
I chose a 20amp rated toggle switch to use for the mr16s.... I drilled my hole here...

seems like an appropriot place for the new switch, next to the other switches and all.
More pictures of the assembly:

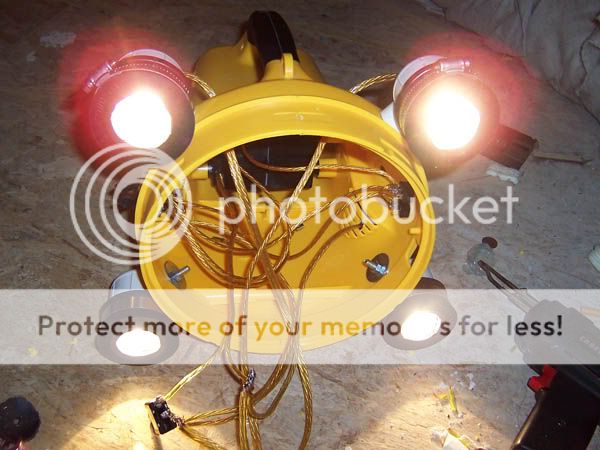
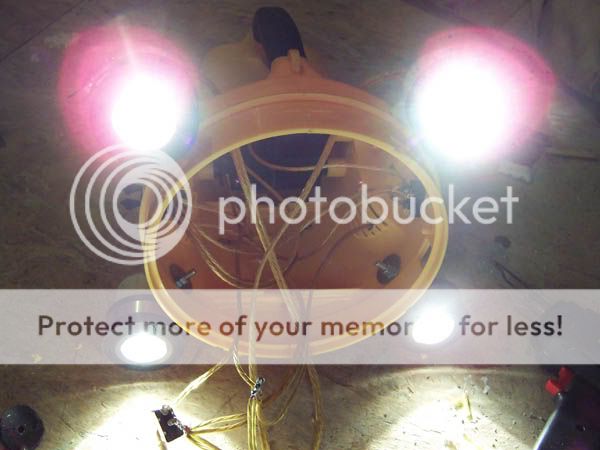
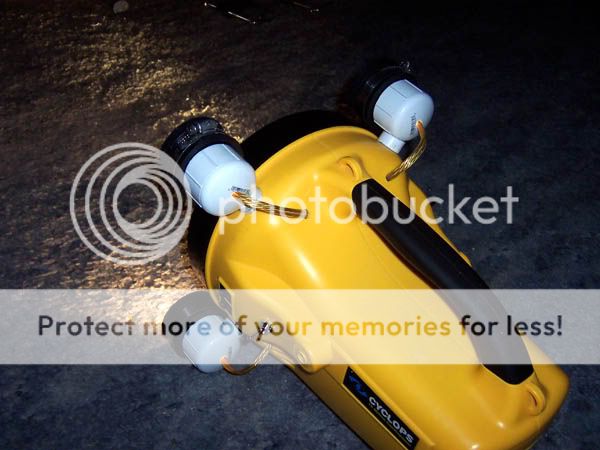
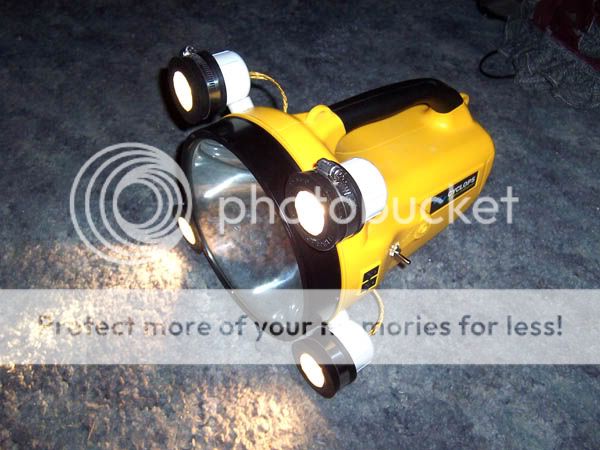
some shots with everything closed back up and running:


This mod takes a few hours to complete, but is very cool imo!!
now... what am I going to call this new light?
Zespectre's thread: https://www.candlepowerforums.com/threads/110324
and
Lightlust's thread: https://www.candlepowerforums.com/threads/110345&highlight=lumen
and of cource, the page that those threads link to: http://www.instructables.com/ex/i/9129E65EFFBE102880EC001143E7E506/?ALLSTEPS
After having a little fun creating the animal you can see in my signature, I decided I wanted to do a perminant installation of additional lights onto my thor. The "$10 bike light" was perfect, and MR16 lamps (from track lighting) are 12V, so they could run off of the power already available (internal 12V 7AH SLA).... after doing some research on SLA batteries, I learned that they are VERY tolerant to extreme discharge rates, and for most 7AH batteries, 30-40 amps is within reach continuasly, up to 200 amps is possible with some 7AH SLAs for a few seconds without damage... As it is now, with both filaments on, with a fresh charge, It runs at about 17 amps. So I knew I had the power available to run more lights!
I did some minor research on MR16 lamps. Most MR16s, burn at about 3000K color temp, come in a veriety of wattages (~15-75W), and are available in different levels of focus (9 degree spot - 60 degree flood). If you wanted to repeat what I have done, I would recomend Solux lamps, they are available in color temps up to 4700K, and their spec pages list characteristics in overdrive up to 15V (suggesting that they are capable of handling a mod to increase the voltage as well). In an effort to save money, and have the lamps quickly to get the project under way, I went with Sylvania 20W "spot" lamps, sold in 3 packs at Lowes for $10 per pack. Not the nicest lamps, but the price and availability is nice. If I ever get the urge to uprgrade, i'll go with 35W, 4700K, Solux Spots.
some picts of these mr16s.
The assembly pretty much follows the directions for the "Bike light," with a few minor tweaks.
As you can see, the parts I chose are slightly different, but the result is the same idea: a PVC canaster for the MR16. I found that the "quick caps" were less expensive than the "no hub couplings" listed in the original project, and serve the same purpose. I used a different adapter (half the price of a "trap adapter") and came to essencially the same result. (had to use a larger pvc threaded cap though). Test the fitment of different components before purchasing... the rubber pieces are going to vary in thickness from brand to brand. The rubber caps I chose, fit loosely- and require the hoseclampt to make a snug fitment.
I decided to attatch 4 lamps to the thor. any more and the wiring would get pretty messy, any less and it just wouldn't look all that impressive. I used 14GA copper speaker wire for the project (same stuff I used to rewire the thor with).
a look at the project in progess
I measured out positions and drilled holes in the thor to mount the PVC canisters to. I used a large washer on the inside to spread out the pressure (so as not to crack the thor body).
I used 1/2" lengths of 3/4" PVC as spacers between the body of the thor and the mr16 pvc canisters... Longer spacers should be used if you want to be able to attatch the large rubber boot to the thor again.
I couldn't find any MR16 sockets in town... (even visited a major electronics supply store). So I went with a brute force method....
The advantage, is less resistance, the disadvantage, is the lengthy replacement proceedure... My soldering skills are pretty bad, so this was not easy for me at all: I bent the pins out a bit to make it easier to work with.
I chose a 20amp rated toggle switch to use for the mr16s.... I drilled my hole here...
seems like an appropriot place for the new switch, next to the other switches and all.
More pictures of the assembly:
some shots with everything closed back up and running:
This mod takes a few hours to complete, but is very cool imo!!
now... what am I going to call this new light?
Last edited: