The upcoming round of about 40 lights will all have HA black aluminum bodies and battery caps. The head and knob options are listed below.
Overview of Flashlight Models
Here is a list with a little more detail on the differences between the models;
The old chrome 005 was an aluminum body light with chrome plated head and knob. There will not be any more of these produced.
The stainless 005 is a HA black aluminum body light with
polished SS 304 head and knob. This light will look very similar to a chrome 005 and will cost $450. I am releasing about 20 of these.
The titanium 005 is a black aluminum body light with polished titanium head and knob. Polished titanium has a darker luster to it than chrome. It will cost $550. I am releasing about 20 of these.
The Damascus 005 is a black aluminum body light with blue tongue Damascus head and a polished SS 304 or titanium knob. This lights head will look similar to Orb's Damascus raw and will cost $850. I am releasing 4 of these.
The prototype scratch and dent 005 is a HA natural aluminum body with chrome head and high polish SS 304 knob. This light will look very similar to a chrome HA natural 005 and will cost $325. I am releasing 10 to 15 of these soon after the other 005s.
The 007 is an all titanium light. Titanium body, head and knob. This light is still in design but I have started the machining setup and acquisition of necessary tooling. The 007 body will have a new look.
All of these lights will have the new advanced STFu micro processor based controller board. Most of the lights will have Seoul emitters (w/ McR18 Seoul reflector) but some (about 20%) will have Cree emitters (w/ modified McR16XR reflector). Some of the lights will have a different battery cap than I have shown before.
dat2zip's New Converter Board
I am not shy or humble about the new STFu board. Wayne has created the perfect converter board for the SPY and I am very excited about it. We spent well over six months in the development of this board (about 1.5 man years total) and that is nearly unprecedented. It has some impressive upgrades over the old board:
1) even in the tiny SPY it can run full power (1000mA) at 100% duty cycle.
2) more efficient than the old DB board and so uses less of the battery power and produces less heat.
3) does not flicker when changing power levels. even if you move the switch very slow it holds the current level till the uP sees the next switch state.
4) through a special mode accessed by removing the battery, the user can adjust the power levels. the intent here is that only a moderate change should be made from the current factory levels of 2mA, 30mA, 100mA, 250mA, 500mA and 1000mA. Some of the testers have made drastic changes to the levels and it has worked. There are software limits imposed on all the power levels; level 1 [ off to 100 mA ], level 2 and level 3 [~5 mA to 100mA] level 4 to level 6 [~50mA to 1250 mA].
5) power level one is a voltage source level and can be adjusted all the way down till the LED appears off. it can be lowered till the LED light can not be seen unless you are in a dark room and look directly into the reflector. It is dim even when compared with a micro tritium vial. In a pitch black room this is a fun thing to play with.
6) power level 6 can be adjusted up to ~1250mA, this would shorten the LED lifespan and consume a larger amount of battery power but the light output would be high. Duty cycle is TBD up here.
7) once the user levels are set the uP EEPROM saves the data and it never needs to be redone, even if the battery is removed or drains completely.
8) there is a mode to easily revert the power states back to factory settings.
9) there is a new screw attachment method for holding the board in the light that will make it easier for modders to break the light down and therefor upgrade to newer LEDs in the future.
10) when the STFu is in it's off state the processor consumes only ~6uA. This is so low that batteries can be left in the light for many years without being completely drained.
11) the new STFu board is drool proof too (LowWorm beta tested)
") Some of the features of the board that are not new:
Some of the features of the board that are not new:
1) electronic reverse polarity protection
2) any rechargeable batteries can be used if they are not to thick to fit.
3) six power levels
4) all the levels are a very pure DC to the LED (the AC component is only a couple mV). You can not see flicker at any power level because there is none.
5) fastest light in the west!
How to change the power levels on the STFu.
First, a little background. The spy has a knob that clicks the switch into 7 discrete locations. They are positions zero through six. Looking at the knob from the front of the light (the LED end), the knob functions like a standard volume control, rotating the knob CCW is the position zero or off direction and CW is the higher power direction.
Switch setting 0 is off. Switch setting 1 is the lowest power setting. Setting 2 is higher, and so it goes all the way to full power with setting 6. The default factory power levels 1 to 6 are: 2mA, 30mA, 90mA, 250mA, 500mA, 1000mA.
When you put batteries in the SPY and then snap the battery cap on, that will "power-up" the STFu processor on the converter board. I will refer to "powering-up" the light many times in this tutorial. So to power-up the converter simply replace the battery cap. Power-up does NOT imply turning on the LED.
What position the switch is in when you power up the light determines what mode the light will be put into. Normally you should keep the switch in the off position when changing the batteries. In this case the light works normally. This power-up-0 mode is the normal operating mode.
Also, If you power up the light with the switch in position 6 the light will come on at full power. I did this in case you do not remember where off is and happen to have the switch turned the wrong way. This would be called a power-up-6 and this mode is in all other ways, identical to the power-up-0 mode.
For those of you interested in changing the power levels from the factory defaults listed above, please read on. To adjust any of the six power levels you use the following power-up modes;
power-up-3 = reset all power levels to factory defaults and perform calibration
power-up-4 = lower a power level
power-up-5 = raise a power level
Once you do a power-up-4, you have nine seconds to move the switch to the setting you want to modify. During that nine seconds the LED is sweeping, it sweeps nine times. It does this just so you know you have time to move the knob. So move the knob to the power level you want to modify and wait for the rest of the nine seconds to pass. Watch and you will see the sweeping will cease and the LED will be on steady except every second it will flicker. Each time it flickers it will be a little dimmer. See the chart below to know how much dimmer it gets each time it flickers. When the LED gets to the power you desire simply turn the knob to the off position. At this point the light is back to the normal operating mode.
The power-up-5 mode works the exact same way as the power-up-4 mode except each time the LED flickers, it is getting brighter.
As an example: Say you want to reduce the power of level 3 from the factory 90mA to a new value of 75mA. You take the battery cap off, then you set the knob to position 4, then you put the battery cap back on and then quickly (within nine seconds) move the knob to position 3. When the LED quits sweeping, it will be powered with exactly 90mA of current. Then count the number of times it flickers. When it has flickered 15 times, turn the knob to the off position. You are done. assuming you started with a calibrated light you will have the following power levels ==> 2mA, 30mA, 75mA, 250mA, 500mA, 1000mA.
If after changing a power level the light does not come on when you turn the knob, perform a power-up-0. If you get confused and the light is not doing what you think it should be doing, perform a power-up-3. This will reset the light to factory levels and do a calibration. The cal will slowly sweep through the power levels and record the Vf data for your emitter. This calibration takes a couple minutes and requires new or strong batteries. Batteries that can run the light to the full 1000mA of power. If after you adjust a few levels, you are not happy with how the light functions, perform a power-up-3. If you are performing a power-up-3 and the light appears stuck at a level and is flickering pick up the light and hold it in your hand for a few seconds. When the calibration is finished the light will sweep a few times and then come on to PL3. During a calibration the light does not read the switch position. So if you want to stop it you will have to pull the battery cap off.
This chart shows how much each level changes each time the LED flickers and what range of adjustment you can perform:
PL1 changes +- a nats *** with a range of off to 100mA.
PL2 changes +- 1mA with a range of 5mA to 100mA.
PL3 changes +- 1mA with a range of 5mA to 100mA.
PL4 changes +- 5mA with a range of 50mA to 1250mA.
PL5 changes +- 5mA with a range of 50mA to 1250mA.
PL6 changes +- 5mA with a range of 50mA to 1250mA.
My intent as I designed the code's algorithms for the user adjustable levels was that you only move the levels a small amount. Please play with it, in any case, no harm can come to the light.
Loading Batteries
When you are putting the batteries in the light please keep this in mind. On the battery that goes behind the LED, please put the "+" end in first. The other battery goes in with the "-" end in first.
The battery cap must be pushed straight on. If it gets crooked it will stick and you have to take it off and start again.
You can not hurt the light by putting the batteries in the wrong way.
Damascus Pictures
Damascus is quite interesting, the acid etching process is like being in a Hogwarts potions class.

The SS is on the left, the Ti is on the right. The SS is slightly brighter but it is not easy to capture in a photograph.
The body of the top light in this picture is frosted. There is only one of these Seoul Ti 005 lights and it does not have a frosted battery cap.
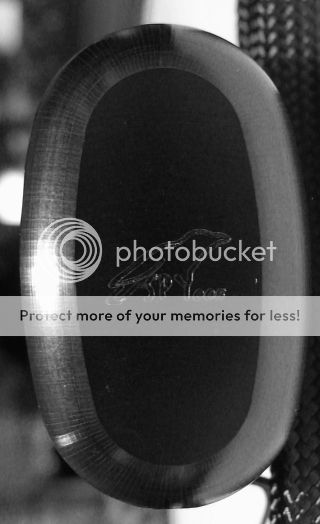
These are the five custom battery caps. The logo is inset in an oval depression.
The bottom row shows three of the Cree lights with the McR-19 Cree reflector.
Cheers
Dave


 :santa: