
milkyspit
Flashlight Enthusiast
Yesterday I finished this build for fellow CPFer Donn. Wanted to share it with folks. It was the culmination of a long effort, at times a slightly traumatic ordeal, and overall, may have been the toughest build I've yet done.
Much of this post was written in the wee hours of the morning when I should have been asleep. For that reason it may noyt be the best thing I've ever written, and may well be among the worst! Heck, for all I know maybe I'm still asleep as I write this. Anyway, please excuse. :sleepy:
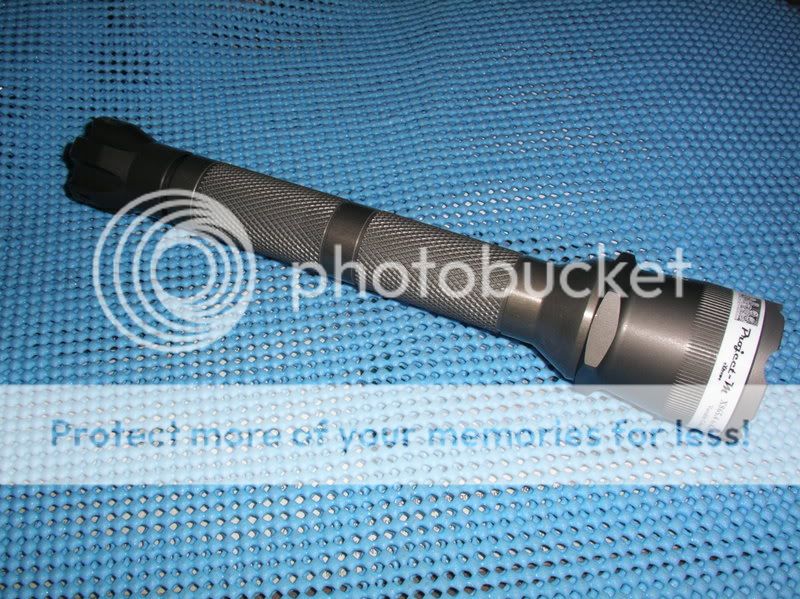
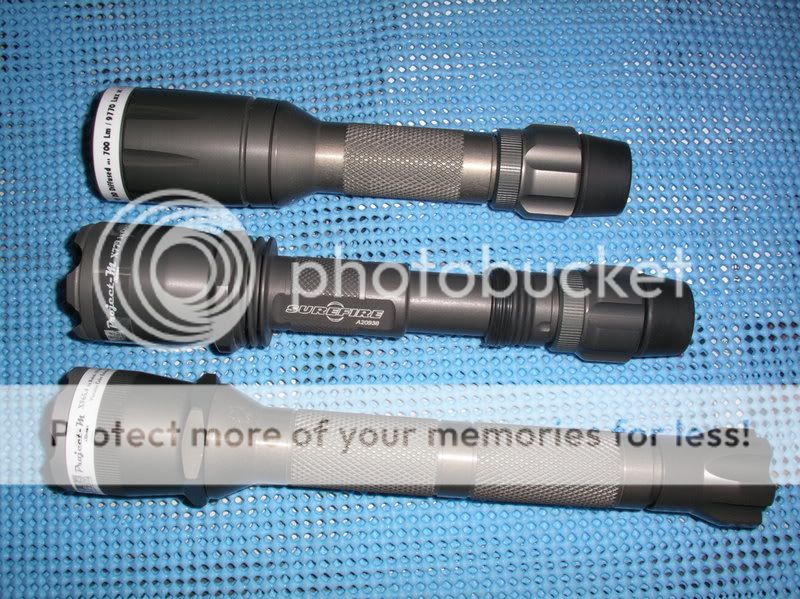
Here's our little bloody instrument of modder torture.
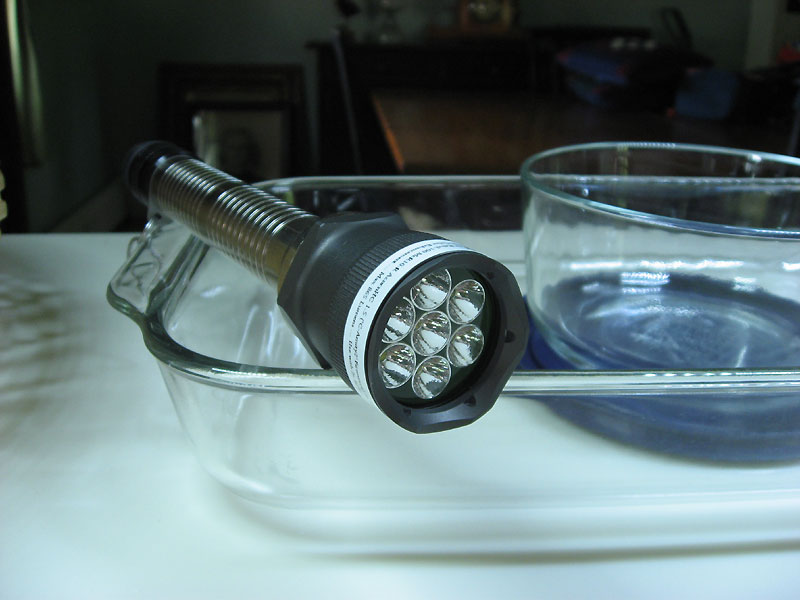
The body is separate: that's mine! So are the casserole dish, the storage container with lid, and the paintings propped against the wall in the far left corner of the room.oo:
No, dear reader, it's the head itself that is the subject of our thread. In keeping with Project-M tradition, it's got an overly technical, vaguely Star Trek-sounding name...

Project-M: This build complies with the general design architecture of my own Project-M builds. Please see this thread for more on that.
eXtrame: The build is a little too experimental in nature and/or not quite efficient enough to meet Project-M standards, receiving the "X" designation to indicate this fact. (Just occurred to me that NASA has long named their rocket-powered test aircraft using an "X" designation... the X15, for example... maybe at some level this influenced my own choice of lettering.)
X865.4: This light receives a nominal rating of 865 lumens max output. The rating is based on the guaranteed minimum output for each Rebel-100 emitter, adjusted for the output current they actually see. It is entirely possible the light might produce 900+ lumens, but I prefer to rate Project-M and related builds a little on the conservative side. As for the ".4" part... that indicates the head provides four brightness levels. (Actually it offers EIGHT levels, but we'll get to that.)
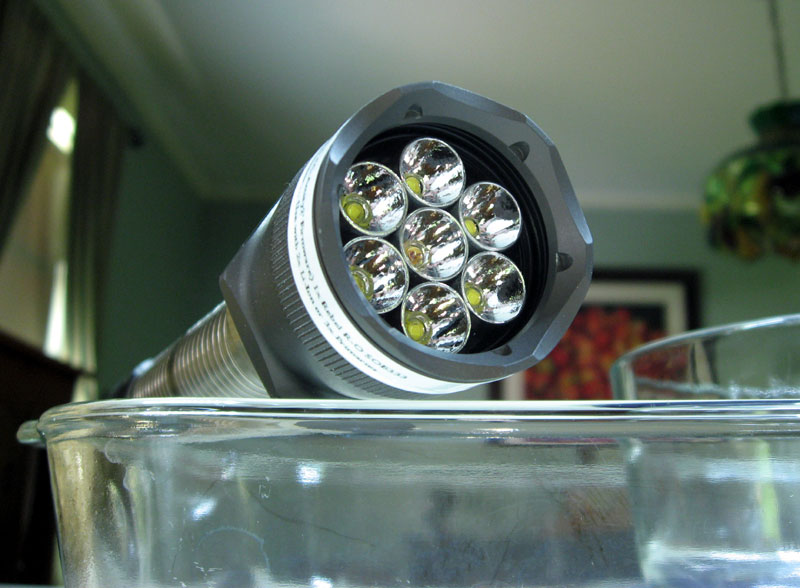
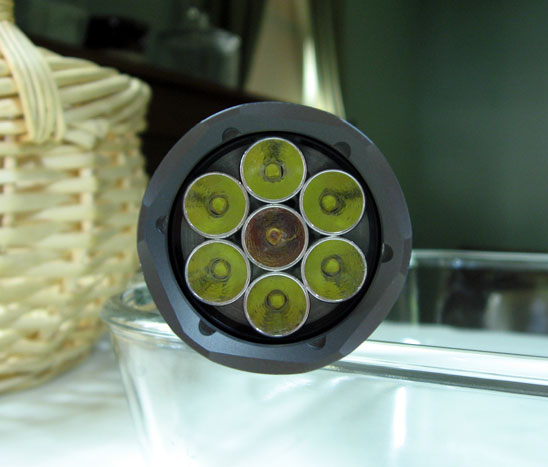
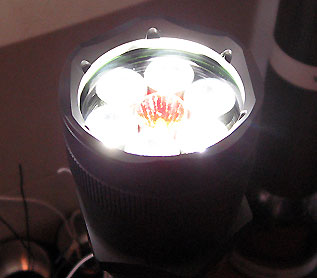
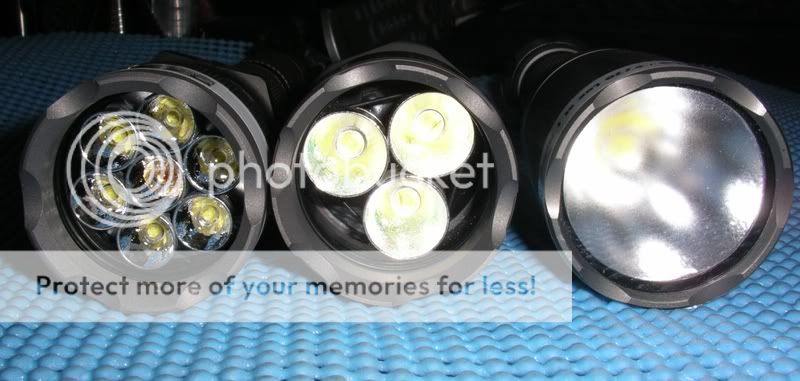
6x Rebel-100: Six white Rebel-100 emitters are present.
McR10-R: These are the reflectors used on the white emitters. They are McGizmo-produced and built specifically for the Luxeon Rebel series of LEDs.
AcornHC 1.5: The driver used for the white LEDs is the same one developed for use in the Gotham flashlight. This particular driver is set to deliver a maximum 1.5 Amps output current overall.
'C-Amity' Firmware: This is the version of software that controls the light's user interface as well as functionality in general. It's an offshoot of my current "Bailey" firmware and incorporates some tweaks Donn had requested to the brightness of the various levels.
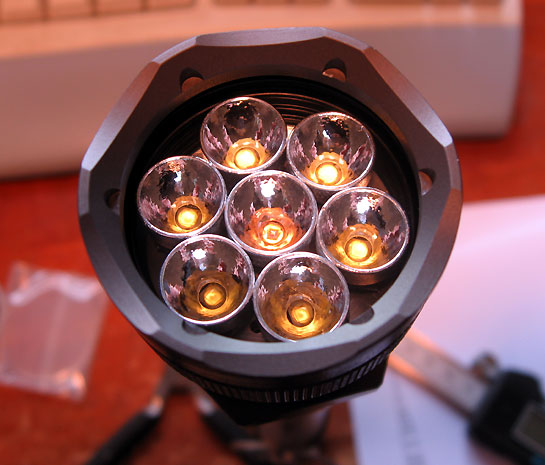
1x Rebel R-O: One red-orange Rebel emitter is present.
SOB333: The driver used to power the red-orange emitter is an SOB333 constant-current buck converter.
Variable Color Enhancement: Similar to the various "Pinky" builds I've done in the past, except for one critical difference... normally a pinky build keeps the degree of color enhancement constant at the various levels of output... by contrast, this light is designed for the proportion of red-orange to VARY, with it most present at the lowest outputs, similar to the red lights some folks use to retain their night vision... and least present at max output, which is most likely being used for longer ranges where the enhanced color rendition would be least effective anyway... the contribution of the red-orange was tuned to provide optimal blending for color rendition purposes at MEDIUM output. (The light ranges from ultralow, to low, to medium, to max.)
Use with 2x Li-Ion or 3x123 Primaries: Doesn't matter which size lithium-ion rechargeable, just use TWO of them and all will be well. Use three and you'll have a nifty paperweight before too long. Likewise, 3x123 primaries is fine, 4x123 not so fine. oo:
One thing the label does NOT explicitly say is this particular build also incorporates the new "Miser Mode" that was introduced in the Bailey version of the firmware on which C-Amity2 is based. Miser mode allows the light to be adapted to long-runtime scenarios with a simple key sequence... takes all of 10 seconds or so, maybe less... in this mode the light scales all output levels down to generate what the human eye will perceive as 50% the usual brightness... and in so doing, runtimes across the board increase to 5-6 times normal. Miser mode can be activated and deactivated at will, and while it is active the light continues to operate with the same user interface, operating modes, special features... well, same EVERYTHING, just perceptually at 50% the normal brightness and vastly longer battery life.
The AcornHC itself is a good performer... in this particular application I'd estimate 95% or so average efficiency when running on a pair of rechargeables... that translates (with 2x18650 AW 2200mAh protected Li-Ion rechargeables) to roughly 1h23m max output at or near the full 865 lumens, with lower brightness levels operating several times longer... at the other end of the spectrum, ultralow in this configuration ought to last for a number of DAYS if not WEEKS... and the same levels in miser mode... well, let's just say Donn probably won't want to wait for the miser mode runtime tests to complete before he receives his light!
3x123 primaries are no slouches, either... max output ought to last 37m or so, and as above, the lower outputs will last much longer.
The entire head is weatherproofed using double-seal o-rings with the lens seal underneath the lens itself rather than above it... while I would NOT recommend diving with this head, it should handle just fine being splashed by waves crashing over the deck in rough seas... hopefully Captain Donn will, too!
(Disclaimer: The X865.4 informal Milky Labs warrantee is null and void in the event of using the light while doing battle with certain Great White Whales of lore. Likewise this light is not designed to sustain inadvertent harpoon impacts. DO SO AT YOUR OWN RISK! Certain federal, state, and literary restrictions may also apply.)
I fabricated the heatsink on the lathe I'd recently purchased from fellow CPFer Wquiles. It's no masterpiece, and definitely took some time to get even remotely close to right... I attribute that to operator error... but dangit, the surface really IS smooth, so I'm happy! In the end it fits into the KL2 head like a glove and does seem to do its job, so guess it worked out okay.
(Incidentally, that wasn't where the blood part came in... that was in slicing my finger on the sharp edges of the KL2 itself while cleaning it out!)
The Rebels themselves cause headaches every time I work with them (here's where the sweat and tears come in)... first there's reflow soldering them onto some very small, custom boards I'd commissioned Jtr1962 to create per the Lumileds spec (and as usual he did masterfully)... then mounting them with thermal epoxy and the ordeal of getting all seven emitters centered in all seven reflectors before the epoxy set, and without making a total mess... surely this is a game even more sinister than the "Whack-A-Mole" games on the boardwalk at the Jersey Shore. Then there's the wiring, which is surprisingly complex... and the unusually tiny connection pads which serve to increase the overall stress level throughout the whole procedure, as if the ambient stress wasn't already great enough... and THEN, IF actually surviving all the above, there's the hurry-up-and-wait LOOOONG burn-in process during which I gradually increase the current to the emitters hourly, in controlled fashion, going half-blind by virtue of the visual inspections I perform throughout, for a total of OVER 21 CONTINUOUS HOURS. (Hmm... did I get paid enough to cover the cataract surgery?)
If any of the emitters fail during any of the above, then we have even more fun! We replace the emitter and begin the whole big wonderful destructive circus all over again!!
As an encore, there's the small matter of getting everything to fit inside the head without crunching or shorting a circuit board, nor snapping a wire... getting the heatsink to seat properly... getting the lens in place and bezel ring on without chipping the lens or crushing the emitters... etc.
We've made it this far (knock on wood), let's light this candle. :naughty:
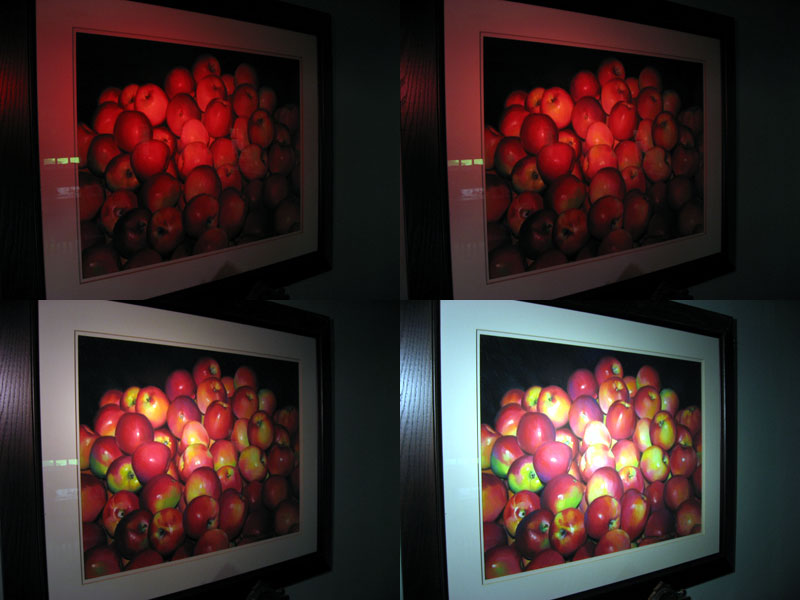
The framed apple piece on the wall is the masterful work of artist Roz Hollander of Newton, NJ. These digital pix don't do justice to the work... in real life, at casual glance it looks like a PHOTOGRAPH and only on close inspection does one realize the whole thing is actually done in PASTEL! I feel no shame in singing the praises of Mrs. Hollander here, publicly... this woman has TALENT!!!
Her painting also made a great backdrop for putting the X865.4 through its paces. Note the strong red bias in the lowest two brightness settings (ultralow and low), as expected.
In medium brightness the painting comes to life, and though it may not be apparent in this particular photo, the apples just about jump out of the frame. Nice! :bow:
Max output still looks good, and certainly plenty bright, though it somewhat flattens the image, reducing but not totally eliminating the three-dimensional effect we saw on medium. All in all, an encouraging test.
How do we fare in a completely different test environment, shining down into our cellar with its fieldstone and mortar walls?
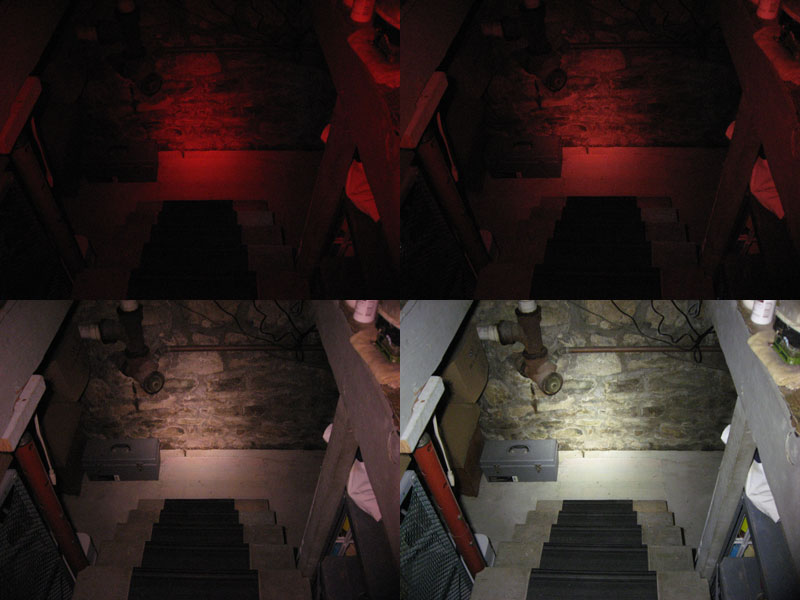
Shining the beam into the cellar, ultralow is just about completely red, also surprisingly bright and easy to use for walking around. Low is similar, but note the increased output... it's subtle... look at the toolbox in the lower left, how on low the light illuminates it more effectively than did the ultralow. It's the stepping-up of the white output of the light, albeit modestly, which made the difference.
Medium output delivers not only a sufficiently bright beam for this application, but also draws out the browns and tans in the stone and surrounding features, also the red, yellow and orange hues. There's a richness to the color rendering at this level that gives the feel of a "heavy" beam and seems brighter than it really is.
Max output still benefits from the central red-orange emitter, but it's a far more subtle effect... the color enhancement is more modest while overall output has increased dramatically. By this point we're bringing the full 865 lumens (and quite possibly 900+ lumens) to bear in a center-weighted beam pattern consisting of large hotspot with gradual falloff to sidespill. For reference, it's maybe 14 feet from where I'm sitting to the base of the cellar wall.
All in all, blood, sweat and tears notwithstanding, I was happy with this build. Hope the customer is, too.
Thank you for reading! :bow: :bow:
Much of this post was written in the wee hours of the morning when I should have been asleep. For that reason it may noyt be the best thing I've ever written, and may well be among the worst! Heck, for all I know maybe I'm still asleep as I write this. Anyway, please excuse. :sleepy:
Here's our little bloody instrument of modder torture.
The body is separate: that's mine! So are the casserole dish, the storage container with lid, and the paintings propped against the wall in the far left corner of the room.
oo:No, dear reader, it's the head itself that is the subject of our thread. In keeping with Project-M tradition, it's got an overly technical, vaguely Star Trek-sounding name...
Project-M: This build complies with the general design architecture of my own Project-M builds. Please see this thread for more on that.
eXtrame: The build is a little too experimental in nature and/or not quite efficient enough to meet Project-M standards, receiving the "X" designation to indicate this fact. (Just occurred to me that NASA has long named their rocket-powered test aircraft using an "X" designation... the X15, for example... maybe at some level this influenced my own choice of lettering.)
X865.4: This light receives a nominal rating of 865 lumens max output. The rating is based on the guaranteed minimum output for each Rebel-100 emitter, adjusted for the output current they actually see. It is entirely possible the light might produce 900+ lumens, but I prefer to rate Project-M and related builds a little on the conservative side. As for the ".4" part... that indicates the head provides four brightness levels. (Actually it offers EIGHT levels, but we'll get to that.)
6x Rebel-100: Six white Rebel-100 emitters are present.
McR10-R: These are the reflectors used on the white emitters. They are McGizmo-produced and built specifically for the Luxeon Rebel series of LEDs.
AcornHC 1.5: The driver used for the white LEDs is the same one developed for use in the Gotham flashlight. This particular driver is set to deliver a maximum 1.5 Amps output current overall.
'C-Amity' Firmware: This is the version of software that controls the light's user interface as well as functionality in general. It's an offshoot of my current "Bailey" firmware and incorporates some tweaks Donn had requested to the brightness of the various levels.
1x Rebel R-O: One red-orange Rebel emitter is present.
SOB333: The driver used to power the red-orange emitter is an SOB333 constant-current buck converter.
Variable Color Enhancement: Similar to the various "Pinky" builds I've done in the past, except for one critical difference... normally a pinky build keeps the degree of color enhancement constant at the various levels of output... by contrast, this light is designed for the proportion of red-orange to VARY, with it most present at the lowest outputs, similar to the red lights some folks use to retain their night vision... and least present at max output, which is most likely being used for longer ranges where the enhanced color rendition would be least effective anyway... the contribution of the red-orange was tuned to provide optimal blending for color rendition purposes at MEDIUM output. (The light ranges from ultralow, to low, to medium, to max.)
Use with 2x Li-Ion or 3x123 Primaries: Doesn't matter which size lithium-ion rechargeable, just use TWO of them and all will be well. Use three and you'll have a nifty paperweight before too long.
Likewise, 3x123 primaries is fine, 4x123 not so fine. oo:
One thing the label does NOT explicitly say is this particular build also incorporates the new "Miser Mode" that was introduced in the Bailey version of the firmware on which C-Amity2 is based. Miser mode allows the light to be adapted to long-runtime scenarios with a simple key sequence... takes all of 10 seconds or so, maybe less... in this mode the light scales all output levels down to generate what the human eye will perceive as 50% the usual brightness... and in so doing, runtimes across the board increase to 5-6 times normal. Miser mode can be activated and deactivated at will, and while it is active the light continues to operate with the same user interface, operating modes, special features... well, same EVERYTHING, just perceptually at 50% the normal brightness and vastly longer battery life.
The AcornHC itself is a good performer... in this particular application I'd estimate 95% or so average efficiency when running on a pair of rechargeables... that translates (with 2x18650 AW 2200mAh protected Li-Ion rechargeables) to roughly 1h23m max output at or near the full 865 lumens, with lower brightness levels operating several times longer... at the other end of the spectrum, ultralow in this configuration ought to last for a number of DAYS if not WEEKS... and the same levels in miser mode... well, let's just say Donn probably won't want to wait for the miser mode runtime tests to complete before he receives his light!
3x123 primaries are no slouches, either... max output ought to last 37m or so, and as above, the lower outputs will last much longer.
The entire head is weatherproofed using double-seal o-rings with the lens seal underneath the lens itself rather than above it... while I would NOT recommend diving with this head, it should handle just fine being splashed by waves crashing over the deck in rough seas... hopefully Captain Donn will, too!
(Disclaimer: The X865.4 informal Milky Labs warrantee is null and void in the event of using the light while doing battle with certain Great White Whales of lore. Likewise this light is not designed to sustain inadvertent harpoon impacts. DO SO AT YOUR OWN RISK! Certain federal, state, and literary restrictions may also apply.)
I fabricated the heatsink on the lathe I'd recently purchased from fellow CPFer Wquiles. It's no masterpiece, and definitely took some time to get even remotely close to right... I attribute that to operator error... but dangit, the surface really IS smooth, so I'm happy! In the end it fits into the KL2 head like a glove and does seem to do its job, so guess it worked out okay.
(Incidentally, that wasn't where the blood part came in... that was in slicing my finger on the sharp edges of the KL2 itself while cleaning it out!)
The Rebels themselves cause headaches every time I work with them (here's where the sweat and tears come in)... first there's reflow soldering them onto some very small, custom boards I'd commissioned Jtr1962 to create per the Lumileds spec (and as usual he did masterfully)... then mounting them with thermal epoxy and the ordeal of getting all seven emitters centered in all seven reflectors before the epoxy set, and without making a total mess... surely this is a game even more sinister than the "Whack-A-Mole" games on the boardwalk at the Jersey Shore.
Then there's the wiring, which is surprisingly complex... and the unusually tiny connection pads which serve to increase the overall stress level throughout the whole procedure, as if the ambient stress wasn't already great enough... and THEN, IF actually surviving all the above, there's the hurry-up-and-wait LOOOONG burn-in process during which I gradually increase the current to the emitters hourly, in controlled fashion, going half-blind by virtue of the visual inspections I perform throughout, for a total of OVER 21 CONTINUOUS HOURS. (Hmm... did I get paid enough to cover the cataract surgery?) If any of the emitters fail during any of the above, then we have even more fun! We replace the emitter and begin the whole big wonderful destructive circus all over again!!
As an encore, there's the small matter of getting everything to fit inside the head without crunching or shorting a circuit board, nor snapping a wire... getting the heatsink to seat properly... getting the lens in place and bezel ring on without chipping the lens or crushing the emitters... etc.
We've made it this far (knock on wood), let's light this candle. :naughty:
The framed apple piece on the wall is the masterful work of artist Roz Hollander of Newton, NJ. These digital pix don't do justice to the work... in real life, at casual glance it looks like a PHOTOGRAPH and only on close inspection does one realize the whole thing is actually done in PASTEL! I feel no shame in singing the praises of Mrs. Hollander here, publicly... this woman has TALENT!!!
Her painting also made a great backdrop for putting the X865.4 through its paces. Note the strong red bias in the lowest two brightness settings (ultralow and low), as expected.
In medium brightness the painting comes to life, and though it may not be apparent in this particular photo, the apples just about jump out of the frame. Nice! :bow:
Max output still looks good, and certainly plenty bright, though it somewhat flattens the image, reducing but not totally eliminating the three-dimensional effect we saw on medium. All in all, an encouraging test.
How do we fare in a completely different test environment, shining down into our cellar with its fieldstone and mortar walls?
Shining the beam into the cellar, ultralow is just about completely red, also surprisingly bright and easy to use for walking around. Low is similar, but note the increased output... it's subtle... look at the toolbox in the lower left, how on low the light illuminates it more effectively than did the ultralow. It's the stepping-up of the white output of the light, albeit modestly, which made the difference.
Medium output delivers not only a sufficiently bright beam for this application, but also draws out the browns and tans in the stone and surrounding features, also the red, yellow and orange hues. There's a richness to the color rendering at this level that gives the feel of a "heavy" beam and seems brighter than it really is.
Max output still benefits from the central red-orange emitter, but it's a far more subtle effect... the color enhancement is more modest while overall output has increased dramatically. By this point we're bringing the full 865 lumens (and quite possibly 900+ lumens) to bear in a center-weighted beam pattern consisting of large hotspot with gradual falloff to sidespill. For reference, it's maybe 14 feet from where I'm sitting to the base of the cellar wall.
All in all, blood, sweat and tears notwithstanding, I was happy with this build. Hope the customer is, too.
Thank you for reading!
:bow: :bow:
Last edited:


 ).
).