AvidHiker
Enlightened
I'd like to post this as a reference for those who might be interested in encapsulation/potting of the TiGlow glowrings which were offered by B@rt in the B/S/T forum here.
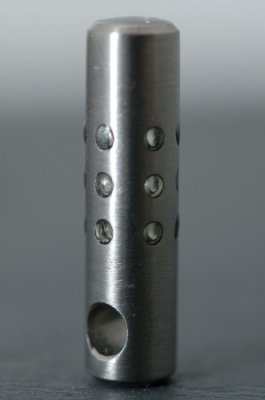
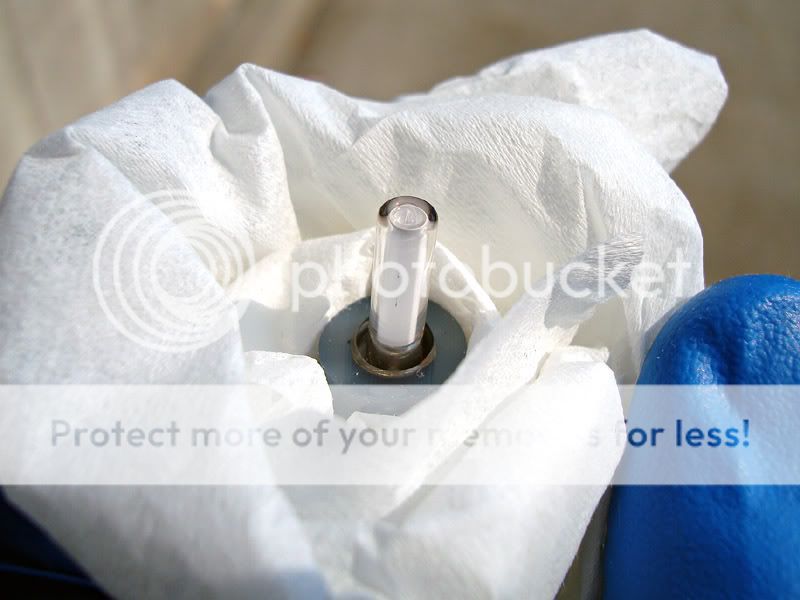
My first one lasted less than a month under mostly keychain carry before I managed to pop the vial. The holes leave a significant portion of the glass vial exposed (although recessed) and, IMO, it's only a matter of time (on a keychain at least) before something pokes its way in there. The vials themselves are quite expensive, so (IMO) are worth the time and effort to protect further. As far as I can tell, the easiest way to encapsulate the vial is to start with everything disassembled (I'm having B@rt ship my remaining TiGlows "unpotted"). It did not appear possible to fill each hole individually without leakage (which would likely make quite a mess of your TiGlow). However, the creative might try this approach anyway. It just might work with Norland 61 if each hole is first sealed by partially filling, then curing (maybe while rotating to keep the adhesive from leaking out onto the case), and finally, going back to complete the fill. Otherwise, a more viscous adhesive might not be so prone to leakage… just some ideas.
Anyway, what follows is my procedure for encapsulation of a TiGlow.
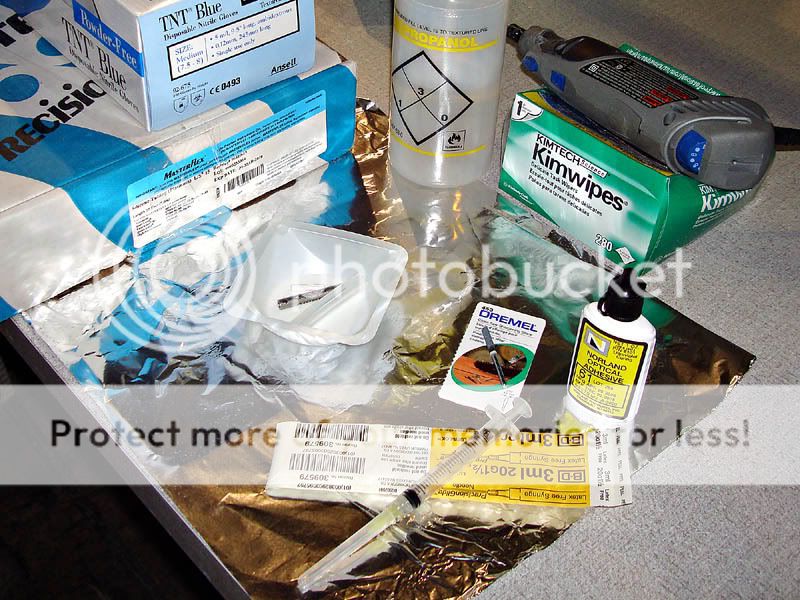
Materials:
Norland 61 optical adhesive (NOA 61) (available here)
Gloves (preferably nitrile)
Isopropanol (aka, rubbing alcohol) – good for precleaning and cleaning up uncured adhesive
Dremel 453 Chainsaw Sharpening Stone (4mm)
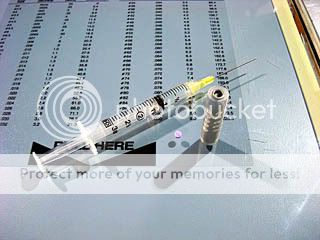
Small syringe with needle (requires ~0.5cc of NOA 61)
~2 inches of LS/15 silicone tubing (Masterflex 96410-15, available here or PM me and I might be able to help you out). Other silicone tubing would likely work, but this is what I used and what I also consider to be ideal for the task.
Razor blade
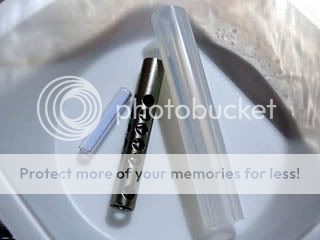
Here's the stuff...
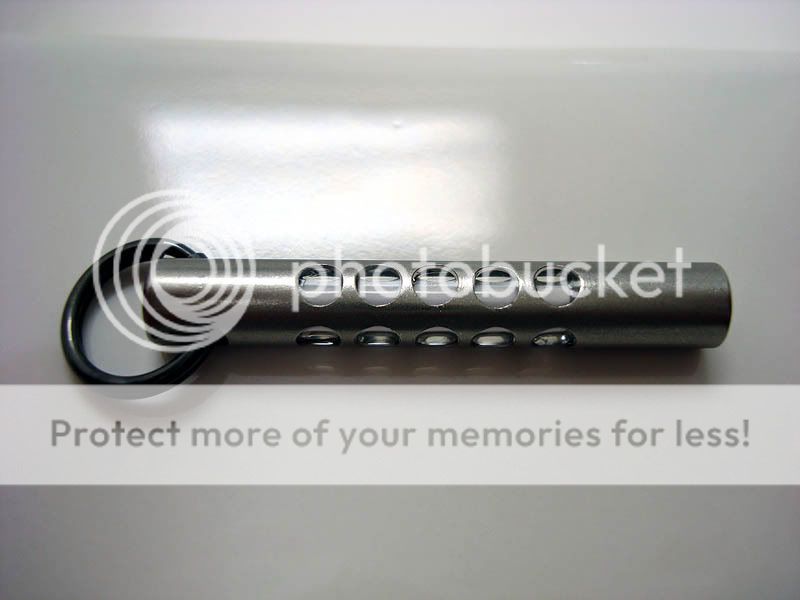
…and that's it. A few tiny bubbles and minor cosmetic defects (barely noticable unless scrutinized), but thankfully no mess on the outer titanium case! The Norland 61 is so transparent that you'll forget its even there.
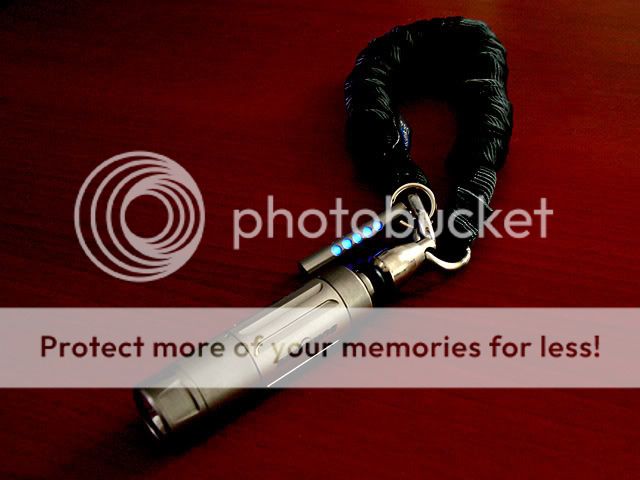
My new TiGlow has now lasted over one month on my keychain with no evidence of wear on the adhesive (which I worried could create a haze which would adversely affect light output). After a few years, it's certainly possible that abrasive wear could damage the adhesive so it won't look so pretty and won't transmit light as well. Polishing might be an option at that point, but either way I still feel the tradeoffs are well worth my piece of mind. This thing is NEVER going to break (I hope).
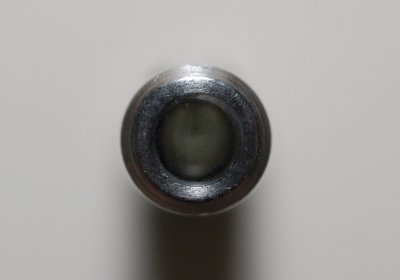
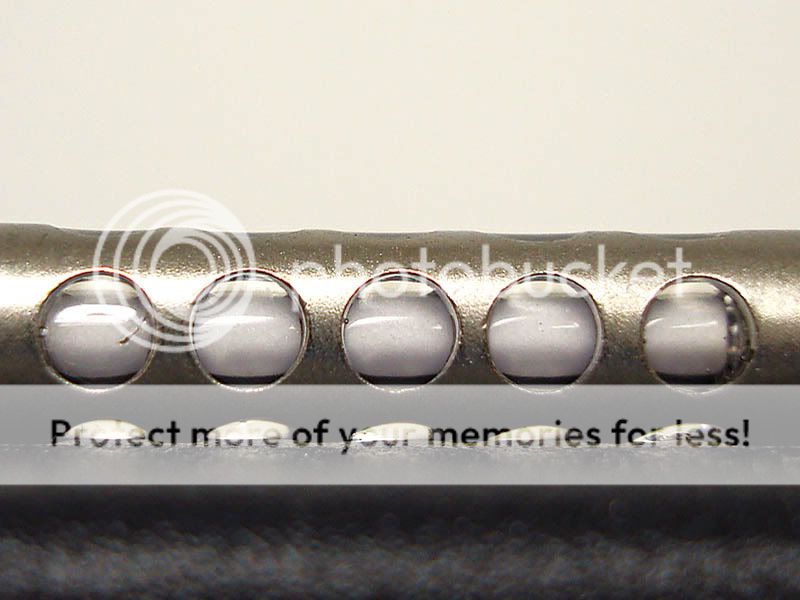
A nice thing about the silicone tubing I decided to use was the thick walls and small ID which appeared to apply significant pressure on each of the holes in the case. As can be seen in the picture below, I believe that this helped to recess the adhesive at these locations, which should ultimately help to limit damage from abrasive wear.
Sorry about the funky formatting (my pics are all over the place on my monitor) but I didn't feel like trying to fix it. Enjoy your TiGlow!
btw - It looks very nice paired with another piece of bead blasted Ti...
My first one lasted less than a month under mostly keychain carry before I managed to pop the vial. The holes leave a significant portion of the glass vial exposed (although recessed) and, IMO, it's only a matter of time (on a keychain at least) before something pokes its way in there. The vials themselves are quite expensive, so (IMO) are worth the time and effort to protect further. As far as I can tell, the easiest way to encapsulate the vial is to start with everything disassembled (I'm having B@rt ship my remaining TiGlows "unpotted"). It did not appear possible to fill each hole individually without leakage (which would likely make quite a mess of your TiGlow). However, the creative might try this approach anyway. It just might work with Norland 61 if each hole is first sealed by partially filling, then curing (maybe while rotating to keep the adhesive from leaking out onto the case), and finally, going back to complete the fill. Otherwise, a more viscous adhesive might not be so prone to leakage… just some ideas.
Anyway, what follows is my procedure for encapsulation of a TiGlow.
Materials:
Norland 61 optical adhesive (NOA 61) (available here)
Gloves (preferably nitrile)
Isopropanol (aka, rubbing alcohol) – good for precleaning and cleaning up uncured adhesive
Dremel 453 Chainsaw Sharpening Stone (4mm)
Small syringe with needle (requires ~0.5cc of NOA 61)
~2 inches of LS/15 silicone tubing (Masterflex 96410-15, available here or PM me and I might be able to help you out). Other silicone tubing would likely work, but this is what I used and what I also consider to be ideal for the task.
Razor blade
Here's the stuff...
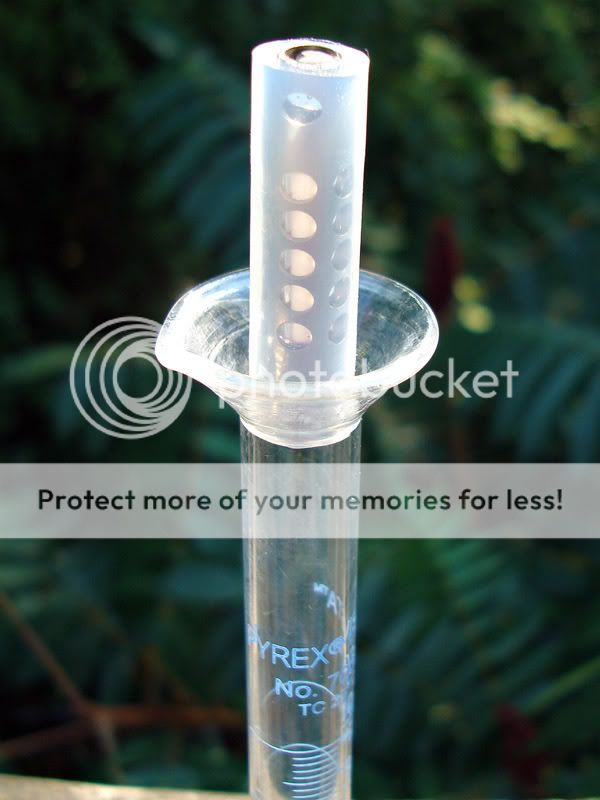
- Bored out titanium case with the Dremel grinding stone, just enough for a slightly loose fit which will allow the NOA 61 to flow past when inserting. I used a fairly low speed drill for this, running at 100-200 rpm or so, 5 minutes on and off until I was happy with the fit.
- Cleaned tritium vial, titanium case and silicone tube with soap and water followed by rinsing with isopropanol.
- Dried everything thoroughly
- Inserted titanium case into tube (it will slide in under firm pressure)
- Cut away excess tubing
- Inserted neoprene spacer, positioned flat, at bottom of case. In hindsight, I would probably leave this out since I believe this was responsible for releasing some air as it came into contact with the base of the vial (which had trapped an air bubble upon insertion). It did not appear to be necessary for maintaining proper position within the case once it was filled with NOA 61.
- Filled syringe with about 1cc of NOA 61 (requires 0.5 cc) and removed bubbles
- Carefully filled case from the bottom with NOA 61 (needle positioned at bottom)
- *Applied drop of NOA 61 to end of vial* (I tried this but don't think I used enough since I still trapped a bubble, but good wetting prior to insertion should help prevent air from being trapped at the vial's base)
- Slowly inserted the vial (wetted end first), being careful not to push it in too far (not really possible with spacer).
- Mounted in a vertical position
- Placed in direct sunlight to cure (weather: occasional clouds, UV index of 8 – i.e., summer sun) for 2 hours within the silicone tube, rotating 90° every 15 minutes (earlier experiments indicated full cure through this tubing within one hour in direct sunlight)
- Removed from silicone tube (carefully sliced lengthwise with razor, but it may be possible to simply push the case out – just make sure its fully cured, or the adhesive surfaces may smear)
- Placed in sun on top of some Al-foil for 1 hour for good measure (rotated 90° every 15 minutes)
- Post cure for 12 hours at 50°C (when mounting trits, I found this appeared to increase the hardness of the adhesive a bit – this is also the recommended procedure to achieve optimal bonding with glass)
…and that's it. A few tiny bubbles and minor cosmetic defects (barely noticable unless scrutinized), but thankfully no mess on the outer titanium case! The Norland 61 is so transparent that you'll forget its even there.
My new TiGlow has now lasted over one month on my keychain with no evidence of wear on the adhesive (which I worried could create a haze which would adversely affect light output). After a few years, it's certainly possible that abrasive wear could damage the adhesive so it won't look so pretty and won't transmit light as well. Polishing might be an option at that point, but either way I still feel the tradeoffs are well worth my piece of mind. This thing is NEVER going to break (I hope).
A nice thing about the silicone tubing I decided to use was the thick walls and small ID which appeared to apply significant pressure on each of the holes in the case. As can be seen in the picture below, I believe that this helped to recess the adhesive at these locations, which should ultimately help to limit damage from abrasive wear.
Sorry about the funky formatting (my pics are all over the place on my monitor) but I didn't feel like trying to fix it. Enjoy your TiGlow!
btw - It looks very nice paired with another piece of bead blasted Ti...