Klem
Enlightened
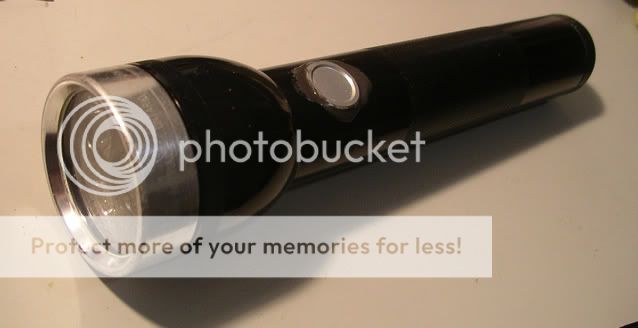
Here's a 2D Maglite mod. The idea is not so much the LED but the use of the full torch (no cables).
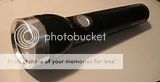
It's a 2D Maglite with a Terralux drop-in LED upgrade (3*Cree XR-E run at 12watts, manufacturer claim 700 lumens). Batteries are 2* D Cell Li-ion (7.2V 5Ah gives 2.5hrs run time). Switch is a piezo and toggle circuit.
This guy has been to 45metres on a few occassions now and compared to other PVC torches I've made is compact and 'bomb proof'. Great day torch, or back-up night torch. Feel free to use and abuse the idea.
Instructions
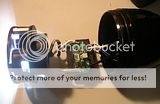
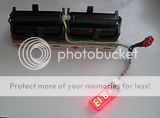
Take a 2D Maglite and remove the switch barrel. Remove the rubber switch cover and use a 2mm Allen key to release the barrel. This is the only way so don't try coming in from the front on that circlip, you'll never get it out. Slide the barrel out the back. Cut off the narrow front section of the barrel and discard. Push out the blue plastic insert and discard the switch mechanism. Hacksaw the blue insert in half, to free up space for the piezo. Cut off the long silver flat lead and solder a cable to what's left of it. This will be your negative take-off forward of the batteries. Solder a positive lead to the metal contact inside the barrel. Return the blue section to the barrel and permanently glue with epoxy.

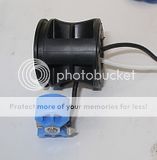
Reinsert the modified barrel back into the Maglite tighten in place with the allen key. Glue a 16mm piezo switch into the space left. Before you glue shorten the legs and solder two leads to the legs. I used 2-part metal epoxy to glue the piezo to the Maglite (Devcon). Run all four leads forward through the convenient hole in the barrel.
So, 2 leads from the switch and the positive and negative leads from the battery.
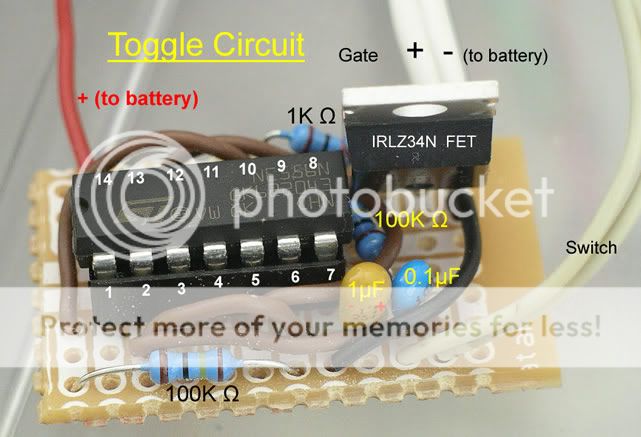
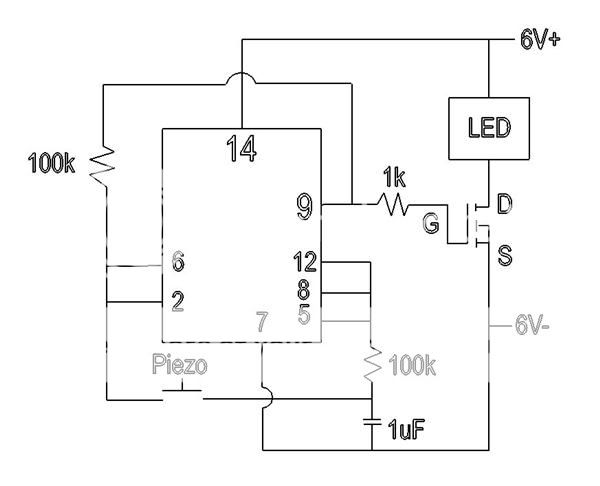
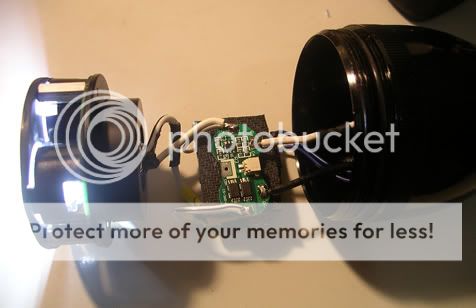
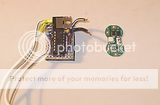
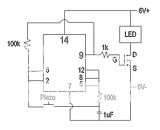
Then connect the power leads to your protection circuit, and from there to the toggle circuit and whatever LED you want to use. The toggle circuit is made from a few parts; including a 556 timer chip and a logic FET. I used the following circuit. The protection circuit is because the D Cell Li-ion's from Kaidomain don't have their own protection circuits. Space is a premium here so the circuit and PCB are back to back, and go in sideways.
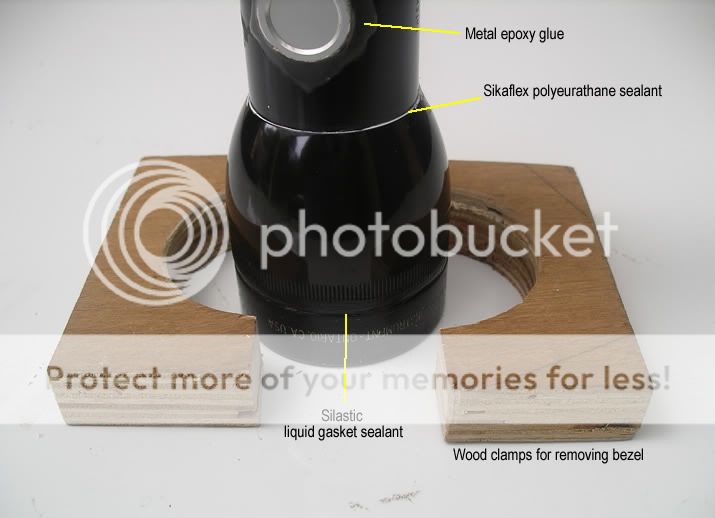
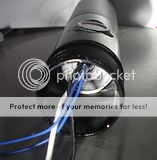
The Maglite head is semi-permanently glued to the body by polyeurathane sealant (Sikaflex Marine). You will not need to open this again.
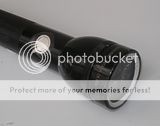
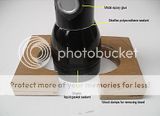
The lens is 4mm glass glued permanently in place by epoxy putty (Selleys Aqua-Knead-it). The bezel is then sealed to the head by silicone sealant (Silastic). So, no O rings in the head section to leak when you don't want them to. Using silicone for the bezel instead of a stronger glue means it can be 'cracked' open if ever you need to service the front section. I made a couple of wood clamps for this; A square of wood holed with a hole saw and cut in half. Good for an even grip in the vise and won't scratch the finish.


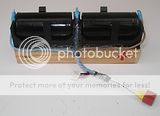
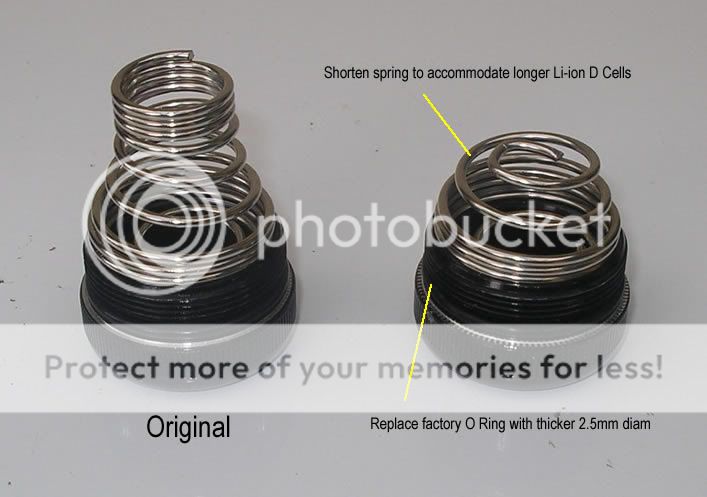
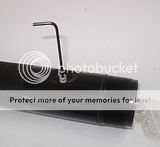
The back end. You need to shorten the spring as in the picture. D Cell Li-ions are slightly longer than normal D Cells. The O ring needs to be upgraded to a thicker 2.5mm one. As the toggle circuit chews a few milliamps I leave the back end slightly cracked to open the circuit and save the batteries. Batteries have a charging bed with leads for both balance charging, and normal fast charging. Again, don't forget they are unprotected so don't mix up the polarity in or out of the torch!

If you prefer a lanyard connection you can always use a hose clamp.
I've made a few torches in my time and this would have to be the most solid. Maglites are a perfect host for a dive torch, and great for heat sink/dissipation, and this one sits in your BC pocket.
Thanks for all your ideas guys, and hope this is of some help to someone.
It's a 2D Maglite with a Terralux drop-in LED upgrade (3*Cree XR-E run at 12watts, manufacturer claim 700 lumens). Batteries are 2* D Cell Li-ion (7.2V 5Ah gives 2.5hrs run time). Switch is a piezo and toggle circuit.
This guy has been to 45metres on a few occassions now and compared to other PVC torches I've made is compact and 'bomb proof'. Great day torch, or back-up night torch. Feel free to use and abuse the idea.
Instructions
Take a 2D Maglite and remove the switch barrel. Remove the rubber switch cover and use a 2mm Allen key to release the barrel. This is the only way so don't try coming in from the front on that circlip, you'll never get it out. Slide the barrel out the back. Cut off the narrow front section of the barrel and discard. Push out the blue plastic insert and discard the switch mechanism. Hacksaw the blue insert in half, to free up space for the piezo. Cut off the long silver flat lead and solder a cable to what's left of it. This will be your negative take-off forward of the batteries. Solder a positive lead to the metal contact inside the barrel. Return the blue section to the barrel and permanently glue with epoxy.
Reinsert the modified barrel back into the Maglite tighten in place with the allen key. Glue a 16mm piezo switch into the space left. Before you glue shorten the legs and solder two leads to the legs. I used 2-part metal epoxy to glue the piezo to the Maglite (Devcon). Run all four leads forward through the convenient hole in the barrel.
So, 2 leads from the switch and the positive and negative leads from the battery.
Then connect the power leads to your protection circuit, and from there to the toggle circuit and whatever LED you want to use. The toggle circuit is made from a few parts; including a 556 timer chip and a logic FET. I used the following circuit. The protection circuit is because the D Cell Li-ion's from Kaidomain don't have their own protection circuits. Space is a premium here so the circuit and PCB are back to back, and go in sideways.
The Maglite head is semi-permanently glued to the body by polyeurathane sealant (Sikaflex Marine). You will not need to open this again.
The lens is 4mm glass glued permanently in place by epoxy putty (Selleys Aqua-Knead-it). The bezel is then sealed to the head by silicone sealant (Silastic). So, no O rings in the head section to leak when you don't want them to. Using silicone for the bezel instead of a stronger glue means it can be 'cracked' open if ever you need to service the front section. I made a couple of wood clamps for this; A square of wood holed with a hole saw and cut in half. Good for an even grip in the vise and won't scratch the finish.
The back end. You need to shorten the spring as in the picture. D Cell Li-ions are slightly longer than normal D Cells. The O ring needs to be upgraded to a thicker 2.5mm one. As the toggle circuit chews a few milliamps I leave the back end slightly cracked to open the circuit and save the batteries. Batteries have a charging bed with leads for both balance charging, and normal fast charging. Again, don't forget they are unprotected so don't mix up the polarity in or out of the torch!
If you prefer a lanyard connection you can always use a hose clamp.
I've made a few torches in my time and this would have to be the most solid. Maglites are a perfect host for a dive torch, and great for heat sink/dissipation, and this one sits in your BC pocket.
Thanks for all your ideas guys, and hope this is of some help to someone.
")