
Warning: pic heavy, as usual. 
Specifications:
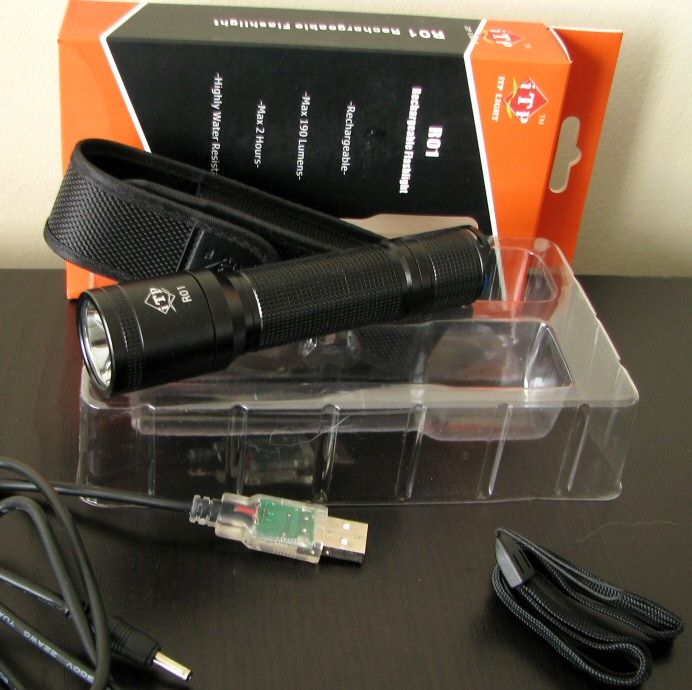
Packaging is fairly basic, in keeping with ITP's status as the "budget" line of Olight. Inside the cardboard box with plastic insert are the light, simple wrist strap, charging cable, and good quality belt holster. There is no manual card, as the instructions are printed on the back of the package. There were no spare o-rings on my sample.
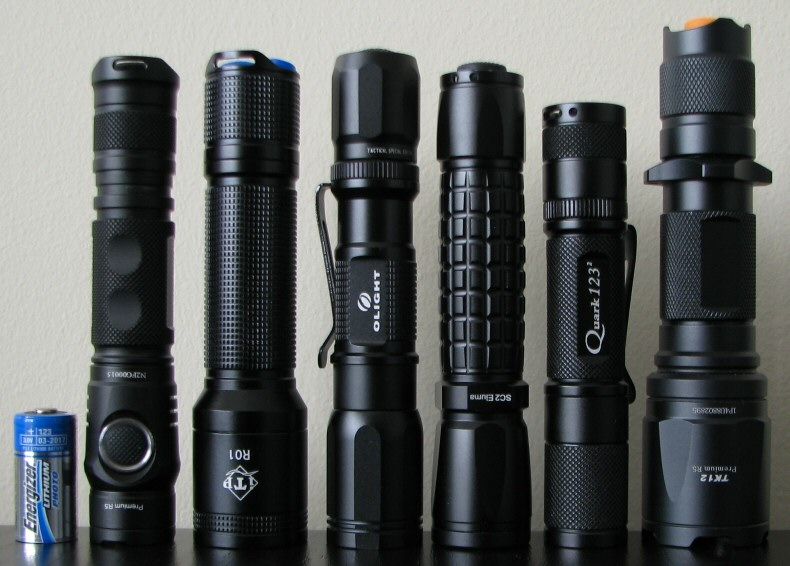
From left to right: Energizer CR123A, Klarus NT20, ITP R01, Olight I20, ITP SC2, 4Sevens Quark 123-2, Fenix TK12
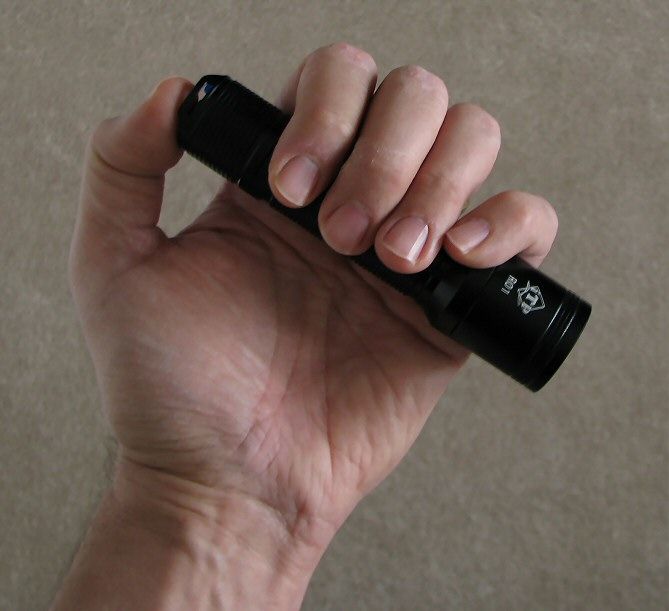
R01: Weight: 122.2g (built-in battery), Length 126.2mm x Width 30.1mm (bezel)
Overall dimensions are reasonable for this class of light. Weight with battery is also reasonable.
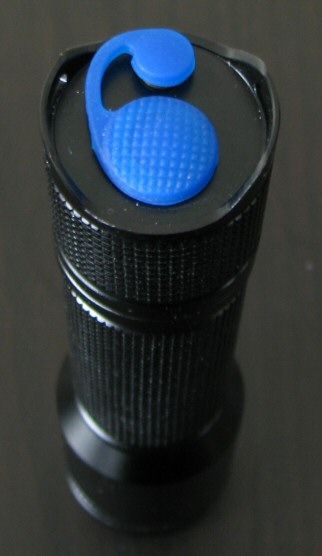
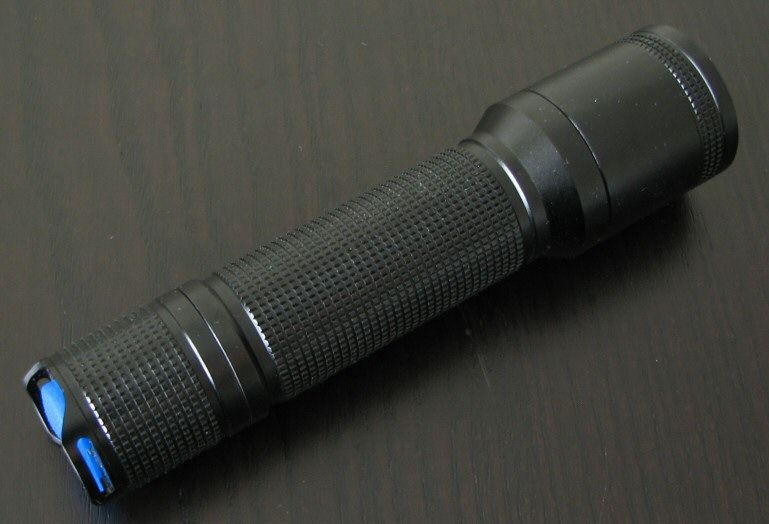
The tailcap switch is a typical forward clicky, with reasonably good feel. The switch boot cover is continuous with charging cable plug. The light can tailstaind. :thumbsup:
Knurling is not very aggressive at all, even less so than most other Olight/ITP lights. I would describe grip as only "ok", as the light could be slippery with wet hands.
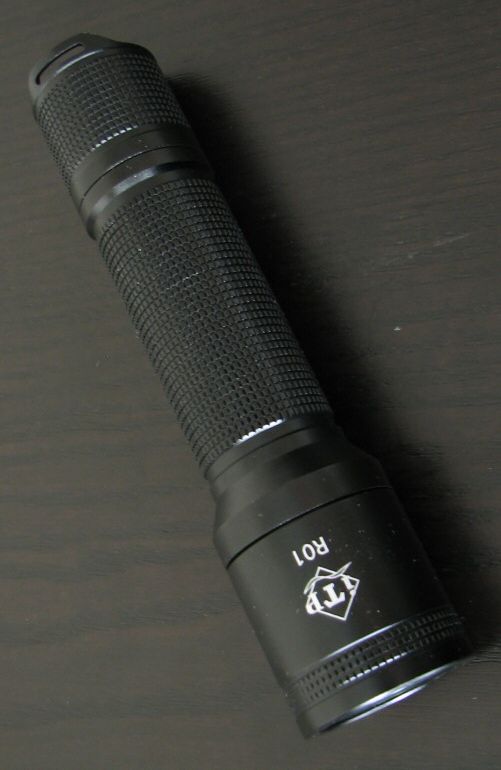
Anodizing is good on my sample, no chips in the black finish (HA = type III). Lettering is sharp and clear, bright against the black background.
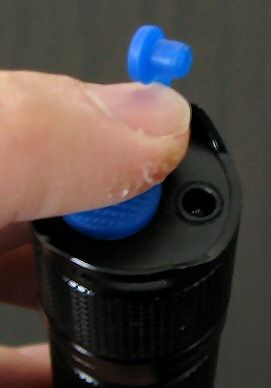
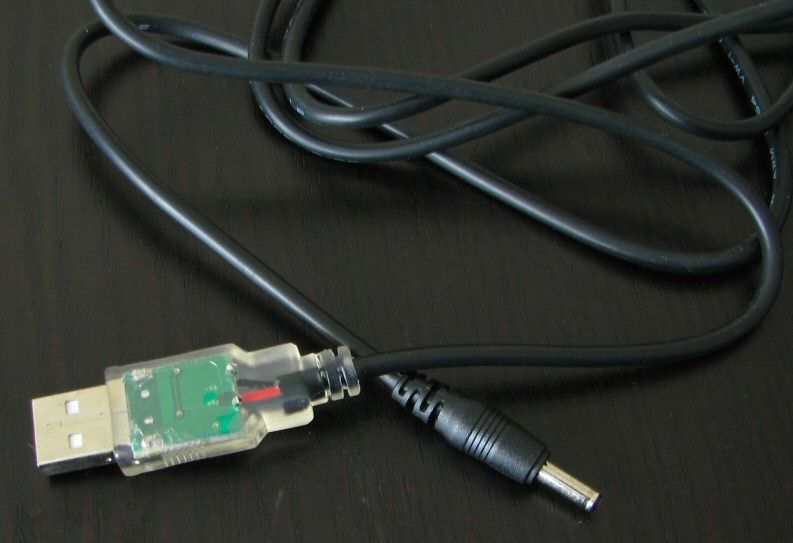
Key point here is the charging method. Unfortunately, the light doesn't use a standard micro-USB connector, but rather a proprietary cable (i.e. similar to many simple cell phone chargers).
But you need to use their supplied cable for another reason - the charging circuit is part of the USB cable, not the actual light. This is rather unusual; you need to look at the USB base to find out what state you are in during charging.
UPDATE: CPF user Ray of Light reports the charging cable uses the same chip as the DSD charger. It therefore should charge at 350 mA with proper termination at 4.2 V.
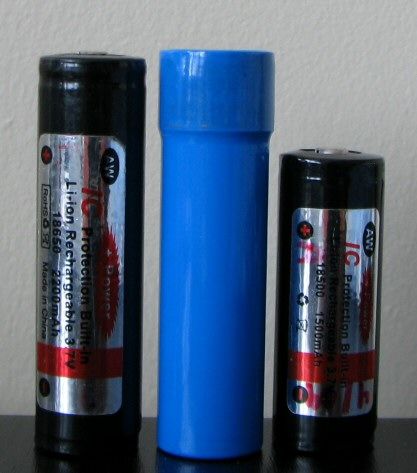
AW Protected 18650 on the left, AW protected 18500 on the right, in the image above.
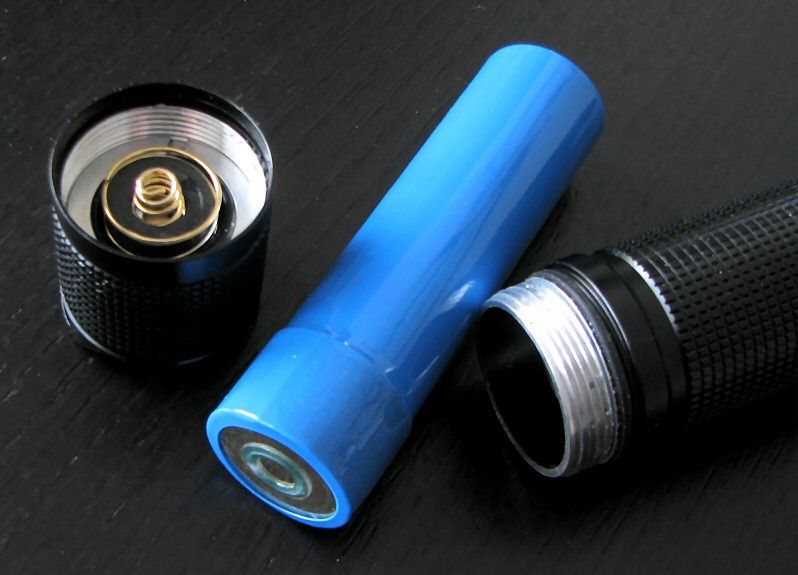
This is where it gets interesting!oo: Turns out the light is not sealed, and you can access the battery. As CPF User Ray of Light points out, it seems to use something close to a 18500 cell (with an extension to reach the positive terminal in the tailcap). But as you will see in my runtime data, the bundled battery performs in keeping with a 2200-2400mAH 18650 cell (scroll down for details).
Note that the polarity is reversed - the negative battery terminal goes to the head, and the positive goes to the tailcap. The bundled battery only fits the correct way.
RoL also reports that the R01 will take a standard 18650 (with positive contact terminal nipple), and I can confirm that is true.
Be careful to observe this unusual polarity arrangement - anything else will fry the R01's circuit. I haven't tried to charge it with a 18650 in there, but RoL reports that doesn't work (and may not be safe thing to try, since it wasn't designed for it). And that's not surprising - the charging system seems to involve a secondary ring around the center top. This likely also explains why flat-top 18650 don't work in the light.
Note the screw threads are not anodized, so there is no tailcap lock-out.
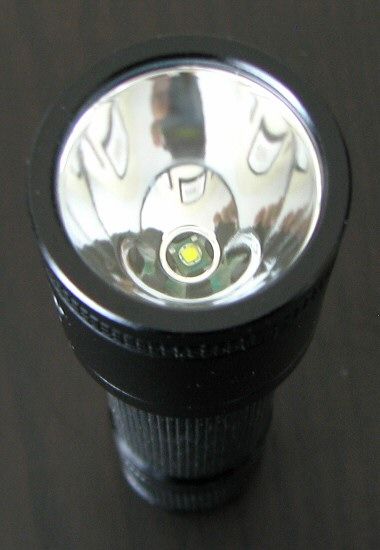

The R01 features the Cree XP-E emitter, Q5 output bin. The reflector is smooth, but there are some slight concentric rings in it. I've seen this before – I can only assume it helps to reduce artifacts/rings in the beam, without going for full texturing. This will likely produce decent throw.
Which brings us to the requisite white wall hunting. All lights are on Hi on 18650 (AW Protected where available), about ~0.75 meter from a white wall (with the camera ~1.25 meters back from the wall). Automatic white balance on the camera, to minimize tint differences.
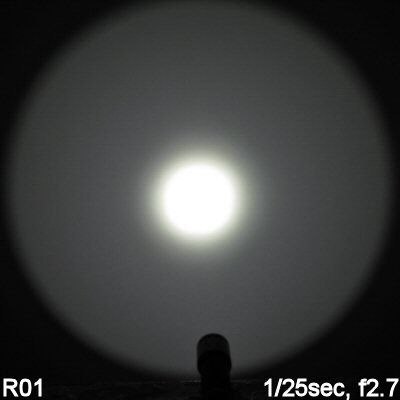
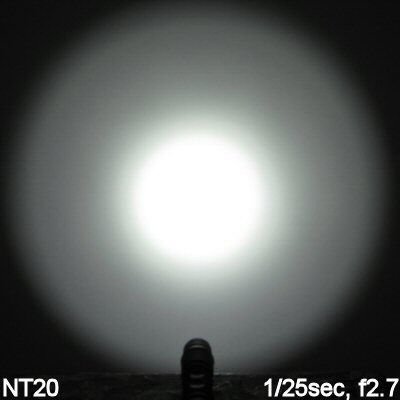
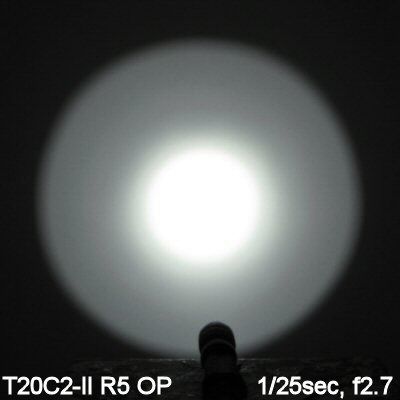
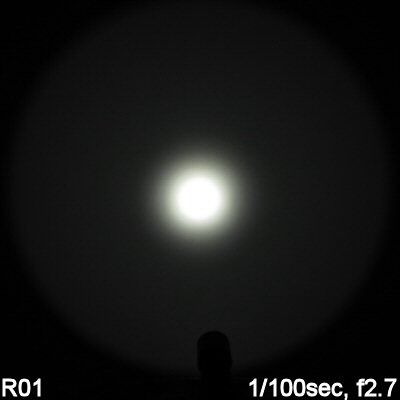
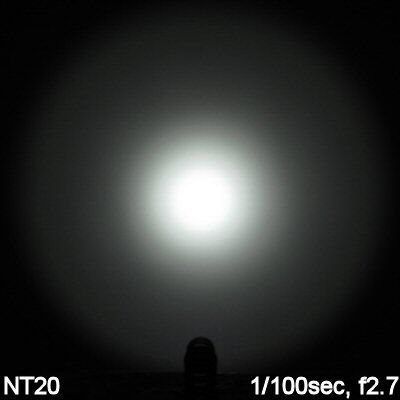
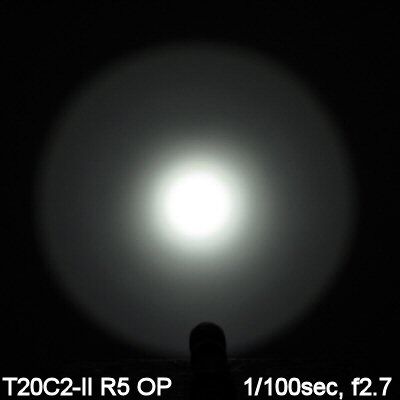
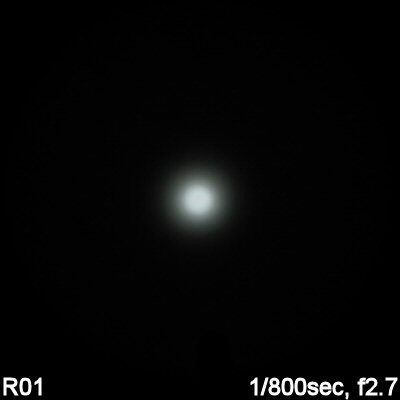
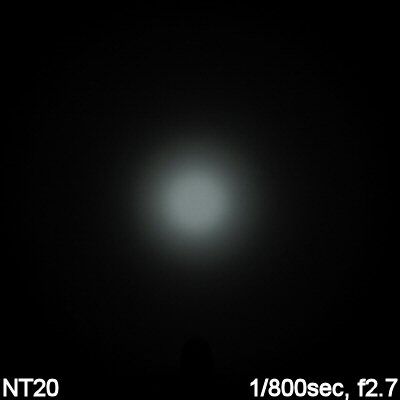
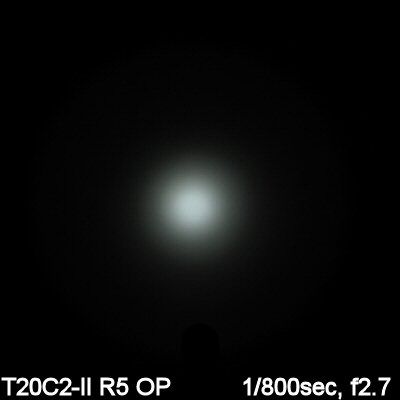
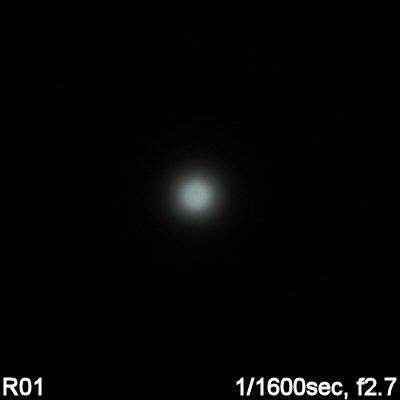
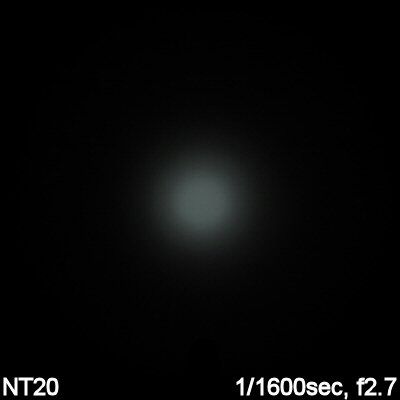
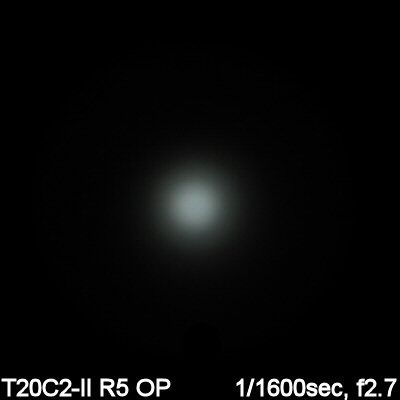
From now on, all my beamshots will be taken in this standard configuration, to facilitate comparisons.
As you can see, the R01 is focused for throw, with a very tight hotspot. Actually, it rather reminds me of my classic Streamlight ProPolymer luxeon in some ways. Scroll down to my Summary Tables for more specifics on output.
UPDATE 12/29/10: I'm going to be updating my 100-yard beamshot thread soon, but here's a sneak preview of a relevant R01 comparison:
Obviously, the XP-E Q5-equipped R01 can't compare to the XP-G R5-equipped Maelstrom G5, but it gives you a general idea.
User Interface
On/off is controlled by the tailcap clicky (press for momentary on, click for lock on). That's it - the light is single-stage only. :kiss:
Charging is automatic when the cable is plugged in. When the USB cable is connected to a computer without the R01 light attached, a small green LED on the base of the USB connector will flash. When connected to the light and charging, the USB cable base lights up a solid bright green. When fully charged, the green light shuts off completely. It took ~7 hours to fully charge a nearly depleted light.
CPF user Ray of Light reports the charging cable uses the same chip as the DSD charger. It therefore should charge at 350 mA with termination at 4.2V.
No PWM or Strobe
There is no PWM or Strobe – the light is single-stage full power. :kiss:
Testing Method:
All my output numbers are relative for my home-made light box setup, a la Quickbeam's flashlightreviews.com method. You can directly compare all my relative output values from different reviews - i.e. an output value of "10" in one graph is the same as "10" in another. All runtimes are done under a cooling fan, except for any extended run Lo/Min modes (i.e. >12 hours) which are done without cooling.
I have recently devised a method for converting my lightbox relative output values (ROV) to estimated Lumens. See my How to convert Selfbuilt's Lighbox values to Lumens thread for more info.
Throw/Output Summary Chart:
Effective November 2010, I have revised my summary tables to match with the current ANSI FL-1 standard for flashlight testing. Please see http://www.sliderule.ca/FL1.htm for a description of the terms used in these tables.

The max output and throw of the R01 are consistent with its emitter (Q5 output bin) and reflector design.
See my runtimes below for info on the relative output levels.
Output/Runtime Comparison:
UPDATE Dec 21, 2010: Runtimes updated with a standard 2200mAh AW Protected 18650.
On the bundled battery (orange trace above), output/runtime is what you would expect for a single-stage Q5-equipped light running on an 18650 cell – flat regulation for a good amount of time, followed by slow direct-drive decay.
Using a standard 2200mAh AW protected 18650 (red trace above), I get a roughly similar runtime pattern. Regulation is a bit tighter, with the light holding max output longer, but the drop-off once the battery falls out of regulation is faster. A higher capacity cell would last longer.
Potential Issues
A proprietary USB charging cable needs to be used with the bundled battery (included). Charge indicator status is on the cable, not the light.
All USB charging methods carry a potential risk to your USB ports. An optional AC charging cable would have been appreciated. But a number of inexpensive USB-AC (or USB-DC) adapters are available, and would likely work.
Light is single-stage only.
Preliminary Observations
The R01 is a distinctive little light. It feels solid and well built. It performed as expected in my testing. I'm glad to see the regulated circuit, with gradual drop-off rather than abrupt shut-down.
Throw on this light is impressive for the size, with a virtual absence of rings or artifacts. :thumbsup: The hotspot is quite tight, but there is a reasonable corona around it. While not as bright as some of the newer lights with higher output bin emitters, I still found the R01 quite bright in its own right.
I am disappointed to see that a proprietary USB cable is used. I would have preferred a standard micro-USB connector, with charging circuit built into the flashlight (and not the cable). With a proprietary cable, you need to take it with you wherever you go (and if you lose it, you can no longer recharge the light). I suppose this solution helps keep the weight and size down on the flashlight, though. :shrug:
Given that you need a proprietary cable, why not simply dispense with USB and go with a regular AC power connector? If you have access to a USB port, you presumably also have access to AC power. :thinking: I'm guessing this has to do with cost - the R01 is relatively cheap for what you are getting (~$45), and a certified AC cable (plus adapters) would certainly have added to cost.
On that note, I must admit that I am personally wary of USB-based charging solutions. The charging rate seems acceptable for USB. But a 7 hour charge cycle is a long time, and I always worry about frying a USB port/header with any kind of sustained current. Given how much most of us invest in our computers, the risk of a blown USB port is not something I'm very comfortable with. I recommend you pick up an USB-AC adapter - they are pretty common and inexpensive (i.e. a lot of people use them for iPods, etc.).
But the key surprise is that you can use your own 18650 in there (as long as it has a positive terminal nipple - flat-tops won't work).oo: But pay attention to the polarity - it is reversed from most lights, with the positive contact going to the tailcap and the negative contact going to the head. This is an unexpected find, and my kudos to CPF user Ray of Light for the insight! :thumbsup:
At the end of the day, I found it a fun a little light to play with. I can see this light being quite popular with general users, given its rechargeable nature. It would also serve well as a duty light for LEO/Security/etc.
Bottom line, if you want a simple, bright, easy to use, USB-charging light (with option to use a standard 18650), this would fit the bill. The ability to use your own 18650 cells is quite a bonus, in my view (especially considering the low cost). Just pick up a simple USB-AC adapter, and you are good to go.
----
R01 provided jointly by batteryjunction.com and goinggear.com for review.
Specifications:
- LED Type: Cree XP-E Q5
- Finish: HA Type III
- Reflector: Orange Peel Reflector
- Lens: Anti-shattering ultra clear lens, anti-scratching and anti-slip
- Water and Dust Resistant to IP68
- Switch: Forward Tail Switch
- Mil-spec: MIL-STD-810F
- Function: Single output level 190 lumens (2hours)
- Battery Type: Special customized internal lithium-ion battery
- Size and Weight: L 126mm (4.96") x D 30mm (1.18"), 122g (Including Battery)
- Operation: Press tail tactical switch to turn light on/off.
- Charging: Connect one side of USB cable to the flashlight, and the other side to the computer or USB charger for charging. The USB indicator light will keep on during the charging, then the indicator light will be off after 6 hours full charging. If only connect one side of USB cable to the computer or USB charger, the USB indicator light will flash.
- Standard Accessories: 1 x holster, 1 x Lanyard, 1 xUSB cable, 2 x O-rings
- Estimated MSRP ~$45
Packaging is fairly basic, in keeping with ITP's status as the "budget" line of Olight. Inside the cardboard box with plastic insert are the light, simple wrist strap, charging cable, and good quality belt holster. There is no manual card, as the instructions are printed on the back of the package. There were no spare o-rings on my sample.
From left to right: Energizer CR123A, Klarus NT20, ITP R01, Olight I20, ITP SC2, 4Sevens Quark 123-2, Fenix TK12
R01: Weight: 122.2g (built-in battery), Length 126.2mm x Width 30.1mm (bezel)
Overall dimensions are reasonable for this class of light. Weight with battery is also reasonable.
The tailcap switch is a typical forward clicky, with reasonably good feel. The switch boot cover is continuous with charging cable plug. The light can tailstaind. :thumbsup:
Knurling is not very aggressive at all, even less so than most other Olight/ITP lights. I would describe grip as only "ok", as the light could be slippery with wet hands.
Anodizing is good on my sample, no chips in the black finish (HA = type III). Lettering is sharp and clear, bright against the black background.
Key point here is the charging method. Unfortunately, the light doesn't use a standard micro-USB connector, but rather a proprietary cable (i.e. similar to many simple cell phone chargers).
But you need to use their supplied cable for another reason - the charging circuit is part of the USB cable, not the actual light. This is rather unusual; you need to look at the USB base to find out what state you are in during charging.
UPDATE: CPF user Ray of Light reports the charging cable uses the same chip as the DSD charger. It therefore should charge at 350 mA with proper termination at 4.2 V.
AW Protected 18650 on the left, AW protected 18500 on the right, in the image above.
This is where it gets interesting!
oo: Turns out the light is not sealed, and you can access the battery. As CPF User Ray of Light points out, it seems to use something close to a 18500 cell (with an extension to reach the positive terminal in the tailcap). But as you will see in my runtime data, the bundled battery performs in keeping with a 2200-2400mAH 18650 cell (scroll down for details).Note that the polarity is reversed - the negative battery terminal goes to the head, and the positive goes to the tailcap.
The bundled battery only fits the correct way.RoL also reports that the R01 will take a standard 18650 (with positive contact terminal nipple), and I can confirm that is true.
Be careful to observe this unusual polarity arrangement - anything else will fry the R01's circuit. I haven't tried to charge it with a 18650 in there, but RoL reports that doesn't work (and may not be safe thing to try, since it wasn't designed for it). And that's not surprising - the charging system seems to involve a secondary ring around the center top. This likely also explains why flat-top 18650 don't work in the light.
Note the screw threads are not anodized, so there is no tailcap lock-out.
The R01 features the Cree XP-E emitter, Q5 output bin. The reflector is smooth, but there are some slight concentric rings in it. I've seen this before – I can only assume it helps to reduce artifacts/rings in the beam, without going for full texturing. This will likely produce decent throw.
Which brings us to the requisite white wall hunting
. All lights are on Hi on 18650 (AW Protected where available), about ~0.75 meter from a white wall (with the camera ~1.25 meters back from the wall). Automatic white balance on the camera, to minimize tint differences.
From now on, all my beamshots will be taken in this standard configuration, to facilitate comparisons.
As you can see, the R01 is focused for throw, with a very tight hotspot. Actually, it rather reminds me of my classic Streamlight ProPolymer luxeon in some ways.
Scroll down to my Summary Tables for more specifics on output.UPDATE 12/29/10: I'm going to be updating my 100-yard beamshot thread soon, but here's a sneak preview of a relevant R01 comparison:
Obviously, the XP-E Q5-equipped R01 can't compare to the XP-G R5-equipped Maelstrom G5, but it gives you a general idea.
User Interface
On/off is controlled by the tailcap clicky (press for momentary on, click for lock on). That's it - the light is single-stage only. :kiss:
Charging is automatic when the cable is plugged in. When the USB cable is connected to a computer without the R01 light attached, a small green LED on the base of the USB connector will flash. When connected to the light and charging, the USB cable base lights up a solid bright green. When fully charged, the green light shuts off completely. It took ~7 hours to fully charge a nearly depleted light.
CPF user Ray of Light reports the charging cable uses the same chip as the DSD charger. It therefore should charge at 350 mA with termination at 4.2V.
No PWM or Strobe
There is no PWM or Strobe – the light is single-stage full power. :kiss:
Testing Method:
All my output numbers are relative for my home-made light box setup, a la Quickbeam's flashlightreviews.com method. You can directly compare all my relative output values from different reviews - i.e. an output value of "10" in one graph is the same as "10" in another. All runtimes are done under a cooling fan, except for any extended run Lo/Min modes (i.e. >12 hours) which are done without cooling.
I have recently devised a method for converting my lightbox relative output values (ROV) to estimated Lumens. See my How to convert Selfbuilt's Lighbox values to Lumens thread for more info.
Throw/Output Summary Chart:
Effective November 2010, I have revised my summary tables to match with the current ANSI FL-1 standard for flashlight testing. Please see http://www.sliderule.ca/FL1.htm for a description of the terms used in these tables.
The max output and throw of the R01 are consistent with its emitter (Q5 output bin) and reflector design.
See my runtimes below for info on the relative output levels.
Output/Runtime Comparison:
UPDATE Dec 21, 2010: Runtimes updated with a standard 2200mAh AW Protected 18650.
On the bundled battery (orange trace above), output/runtime is what you would expect for a single-stage Q5-equipped light running on an 18650 cell – flat regulation for a good amount of time, followed by slow direct-drive decay.
Using a standard 2200mAh AW protected 18650 (red trace above), I get a roughly similar runtime pattern. Regulation is a bit tighter, with the light holding max output longer, but the drop-off once the battery falls out of regulation is faster. A higher capacity cell would last longer.
Potential Issues
A proprietary USB charging cable needs to be used with the bundled battery (included). Charge indicator status is on the cable, not the light.
All USB charging methods carry a potential risk to your USB ports. An optional AC charging cable would have been appreciated. But a number of inexpensive USB-AC (or USB-DC) adapters are available, and would likely work.
Light is single-stage only.
Preliminary Observations
The R01 is a distinctive little light. It feels solid and well built. It performed as expected in my testing. I'm glad to see the regulated circuit, with gradual drop-off rather than abrupt shut-down.
Throw on this light is impressive for the size, with a virtual absence of rings or artifacts. :thumbsup: The hotspot is quite tight, but there is a reasonable corona around it. While not as bright as some of the newer lights with higher output bin emitters, I still found the R01 quite bright in its own right.
I am disappointed to see that a proprietary USB cable is used. I would have preferred a standard micro-USB connector, with charging circuit built into the flashlight (and not the cable). With a proprietary cable, you need to take it with you wherever you go (and if you lose it, you can no longer recharge the light). I suppose this solution helps keep the weight and size down on the flashlight, though. :shrug:
Given that you need a proprietary cable, why not simply dispense with USB and go with a regular AC power connector? If you have access to a USB port, you presumably also have access to AC power. :thinking: I'm guessing this has to do with cost - the R01 is relatively cheap for what you are getting (~$45), and a certified AC cable (plus adapters) would certainly have added to cost.
On that note, I must admit that I am personally wary of USB-based charging solutions. The charging rate seems acceptable for USB. But a 7 hour charge cycle is a long time, and I always worry about frying a USB port/header with any kind of sustained current. Given how much most of us invest in our computers, the risk of a blown USB port is not something I'm very comfortable with. I recommend you pick up an USB-AC adapter - they are pretty common and inexpensive (i.e. a lot of people use them for iPods, etc.).
But the key surprise is that you can use your own 18650 in there (as long as it has a positive terminal nipple - flat-tops won't work).
oo: But pay attention to the polarity - it is reversed from most lights, with the positive contact going to the tailcap and the negative contact going to the head. This is an unexpected find, and my kudos to CPF user Ray of Light for the insight! :thumbsup:At the end of the day, I found it a fun a little light to play with. I can see this light being quite popular with general users, given its rechargeable nature. It would also serve well as a duty light for LEO/Security/etc.
Bottom line, if you want a simple, bright, easy to use, USB-charging light (with option to use a standard 18650), this would fit the bill. The ability to use your own 18650 cells is quite a bonus, in my view (especially considering the low cost). Just pick up a simple USB-AC adapter, and you are good to go.
----
R01 provided jointly by batteryjunction.com and goinggear.com for review.
Last edited: