
find_bruce
Newly Enlightened
- Joined
- May 5, 2011
- Messages
- 84
Executive summary – for the regulars
Nice new battery case, might even be water resistant.
Same old battery inside
Note this is the deal extreme case, NOT the replacement battery from geoman or various other sellers.
Background
I bought a magicshine bike light mj-808 with an updated battery back that appears to be better designed & possibly even rainproof. I am one of those people that pulls new stuff apart to see how it works & this was no exception
The battery pack is known as mj-828. It is not listed separately on DX but there are a few listed on ebay.
The same battery pack is used in the similar light with a different housing & clip but the extra $20 did not seem worth it to me.
As I understand it, there are four issues with the magicshine batteries:
· Getting wet
· Overcharging
· Excessive discharging
· Defective cells
Makes them sound like gremlins – don't get them wet, don't feed them after midnight.
What really got my attention was this Material Safety Data Sheet "At contact of electrolyte with water traces of hydrofluoric acid may be formed".
Despite the focus on flames, personally I am far more concerned about any possibility of coming into contact with hydrofluoric acid, so a waterproof battery pack was high on my list of priorities.
The before shots
The promotional shots are as good as any.

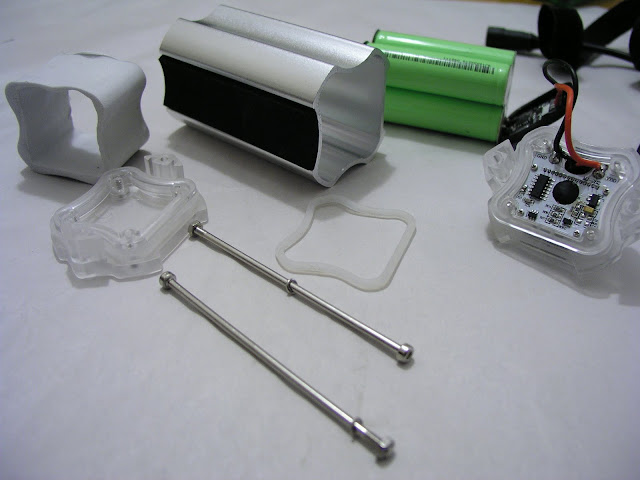
Getting it apart
Getting it apart was easy. The end caps are held on by two external allen head bolts. Undo these, trying not to lose the nuts or washers, and both end caps simply slide out.
Initial impressions reinforced the build quality you have come to know and love from these lights – in my case there was a piece of foam caught under the o-ring which would have done a nice job of wicking water straight past the seal and nothing to indicate any grease on the o-ring. It seems that o-ring grease is as uncommon as thermal paste in these Chinese factories.
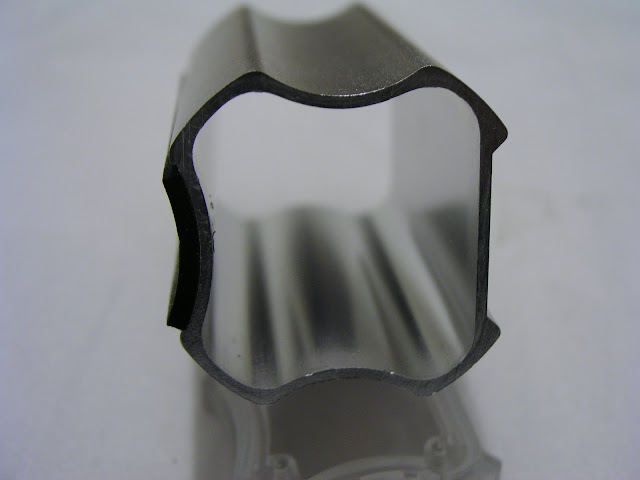
The housing is simply a tube of aluminium
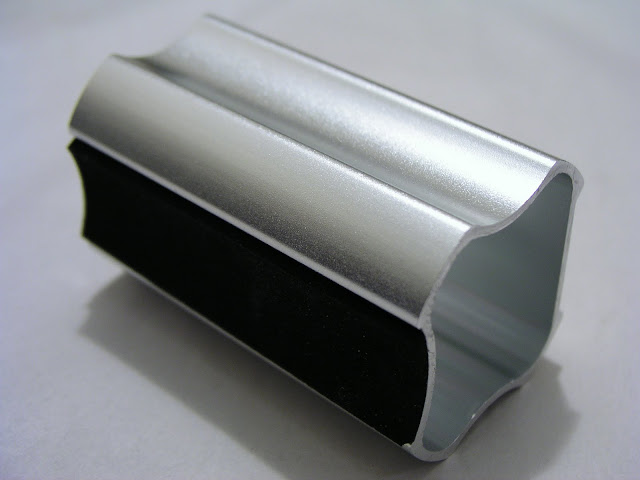
One side is flat while the other 3 have a curve, so the caps only fit on one way.
The battery pack itself
Call me optimistic, but I was hoping that having put the battery pack in a better case that they might have paid some attention to the battery itself. I was surprised to see a centre tap wire & dared to hope that it might possibly be used for balancing.
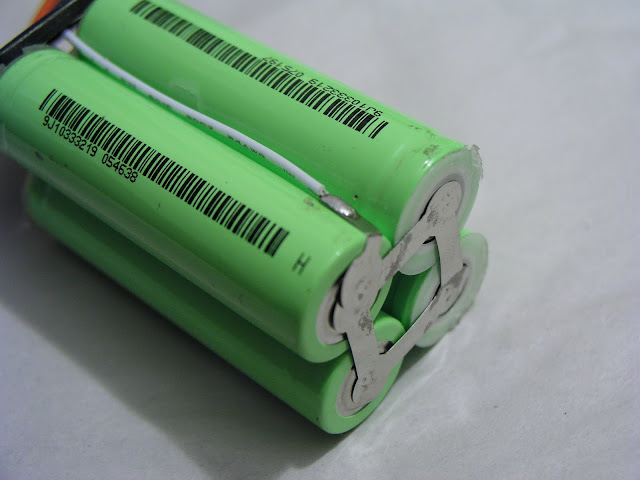
Alas it appears this was there on the old packs and is only used for over/under voltage shutdown and doesn't perform any balancing see this thread on mtbr at post 87
To my untrained eye the PCB appears to be the same
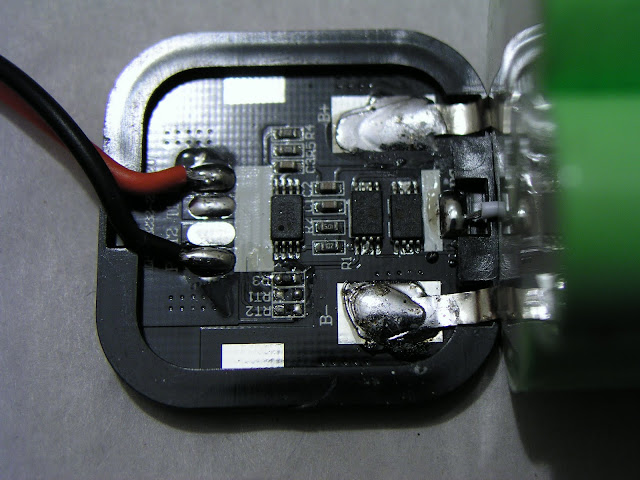
On the plus side there is nothing to indicate that the battery is any worse than the original – yes I am an optimist.
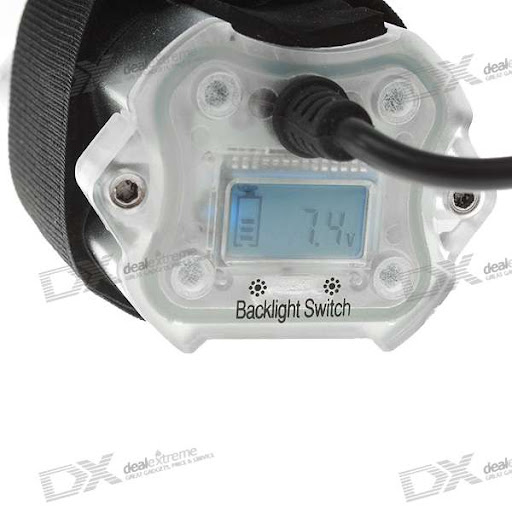
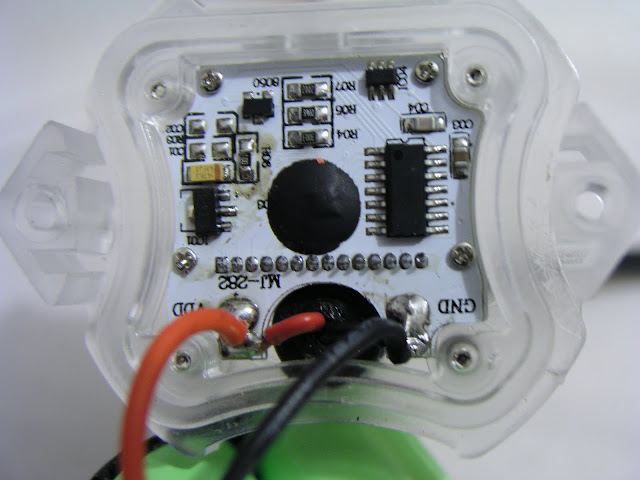
The volt meter
One of the pieces of marketing on this pack is that it has a backlit lcd display showing volts & a little fuel gauge with 5 steps. To my way of thinking this "feature" is completely useless
· When I mounted the battery on my bike, there was no easy way to see the lcd
· The led on the back of the light changes from Green to Blue to Orange to Red as the voltage drops.
· It displays voltage of the pack, which doesn't tell you if the pack is out of balance
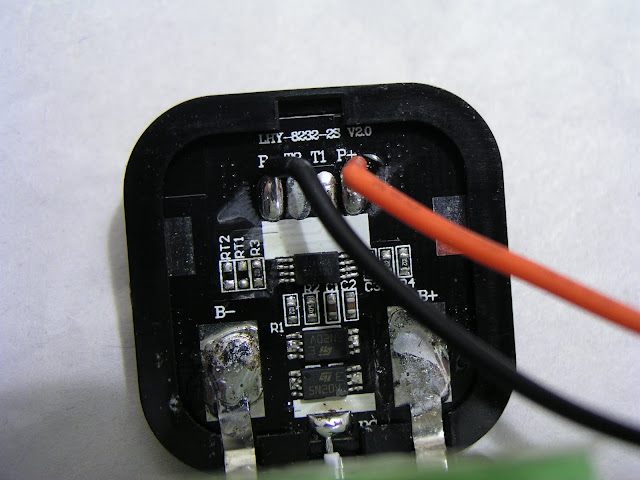
In case you care, here is a pic of the volt meter circuit board
I voted with my soldering iron & removed it. Oops there goes my "warranty" but it means there is one less thing to go wrong & there is now a convenient spot to put a switch to turn the battery off rather than having to unplug it from the lighthead.
It probably sums up the build of the pack that when I removed the volt meter I discovered they fitted strain relief to the cable to stop you pulling it out of the end cap. Unfortunately the strain relief they chose was a steel circlip – two nice points of thin conductive material – just what you don't want putting pressure on you power lead, so I removed that too and replaced it with a small plastic zip tie.
Putting it back together
It's just a reverse of the disassembly steps right? After spending a couple of fruitless hours trying to re-insert the end caps & o-rings, contemplating replacing the o-rings with silastic & general frustration, I had a closer look at the end caps.
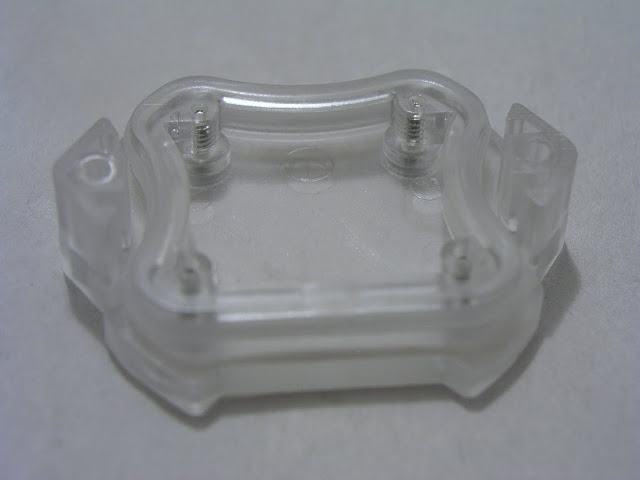
Each one has four screws –if you look carefully you will see them hidden under round pieces of plastic. The end caps are actually two parts that squeeze the o-ring, so once you take the cap out, it won't just slide back in.
Instead you have to loosen the four screws till they are just holding the pieces together, lubricate & re-insert the o-ring, insert the end cap & tighten the four screws. When done this way it was a work of minutes.
The observant will see that these screws introduce eight potential leak points & a piece of glorified sticky tape is unlikely to last the distance. The bodger in me wanted to fill the heads with silastic, but I know if I ever want to reassemble it again, silastic in Phillips head screws is a PITA. For now I have kept the plastic dots, but will need to find a better solution
Conclusion
The new housing addresses one problem – waterproofing, but the other three remain. Overcharging & discharging can be addressed with care and a better charger. Time and monitoring the voltages of the individual cells will reveal defective cells.
Welcome to the Chinese lottery – you pays your money and you take your chances
Nice new battery case, might even be water resistant.
Same old battery inside
Note this is the deal extreme case, NOT the replacement battery from geoman or various other sellers.
Background
I bought a magicshine bike light mj-808 with an updated battery back that appears to be better designed & possibly even rainproof. I am one of those people that pulls new stuff apart to see how it works & this was no exception
The battery pack is known as mj-828. It is not listed separately on DX but there are a few listed on ebay.
The same battery pack is used in the similar light with a different housing & clip but the extra $20 did not seem worth it to me.
As I understand it, there are four issues with the magicshine batteries:
· Getting wet
· Overcharging
· Excessive discharging
· Defective cells
Makes them sound like gremlins – don't get them wet, don't feed them after midnight.
What really got my attention was this Material Safety Data Sheet "At contact of electrolyte with water traces of hydrofluoric acid may be formed".
Despite the focus on flames, personally I am far more concerned about any possibility of coming into contact with hydrofluoric acid, so a waterproof battery pack was high on my list of priorities.
The before shots
The promotional shots are as good as any.
Getting it apart
Getting it apart was easy. The end caps are held on by two external allen head bolts. Undo these, trying not to lose the nuts or washers, and both end caps simply slide out.
Initial impressions reinforced the build quality you have come to know and love from these lights – in my case there was a piece of foam caught under the o-ring which would have done a nice job of wicking water straight past the seal and nothing to indicate any grease on the o-ring. It seems that o-ring grease is as uncommon as thermal paste in these Chinese factories.
The housing is simply a tube of aluminium
One side is flat while the other 3 have a curve, so the caps only fit on one way.
The battery pack itself
Call me optimistic, but I was hoping that having put the battery pack in a better case that they might have paid some attention to the battery itself. I was surprised to see a centre tap wire & dared to hope that it might possibly be used for balancing.
Alas it appears this was there on the old packs and is only used for over/under voltage shutdown and doesn't perform any balancing see this thread on mtbr at post 87
To my untrained eye the PCB appears to be the same
On the plus side there is nothing to indicate that the battery is any worse than the original – yes I am an optimist.
The volt meter
One of the pieces of marketing on this pack is that it has a backlit lcd display showing volts & a little fuel gauge with 5 steps. To my way of thinking this "feature" is completely useless
· When I mounted the battery on my bike, there was no easy way to see the lcd
· The led on the back of the light changes from Green to Blue to Orange to Red as the voltage drops.
· It displays voltage of the pack, which doesn't tell you if the pack is out of balance
In case you care, here is a pic of the volt meter circuit board
I voted with my soldering iron & removed it. Oops there goes my "warranty" but it means there is one less thing to go wrong & there is now a convenient spot to put a switch to turn the battery off rather than having to unplug it from the lighthead.
It probably sums up the build of the pack that when I removed the volt meter I discovered they fitted strain relief to the cable to stop you pulling it out of the end cap. Unfortunately the strain relief they chose was a steel circlip – two nice points of thin conductive material – just what you don't want putting pressure on you power lead, so I removed that too and replaced it with a small plastic zip tie.
Putting it back together
It's just a reverse of the disassembly steps right? After spending a couple of fruitless hours trying to re-insert the end caps & o-rings, contemplating replacing the o-rings with silastic & general frustration, I had a closer look at the end caps.
Each one has four screws –if you look carefully you will see them hidden under round pieces of plastic. The end caps are actually two parts that squeeze the o-ring, so once you take the cap out, it won't just slide back in.
Instead you have to loosen the four screws till they are just holding the pieces together, lubricate & re-insert the o-ring, insert the end cap & tighten the four screws. When done this way it was a work of minutes.
The observant will see that these screws introduce eight potential leak points & a piece of glorified sticky tape is unlikely to last the distance. The bodger in me wanted to fill the heads with silastic, but I know if I ever want to reassemble it again, silastic in Phillips head screws is a PITA. For now I have kept the plastic dots, but will need to find a better solution
Conclusion
The new housing addresses one problem – waterproofing, but the other three remain. Overcharging & discharging can be addressed with care and a better charger. Time and monitoring the voltages of the individual cells will reveal defective cells.
Welcome to the Chinese lottery – you pays your money and you take your chances
Last edited:
") .
.