
red_hackle
Enlightened
At some point during the recent outage of CPF I decided I needed to mod a light myself rather than just collecting custom lights made by other people - so please read on for an illustrated write-up of my first ever mod! :huh:
The Subject:
Surefire's KL3 head with red LED - While I immediately loved the heft and sturdy feel of the unit I was utterly disappointed to find the output to be almost useless (too tightly focused to use on short distance, but not bright enough for decent throw).
The Plan:
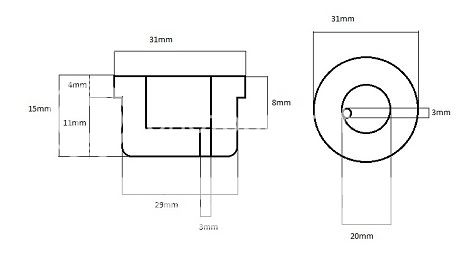
Being a bit of an Oveready/Moddoo fanboy and having only basic tools at hand in my current living situation I decided a L333 single mode engine with red LEDs from Lux-RC Labs would be just the right thing to spice up my KL3 while keeping assembly reasonably easy (LEDs and driver in one unit; pre-soldered connector cables available). I came up with this rather crude drawing of a heatsink that would achieve the fusion of the two:
The Build:
Disassembly. Now this sounds real easy, but Surefire's generous application of red loctite to all threads of the KL3s different sections turned this into the most painful exercise... ever! Countless freeze/boil cycles and two ripped rubberstrap wrenches later the job was done. :sick2:
The Heatsink. CPF member mettee kindly offered to turn the heatsink for me out of high-grade copper for a very reasonable price. The result truly exceeded my highest expectations:
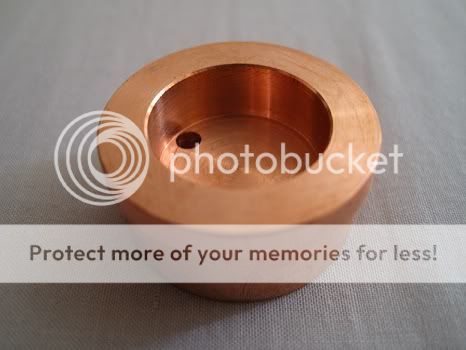
...and is also heavier than the whole KL3 head in stock condition.
Assembly. After some very careful sanding to smoothen the edges of the L333, light engine and optic fitted like a glove into the heatsink. The cables are routed through the 3mm hole in the heatsink and then through the two smaller holes in the KL3 head from the original wiring towards the springs at the back. The soldering spots at the springs are not very pretty, but seem to hold.
Pictures
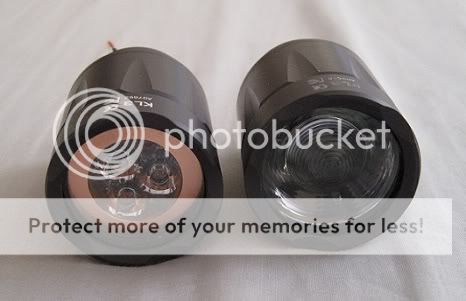
Front view of my mod next to a stock KL3 head...
Bezel ring removed:
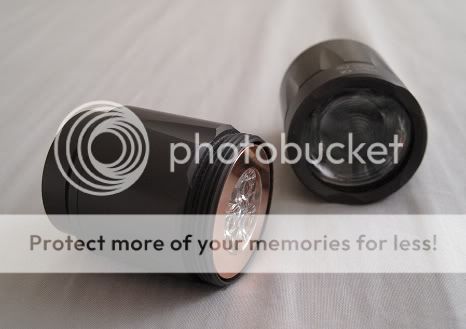
My mod in action! :rock:
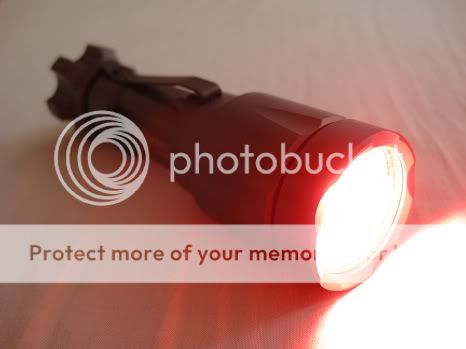
After two to three minutes the KL3 gets nice and toasty on the outside indicating heat is dissipated to the outside quite effectively. Unsurprisingly, the beam pattern is very similar to a Moddoo triple... just in red! :thumbsup:
The Subject:
Surefire's KL3 head with red LED - While I immediately loved the heft and sturdy feel of the unit I was utterly disappointed to find the output to be almost useless
(too tightly focused to use on short distance, but not bright enough for decent throw).The Plan:
Being a bit of an Oveready/Moddoo fanboy and having only basic tools at hand in my current living situation I decided a L333 single mode engine with red LEDs from Lux-RC Labs would be just the right thing to spice up my KL3 while keeping assembly reasonably easy (LEDs and driver in one unit; pre-soldered connector cables available). I came up with this rather crude drawing of a heatsink that would achieve the fusion of the two:
The Build:
Disassembly. Now this sounds real easy, but Surefire's generous application of red loctite to all threads of the KL3s different sections turned this into the most painful exercise... ever! Countless freeze/boil cycles and two ripped rubberstrap wrenches later the job was done. :sick2:
The Heatsink. CPF member mettee kindly offered to turn the heatsink for me out of high-grade copper for a very reasonable price. The result truly exceeded my highest expectations:
...and is also heavier than the whole KL3 head in stock condition.
Assembly. After some very careful sanding to smoothen the edges of the L333, light engine and optic fitted like a glove into the heatsink. The cables are routed through the 3mm hole in the heatsink and then through the two smaller holes in the KL3 head from the original wiring towards the springs at the back. The soldering spots at the springs are not very pretty, but seem to hold.
Pictures
Front view of my mod next to a stock KL3 head...
Bezel ring removed:
My mod in action! :rock:
After two to three minutes the KL3 gets nice and toasty on the outside indicating heat is dissipated to the outside quite effectively. Unsurprisingly, the beam pattern is very similar to a Moddoo triple... just in red! :thumbsup: