sunny_nites
Enlightened
There seems to be a lot of interest in these beacon lights so I took some advice and split this out from my "modded keychain" post.
I got the inspiration for these from calipsoii and his lamplighter project. If anyone is interested in buying something like this, check in with calipsoii . There was some discussion on his post about possible sales but I haven't seen an update in a while so I'm not sure what the status is.
This post is for info on how I built my version, in case you want to try something similar as well as future upgrades and hopefully ideas from some of you.
And now on with the show.
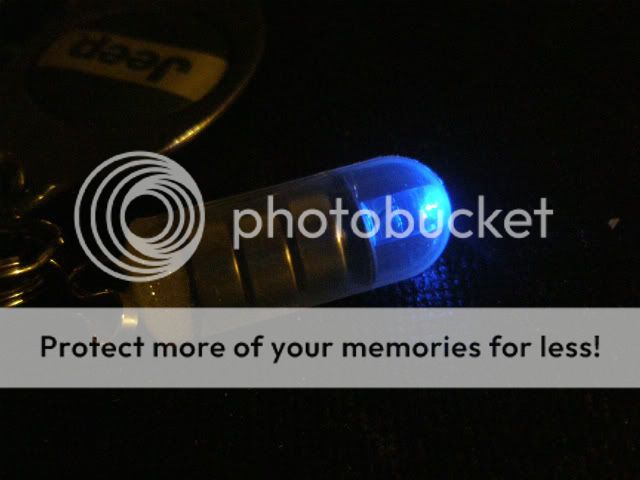
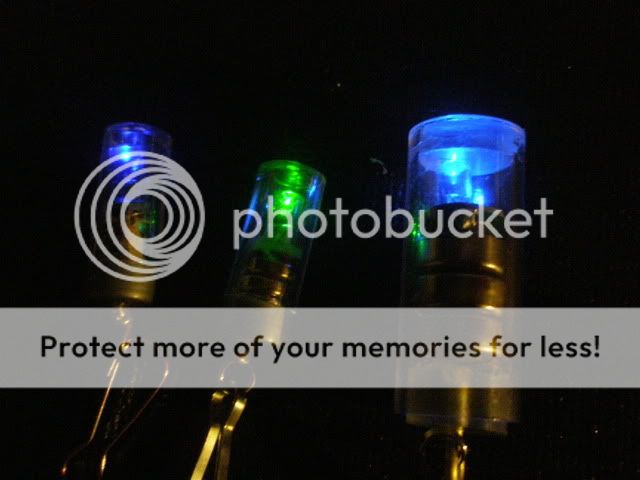
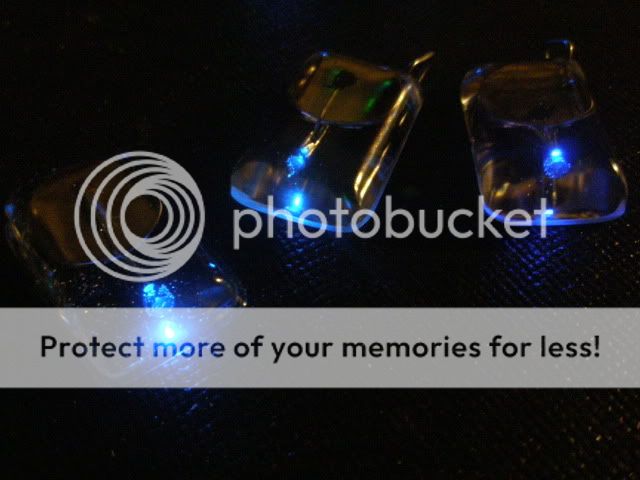
The intention for these lights is to run them on incredibly low current for an unusually long time. The obvious purpose is, of course, to act as a beacon to allow you to find something in the dark, ie. Keychains, flashlights, etc. Think of them as something along the lines of a GID fob or maybe a trit.
I built a couple of beacons using the common current regulation circuit but don't really think it adds much to the abilities of the light (let me know if interested and I can provide more details on the circuit, printing, etching, components, etc). I ended up just using a 220kohm SMD resistor to limit current to something less than 10 micro amps. My meter only goes down to 10 micros and the LED draw won't register so they are running at something less than that. Looking for a meter that goes lower to get a better idea of what the current consumption is exactly.
I've built two different sizes; one that uses LR44 (200mah) batteries and LR621 (30mah) batteries. In theory, the LR621s should last around 6 months and the LR44s could last a couple of years. That's all theoretical of course. I've only been running them for a couple of weeks or so.
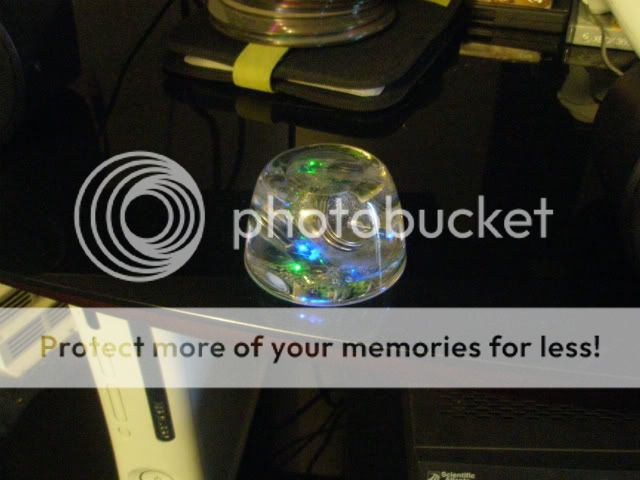
Lights out.
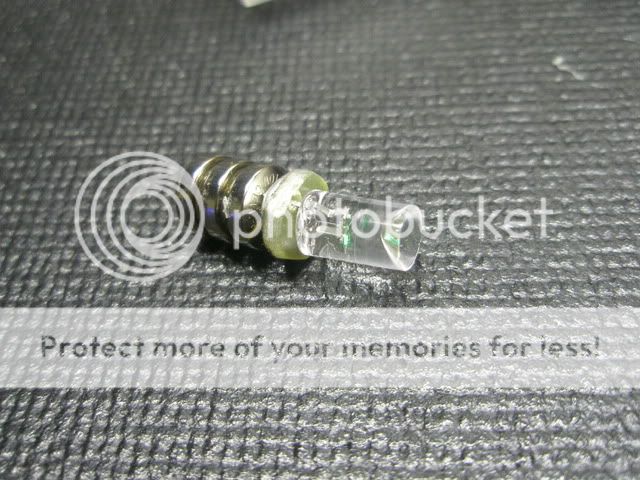
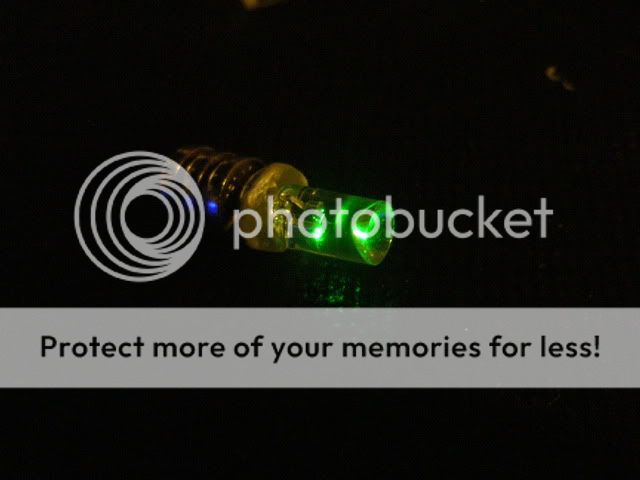
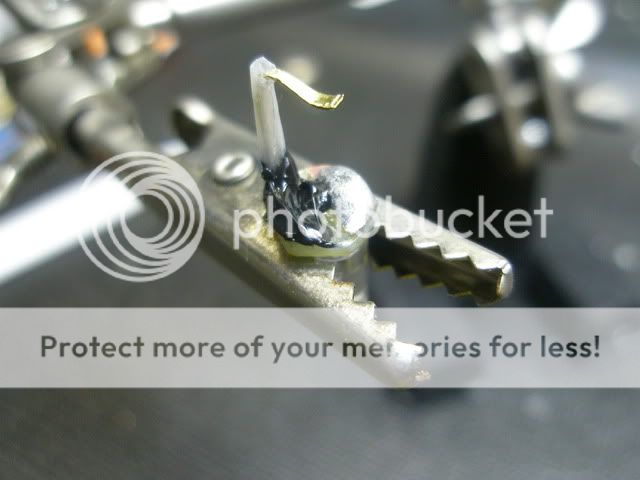
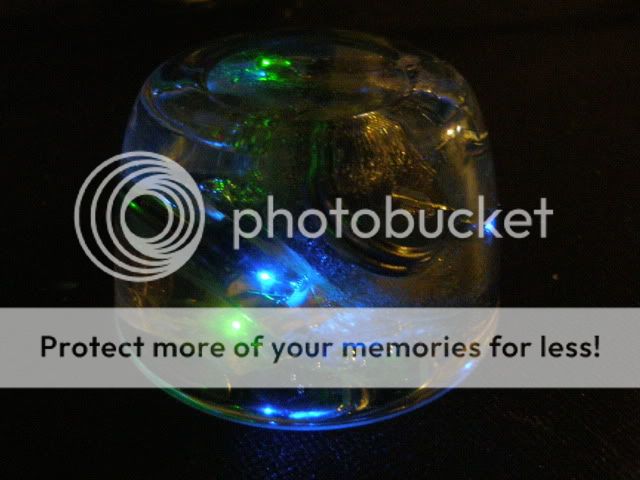
The real trick to this project was finding the "right" LED. I tried every type I could think of; SMD, 5mm, 3mm, domed, low domed, frosted, clear, every color available, UV with reactive phospher coatings, etc. What I found that worked the best was this odd looking 5mm (clear or colored, didn't seem to make much of a difference) unit with the dimple in the top. Not sure what these are officially called (thanks to VegasF6 for the name of these LEDs: inverted cone) but I've seen them used in a lot of Christmas lighting. The point on the inside of the dome actually creates all the magic and it makes the lights appear much brighter than they have any right to be. Also, the LED color made a huge difference, green and Blue were the clear winners.
Last edited by sunny_nites; 11-29-2011 at 08:20 AM.
The LED pictured above is actually a red and green unit in one package. You change the color by reversing the polarity of the battery.
Probably the hardest part of the build for me was creating the round circuit board. I had been cutting them to the approximate size and sanding them into shape. I just got a hold of some circular metal punches that show some promise. I'll provide an update when I have a chance to work with them a little more.
The circuit is really simple. I just used a dremel to make to make two cuts on the board rather than etching them.
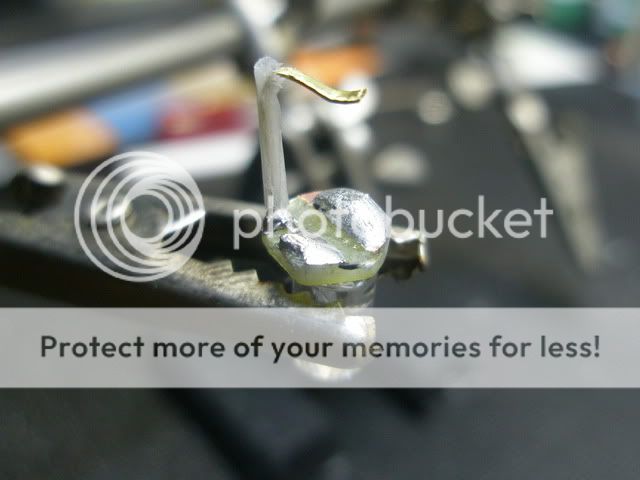
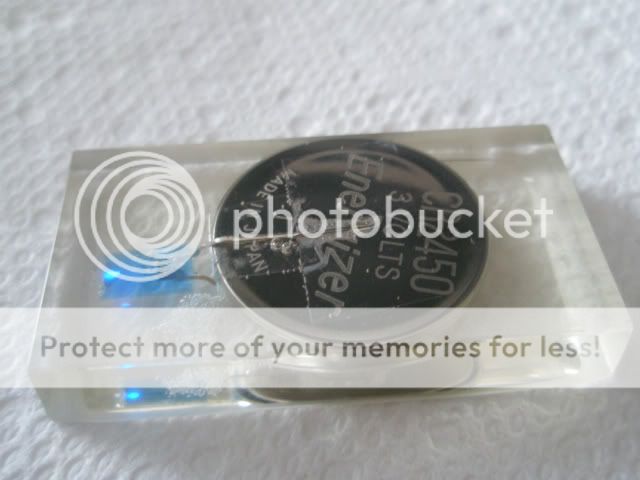
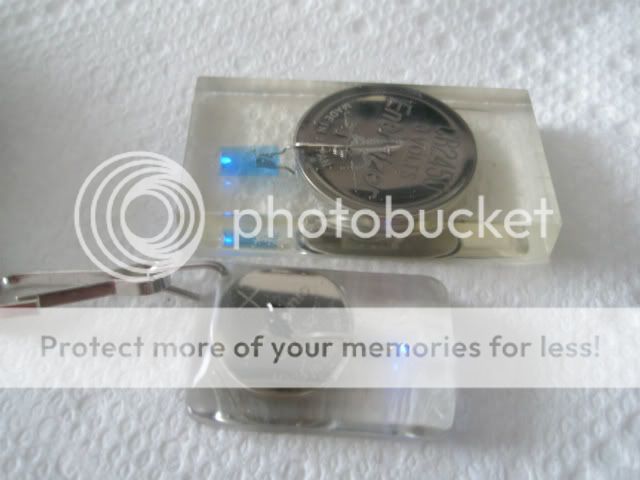
This is a finished board made with only two cuts and two holes for the LED. The microscopic grain of sand bridging two of the cuts is the 220meg SMD resistor. The brass clip holds the batteries together and provides the ground. I tried several methods of insulating the clip but everything proved too big to allow the batteries and circuit to fit into the container or too unreliable. I finally found a cheap and easy solution in clear scotch tape.
Have to use something to insulate the circuit except for the single contact for the other leg of the LED. I use liquid electrical tape. You want to build up the contact for the led with extra solder to get it above the insulation and to allow it to connect to the battery adequately.
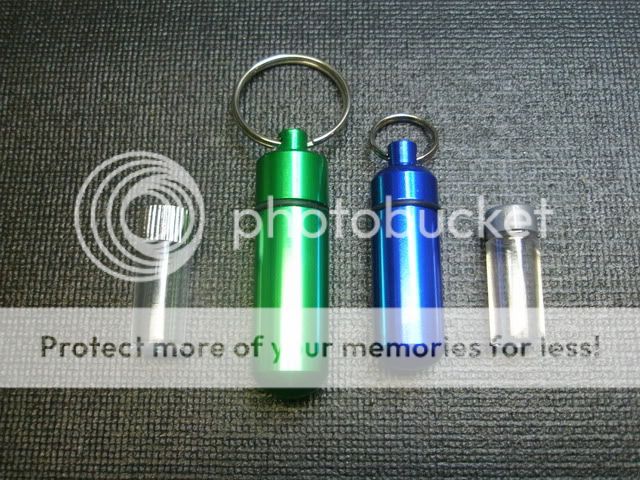
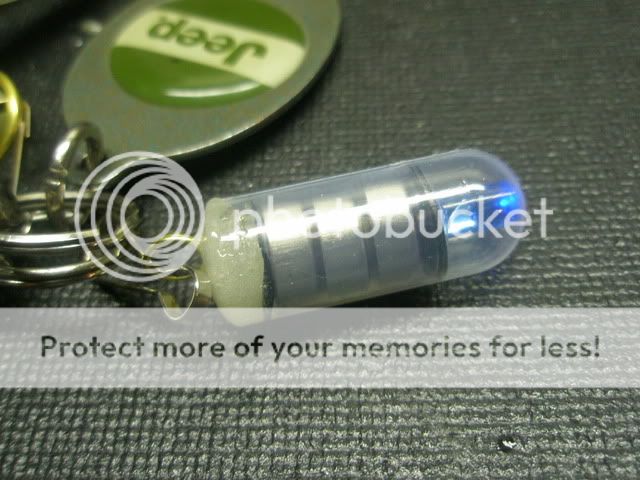
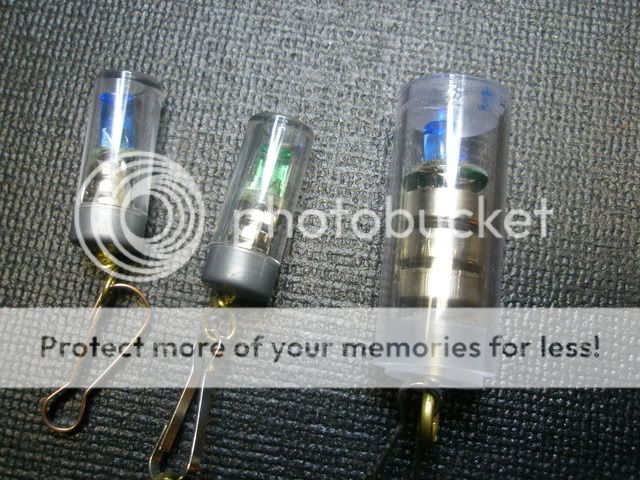
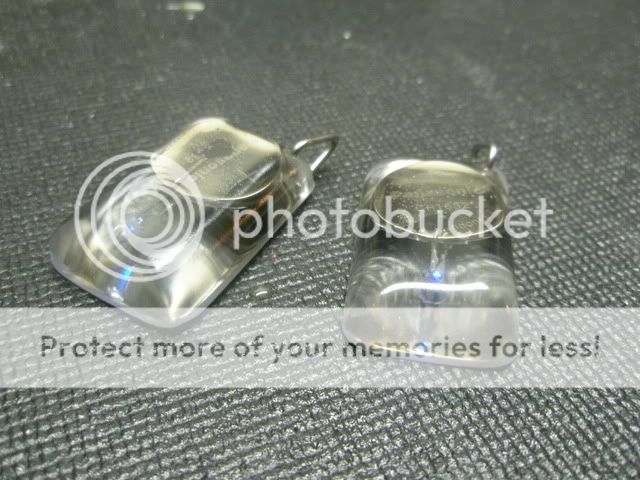
The larger beacons were made with 1/2" ID poly-carbonate tubing and 1/2" poly-carbonate rod. They are fairly large in size but work well on a key chain. The smaller beacons were made with the plastic portion of pill holders as in the picture above. But note they are all not made the same! Both pill holders were purchased from the same place but several months apart and they are different. The one on the right has a plastic lid and the beacon circuit and batteries fit perfectly. The unit on the left has a metal lid and at first I thought would be a great improvement over the plastic but It turned out not to be so easy.
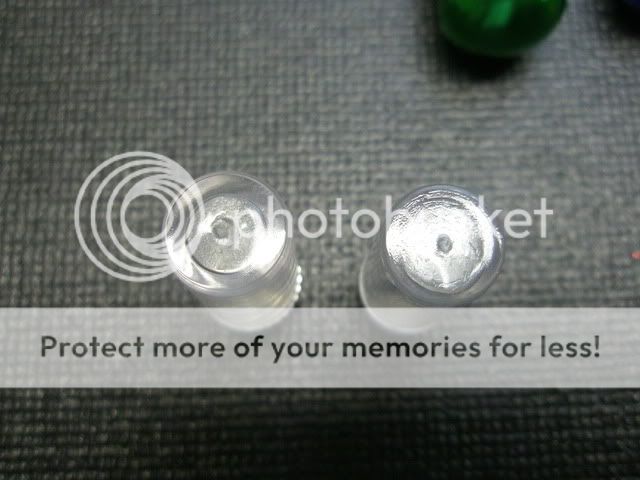
It's a bit hard to see because of the glare but notice that the holder on the left has thicker walls than the holder on the right? Unfortunately, that makes all the difference and the LR621 batteries will not fit with the ground strap. That being said, I have been working with these holders and there may be hope. I was able to mill a channel inside the plastic for the strap and it may just work. I need to make a smaller circuit board as well to really try it out.
Stay tuned!!
I got the inspiration for these from calipsoii and his lamplighter project. If anyone is interested in buying something like this, check in with calipsoii . There was some discussion on his post about possible sales but I haven't seen an update in a while so I'm not sure what the status is.
This post is for info on how I built my version, in case you want to try something similar as well as future upgrades and hopefully ideas from some of you.
And now on with the show.
The intention for these lights is to run them on incredibly low current for an unusually long time. The obvious purpose is, of course, to act as a beacon to allow you to find something in the dark, ie. Keychains, flashlights, etc. Think of them as something along the lines of a GID fob or maybe a trit.
I built a couple of beacons using the common current regulation circuit but don't really think it adds much to the abilities of the light (let me know if interested and I can provide more details on the circuit, printing, etching, components, etc). I ended up just using a 220kohm SMD resistor to limit current to something less than 10 micro amps. My meter only goes down to 10 micros and the LED draw won't register so they are running at something less than that. Looking for a meter that goes lower to get a better idea of what the current consumption is exactly.
I've built two different sizes; one that uses LR44 (200mah) batteries and LR621 (30mah) batteries. In theory, the LR621s should last around 6 months and the LR44s could last a couple of years. That's all theoretical of course. I've only been running them for a couple of weeks or so.
Lights out.
The real trick to this project was finding the "right" LED. I tried every type I could think of; SMD, 5mm, 3mm, domed, low domed, frosted, clear, every color available, UV with reactive phospher coatings, etc. What I found that worked the best was this odd looking 5mm (clear or colored, didn't seem to make much of a difference) unit with the dimple in the top. Not sure what these are officially called (thanks to VegasF6 for the name of these LEDs: inverted cone) but I've seen them used in a lot of Christmas lighting. The point on the inside of the dome actually creates all the magic and it makes the lights appear much brighter than they have any right to be. Also, the LED color made a huge difference, green and Blue were the clear winners.
Last edited by sunny_nites; 11-29-2011 at 08:20 AM.
The LED pictured above is actually a red and green unit in one package. You change the color by reversing the polarity of the battery.
Probably the hardest part of the build for me was creating the round circuit board. I had been cutting them to the approximate size and sanding them into shape. I just got a hold of some circular metal punches that show some promise. I'll provide an update when I have a chance to work with them a little more.
The circuit is really simple. I just used a dremel to make to make two cuts on the board rather than etching them.
This is a finished board made with only two cuts and two holes for the LED. The microscopic grain of sand bridging two of the cuts is the 220meg SMD resistor. The brass clip holds the batteries together and provides the ground. I tried several methods of insulating the clip but everything proved too big to allow the batteries and circuit to fit into the container or too unreliable. I finally found a cheap and easy solution in clear scotch tape.
Have to use something to insulate the circuit except for the single contact for the other leg of the LED. I use liquid electrical tape. You want to build up the contact for the led with extra solder to get it above the insulation and to allow it to connect to the battery adequately.
The larger beacons were made with 1/2" ID poly-carbonate tubing and 1/2" poly-carbonate rod. They are fairly large in size but work well on a key chain. The smaller beacons were made with the plastic portion of pill holders as in the picture above. But note they are all not made the same! Both pill holders were purchased from the same place but several months apart and they are different. The one on the right has a plastic lid and the beacon circuit and batteries fit perfectly. The unit on the left has a metal lid and at first I thought would be a great improvement over the plastic but It turned out not to be so easy.
It's a bit hard to see because of the glare but notice that the holder on the left has thicker walls than the holder on the right? Unfortunately, that makes all the difference and the LR621 batteries will not fit with the ground strap. That being said, I have been working with these holders and there may be hope. I was able to mill a channel inside the plastic for the strap and it may just work. I need to make a smaller circuit board as well to really try it out.
Stay tuned!!
Last edited:


")