Spartacus001
Newly Enlightened
- Joined
- Nov 30, 2009
- Messages
- 13
My first light review:
Advertised Specs:
Emitter Type: XML T6 LED Output 1800 lumens
Modes: High / Low / Strobe (high) with no memory
Run Time: 180 minutes on High
Battery pack: 1 x 8.4v Li-Ion 6400mAh Battery Pack
Battery Charger: 115v with LED indication for Charging (Red) / Full charge (Green)
Power Warning: Red Low Power behind tail click
Helmet Strap: O-ring mount
Head dimension: Light 43mm DIA
Weight: 118g (lamp head) 200gm battery pack : Total 318gm
My lighting needs for city commuting at night has always been adequate using a cheap handlebar mounted light. However due to a change in my route I now ride about 10km on paved trials where there is no lighting whatsoever. Ebay offered many of options ranging from cheap flashers to a high end NiteRider Pro kit. I needed robust and bright enough for commuting that wasn't going to cost me a arm and a leg. So I decided to try out one of the Chinese vendors who offered a hard-to-believe 1800 Lumen kit for under $60. I believe this light is a version of the popular Magic Shine lighting system.
I knew that an output of 1800 Lumen was impossible with the XML T6 with the advertised setup. Still, I figured if the output was half it was still worth $60. After I ordering the light I was expecting it to take at least 4 weeks to arrive from China but I was pleasantly surprised to find it in my mailbox after 7 working days. Apparently the particular vendor operated out of Hong Kong so the shipping time was cut by 1/3rd.
Kit Contents
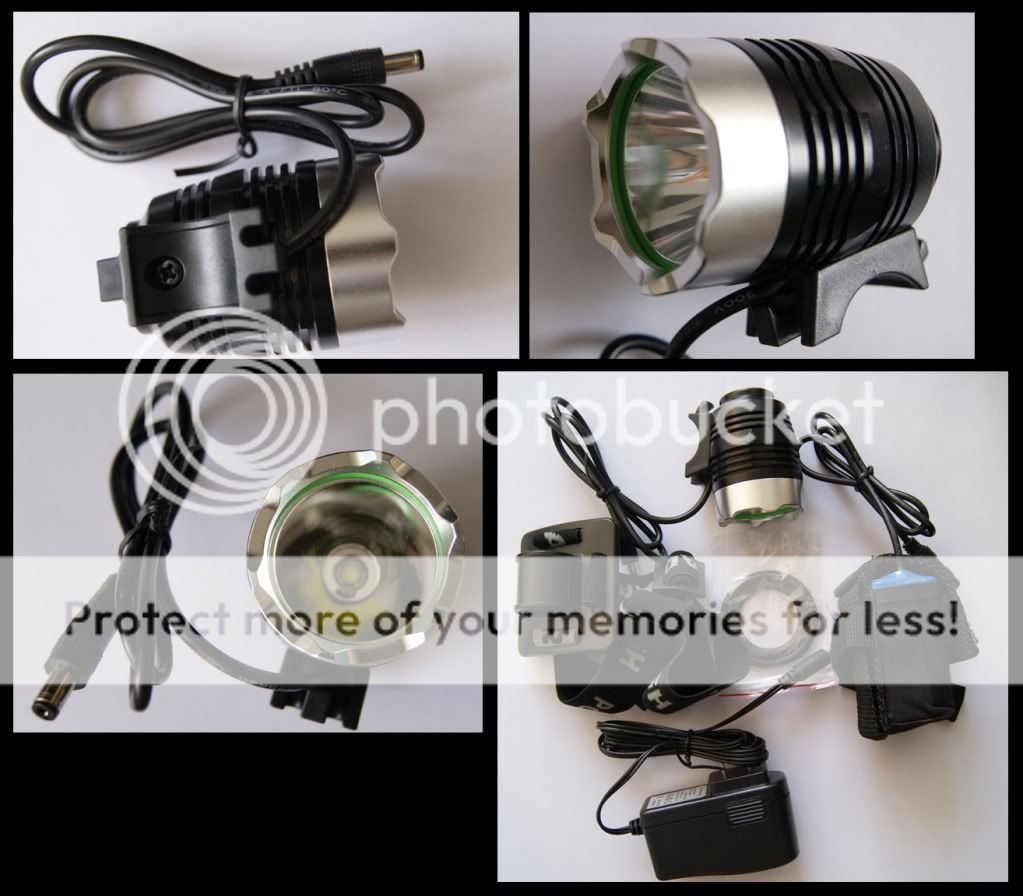
The kit came in a small box which contained the lamp, battery/charge, 2-Orings, Helmet strap/adapter, battery holder. At first sight the body was machined well with matt black anodizing. I was actually surprised with the quality of the workmanship. No burs, machine marks nor blotchy finishing. The threads were smooth and fitting was tight.
The Aluminium reflector had a smooth finish instead of the Orange peel texture that was pictured in the ad. The LED was mounted on the board with a large heat-sink which threaded into the body. There was plenty of room in the housing for heat dissipation. T
he crowned Bezel has 6-points with a nice satin brushed finish. Under the glass lens there is a GITD (Glow in the Dark) silicon O-ring and silicon rubber tail cap. The tailcap switch is a reverse clicky with a LED battery indicator behind it.
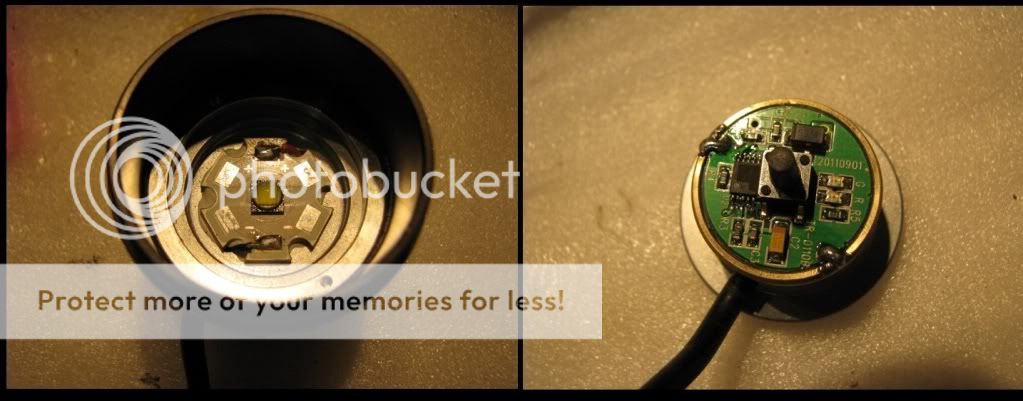
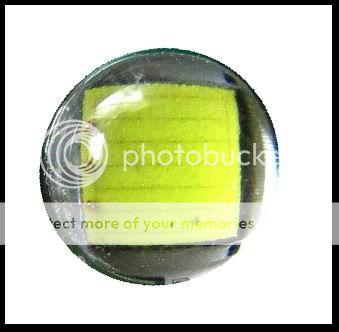
There were no markings on the board that indicated that the emmitter was actually the newest T6 but based on the pattern of the emitter (7-bar grid pattern) and the production date of 20110901 I'm pretty certain it's a XML. I was happy to see a nice blob of thermal paste for heat transfer. On the board all the the solder joints were clean.
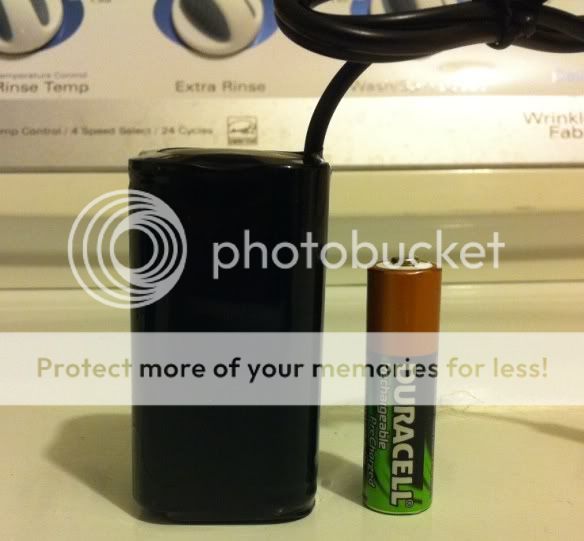
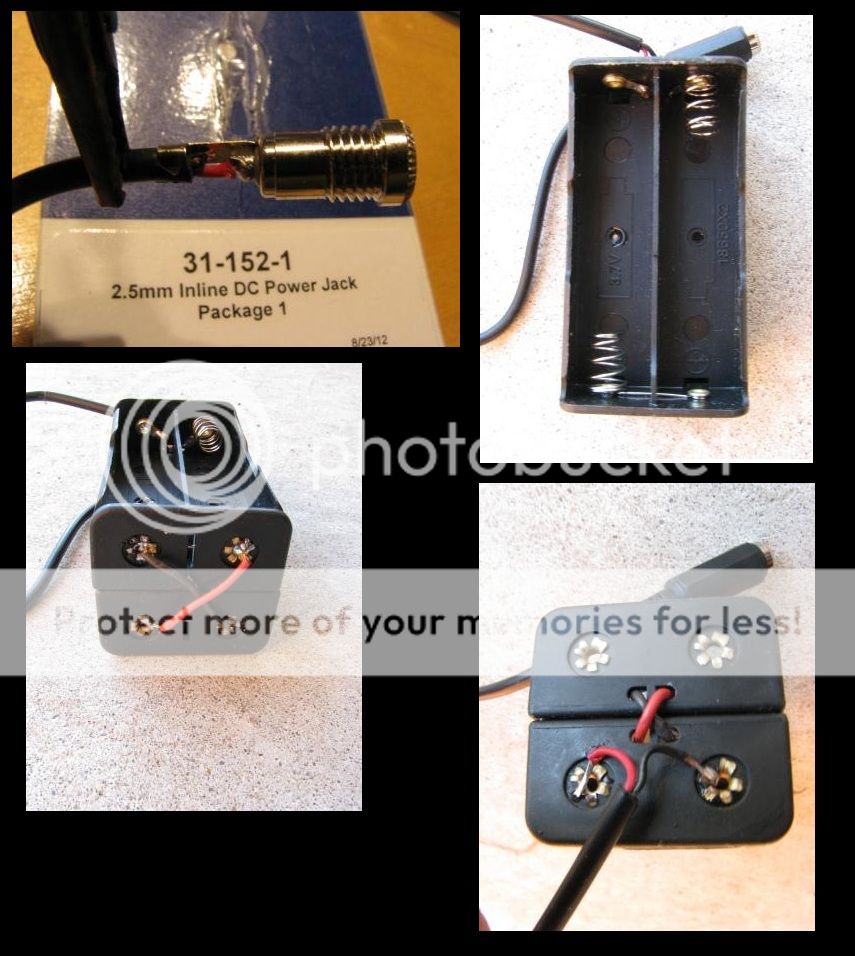
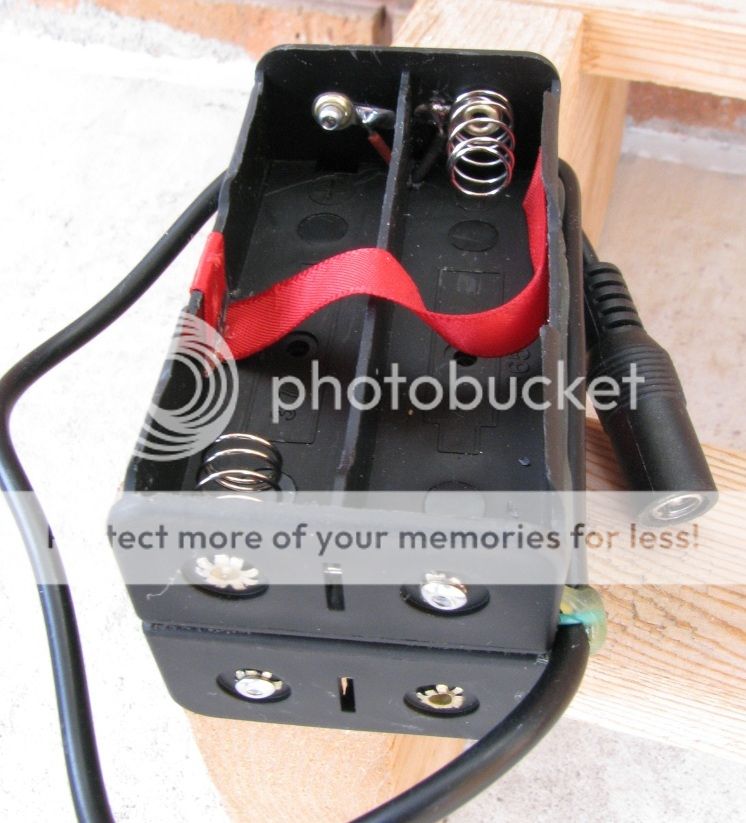
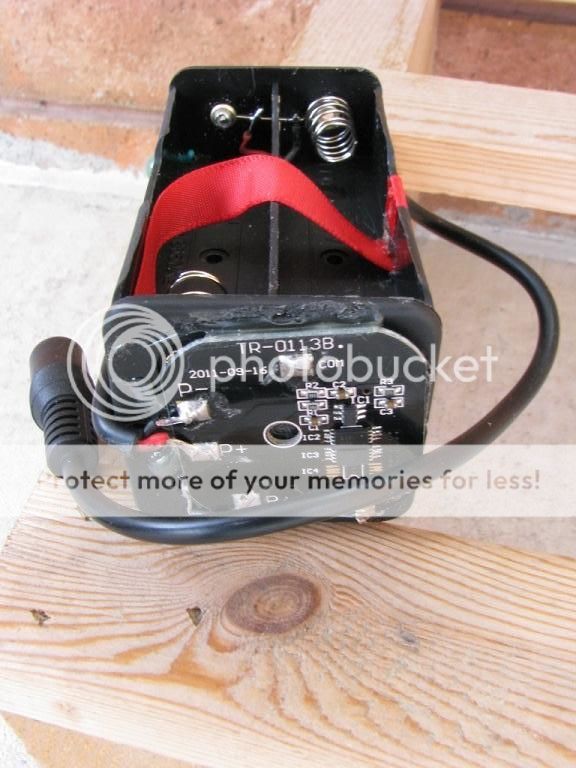
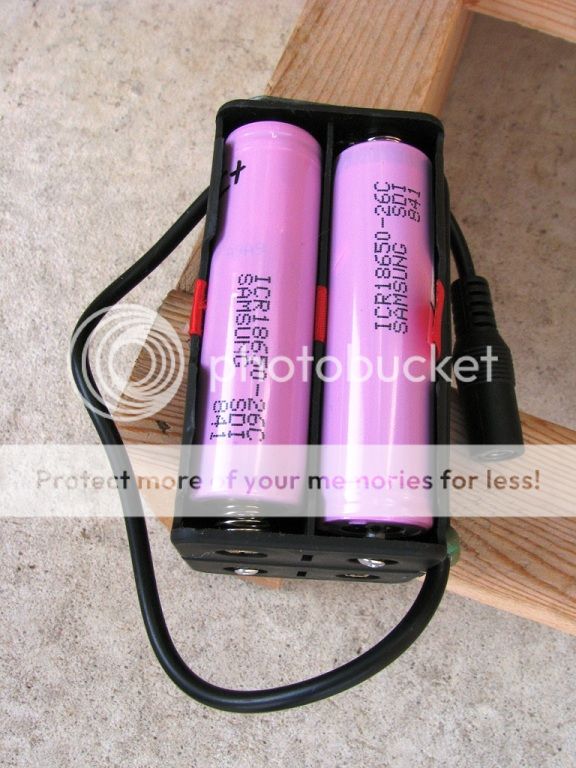
The battery pack appears to be 4 x18650 linked in series and bundled in heat shrink. It's hard to tell if these are protected cells and I didn't want to take off the heat shrink. The cable and connectors pushed together snugly but they lack weather sealed caps which would have been nice. When I plugged in the light I was surprised to find the the batteries already charged. I put it on a volt meter and it measured 7.9V on the 3rd charge. Not the advertised 8.4V. Maybe it needs a break in time <?>
** Update **
Burn Time
On the 4th full charge the battery reached 8.27V in just over 6hrs. The charger was warm but the battery remained cool the entire time.
High: 185 mins.
A full 3+ hours exceeded my expectations. But the lamp got hot after running for 10mins. It was hot enough that I couldn't hold on to it for more then 30seconds. The battery was at normal indoor temperature (22 degrees). I ended up placing the lamp head in between an aluminium sliding door frame to help dissipate the heat.
The backlit switch remained green the entire time with no low battery warning light.
Low: testing in progress
Strobe: in progress
Beam Shots
The beam was very bright but I don't have a light meter to measure it. The beam is very bright with a hot center with wide spillage. There are some small artifacts in the spot but not very noticable. It has excellent throw qualities but this is not ideal for a bike light. Comparing the beam side-by-side with my EagleTac P20A2 (which pumps out about 220Lm) this light seemed at least twice as bright.
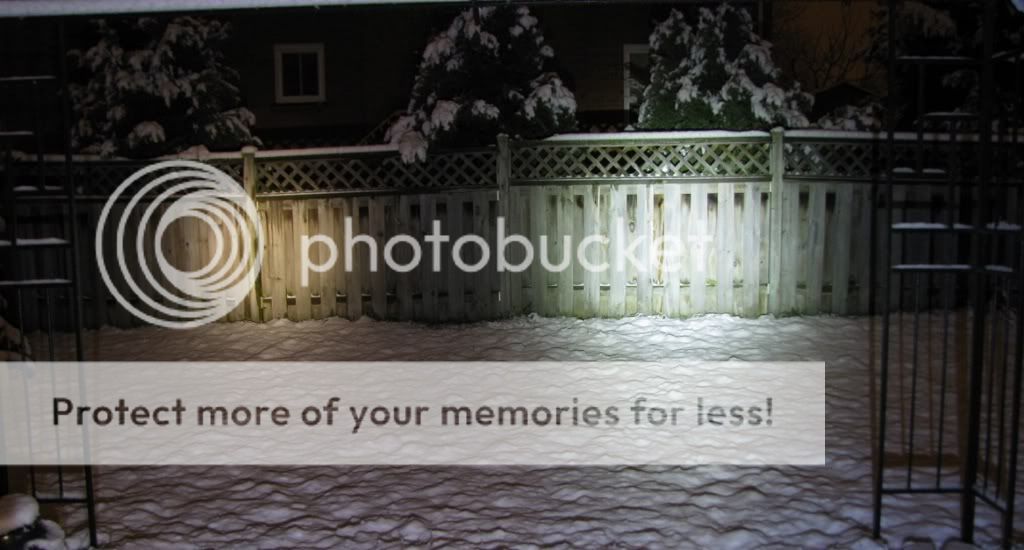
LEFT: Comparion to an EagleTac P20A2 with Sanyo Eneloops AAs. Spot lens on High.
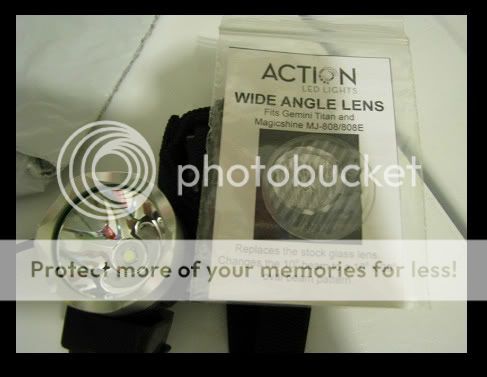
Wide Angle Lens
Definitely a wider flood pattern is need for commuting. I decided to replace the stock lens with an aftermarket wide angle lens from Ebay. The Action Light lens was shipped out very quickly. Thanks Jim. It converted the 10 degree spot beam to a 10 degree high by 30 degree wide flood light. The beam pattern is rectangular in shape.
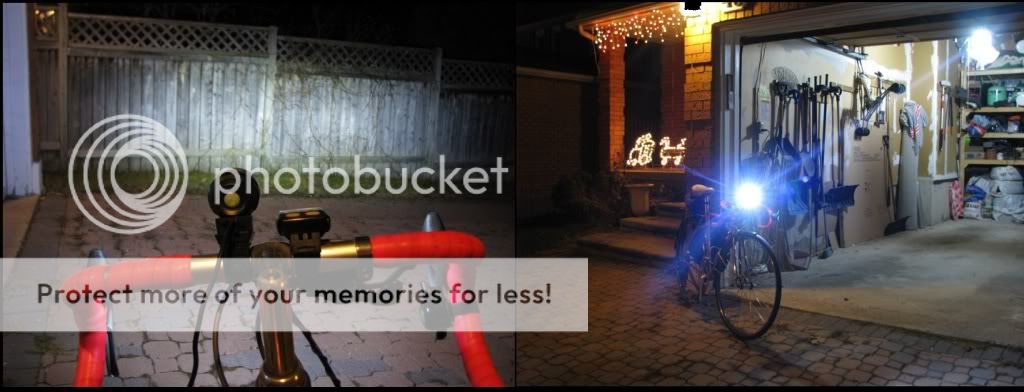
Light comparions: Wall light is a CFL 40W Equivalent. The Garage light is a CFL 100 W Equivalent
Compared to car headlights it is easily on par with BMW or Lexus HIDs
I like the volume of light but would have much prefered a warmer light. I find the warmer temperatures giving an more accurate depth perception i.e. better CRI (Color rendering index)
This might be a DIY project for later (if I find the time to learn how to replace it with a Warmer T5 Emitter).
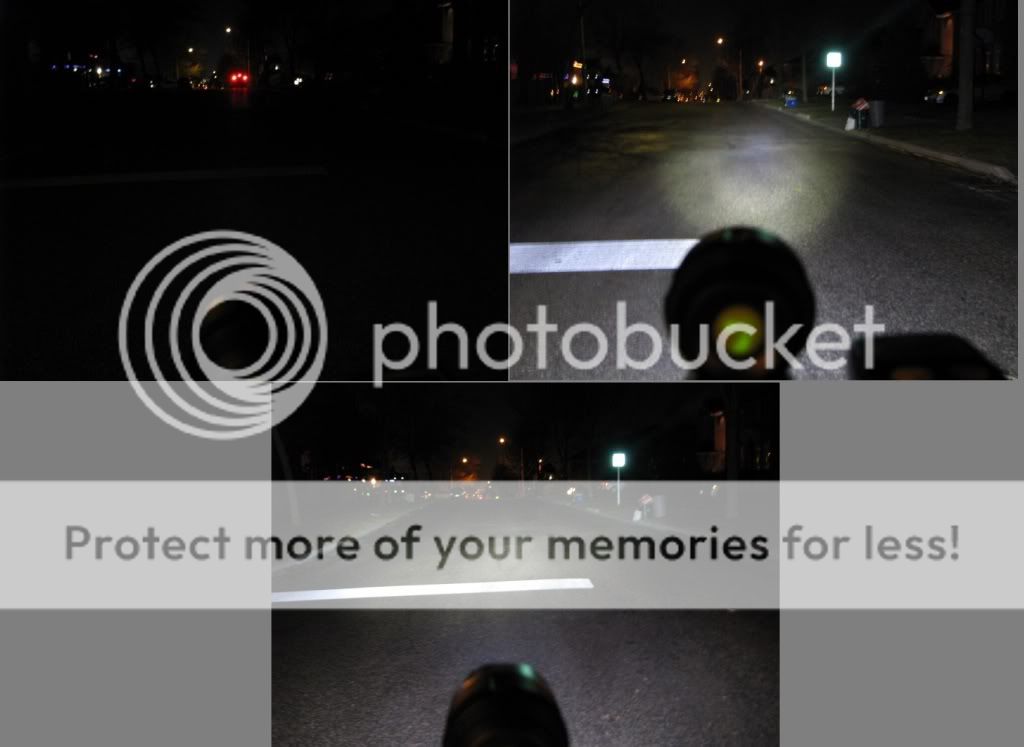
You can see the difference between the standard and wide angle pattern.
Road beam Pattern on High: Spot vs Wide angle
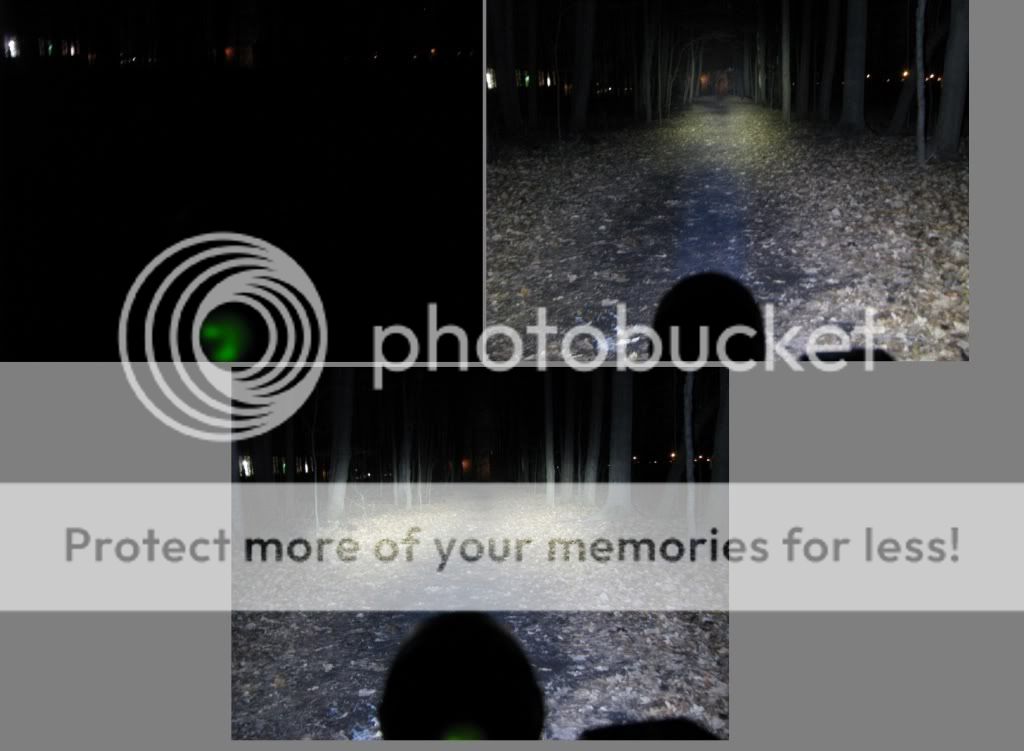
Trail beam Pattern on High: Spot vs Wide angle
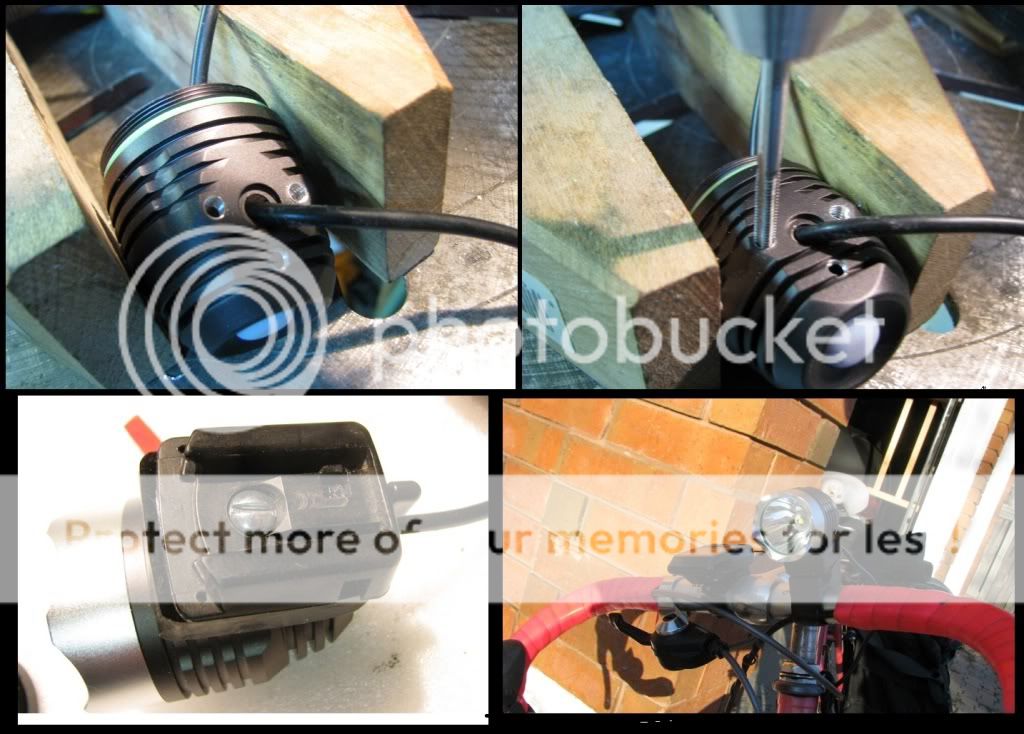
Mount
I didn't even bother with the standard mount. A single O-ring didn't seem like very secure system and it doesn't lend itself for quick mounting and removal. So I discarded the mount and replaced it with one from my old Cateye H-24. An spacer plate was needed so I fabricated one from a piece of plexiglass. I drilled two holes for screws and made a channel for the wire. Then I modified the body by drilling/tapping 2 holes 8-32 to which the spacer is bolted on to. I add clear silicone to all holes and gaps to ensure good water resistance.
Conclusion
Good: Overall I'm happy with the light. The construction is solid with more then enough output for city communting needs. It reached a full burn time of 3hrs on High. The design and construction is simple which is attractive to tinkerers who plan to modify the light. An excellent value light.
Bad: The spot light isn't ideal for a bike light so I'd recommend a wide angle lens especially for off trail. It is falsely advertised as 1800 Lm. At best it's probably in the range of 450-550 Lm. The O-ring friction mount seemed like an after thought. It definitely needs a better mounting system. There was no low battery warning indicator. The battery pouch is adequate but the strap is too long. It could use a second strap so to give a little more support. The option of a warmer T5 would make it almost perfect.
Time will tell how many cycles the batter pack will last. When it dies I plan to build my own pack.
At the time of this review the Ebay seller had 12614 feedback and 99.6% +ve
I'll update this thread with the Low burn time after I log more hours.
Enjoy
Advertised Specs:
Emitter Type: XML T6 LED Output 1800 lumens
Modes: High / Low / Strobe (high) with no memory
Run Time: 180 minutes on High
Battery pack: 1 x 8.4v Li-Ion 6400mAh Battery Pack
Battery Charger: 115v with LED indication for Charging (Red) / Full charge (Green)
Power Warning: Red Low Power behind tail click
Helmet Strap: O-ring mount
Head dimension: Light 43mm DIA
Weight: 118g (lamp head) 200gm battery pack : Total 318gm
My lighting needs for city commuting at night has always been adequate using a cheap handlebar mounted light. However due to a change in my route I now ride about 10km on paved trials where there is no lighting whatsoever. Ebay offered many of options ranging from cheap flashers to a high end NiteRider Pro kit. I needed robust and bright enough for commuting that wasn't going to cost me a arm and a leg. So I decided to try out one of the Chinese vendors who offered a hard-to-believe 1800 Lumen kit for under $60. I believe this light is a version of the popular Magic Shine lighting system.
I knew that an output of 1800 Lumen was impossible with the XML T6 with the advertised setup. Still, I figured if the output was half it was still worth $60. After I ordering the light I was expecting it to take at least 4 weeks to arrive from China but I was pleasantly surprised to find it in my mailbox after 7 working days. Apparently the particular vendor operated out of Hong Kong so the shipping time was cut by 1/3rd.
Kit Contents
The kit came in a small box which contained the lamp, battery/charge, 2-Orings, Helmet strap/adapter, battery holder. At first sight the body was machined well with matt black anodizing. I was actually surprised with the quality of the workmanship. No burs, machine marks nor blotchy finishing. The threads were smooth and fitting was tight.
The Aluminium reflector had a smooth finish instead of the Orange peel texture that was pictured in the ad. The LED was mounted on the board with a large heat-sink which threaded into the body. There was plenty of room in the housing for heat dissipation. T
he crowned Bezel has 6-points with a nice satin brushed finish. Under the glass lens there is a GITD (Glow in the Dark) silicon O-ring and silicon rubber tail cap. The tailcap switch is a reverse clicky with a LED battery indicator behind it.
There were no markings on the board that indicated that the emmitter was actually the newest T6 but based on the pattern of the emitter (7-bar grid pattern) and the production date of 20110901 I'm pretty certain it's a XML. I was happy to see a nice blob of thermal paste for heat transfer. On the board all the the solder joints were clean.
The battery pack appears to be 4 x18650 linked in series and bundled in heat shrink. It's hard to tell if these are protected cells and I didn't want to take off the heat shrink. The cable and connectors pushed together snugly but they lack weather sealed caps which would have been nice. When I plugged in the light I was surprised to find the the batteries already charged. I put it on a volt meter and it measured 7.9V on the 3rd charge. Not the advertised 8.4V. Maybe it needs a break in time <?>
** Update **
Burn Time
On the 4th full charge the battery reached 8.27V in just over 6hrs. The charger was warm but the battery remained cool the entire time.
High: 185 mins.
A full 3+ hours exceeded my expectations. But the lamp got hot after running for 10mins. It was hot enough that I couldn't hold on to it for more then 30seconds. The battery was at normal indoor temperature (22 degrees). I ended up placing the lamp head in between an aluminium sliding door frame to help dissipate the heat.
The backlit switch remained green the entire time with no low battery warning light.
Low: testing in progress
Strobe: in progress
Beam Shots
The beam was very bright but I don't have a light meter to measure it. The beam is very bright with a hot center with wide spillage. There are some small artifacts in the spot but not very noticable. It has excellent throw qualities but this is not ideal for a bike light. Comparing the beam side-by-side with my EagleTac P20A2 (which pumps out about 220Lm) this light seemed at least twice as bright.
LEFT: Comparion to an EagleTac P20A2 with Sanyo Eneloops AAs. Spot lens on High.
Wide Angle Lens
Definitely a wider flood pattern is need for commuting. I decided to replace the stock lens with an aftermarket wide angle lens from Ebay. The Action Light lens was shipped out very quickly. Thanks Jim. It converted the 10 degree spot beam to a 10 degree high by 30 degree wide flood light. The beam pattern is rectangular in shape.
Light comparions: Wall light is a CFL 40W Equivalent. The Garage light is a CFL 100 W Equivalent
Compared to car headlights it is easily on par with BMW or Lexus HIDs
I like the volume of light but would have much prefered a warmer light. I find the warmer temperatures giving an more accurate depth perception i.e. better CRI (Color rendering index)
This might be a DIY project for later (if I find the time to learn how to replace it with a Warmer T5 Emitter).
You can see the difference between the standard and wide angle pattern.
Road beam Pattern on High: Spot vs Wide angle
Trail beam Pattern on High: Spot vs Wide angle
Mount
I didn't even bother with the standard mount. A single O-ring didn't seem like very secure system and it doesn't lend itself for quick mounting and removal. So I discarded the mount and replaced it with one from my old Cateye H-24. An spacer plate was needed so I fabricated one from a piece of plexiglass. I drilled two holes for screws and made a channel for the wire. Then I modified the body by drilling/tapping 2 holes 8-32 to which the spacer is bolted on to. I add clear silicone to all holes and gaps to ensure good water resistance.
Conclusion
Good: Overall I'm happy with the light. The construction is solid with more then enough output for city communting needs. It reached a full burn time of 3hrs on High. The design and construction is simple which is attractive to tinkerers who plan to modify the light. An excellent value light.
Bad: The spot light isn't ideal for a bike light so I'd recommend a wide angle lens especially for off trail. It is falsely advertised as 1800 Lm. At best it's probably in the range of 450-550 Lm. The O-ring friction mount seemed like an after thought. It definitely needs a better mounting system. There was no low battery warning indicator. The battery pouch is adequate but the strap is too long. It could use a second strap so to give a little more support. The option of a warmer T5 would make it almost perfect.
Time will tell how many cycles the batter pack will last. When it dies I plan to build my own pack.
At the time of this review the Ebay seller had 12614 feedback and 99.6% +ve
I'll update this thread with the Low burn time after I log more hours.
Enjoy
Last edited:
")