Recently featured on the CPF DX banner advert, the UltraFire UF-T90 is a compact 4x18650 light with optional handle. This format is appearing frequently now, so how does this one perform?
Initial Impressions:
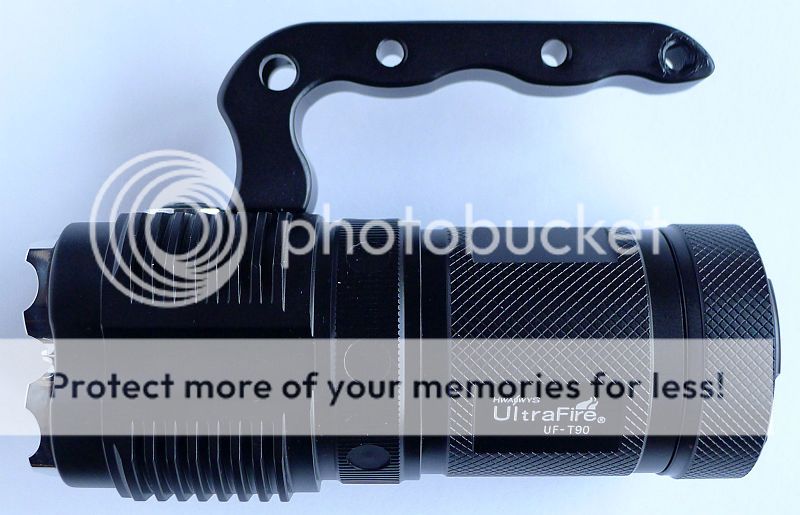
The box was smaller than I expected, and opening the box revealed a nice compact light. The handle adds quite a lot of bulk, but this is relative, as the overall light is nice and compact. The handling is much improved with the handle, so although it adds to the overall size it is worth keeping. If you really need to, the handle can be removed easily using a screwdriver.
The 'attack' bezel around each of the four reflectors might seem a little aggressive, but it is nicely finished with no actual sharp corners, so it is not actually abrasive. It does give good protection to the lenses, especially if you place the light on a surface bezel down. There is plenty of clearance from the surface you put it on to show the light is on, so you won't forget it is running.
Placement of the main switch is a little awkward as it is so tight to the handle. With the handle fitted, one handed operation is not easy.
What is in the box:
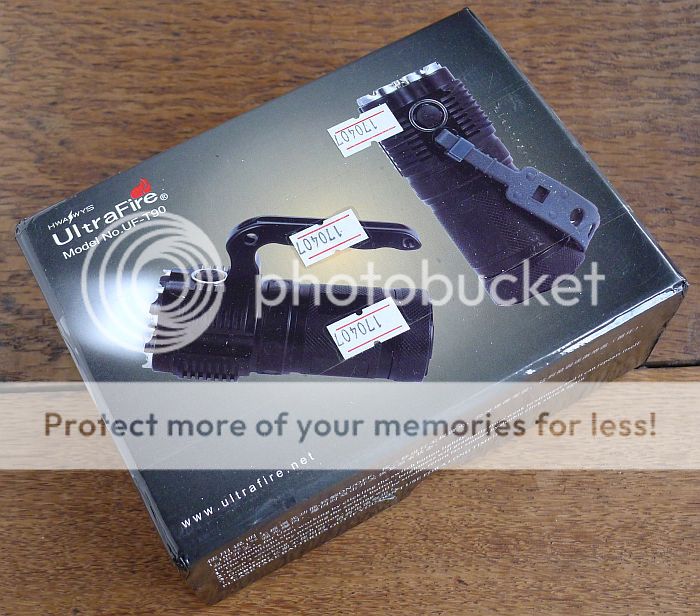
The sturdy cardboard box with obligatory DX SKU number stickers on it.
A cut-out of closed cell padding holds the light securely.
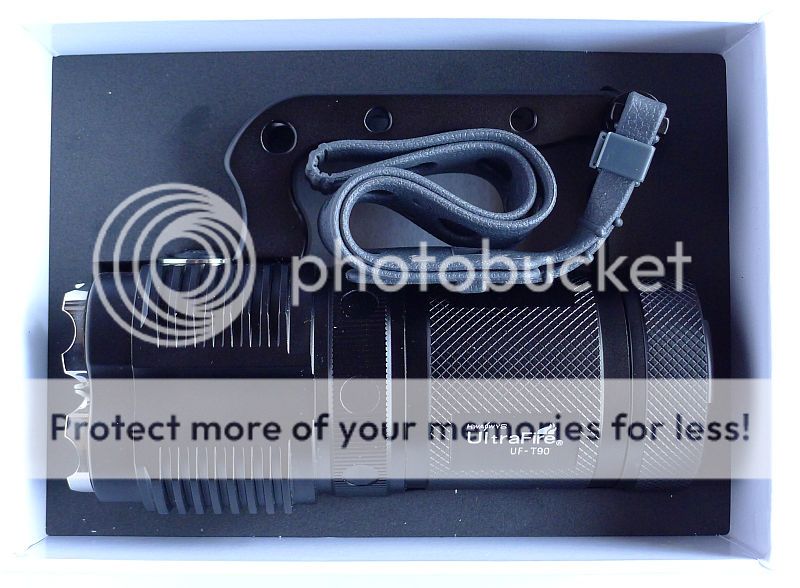
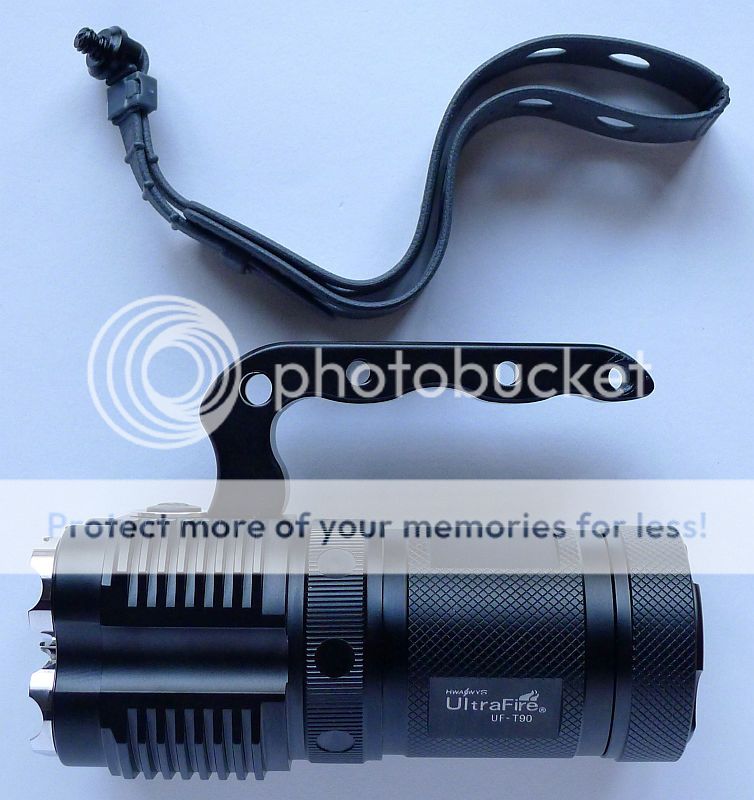
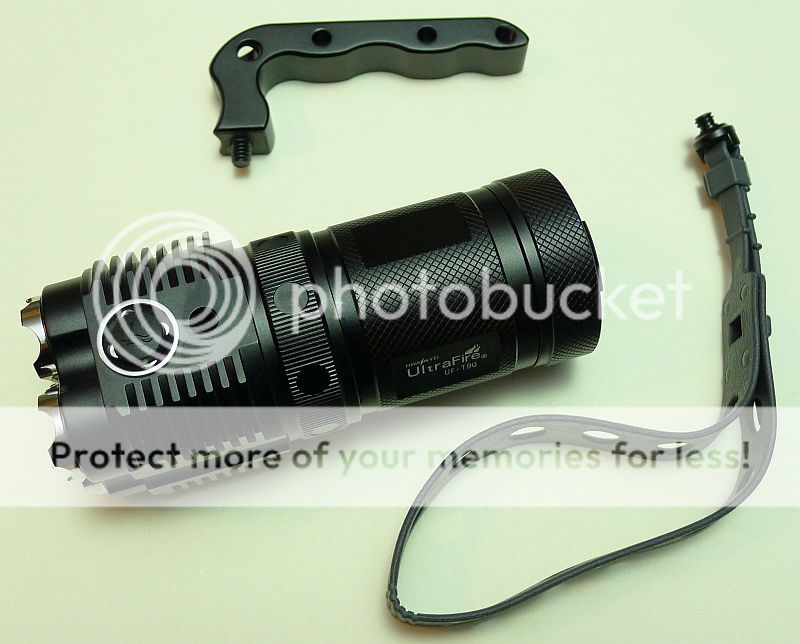
The UF-T90 with handle attached and rubberised flat wrist strap. The strap screws either into the end of the handle, or if the handle is removed, it can fit into the screw hole for the handle fixing screw.
Taking a closer look and looking inside:
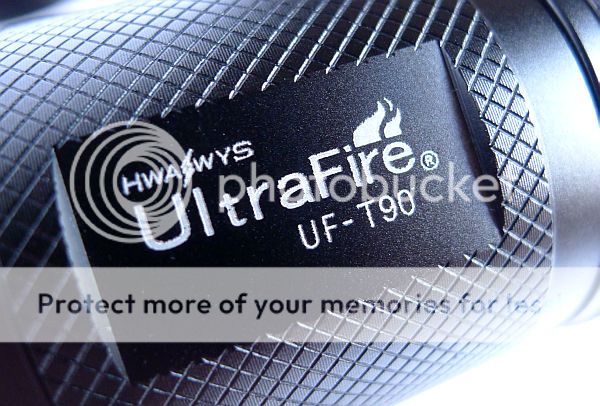
The brand and model are laser etched into the anodised surface.
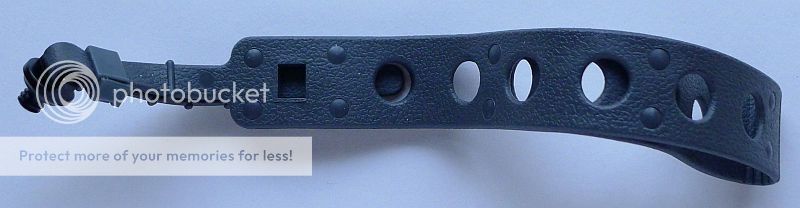
The wrist strap provided has a metal screw to fix it to the UF-T90.
Looking side-on, the handle's three finger indents are visible. On the far right of the handle you can see the grease surrounding the lanyard attachment threaded hole. (the grease is from an o-ring that was meant to sit between the screw and the handle. This o-ring split the second time I fitted the lanyard)
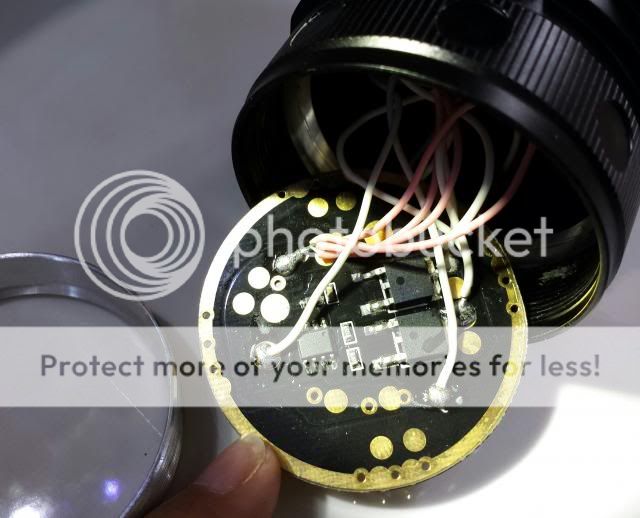
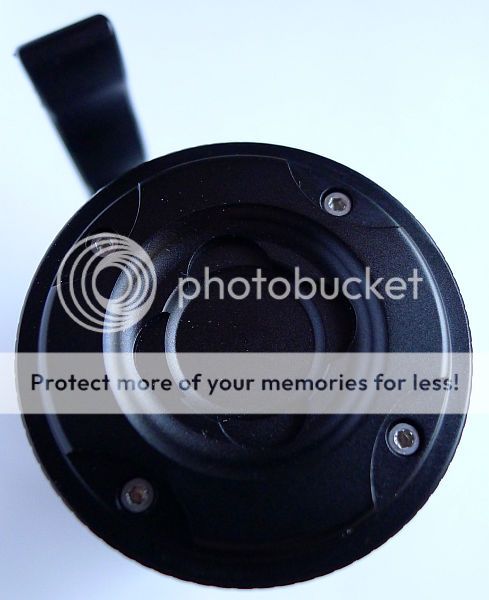
The tail has four screws which secure the contact board inside the light.
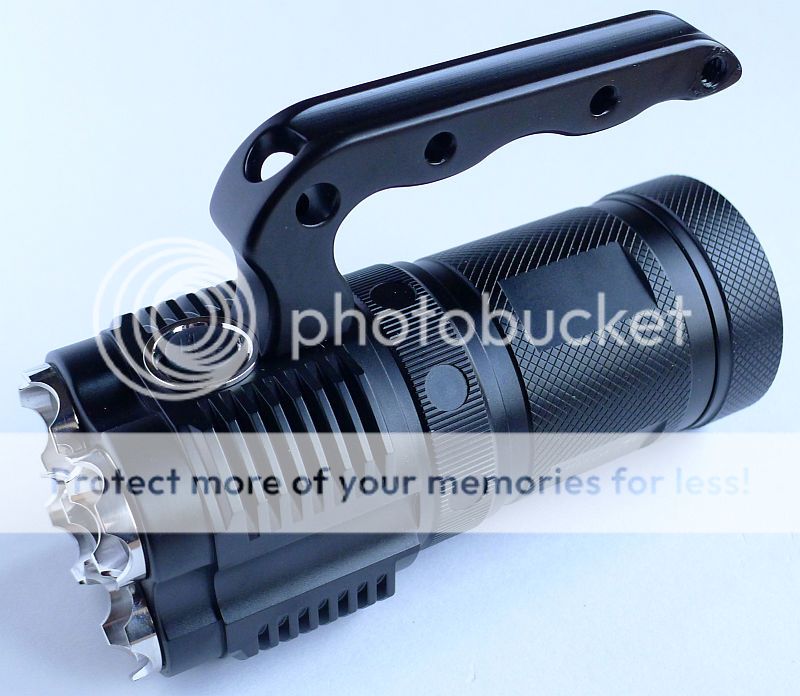
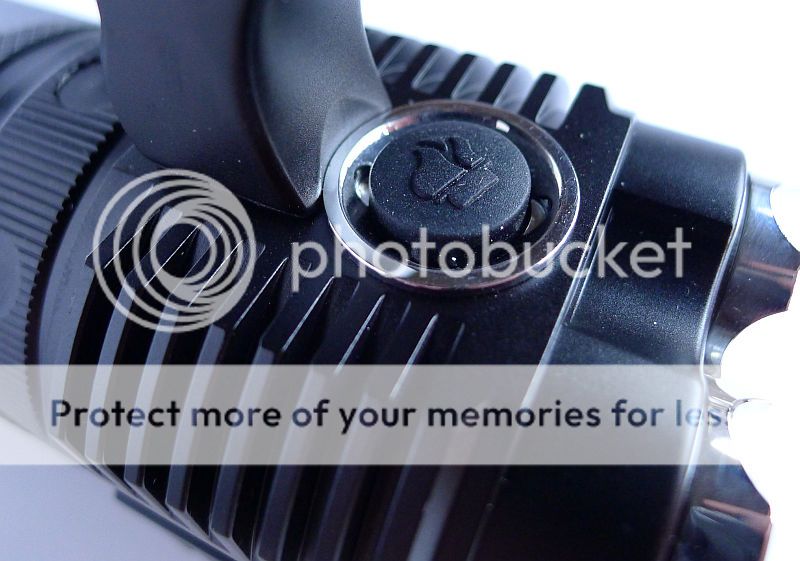
The power switch and heat-sink fins.
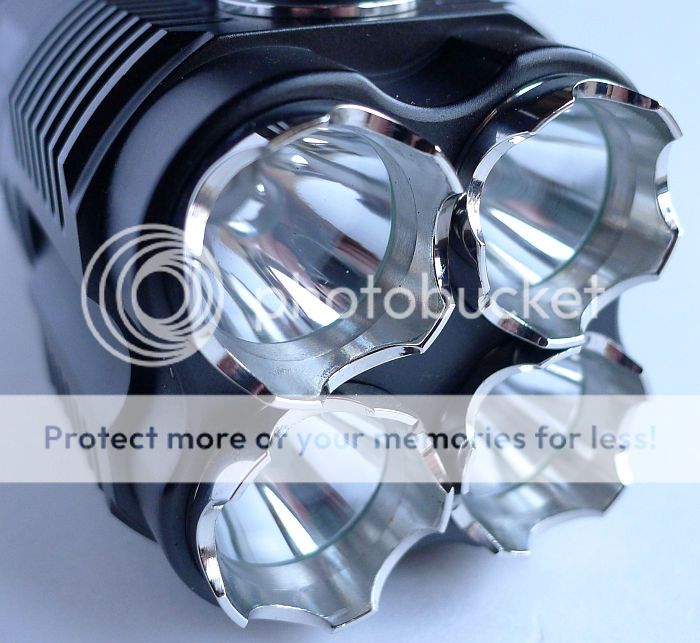
The deeply scalloped stainless bezels. All edges are smoothed off so there are no sharp corners to abrade your pocket or any pouch you might carry it in.
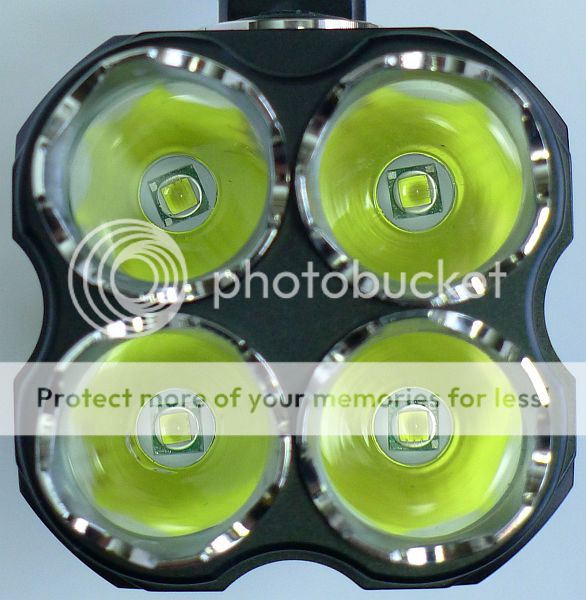
The XM-L U2 LEDs
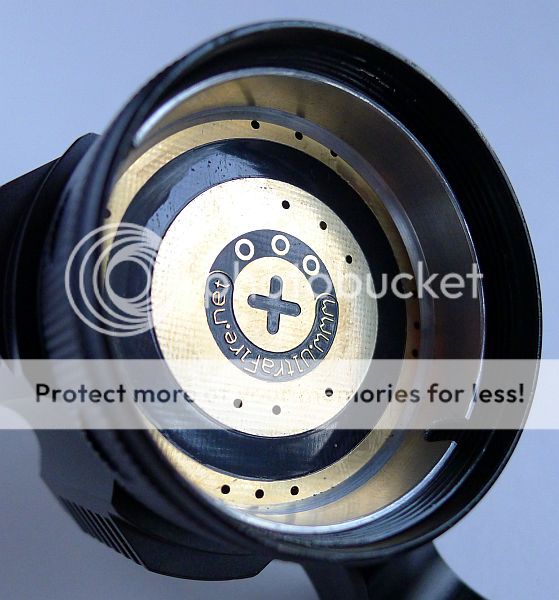
Looking into the head and the positive contact ring and the aluminium retaining ring which is the negative contact for the end of the battery tube.
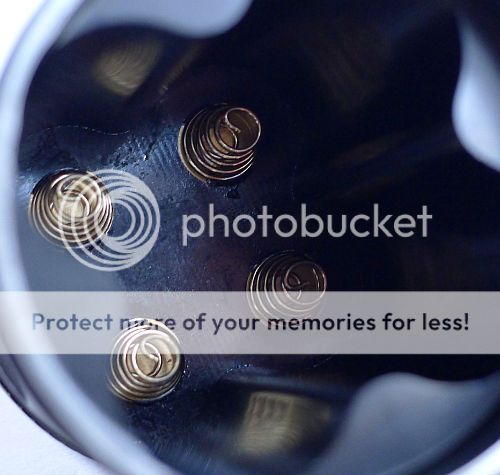
At the base of the battery tube are the negative contact springs which give an ample leeway for cell length.
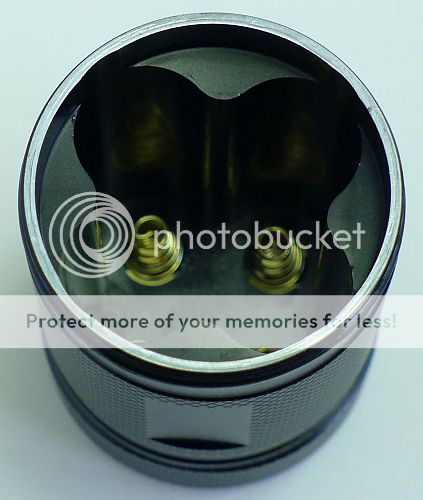
The battery tube has shaping which holds the 4 x x18650 cells in place. It also allows for two cells to be paced in adjacent positions and held securely enough to assemble and use the light. (one cell on its own will slide out of place)
The threads are well formed standard profile and fully anodised. There is a single o-ring to seal the tube.

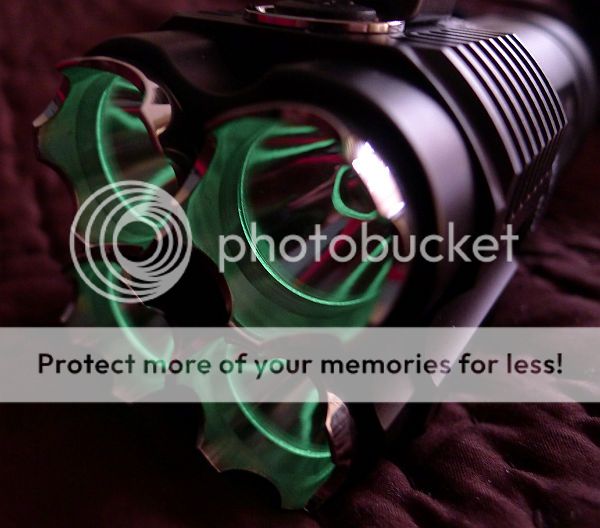
When you switch off the UF-T90 off you are presented with a green afterglow courtesy of the GITD o-rings used to seal the lenses.
Modes and User Interface:
There are two basic modes. A user defined constant output and a strobe.
From OFF, a single press turns on the user defined mode. A single press switches it off.
From ON, pressing and holding starts the ramping of the output. The time to ramp from maximum to minimum is 3s, there are no pauses at any level and it does not stop at either maximum or minimum.
The only way to guarantee you have maximum is to partially unscrew the battery tube to lock-out the light and when tightening the tube again the UF-T90 will default to maximum.
To enter strobe, double click when the light is ON. A single press switches off the UF-T90, but it remembers it is in strobe, so to exit strobe, double click again when it is on, or reset it by locking –out the battery tube.
Batteries and output:
Due to the battery tube design, the UF-T90 can run on 2x18650 as a minimum (a single cell is not held in place while screwing the battery tube in) or 3 or 4x 18650. The negative contact springs allow for anything from unprotected to long protected cells to be used.
The testing was carried out with UltraFire 2600mAh protected red cells.
To measure actual output, I built an integrating sphere. See here for more detail. The sensor registers visible light only (so Infra-Red and Ultra-Violet will not be measured).
Please note, all quoted lumen figures are from a DIY integrating sphere, and according to ANSI standards. Although every effort is made to give as accurate a result as possible, they should be taken as an estimate only. The results can be used to compare outputs in this review and others I have published.
Strobe runs at 10Hz.
As the UF-T90 utilises an electronic switch, there is parasitic drain to consider.
In this regard, the UF-T90 excels, with the second lowest parasitic drain I've ever measured. After an initial powering up of the circuitry the drain current stabilised at 1.1uA meaning it would take over 1000 years for this to drain the batteries. Parasitic drain this low is negligible and far lower than the cells own internal drain.
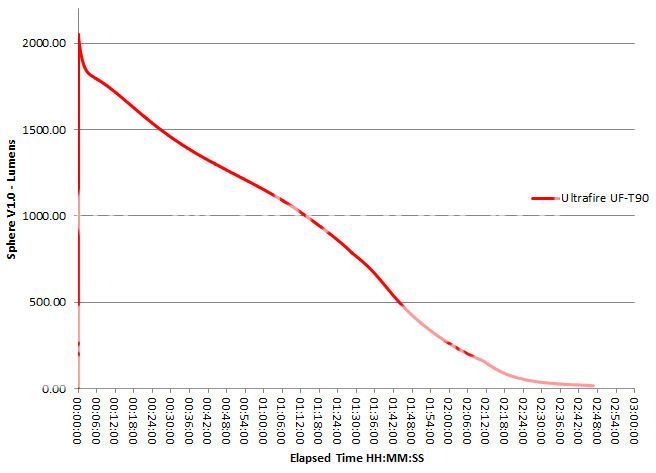
The runtime graph was intended to capture the maximum output; the following output trace is the result.
The beam
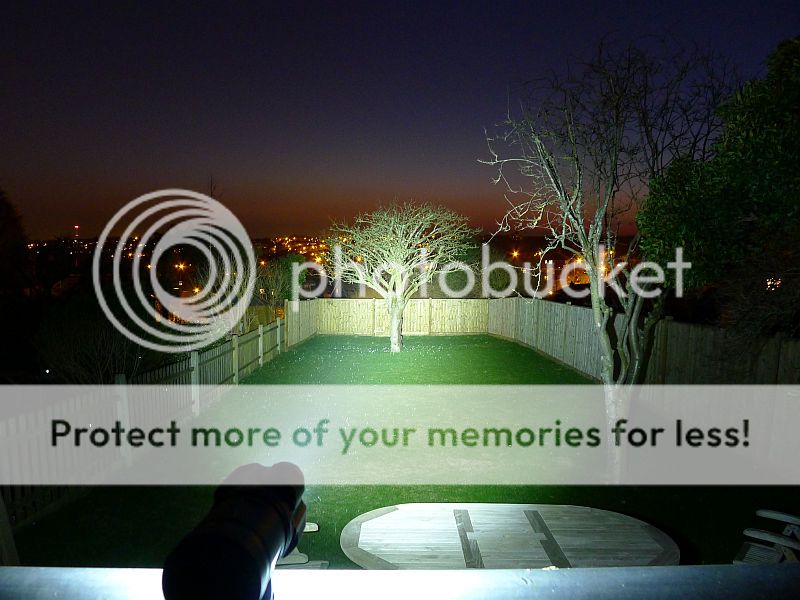
The indoor beamshot shows the relatively narrow beam but broad hotspot.
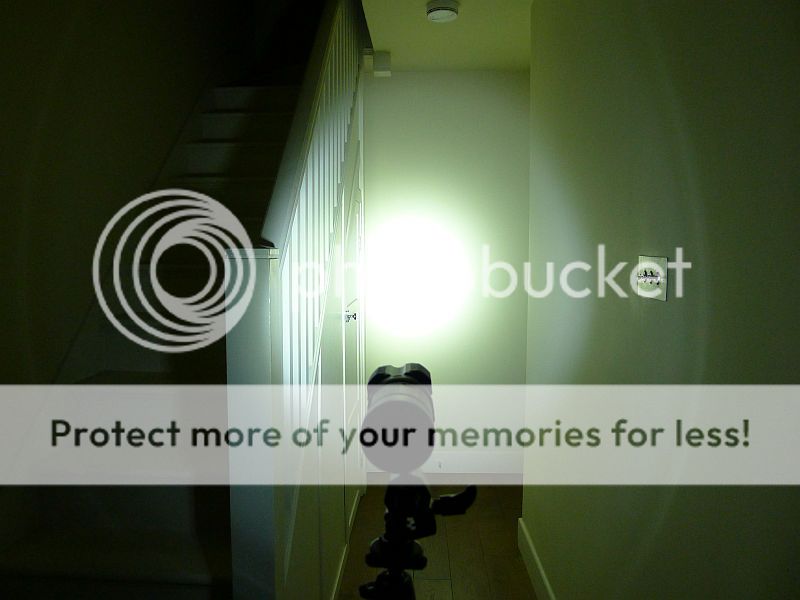
The UF-T90 is bright across the beam's width, but as the beam is not that wide it seems better suited to mid to long range use. Neither great flood, nor great throw, but it puts out a lot of light.
What it is really like to use…
The handle of the UF-T90 is very comfortable to hold and makes long term use easy. The only complaint being the positioning of the power switch, however unless this were moved to the handle itself, the ergonomics of this couldn't really be improved.
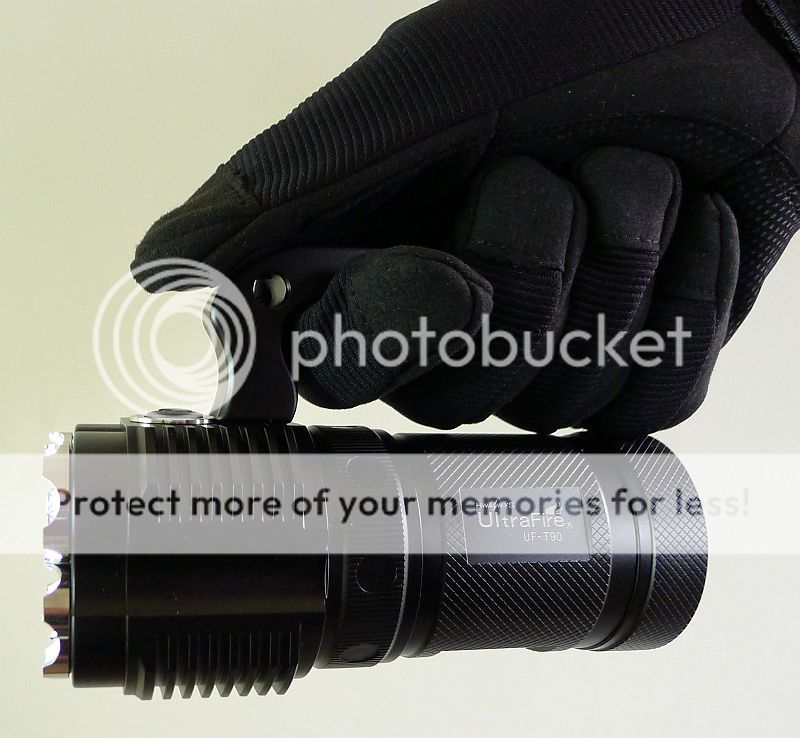
Shown here next to a couple of protected 18650s, the compact form of the UF-T90 can be appreciated.
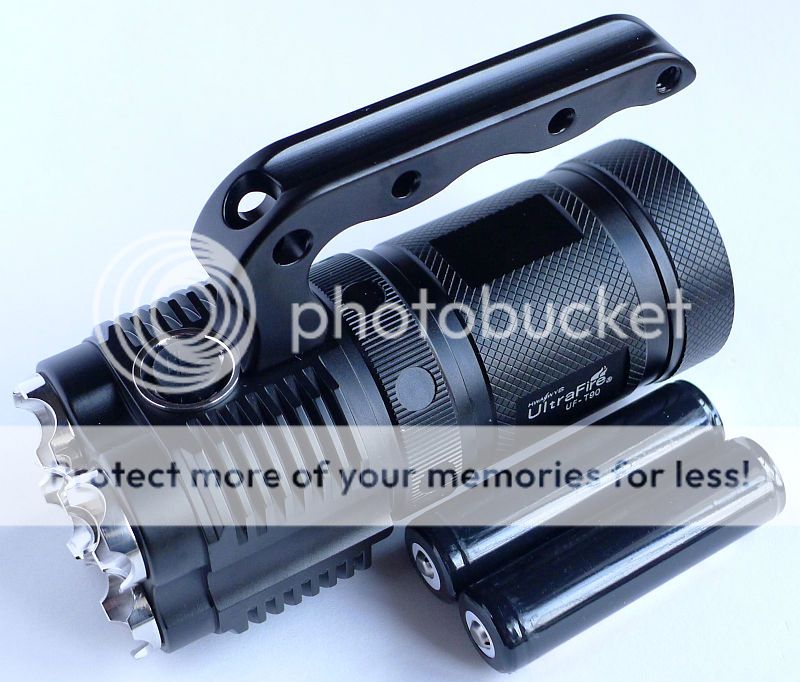
It becomes even more compact with the handle removed. Unfortunately if you fit the lanyard screw into the hole left by removing the handle, it does interfere with the easy operation of the power switch.
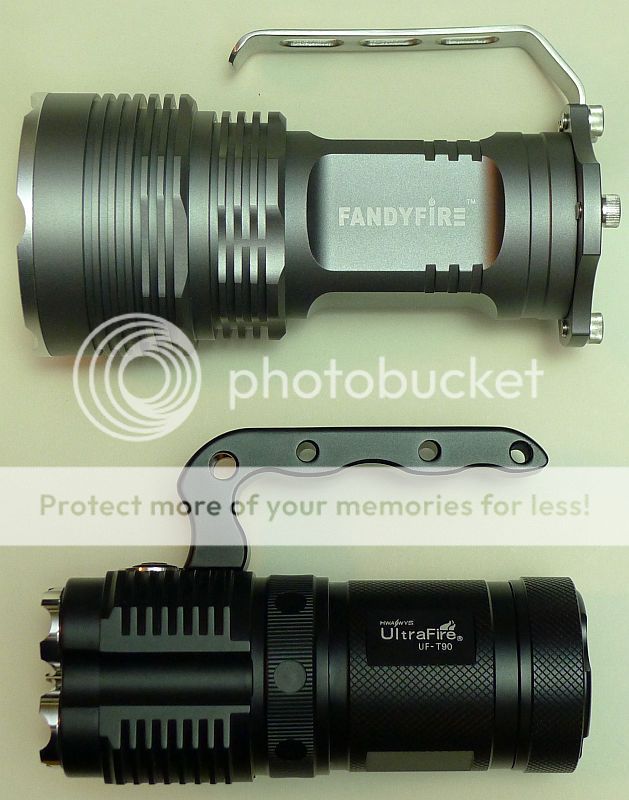
Putting it next to the FandyFire Raging, the UF-T90 has a much smaller profile, with a considerable more compact head.

The PWM is present in all levels of output, but at 200Hz is not too intrusive. It is a bit laboured if you want different levels as you need to enter the ramping to change brightness. If the last time you stopped the ramping on its way up, and now you want to turn it down, it does remember that it was ramping-up, so you end up having to go to maximum before it ramps-down again.
This light works best, once you have set the output you want. Reverting to maximum is an easy undo of the battery tube, do it back up and away you go with maximum.
The bezels may look quite aggressive, but you barely notice them in use and they don't catch or scratch so are merely an aesthetic feature.
The UF-T90 certainly ticks several boxes. If you need to constantly change output modes then it is not going to suit, but if you tend to use one output level then the interface here is straight forward, and the UF-T90 is comfortable to hold, has negligible parasitic drain, with a bright usable beam and all in a nicely compact 4x18650 light.
Test sample provided by DX (DealExtreme) for review.
Initial Impressions:
The box was smaller than I expected, and opening the box revealed a nice compact light. The handle adds quite a lot of bulk, but this is relative, as the overall light is nice and compact. The handling is much improved with the handle, so although it adds to the overall size it is worth keeping. If you really need to, the handle can be removed easily using a screwdriver.
The 'attack' bezel around each of the four reflectors might seem a little aggressive, but it is nicely finished with no actual sharp corners, so it is not actually abrasive. It does give good protection to the lenses, especially if you place the light on a surface bezel down. There is plenty of clearance from the surface you put it on to show the light is on, so you won't forget it is running.
Placement of the main switch is a little awkward as it is so tight to the handle. With the handle fitted, one handed operation is not easy.
What is in the box:
The sturdy cardboard box with obligatory DX SKU number stickers on it.
A cut-out of closed cell padding holds the light securely.
The UF-T90 with handle attached and rubberised flat wrist strap. The strap screws either into the end of the handle, or if the handle is removed, it can fit into the screw hole for the handle fixing screw.
Taking a closer look and looking inside:
The brand and model are laser etched into the anodised surface.
The wrist strap provided has a metal screw to fix it to the UF-T90.
Looking side-on, the handle's three finger indents are visible. On the far right of the handle you can see the grease surrounding the lanyard attachment threaded hole. (the grease is from an o-ring that was meant to sit between the screw and the handle. This o-ring split the second time I fitted the lanyard)
The tail has four screws which secure the contact board inside the light.
The power switch and heat-sink fins.
The deeply scalloped stainless bezels. All edges are smoothed off so there are no sharp corners to abrade your pocket or any pouch you might carry it in.
The XM-L U2 LEDs
Looking into the head and the positive contact ring and the aluminium retaining ring which is the negative contact for the end of the battery tube.
At the base of the battery tube are the negative contact springs which give an ample leeway for cell length.
The battery tube has shaping which holds the 4 x x18650 cells in place. It also allows for two cells to be paced in adjacent positions and held securely enough to assemble and use the light. (one cell on its own will slide out of place)
The threads are well formed standard profile and fully anodised. There is a single o-ring to seal the tube.
When you switch off the UF-T90 off you are presented with a green afterglow courtesy of the GITD o-rings used to seal the lenses.
Modes and User Interface:
There are two basic modes. A user defined constant output and a strobe.
From OFF, a single press turns on the user defined mode. A single press switches it off.
From ON, pressing and holding starts the ramping of the output. The time to ramp from maximum to minimum is 3s, there are no pauses at any level and it does not stop at either maximum or minimum.
The only way to guarantee you have maximum is to partially unscrew the battery tube to lock-out the light and when tightening the tube again the UF-T90 will default to maximum.
To enter strobe, double click when the light is ON. A single press switches off the UF-T90, but it remembers it is in strobe, so to exit strobe, double click again when it is on, or reset it by locking –out the battery tube.
Batteries and output:
Due to the battery tube design, the UF-T90 can run on 2x18650 as a minimum (a single cell is not held in place while screwing the battery tube in) or 3 or 4x 18650. The negative contact springs allow for anything from unprotected to long protected cells to be used.
The testing was carried out with UltraFire 2600mAh protected red cells.
To measure actual output, I built an integrating sphere. See here for more detail. The sensor registers visible light only (so Infra-Red and Ultra-Violet will not be measured).
Please note, all quoted lumen figures are from a DIY integrating sphere, and according to ANSI standards. Although every effort is made to give as accurate a result as possible, they should be taken as an estimate only. The results can be used to compare outputs in this review and others I have published.
| UltraFire UF-T90 | I.S. measured ANSI output Lumens | PWM frequency (Hz) |
|---|---|---|
| Maximum | 1978 | 200 |
| Minimum | 71 | 200 |
Strobe runs at 10Hz.
As the UF-T90 utilises an electronic switch, there is parasitic drain to consider.
In this regard, the UF-T90 excels, with the second lowest parasitic drain I've ever measured. After an initial powering up of the circuitry the drain current stabilised at 1.1uA meaning it would take over 1000 years for this to drain the batteries. Parasitic drain this low is negligible and far lower than the cells own internal drain.
The runtime graph was intended to capture the maximum output; the following output trace is the result.
The beam
The indoor beamshot shows the relatively narrow beam but broad hotspot.
The UF-T90 is bright across the beam's width, but as the beam is not that wide it seems better suited to mid to long range use. Neither great flood, nor great throw, but it puts out a lot of light.
What it is really like to use…
The handle of the UF-T90 is very comfortable to hold and makes long term use easy. The only complaint being the positioning of the power switch, however unless this were moved to the handle itself, the ergonomics of this couldn't really be improved.
Shown here next to a couple of protected 18650s, the compact form of the UF-T90 can be appreciated.
It becomes even more compact with the handle removed. Unfortunately if you fit the lanyard screw into the hole left by removing the handle, it does interfere with the easy operation of the power switch.
Putting it next to the FandyFire Raging, the UF-T90 has a much smaller profile, with a considerable more compact head.
The PWM is present in all levels of output, but at 200Hz is not too intrusive. It is a bit laboured if you want different levels as you need to enter the ramping to change brightness. If the last time you stopped the ramping on its way up, and now you want to turn it down, it does remember that it was ramping-up, so you end up having to go to maximum before it ramps-down again.
This light works best, once you have set the output you want. Reverting to maximum is an easy undo of the battery tube, do it back up and away you go with maximum.
The bezels may look quite aggressive, but you barely notice them in use and they don't catch or scratch so are merely an aesthetic feature.
The UF-T90 certainly ticks several boxes. If you need to constantly change output modes then it is not going to suit, but if you tend to use one output level then the interface here is straight forward, and the UF-T90 is comfortable to hold, has negligible parasitic drain, with a bright usable beam and all in a nicely compact 4x18650 light.
Test sample provided by DX (DealExtreme) for review.
Last edited:
")