
PCC
Flashlight Enthusiast
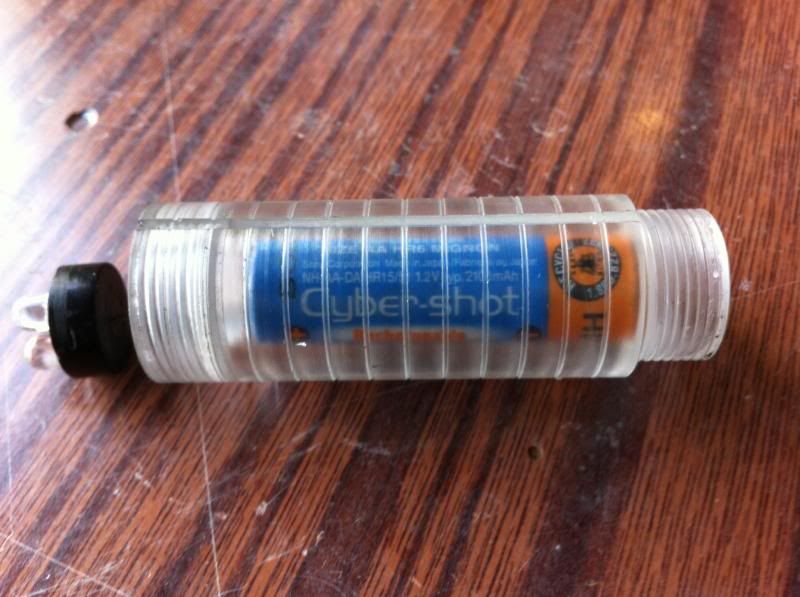
A-AA = Alkaline AA
There was some discussion recently about battery vampires and the concern about alkaline battery leakage. The thought then occurred to me that a plastic light with just two simple brass contacts would be able to handle a leaking alkaline cell and could easily be cleaned and returned to service. This is a build log for that light.
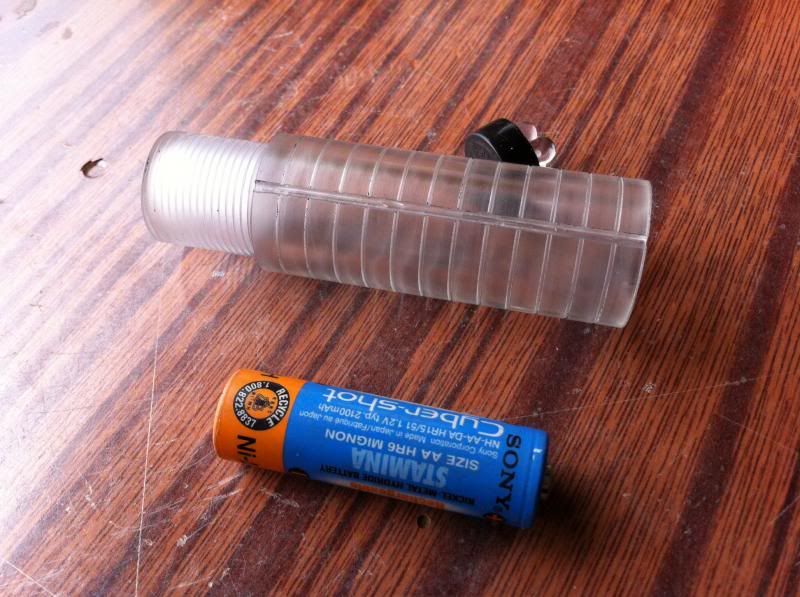
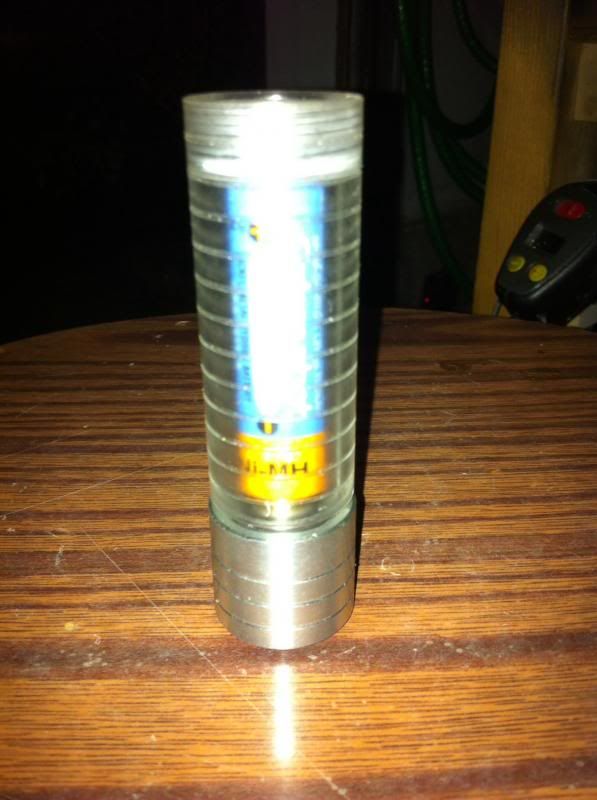
The light engine that I'm using for this project is the now discontinued Nite Ize 3-LED drop-in module for the Mini-Mag. One of the nice things about this drop-in is that it will drain a single battery down to a really low voltage, low enough to have that battery leak.
The body if the light is made from extruded acrylic rod that I had bought for a project that fell through. Since it was paid for I might as well use it.
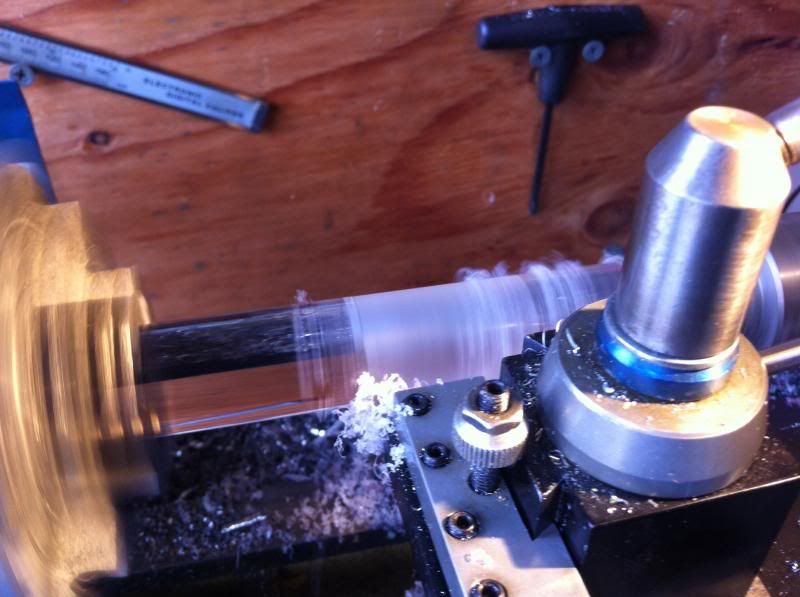
First order of business, chuck the acrylic rod into the lathe, drill the end with a center drill and place a live center on it to try to prevent the rod from flexing. After that turn the outside down to even out the casting marks:
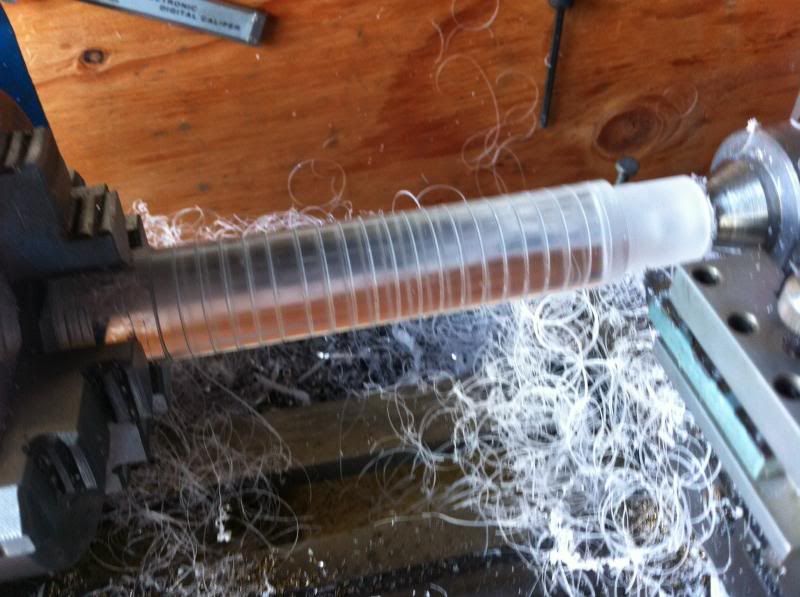
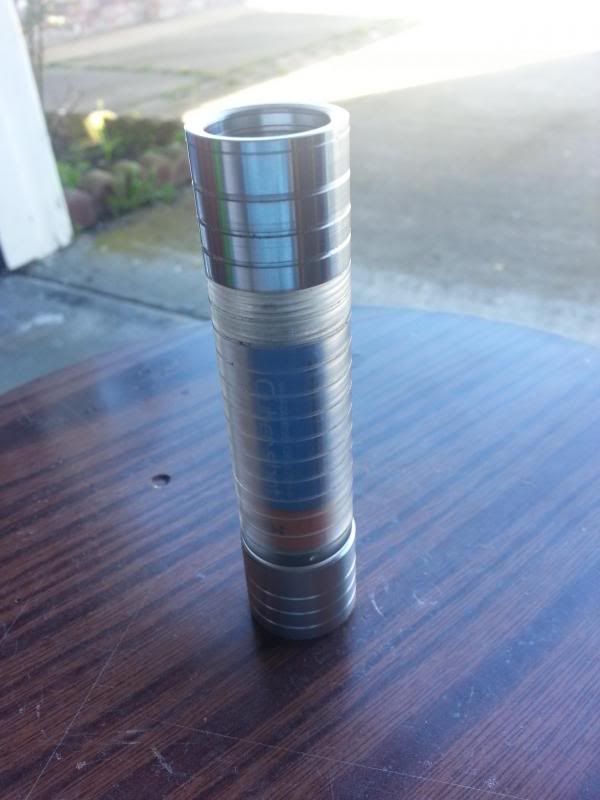
I decided to polish the body with some fine steel wool followed by further polishing with a cloth. Then I cut ribs I to the now smooth body to give me something. To hold onto:
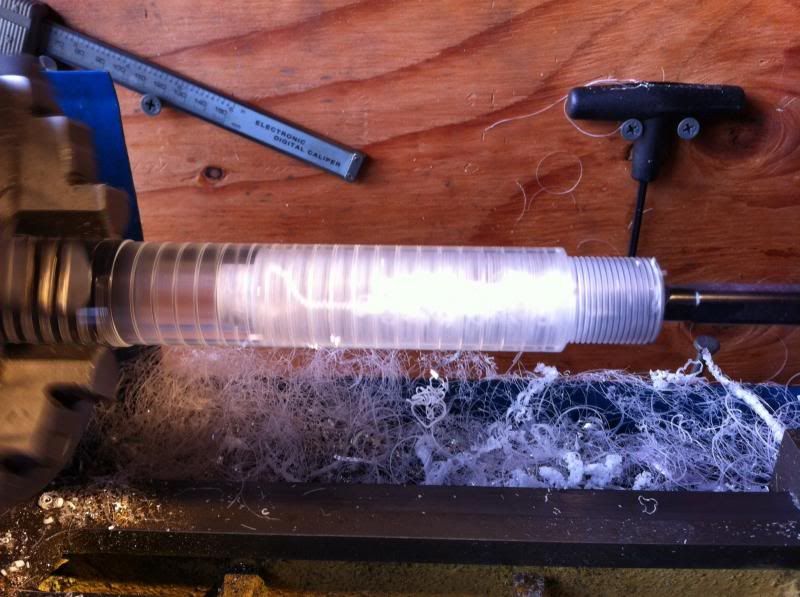
The end was turned down to a smaller diameter and threaded 20TPI for a tail cap:

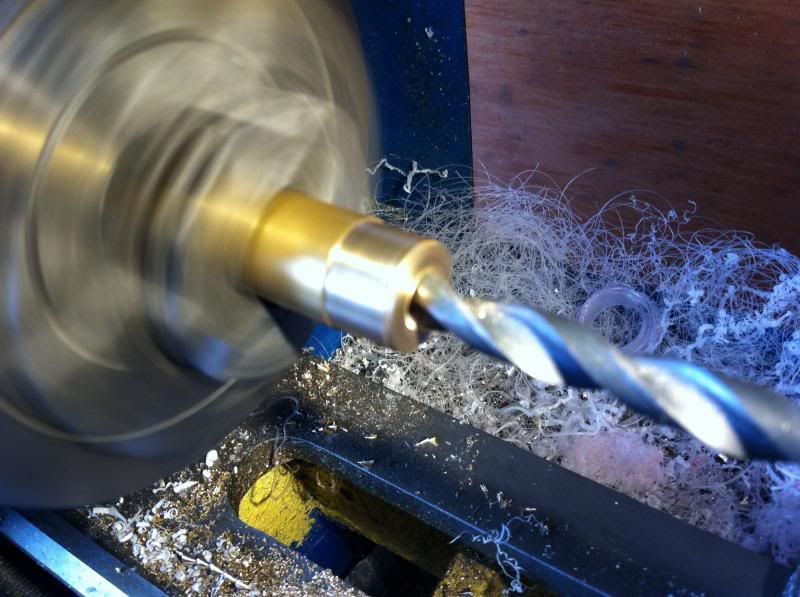
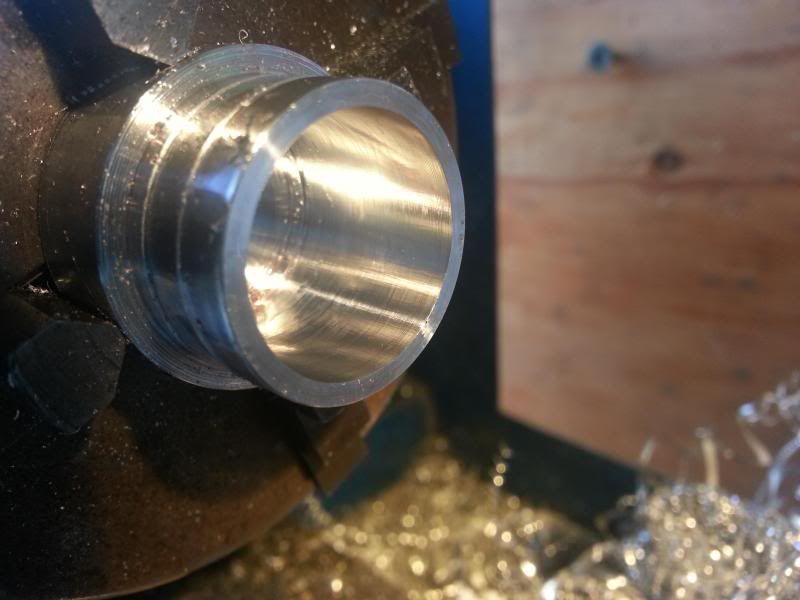
Then the boring part begins:
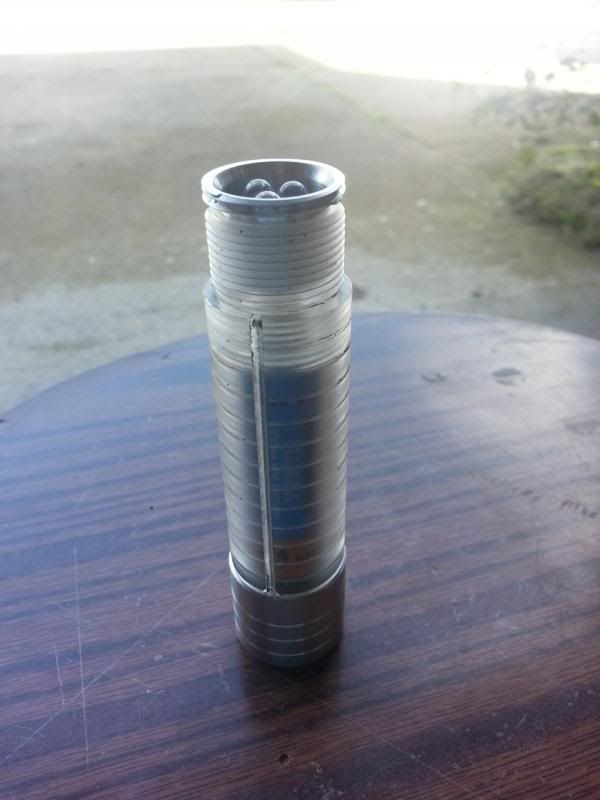
After the boring is done a single groove was cut into the side of the body for its entire length except for the threaded end. The body is then parted off. A bit of masking tape is used to protect the body as I work on the other end of the body. First, the end is bored out then more 20TPI threads are cut into it:
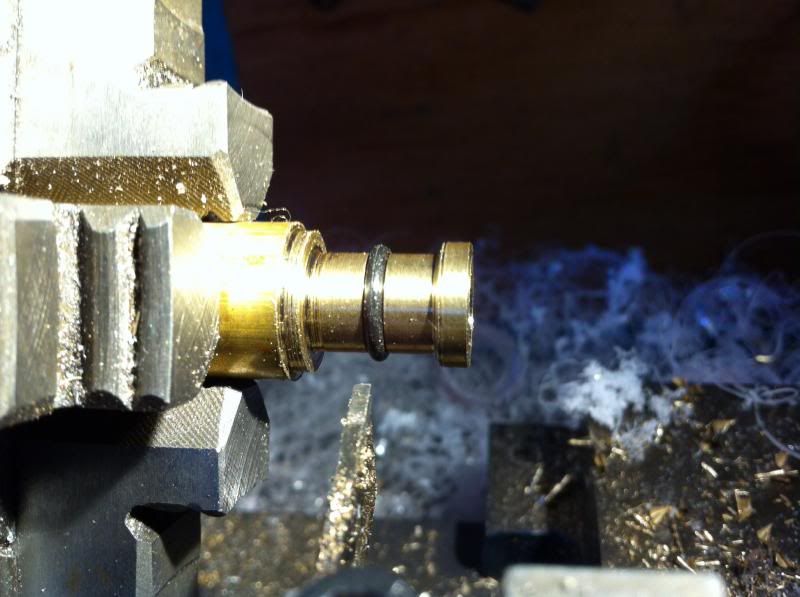
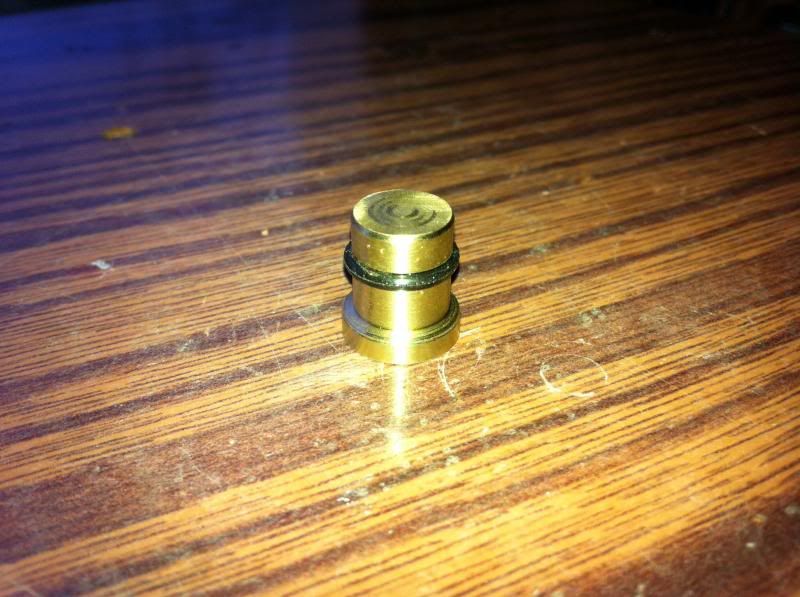
Next comes the tail cap. Chuck a piece of brass into the lathe and drill a hole for a spring then size it as well as cutting an O-ring groove into it:
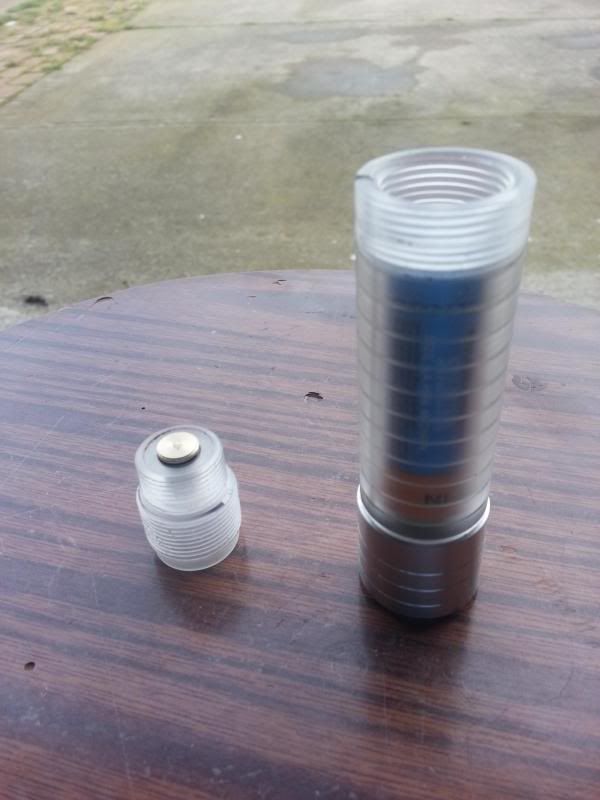
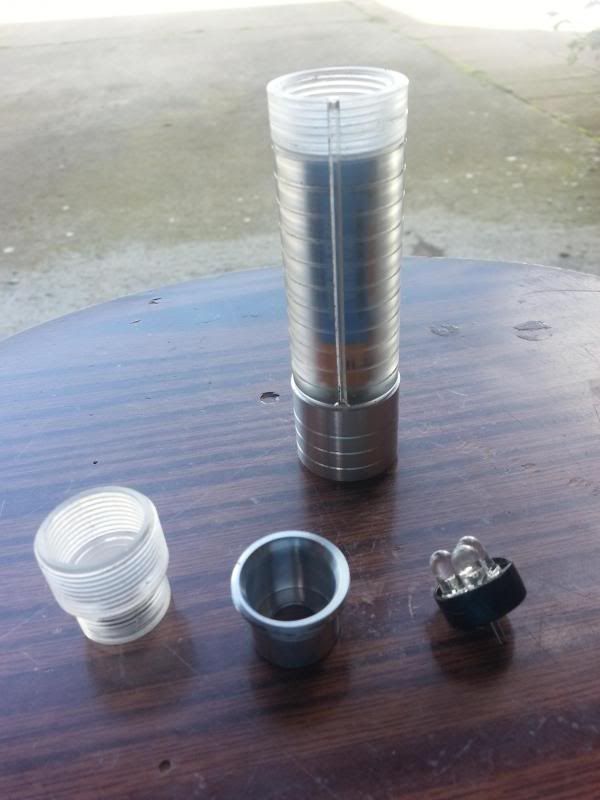
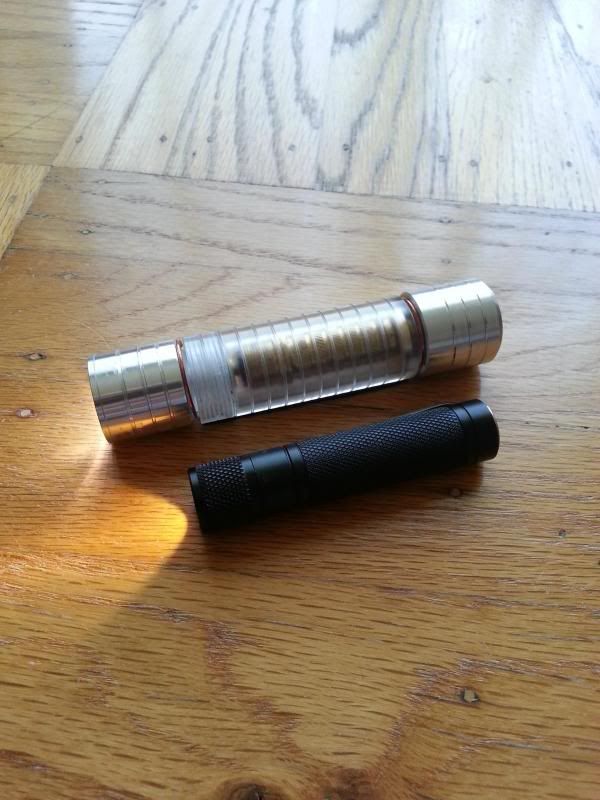
At this point I was getting tired and didn't take pictures of the next two pieces that I had made. They're the tail cap as well an acrylic piece that holds the brass plunger. Here's the completed tail cap along with the body. The brass plunger is spring loaded to compensate for different battery lengths.
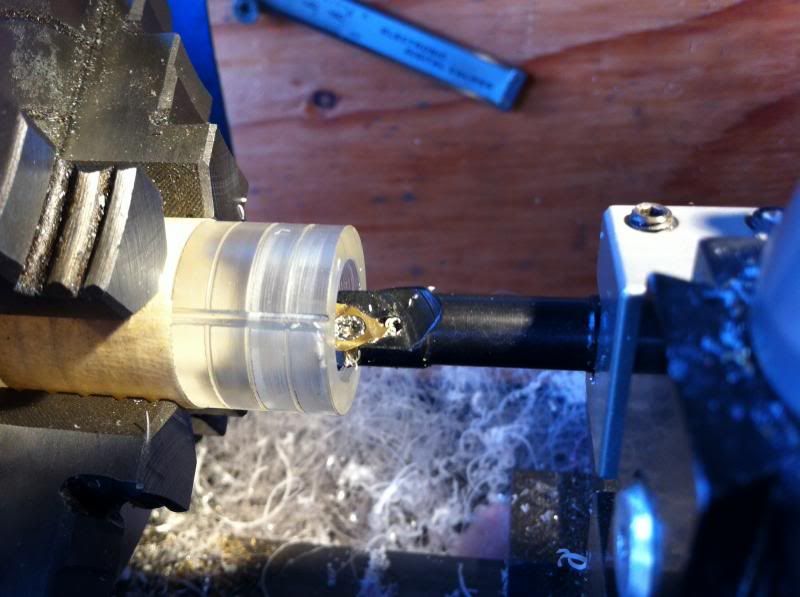
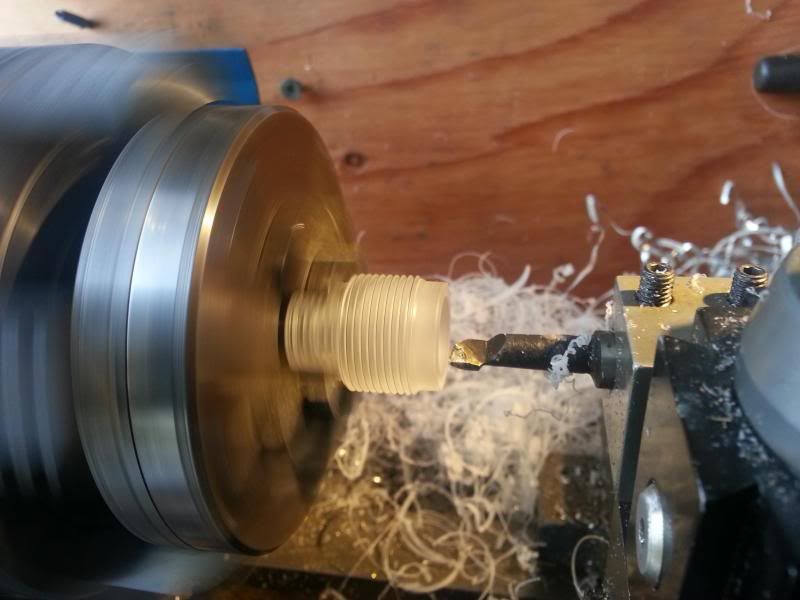
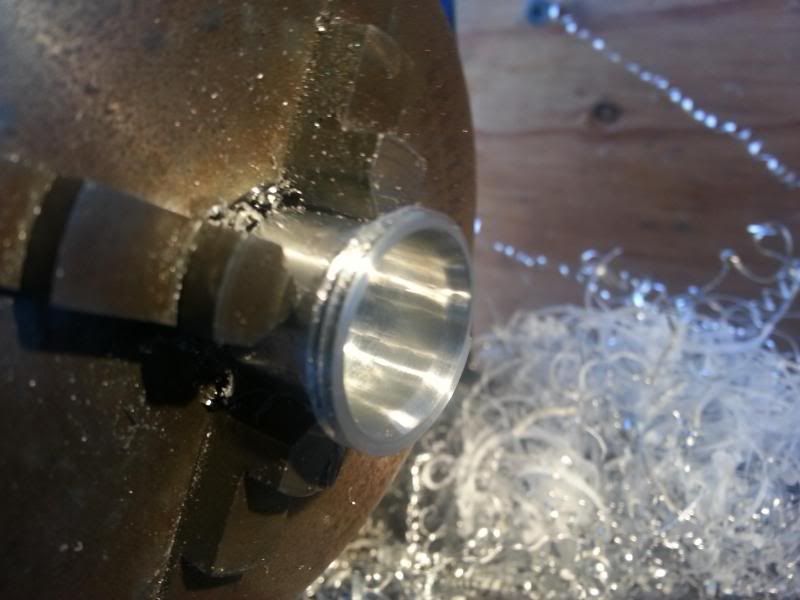
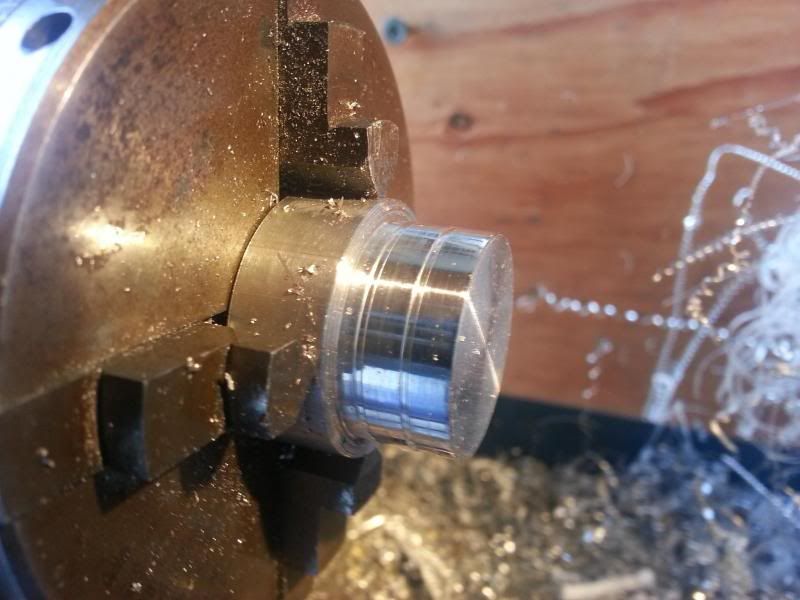
Next comes the head. Using acrylic, I made a piece that threads onto the body's internal threads. The outside is of a larger diameter, which I'll come to regret later. In this picture, it is being bored for the light engine:
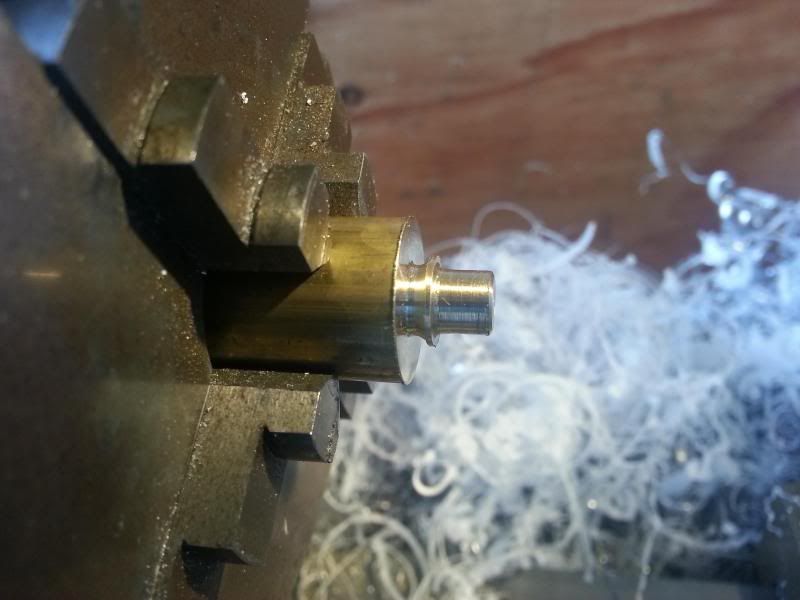
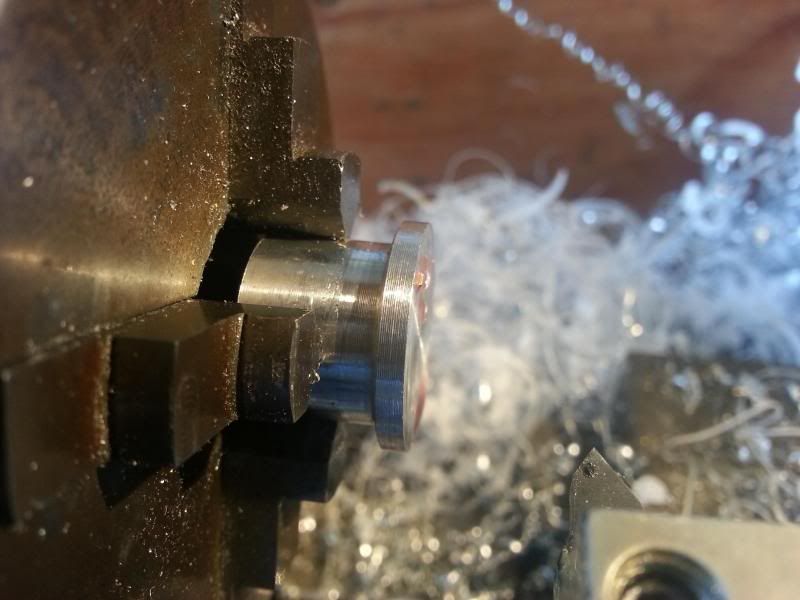
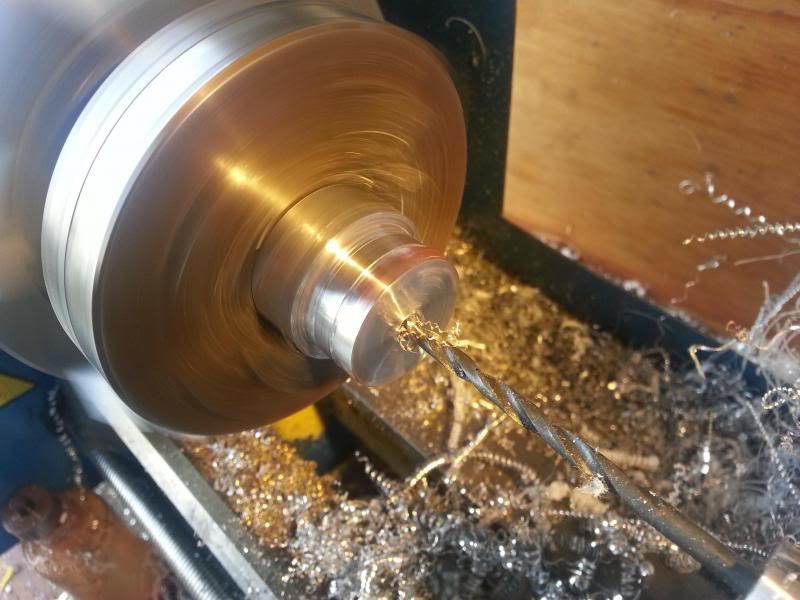
The brass rod is then chucked into the lathe again and this time I'm making the positive contact:
There's a small O-ring between the brass contact and the acrylic piece to seal it from alkali getting into the head:
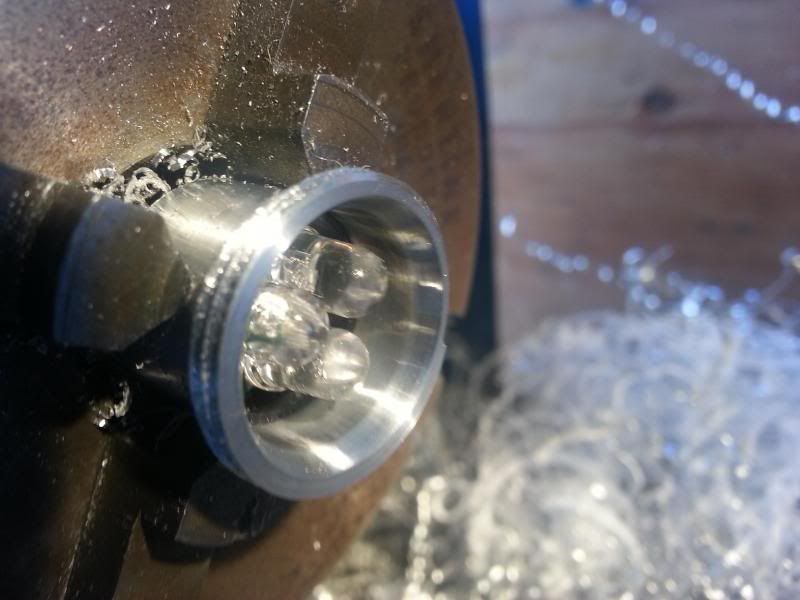
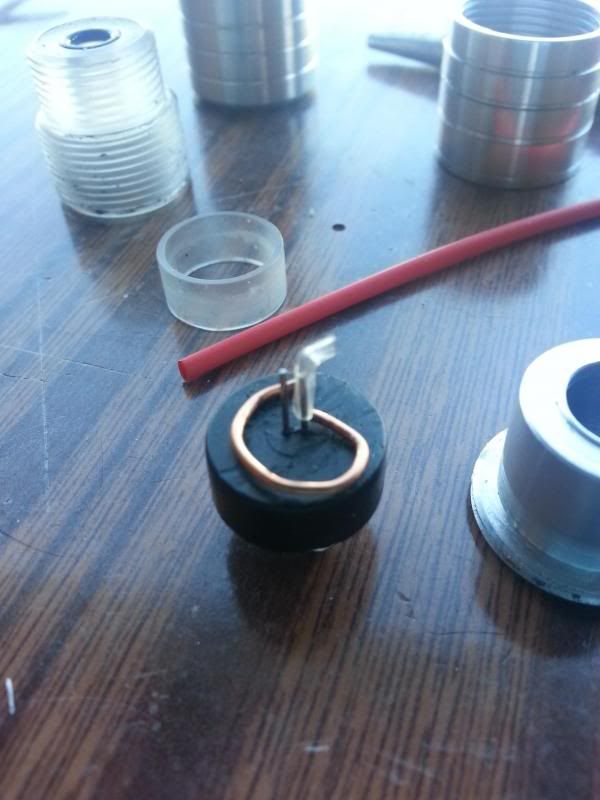
The drop-in goes into the next piece and that piece threads into the head to provide continuity for the negative side:
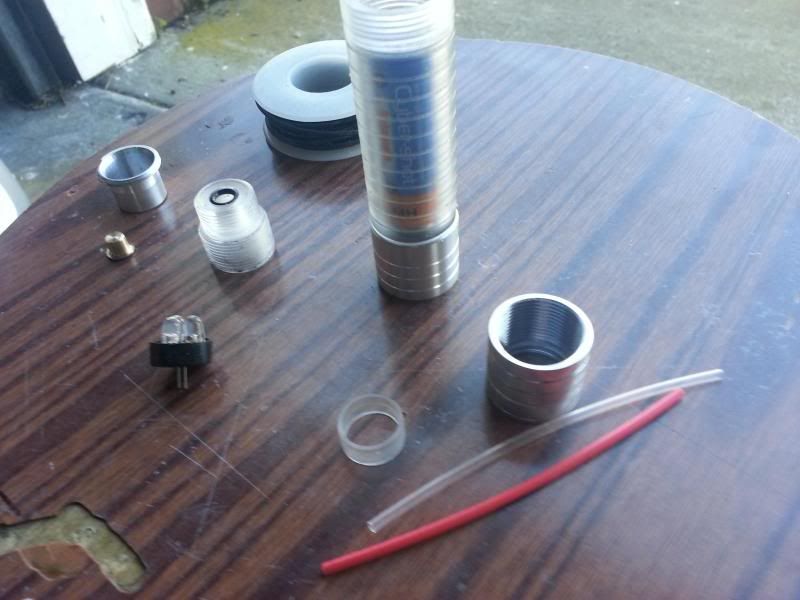
This is how it goes together:
Next, the outer head needs to be made. This was a piece of scrap 7075 I had laying around. Just like making the body, chuck it up, clean it up, bore it out, thread it:
A lens is needed so I cut down a polycarbonate lens that I had cut too small for another project. It started off at 26mm and ended up at 20mm:

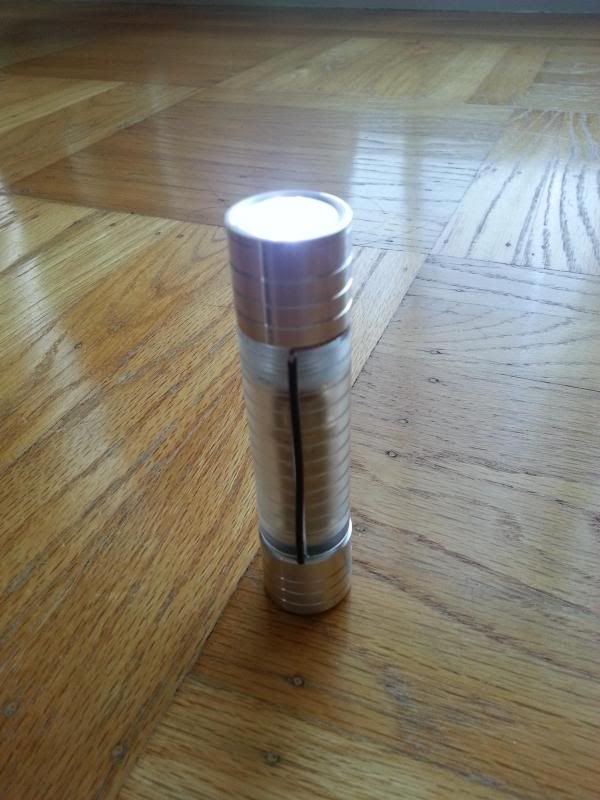
Everything needed to complete this light has been machined so it's just a matter of assembly:

IT'S ALIVE!
There was some discussion recently about battery vampires and the concern about alkaline battery leakage. The thought then occurred to me that a plastic light with just two simple brass contacts would be able to handle a leaking alkaline cell and could easily be cleaned and returned to service. This is a build log for that light.
The light engine that I'm using for this project is the now discontinued Nite Ize 3-LED drop-in module for the Mini-Mag. One of the nice things about this drop-in is that it will drain a single battery down to a really low voltage, low enough to have that battery leak.
The body if the light is made from extruded acrylic rod that I had bought for a project that fell through. Since it was paid for I might as well use it.
First order of business, chuck the acrylic rod into the lathe, drill the end with a center drill and place a live center on it to try to prevent the rod from flexing. After that turn the outside down to even out the casting marks:
I decided to polish the body with some fine steel wool followed by further polishing with a cloth. Then I cut ribs I to the now smooth body to give me something. To hold onto:
The end was turned down to a smaller diameter and threaded 20TPI for a tail cap:
Then the boring part begins:
After the boring is done a single groove was cut into the side of the body for its entire length except for the threaded end. The body is then parted off. A bit of masking tape is used to protect the body as I work on the other end of the body. First, the end is bored out then more 20TPI threads are cut into it:
Next comes the tail cap. Chuck a piece of brass into the lathe and drill a hole for a spring then size it as well as cutting an O-ring groove into it:
At this point I was getting tired and didn't take pictures of the next two pieces that I had made. They're the tail cap as well an acrylic piece that holds the brass plunger. Here's the completed tail cap along with the body. The brass plunger is spring loaded to compensate for different battery lengths.
Next comes the head. Using acrylic, I made a piece that threads onto the body's internal threads. The outside is of a larger diameter, which I'll come to regret later. In this picture, it is being bored for the light engine:
The brass rod is then chucked into the lathe again and this time I'm making the positive contact:
There's a small O-ring between the brass contact and the acrylic piece to seal it from alkali getting into the head:
The drop-in goes into the next piece and that piece threads into the head to provide continuity for the negative side:
This is how it goes together:
Next, the outer head needs to be made. This was a piece of scrap 7075 I had laying around. Just like making the body, chuck it up, clean it up, bore it out, thread it:
A lens is needed so I cut down a polycarbonate lens that I had cut too small for another project. It started off at 26mm and ended up at 20mm:
Everything needed to complete this light has been machined so it's just a matter of assembly:
IT'S ALIVE!
 :twothumbs
")