
Moonshadow
Enlightened
This weekend I completed my latest project. For a while I've been wanting to try a red LED in a Gladius. I think this will make an ideal light for astronomy with the instant adjustability and the very low low.
I've upgraded a couple before with and XP-G and an XM-L:
http://www.candlepowerforums.com/vb/showthread.php?272611-XP-G-modded-Gladius
As mentioned in the previous thread, it helps to get everything organised before you start:
This is my first attempt at a coloured LED upgrade.
Osram on star:
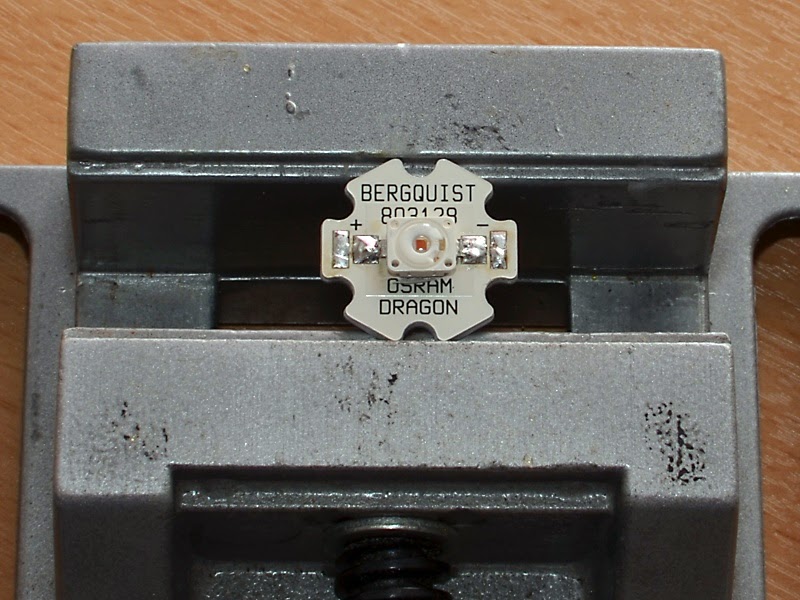
This is the 660nm Hyper-Red Osram, which produces a deeper red than usual, much better for dark adaptation.
Bezel removed:
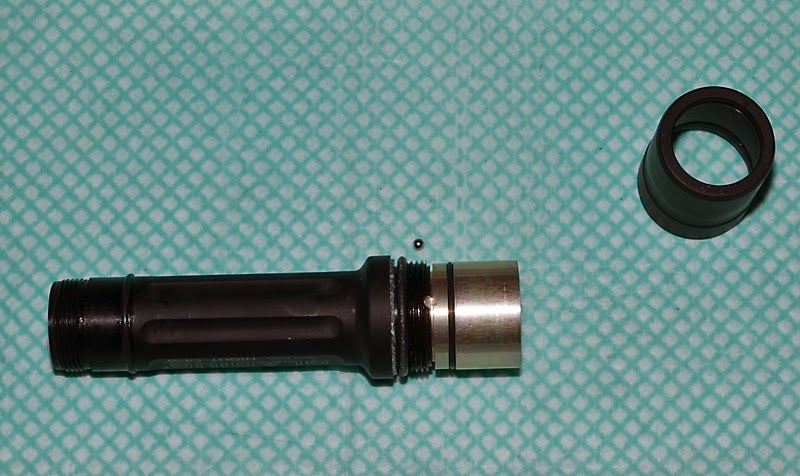
The bezel is held on by a small amount of threadlocking compound. A good twist with a strap wrench is all that's needed to crack it open - there is no need to heat. Note the small ball-bearing that fits into the small circular recess between the threads and the first brass piece: make sure you work over a tray or something to catch this as it falls out.
Reflector assembly detached:

Notice the rubber 'O' ring that sits behind the reflector assembly. When re-assembling, move this to the front so that the reflector sits further back. This ensures that the Osram LED sits at the correct height in the reflector for good focus.
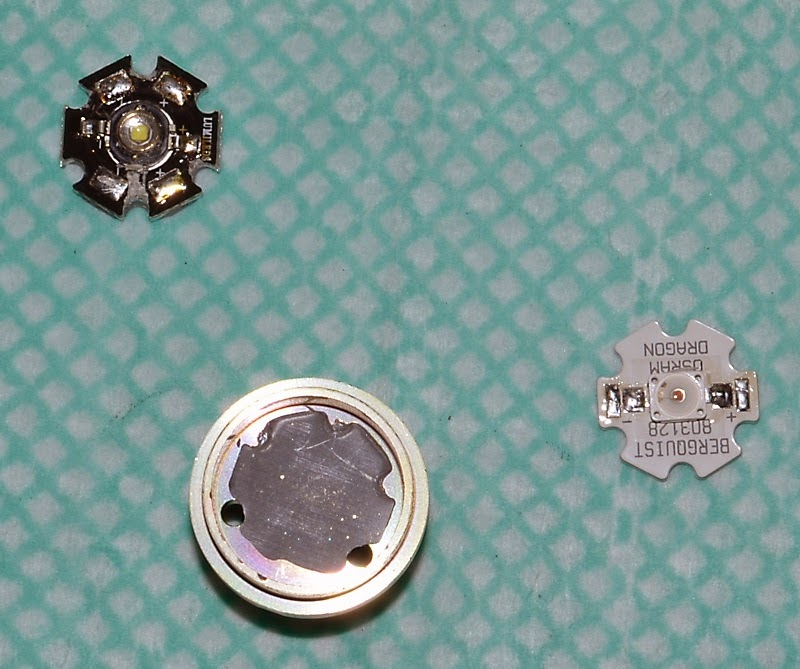
Old and new LED stars:
Wires to old star desoldered:

Pill out:
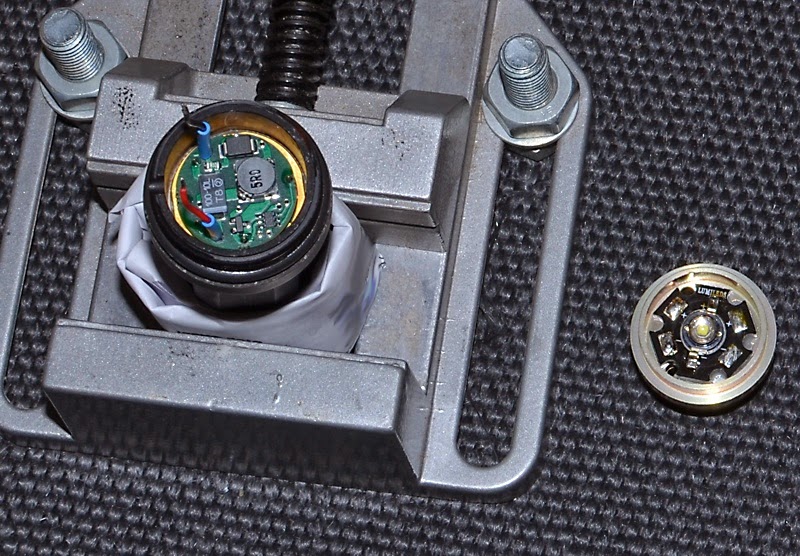
Carefully lift the pill out before working on it: to avoid damage to wires or to the electronics do not apply any pressure or twist while in situ.
Old star removed:
The Luxeon star is held in place with thermal epoxy. A little violence with a pair of pliers is required here. Hold the pill firm in a vice and grip the star with pliers. Twist left and right. At first it feels as though nothing is happening, but twist a couple more times then the star will suddenly break free. The old epoxy can be cleaned off with a dremel and wire brush, although this time I left it in place and just stuck the new star on top with a thin layer of non-setting thermal compound.
New star installed:
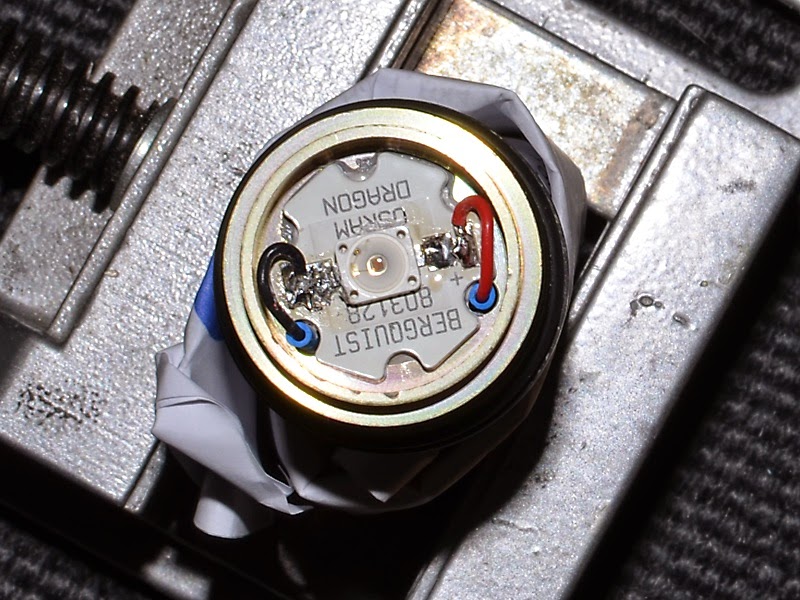
The new star does not need to be glued in place. When resoldering the wires, be careful not to obstruct the slots at the corners of the star: the locating lugs on the back of the reflector fit into these, helping to centre everything up.
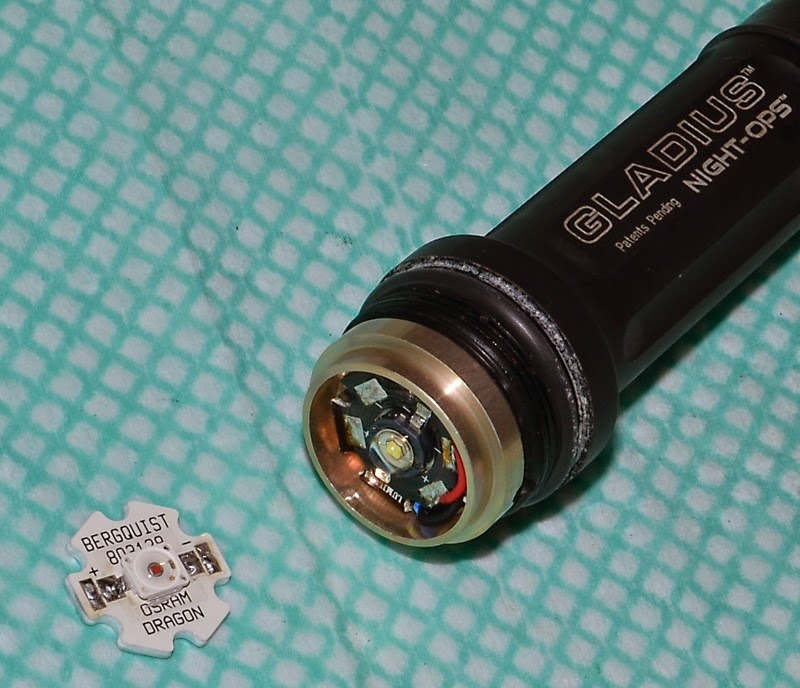
New LED in place:
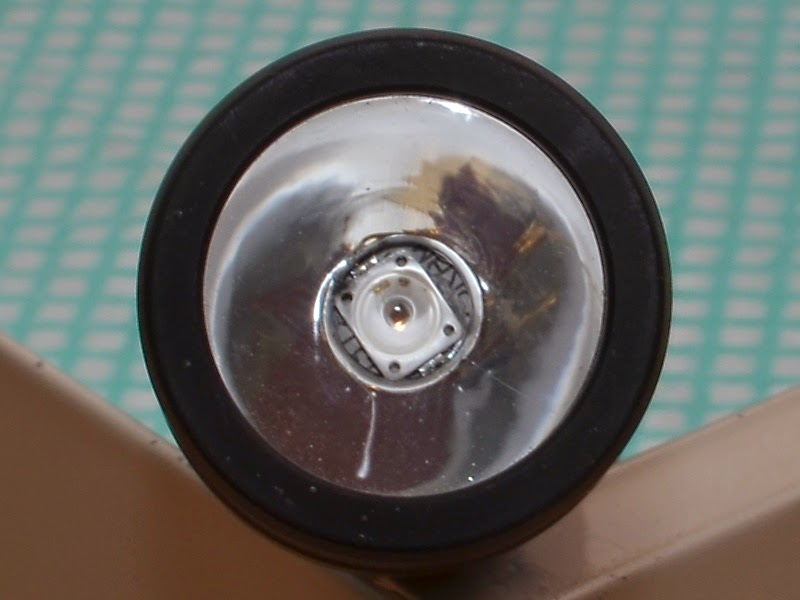
The Osram fits neatly into the reflector opening.
Red beam:
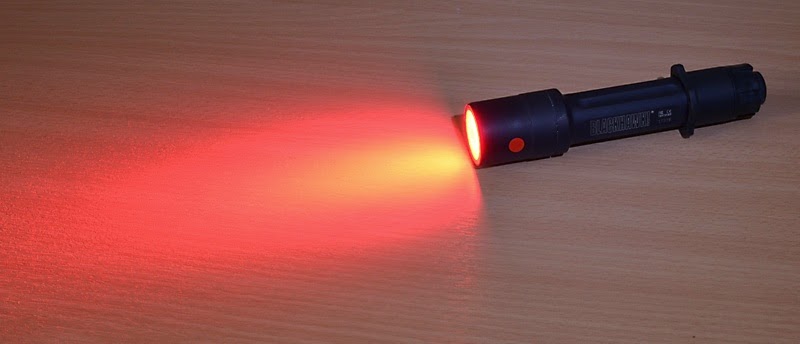
Adjust reflector if necessary to focus the LED. I was able to achieve a beam almost as tight as the original, but here I have added a piece of DC-Fix diffuser to achieve a floodier effect which is more useful for astronomy (illuminating star charts etc). The true colour is difficult to capture on camera. In real life it is a much deeper, saturated red.
I've upgraded a couple before with and XP-G and an XM-L:
http://www.candlepowerforums.com/vb/showthread.php?272611-XP-G-modded-Gladius
As mentioned in the previous thread, it helps to get everything organised before you start:
If you value your sanity, work over a tray or other receptacle to catch any bits (like that ballbearing) that fall out as you dismantle the head. Remove the tailcap and batteries before you start. Do not replace these until after you have re-assembled everything and retightened the head, or you will push the driver board and tube with the ribbon cables out of the head.
This is my first attempt at a coloured LED upgrade.
Osram on star:
This is the 660nm Hyper-Red Osram, which produces a deeper red than usual, much better for dark adaptation.
Bezel removed:
The bezel is held on by a small amount of threadlocking compound. A good twist with a strap wrench is all that's needed to crack it open - there is no need to heat. Note the small ball-bearing that fits into the small circular recess between the threads and the first brass piece: make sure you work over a tray or something to catch this as it falls out.
Reflector assembly detached:
Notice the rubber 'O' ring that sits behind the reflector assembly. When re-assembling, move this to the front so that the reflector sits further back. This ensures that the Osram LED sits at the correct height in the reflector for good focus.
Old and new LED stars:
Wires to old star desoldered:
Pill out:
Carefully lift the pill out before working on it: to avoid damage to wires or to the electronics do not apply any pressure or twist while in situ.
Old star removed:
The Luxeon star is held in place with thermal epoxy. A little violence with a pair of pliers is required here. Hold the pill firm in a vice and grip the star with pliers. Twist left and right. At first it feels as though nothing is happening, but twist a couple more times then the star will suddenly break free. The old epoxy can be cleaned off with a dremel and wire brush, although this time I left it in place and just stuck the new star on top with a thin layer of non-setting thermal compound.
New star installed:
The new star does not need to be glued in place. When resoldering the wires, be careful not to obstruct the slots at the corners of the star: the locating lugs on the back of the reflector fit into these, helping to centre everything up.
New LED in place:
The Osram fits neatly into the reflector opening.
Red beam:
Adjust reflector if necessary to focus the LED. I was able to achieve a beam almost as tight as the original, but here I have added a piece of DC-Fix diffuser to achieve a floodier effect which is more useful for astronomy (illuminating star charts etc). The true colour is difficult to capture on camera. In real life it is a much deeper, saturated red.
Last edited: