

'SHOT SHOW Specials' are a series of reviews inspired by, or as a consequence of, my visit to the SHOT SHOW 2015.
These may contain photos taken while travelling, and may be of a slightly different format.
---------------------------------------------------------------------------------------------------------------------
Author's Statement for Transparency and Disclosure
The test sample/s featured in this article have been provided for technical testing and review by the manufacturer. Test samples are retained by the reviewer following publication of the completed review for the purposes of long term testing and product comparisons.
All output figures and test results published in this review are the sole work of the reviewer, and are carried out independently and without bias. Test results are reported as found, with no embellishments or alteration. Though best endeavours are made to maintain the accuracy of test equipment, the accuracy of these results is not guaranteed and is subject to the test equipment functioning correctly.
----------------------------------------------------------------------------------------------------------------------
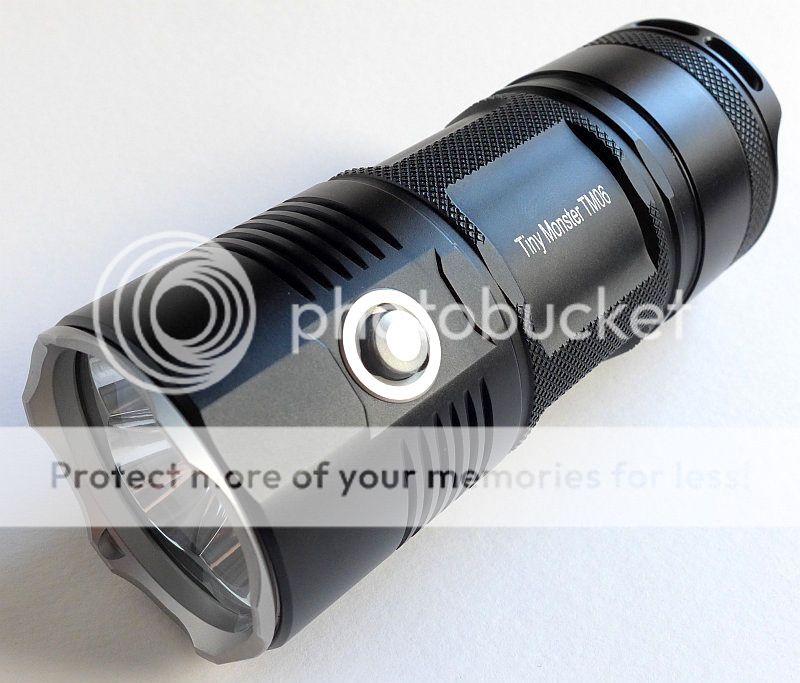
NITECORE have gone back to the basics of the Tiny Monster range and created a new Tiny Monster, a smaller and brighter light truly worthy of the name!
Taking a more detailed look:
Just like the very first TM11, the TM06 comes in a neat cardboard box.

Inside, the TM06 is already in its holster.

Included are the TM06, holster, lanyard and spare o-ring and the instructions.
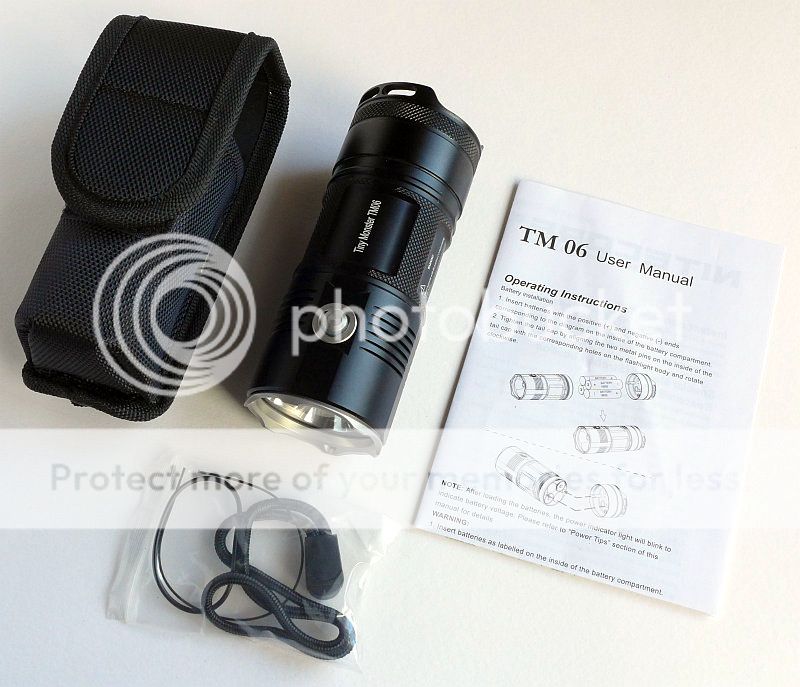
The holster has a D-ring, permanent belt loop and a Velcro closed loop as well.

In a deviation from the other TM series lights, the TM06 has a tail-cap switch as well as the side switch.
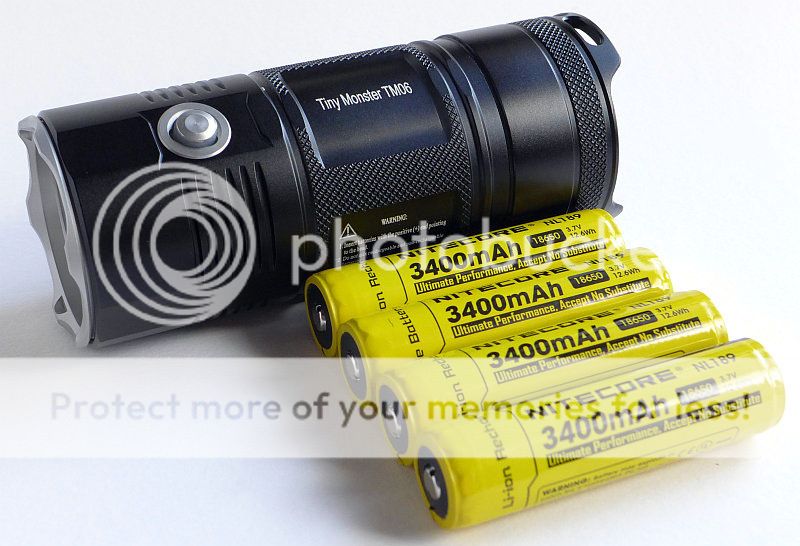
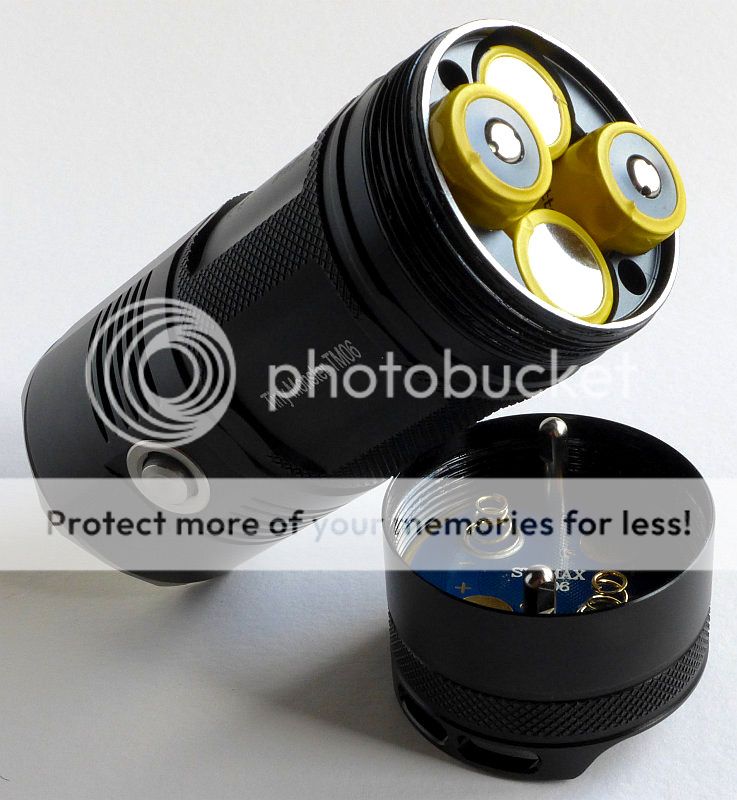
NITECORE have managed to pack 4 x 18650 cells inside the TM06's tiny body.
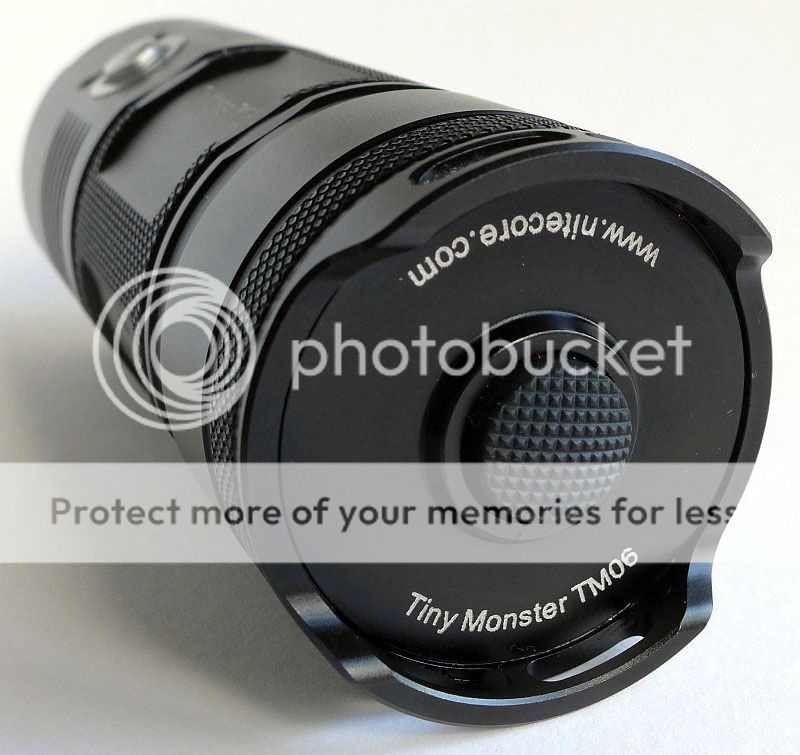
Look carefully before you fire up the TM06 in excitement as it comes with a plastic lens protector fitted.
It is obvious once you peel it back.
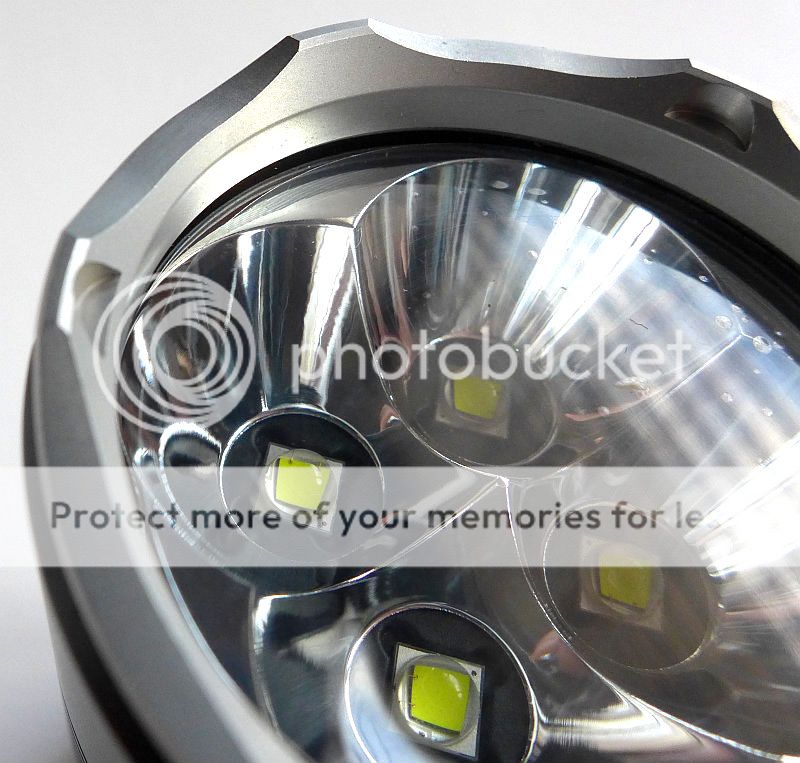
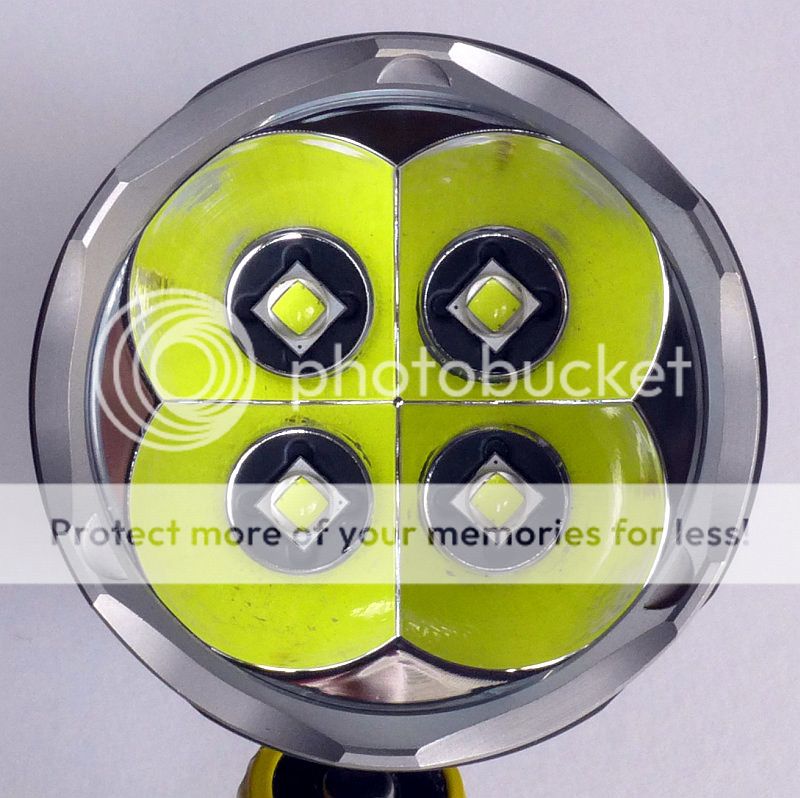
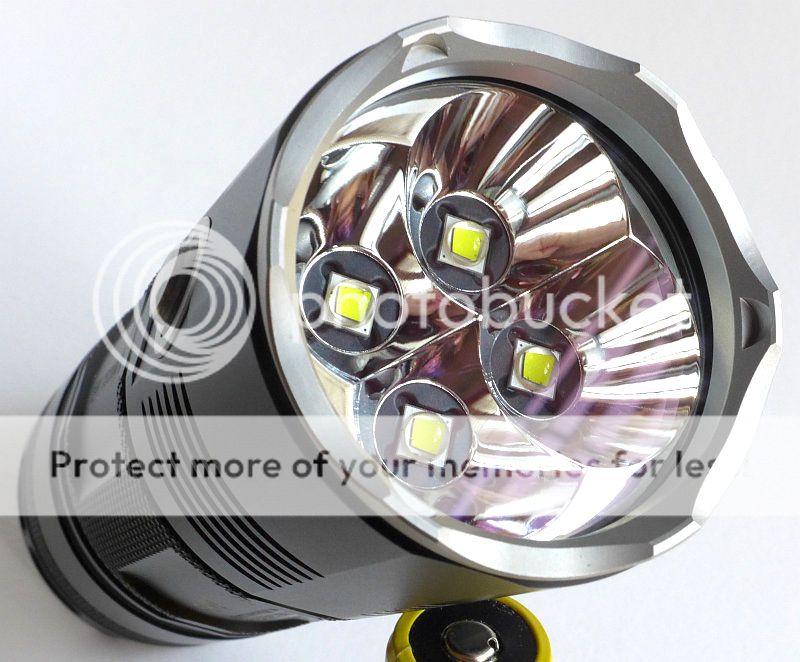
With four XM-L2 LEDs crammed into it, the TM06 uses a compound reflector.

Looking dead onto the LEDs, a view you won't want to have when you unleash Turbo mode!
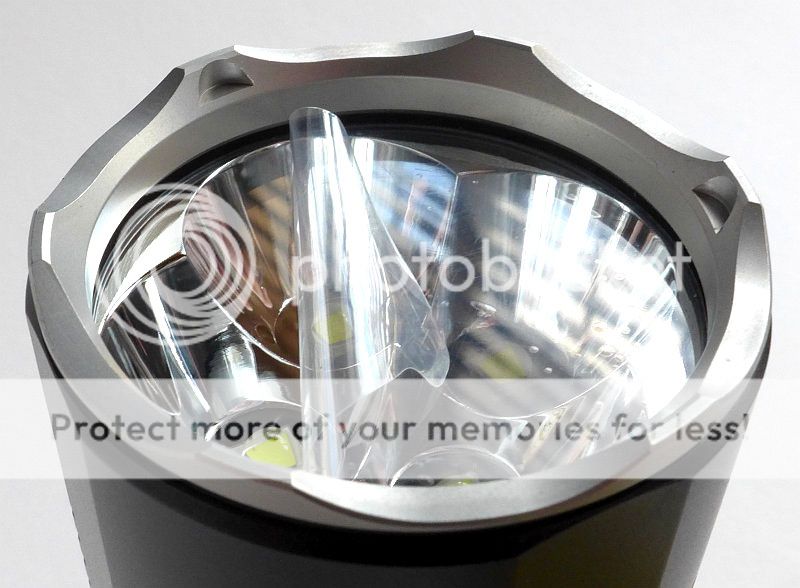
As well as another view of the compound reflector you can also see hints of the lens coating as a purple colour.
The tail-cap has a rotating connection board in it. The pairs of connections are clearly marked and the connected positive and negative pairs easy to spot. When the tail-cap switch is ON the outer contact ring is connected to the right hand pair of contacts. The two pins fit into locating holes in the body to keep the contacts properly aligned.
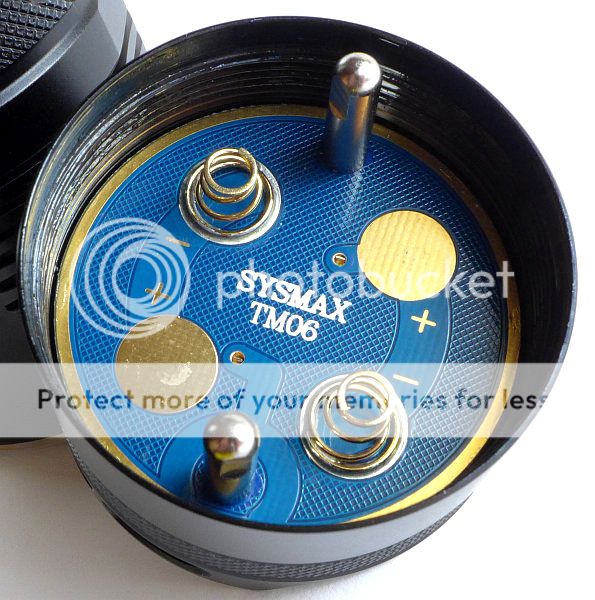
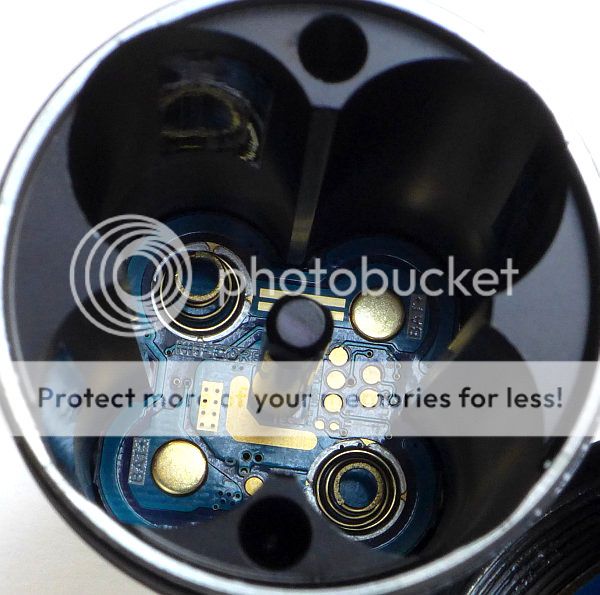
Inside the TM06's body the other set of contacts can be seen.
Fully loaded the TM06 looks like this.
NOTE: The warnings engraved into the side of the TM06 start with "1. Insert batteries with the positive (+) end pointing to the head.". This is of course wrong for the TM06 but would have been right for the TM11.
Out of the box, the threads look like this, standard cut, fully anodised and well lubricated. The sample I have has the threads cut too tightly, and has started to grind and loose the anodised finish. This has not caused any ill effects so far other than to make the tail-cap stiffer than it should be. NITECORE have told me that this issue has been addressed already.

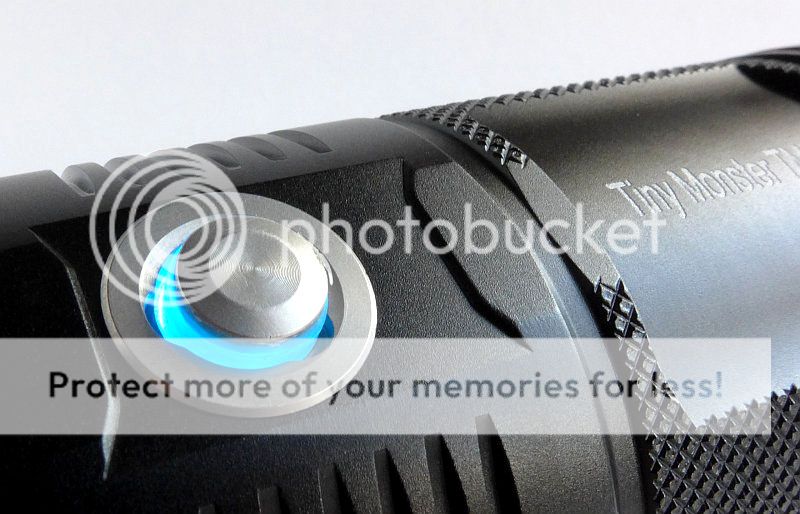
With a new design of illuminated switch, the metal button sits on top of a clear rubber post and lights up as shown.
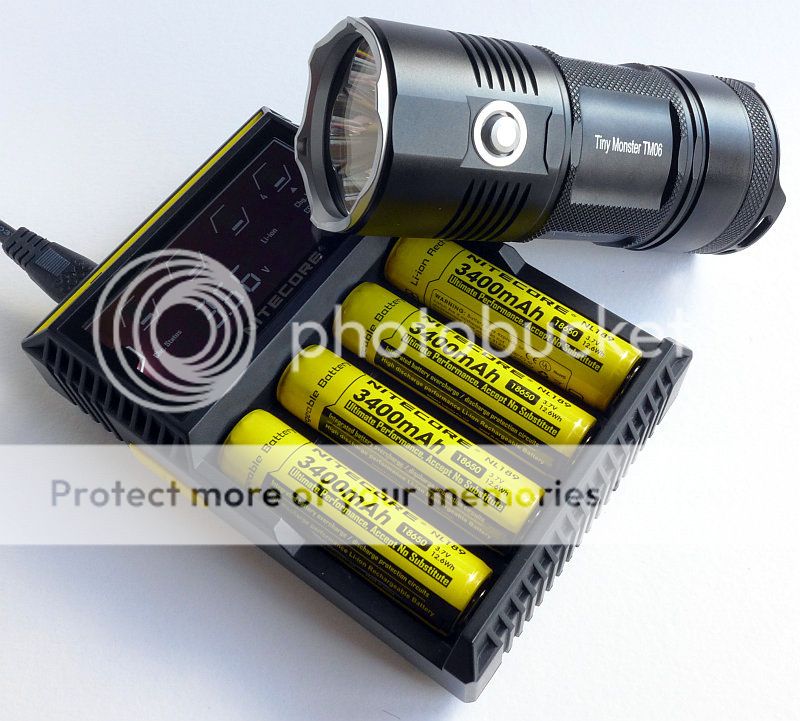
The TM06 waiting for its fill of cells charged on the D4 Digi-charger, and looking small compared to the charger.
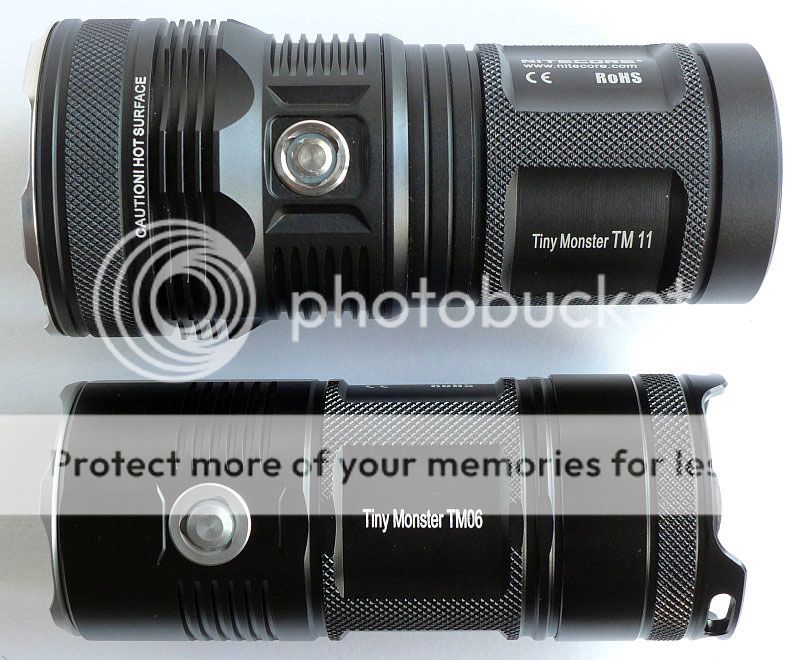
As you can see, the TM06 is quite a bit smaller than the TM11 and yet much brighter.
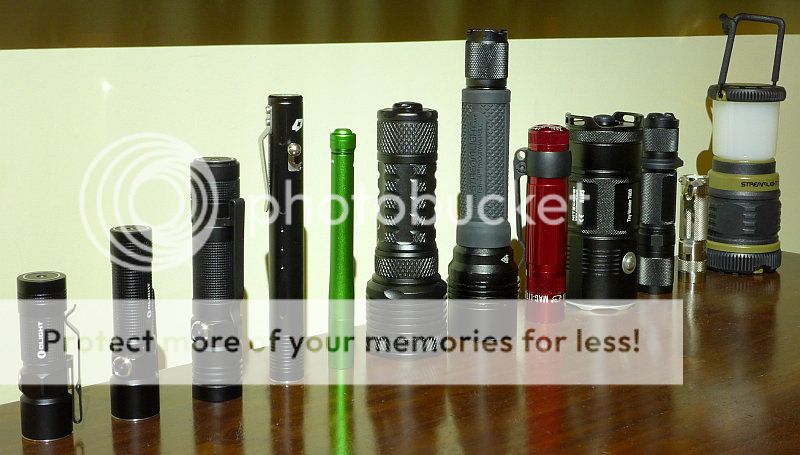
For a further idea of size, here is the TM06 amongst a batch of lights on test.
From left to right these are: Olight S10R, Olight S15R, Olight S30R, FOURSEVENS Bolt-Action, FOURSEVENS Preon P2, FOURSEVENS MMU-X3R, Streamlight ProTac HL3, MAG-LITE XL200, NITECORE TM06, Lumintop ED20-T, V54 DC25Cvn and the Streamlight Siege AA.
The beam
Even though the TM06 is super compact for the output, it is still not really an EDC light due to its weight (with 4x18650). However, its beam still works very well indoors with a very wide spill. The compound reflector does have visible artefacts which are much more visible at close range.

Please be careful not to judge tint based on images you see on a computer screen. Unless properly calibrated, the screen itself will change the perceived tint.
The indoor beamshot is intended to give an idea of the beam shape/quality rather than tint. All beamshots are taken using daylight white balance. The woodwork (stairs and skirting) are painted Farrow & Ball "Off-White", and the walls are a light sandy colour called 'String' again by Farrow & Ball. I don't actually have a 'white wall' in the house to use for this, and the wife won't have one!
To get the full impact of the TM06, first here is the reference Fenix TK41 I regularly use for comparison.

Then switch on the sun as you power up the TM06 on Turbo!. Those close range artefacts are not noticeable now the range has increased, and the entire space is filled with light.

Modes and User Interface:
With the introduction of a tail-cap switch into the Tiny Monster range with the TM06, the interface is quite different from others in the range.
The TM06 has 5 main modes (Turbo, High, Mid, Low, Lower) and three flashing modes (Strobe, Beacon and SOS).
The Tail-cap switch is the master switch, and when set to OFF, the side button cannot activate the main beam.
To turn on the switch locator flashes, when the tail-cap switch is OFF, fully click the side switch. It will then flash to make it possible to locate the TM06 in complete darkness. To turn this feature off, simply give the side switch another full press.
Combining the tail-cap and side switch allows for instant access to Lower or Turbo modes.
To access Lower directly, half press the side switch and at the same time click the tail-cap switch ON.
To access Turbo directly, fully press the side switch and at the same time click the tail-cap switch ON.
Without touching the side switch, operating the tail-cap switch will turn the TM06 onto the last used constant output mode.
When ON (with the tail-cap switch ON), to move between the output levels the TM06's two-stage side switch allows you to either increase or decrease the brightness. When ON, a half press reduces the output level, a full click increases it. This way you can move up and down the scale instead of having to cycle through all the modes – big thumbs up to this feature!
To access flashing modes, with the TM06 ON, press and hold the side button fully for more than one second. To move to the next flashing mode, press and hold the side switch again.
Batteries and output:
To provide sufficient power, the TM06 can only use 4 x 18650 cells. These should be matched and protected as they are run in series. However there is a built-in potential balancing issue I will discuss further when looking at the parasitic drain.
To measure actual output, I built an integrating sphere. See here for more detail. The sensor registers visible light only (so Infra-Red and Ultra-Violet will not be measured).
Please note, all quoted lumen figures are from a DIY integrating sphere, and according to ANSI standards. Although every effort is made to give as accurate a result as possible, they should be taken as an estimate only. The results can be used to compare outputs in this review and others I have published.
| NITECORE TM06 | I.S. measured ANSI output Lumens | PWM frequency or Strobe frequency (Hz) |
|---|---|---|
| Turbo | 3547 | 0 |
| High | 2226 | 0 |
| Medium | 534 | 0 |
| Low | 70 | 0 |
| Lower | 5 | 0 |
| Strobe | 959 | 20 & 18.5 & 16.1 |
| SOS | 3629 | 0 |
| Beacon | not measured | Flash every 1.54s |
Parasitic drain on the TM06 is unusual and something you should be aware of. Of the four 18650 cells needed by the TM06 to function, only two are used by the control/processing circuit. This circuit has a drain which is much higher than the drain for the other two cells. Of course this results in an imbalance in the cells state of charge.
For the pair of cells in 2S configuration, the drain is 1.4mA (when the switch location feature is not in use). At this drain this pair of cells will be fully depleted in 101 days. Turn on the switch flashes and the drain goes up to around 2.86mA and the time to deplete the cells down to 50 days.
Compare this to the second pair of cells which have a drain of 0.07mA and a time to deplete the cells of 5.54 years (2024 days) and you can see the issue.
If you use the switch flashes for 25 days, the first pair of cells will be at 50% capacity. Over the same period the second pair of cells will be at around 98%. You would never load a light with cells at this different state of charge.
When activated, though the processing circuit uses 2S1P in standby, all four cells are used in 4S1P. NITECORE have explained that the reason only 2 cells are used to power the processing circuit is to reduce standby power overall. Personally I would have preferred all four cells drain equally, or for a 2S2P to be used to power the output.
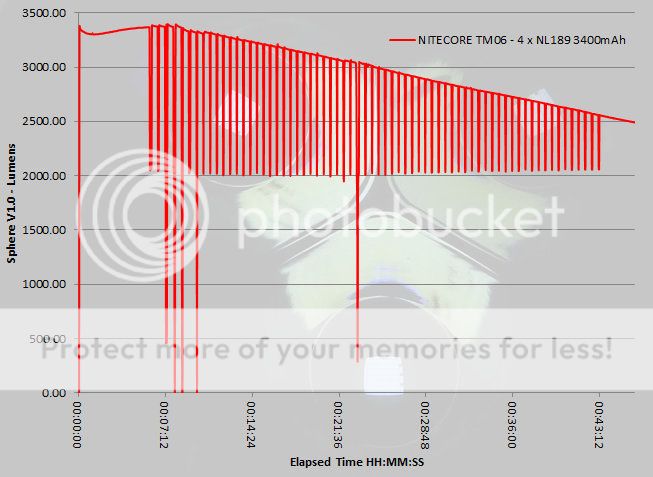
Being so small and powerful, the TM06 is pushing the boundaries of performance. Interestingly, after the initial drop in output in the first minute, the TM06's output climbs again.
The first 6 minutes are uninterrupted maximum output. Then EVERY 30s the output drops to High. It can be reset as seen in the graph (though on occasion I ended up turning it off for a split second). This continued until the output dropped to just over 2500lm after which the run continued without interruption.
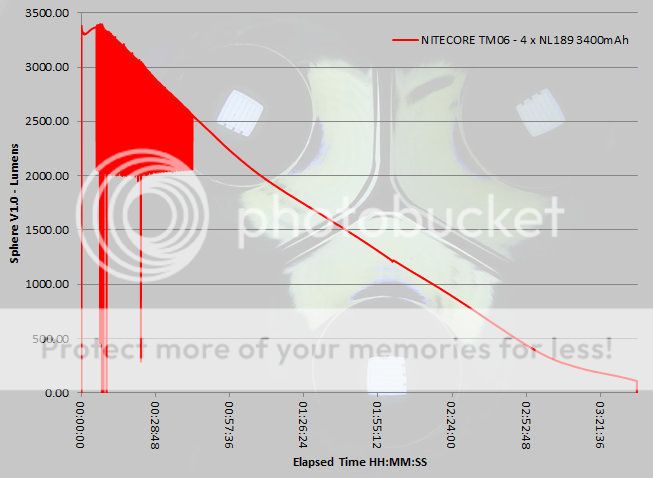
This 30s reset cycle can be seen more clearly by zooming into the first part of the output trace.
Troubleshooting
This is a new section I am adding to mention any minor niggles I came across during testing, in case the information helps anyone else.
Nothing has come up during testing.
As per the description of this section, this information is provided in case anyone else finds a similar 'issue' that might be fixed in the same way.
The TM06 in use
The TM06 is a true Tiny Monster, and gives you the dilemma of 'Do you really need to EDC 3500+ lumens?'
Not really EDC size, by anyone's standards, but the TM06 is getting so close to making this a serious consideration for regular carry. The main factor counting against carrying the TM06 is the weight. With four 18650s in such a compact package it is relatively heavy for its size (thanks to NITECORE packing so much into this small light).
When you want to be packing serious lumens, the TM06 gives you the smallest most convenient way of doing this. If a TM26 or TM15 is just too big to justify carrying, the TM06 could still easily sneak into your bag.
The new layout with a tail-cap switch changes the ergonomics of the TM lights. Instant access to Turbo or Lower is now a two handed job, and going from switching it on, to changing modes, back to switching it off again, requires some juggling around of the TM06 in your hand. Perhaps a small price to pay for such a compact powerhouse, but I'd probably have preferred the TM11 interface and no tail-cap switch.
What the tail-cap switch does give you is true momentary operation (being a forward clicky), and reliable instant OFF, and the TM06 is small enough to use an overhand grip with the thumb resting on the tail-cap switch.
Tail-standing is ultra-stable, with the only downside of using the TM06 like this that the super wide flood beam can make the TM06 dazzling if sitting on a table.
The anti-roll flats on the TM06 do almost nothing to stop it rolling, so don't rely on these.
When trying to use the instant ON to Lower mode, I found the two-stage switch a little difficult to tell when the first stage was pressed. It needs a bit of practice to get the feel for the first stage, and is not to be relied upon if trying to switch it on in a hurry or with gloves.
Unlike the majority of lights, you can either choose to go up the scale of output, or down. A half-press changing down one mode, and a full-press going up one mode. This is one feature I've found particularly good.
Also of note: When ON the TM06 keeps its switch illumination lit. This is quite bright and would be distracting in the Lower mode, however NITECORE have made the TM06 switch illumination turn off when in Lower mode. Excellent attention to detail.
Though you can lock out the TM06 with a turn of the tail-cap, this only locks-out full activation and does not stop parasitic drain. To stop all drain you need to expose the o-ring which means virtually completely unscrewing the tail-cap.
Knowing its little foibles (and the need to charge all the cells fully before a serious session) the TM06 is a fantastically capable, solidly-built light with extreme performance.
Review Summary
| Things I like | What doesn't work so well |
|---|---|
| 3547 ANSI OTF lumens in a super compact body! | Potential cell balancing issue |
| True Momentary operation | Requires two-handed operation at times |
| Can go up OR down the scale of output modes | Two-stage switch can feel a little 'vague' |
| Switch illumination goes off in Lower mode | Incorrect warning on the side of the TM06 |
| Fantastic flood beam | Beam artefacts can be distracting at close range |
| Really useful 5 lumen Lower mode |
If you enjoyed my reviews, please remember to 'Like' me on Facebook and follow me on Twitter @Subwoofer_CPF
to get all the latest updates and news.
You can also find exclusive insights on Instagram and Pinterest


to get all the latest updates and news.
You can also find exclusive insights on Instagram and Pinterest
Last edited:
") :devil:
:devil: (shall I make a smaller version of my banner so it doesn't seem like you are shouting my name?)