
Ok First real review (not possibly done by someone else previously).
Nitefighter BT21 1800LM Cree XM L2 2 LEDs Water-resistant Mountain Bike Lights-15.46 and Free Shipping| GearBest.com
NITEFIGHTER?BICYCLE LIGHT
And time to start the review. DHL was kind and came on a holiday to bring me my light!
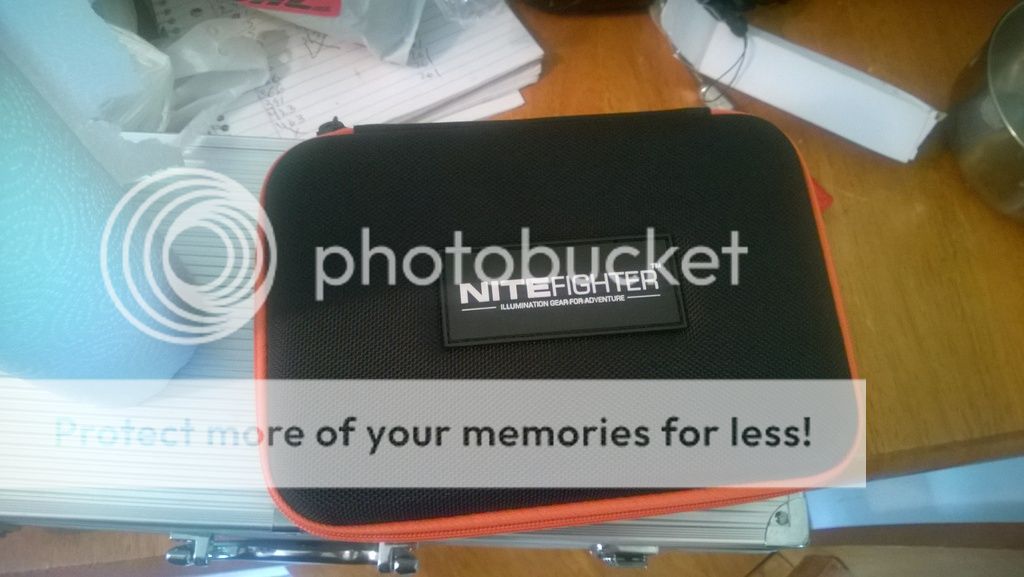
First up the case. OMG THE CASE!!!! Quality is GREAT. Very solid, well built, TOP NOTCH. And for me, it feeds my need, MY NEED FOR ORANGE!!!
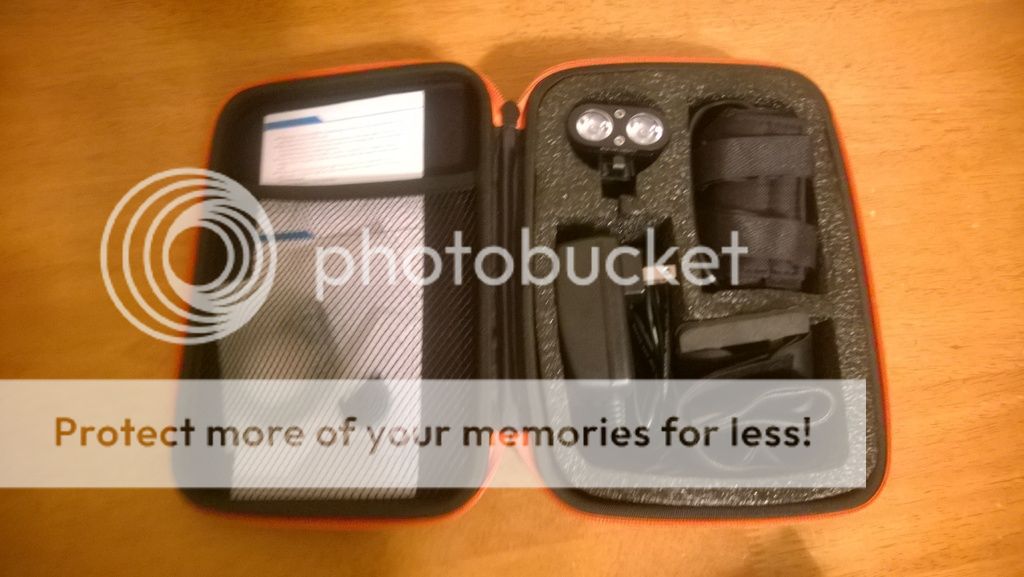
All kinds of storage space, enough for second light and pack once you remove gigantic charger. ALso a mesh pouch for storing the small stuff (bands, velcro, whatever else you want to put in it, is got a ton of space too)
Next up parts list:
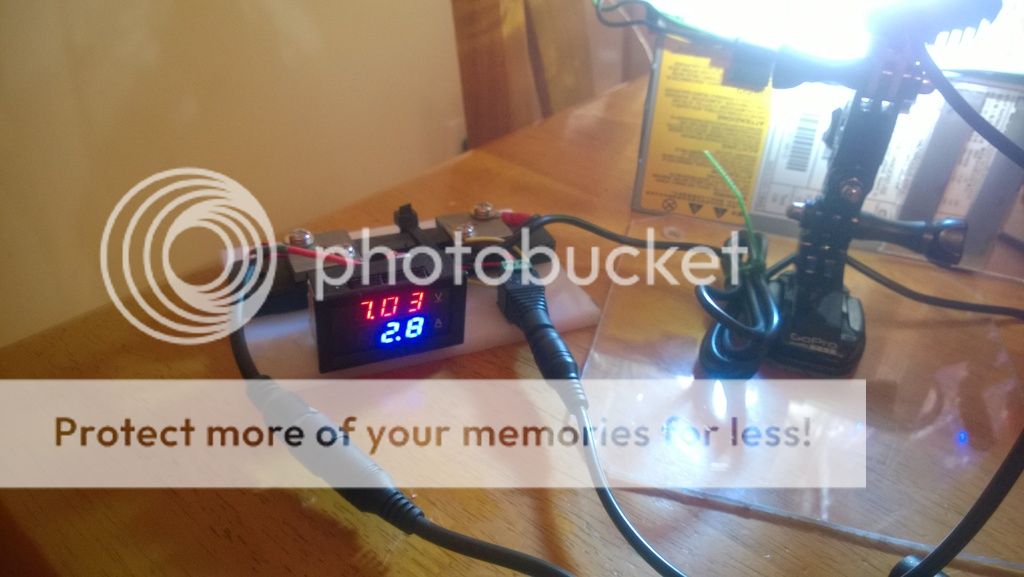
-Light head: Weight 93g (35ish above yinding for reference), Lumens Id say around 1200 on turbo is my "guess" maybe a bit more but optics make it difficult to judge.
-Charger: 2000mA (yeap 2 amp charger) big solid charger with indicator, very nice.
-Battery pack with pouch: Rubber housing around pack, not cheap thin stuff either. Pouch is dual strap long center velcro tabs to hold pack inside with proper eyelet hole for cable. Uses the nice thick magicshine (available at DX too) 20awg cable.
-Extension cable, also 20awg MS/DX cable!
-ACTUAL USABLE HELMET MOUNT. Has the rubber type foam on the back, uses 2 long velcro straps for easy use on vented helmets (very excited because sons helmet cant fit an adhesive gopro mount not can my commuting helmet)
-rolled up velcro cable strap (yeap they thought of holding the cables to the frame too, got you covered)
-And Finally, UNDERSTANDABLE and very clear instructions with charts .
Nitefighter thought this one out heavily and I swear spent time reading these forums and learning what we all need. Too bad BT40S kits dont come with all these goodies too.

And WHAT YOU ALL HAVE BEEN WAITING FOR. My "Lab tests" http://ficdn.mtbr.com/images/icons/icon14.png
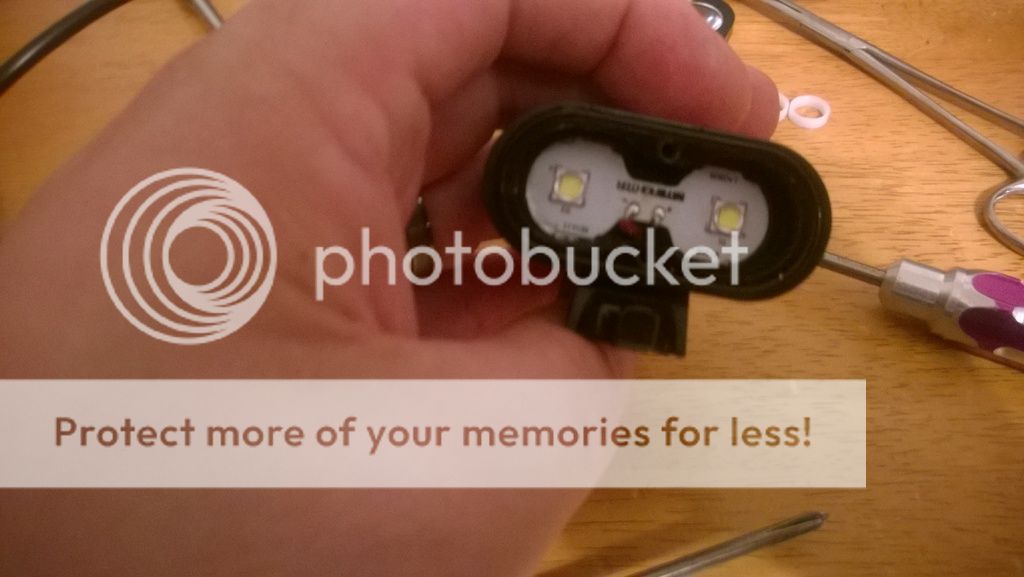
First up tear down:
Single plate for emitters, can tell by looking at phosphor that these arent 3c, but honestly im kind of liking 4C, think my "winter lights" will be this tint.
This part bummed me out, and DO NOT FOR THE LOVE OF ANYTHING, REMOVE THE SILICONE BUTTON.....Dont ask why I know that, but that shiny center ring around the silicone button is pressed in, holds the button, you arent getting that ring out or getting that button back in... but the driver mounting. 2 screws that sit being the emitters, have a layer of silicone to insulate driver from emitter board contact (if you get brave and try to remove driver which I advise against, make sure to put a new layer of silicone on). Remove the screws, driver doesnt move.....its siliconed in! but no reason to mess with it anyway. Youll see why below.
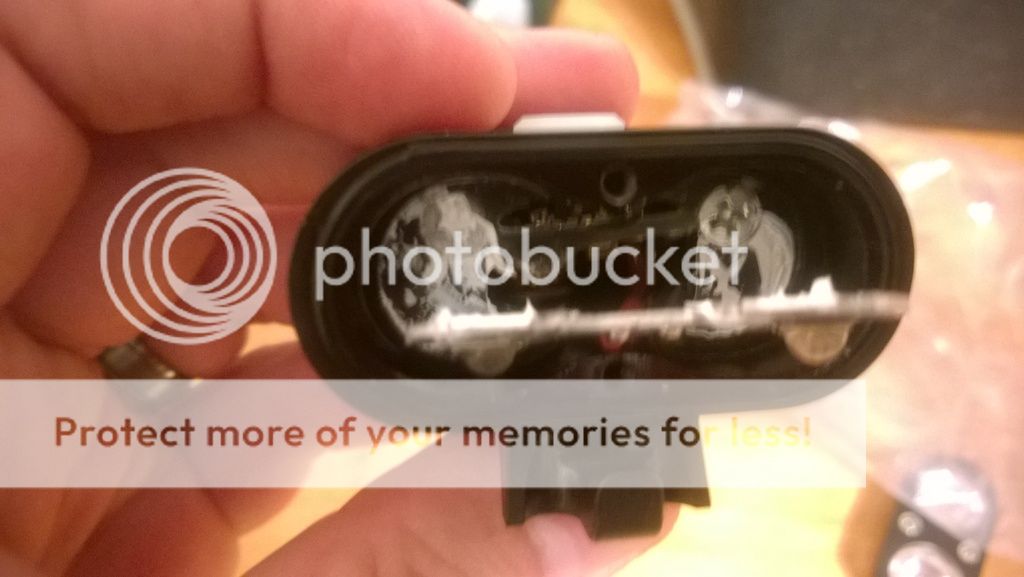
Also, CAN FIT LEDDNA/GLOWWORM OPTICS, but requires different much thinner oring. Carclo seem to fit right in. OR unless you like to ride in heavy downpours, just take the orings out and put the LEDDNA optics in. they fit TIGHT into face plate so small light rain wont bother it.
You can just not even open the light unless you want to change tint or optics:
Ya thats only high not even turbo.
Heres my video review:
Summary: LOVE THIS LIGHT, turbo gets HOT!!! but except for guys that really get some speed going, turbo is overkill anyway (heat causes it to not push maximum output for long). Everything it comes with OH YA, WORTH THE MONEY!!!
If you want one and get a decent deal (ont he nitefighter bt40s as well) check out here (hopefully CPF is ok with links to a cycling forum) http://forums.mtbr.com/lights-night-riding/nitefighter-group-buys-967443.html
Nitefighter BT21 1800LM Cree XM L2 2 LEDs Water-resistant Mountain Bike Lights-15.46 and Free Shipping| GearBest.com
NITEFIGHTER?BICYCLE LIGHT
And time to start the review. DHL was kind and came on a holiday to bring me my light!
First up the case. OMG THE CASE!!!! Quality is GREAT. Very solid, well built, TOP NOTCH. And for me, it feeds my need, MY NEED FOR ORANGE!!!
All kinds of storage space, enough for second light and pack once you remove gigantic charger. ALso a mesh pouch for storing the small stuff (bands, velcro, whatever else you want to put in it, is got a ton of space too)
Next up parts list:
-Light head: Weight 93g (35ish above yinding for reference), Lumens Id say around 1200 on turbo is my "guess" maybe a bit more but optics make it difficult to judge.
-Charger: 2000mA (yeap 2 amp charger) big solid charger with indicator, very nice.
-Battery pack with pouch: Rubber housing around pack, not cheap thin stuff either. Pouch is dual strap long center velcro tabs to hold pack inside with proper eyelet hole for cable. Uses the nice thick magicshine (available at DX too) 20awg cable.
-Extension cable, also 20awg MS/DX cable!
-ACTUAL USABLE HELMET MOUNT. Has the rubber type foam on the back, uses 2 long velcro straps for easy use on vented helmets (very excited because sons helmet cant fit an adhesive gopro mount not can my commuting helmet)
-rolled up velcro cable strap (yeap they thought of holding the cables to the frame too, got you covered)
-And Finally, UNDERSTANDABLE and very clear instructions with charts .
Nitefighter thought this one out heavily and I swear spent time reading these forums and learning what we all need. Too bad BT40S kits dont come with all these goodies too.
And WHAT YOU ALL HAVE BEEN WAITING FOR. My "Lab tests" http://ficdn.mtbr.com/images/icons/icon14.png
First up tear down:
Single plate for emitters, can tell by looking at phosphor that these arent 3c, but honestly im kind of liking 4C, think my "winter lights" will be this tint.
This part bummed me out, and DO NOT FOR THE LOVE OF ANYTHING, REMOVE THE SILICONE BUTTON.....Dont ask why I know that, but that shiny center ring around the silicone button is pressed in, holds the button, you arent getting that ring out or getting that button back in... but the driver mounting. 2 screws that sit being the emitters, have a layer of silicone to insulate driver from emitter board contact (if you get brave and try to remove driver which I advise against, make sure to put a new layer of silicone on). Remove the screws, driver doesnt move.....its siliconed in! but no reason to mess with it anyway. Youll see why below.
Also, CAN FIT LEDDNA/GLOWWORM OPTICS, but requires different much thinner oring. Carclo seem to fit right in. OR unless you like to ride in heavy downpours, just take the orings out and put the LEDDNA optics in. they fit TIGHT into face plate so small light rain wont bother it.
You can just not even open the light unless you want to change tint or optics:
Ya thats only high not even turbo.
Heres my video review:
Summary: LOVE THIS LIGHT, turbo gets HOT!!! but except for guys that really get some speed going, turbo is overkill anyway (heat causes it to not push maximum output for long). Everything it comes with OH YA, WORTH THE MONEY!!!
If you want one and get a decent deal (ont he nitefighter bt40s as well) check out here (hopefully CPF is ok with links to a cycling forum) http://forums.mtbr.com/lights-night-riding/nitefighter-group-buys-967443.html
Last edited: