
---------------------------------------------------------------------------------------------------------------------
Author's Statement for Transparency and Disclosure
The test sample/s featured in this article have been provided for technical testing and review by the manufacturer. Test samples are retained by the reviewer following publication of the completed review for the purposes of long term testing and product comparisons.
All output figures and test results published in this review are the sole work of the reviewer, and are carried out independently and without bias. Test results are reported as found, with no embellishments or alteration. Though best endeavours are made to maintain the accuracy of test equipment, the accuracy of these results is not guaranteed and is subject to the test equipment functioning correctly.
----------------------------------------------------------------------------------------------------------------------
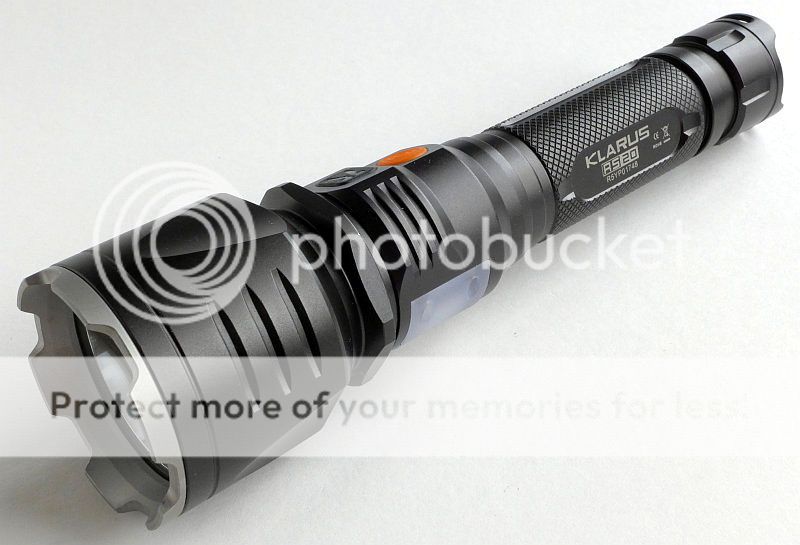
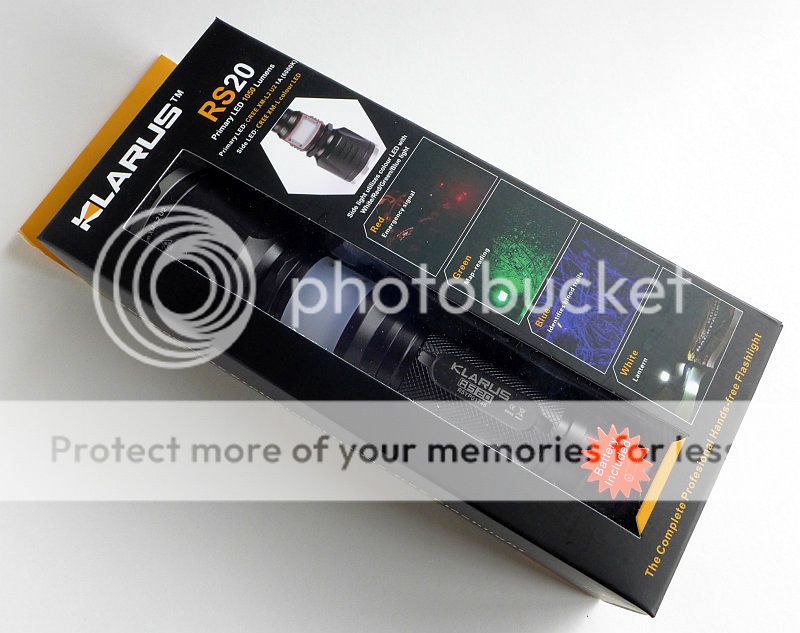
KLARUS have turned the humble flashlight into a versatile multi-use utility light by adding a side mounted, white and multi-colour, secondary LED to a light that will run on its own rechargeable cell, or on standard 18650 or CR123 cells. This light is seriously useful.
Taking a more detailed look:
As well as the RS20 itself, KLARUS supplied a few of the accessories that help this light become even more useful.

The accessories include a wall mount (RC11), as well as a USB car 12V power supply and a universal bike mount.
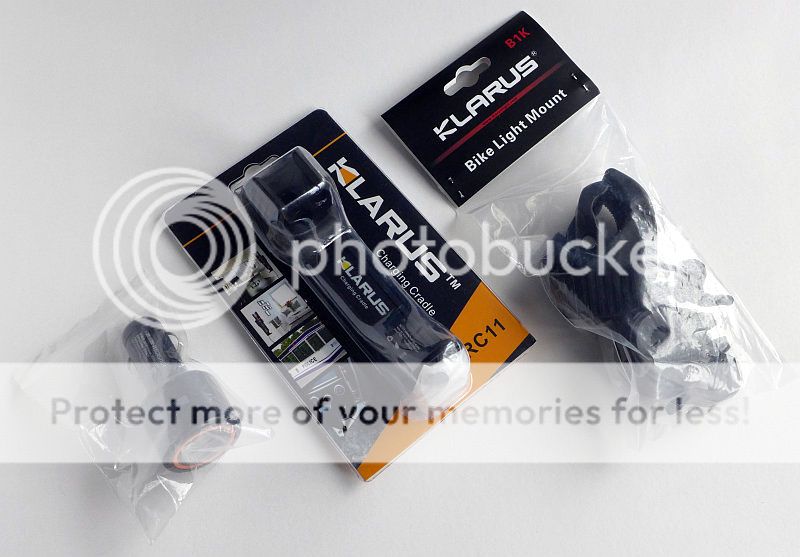
The wall mount includes mounting options and some instructions. The mirrored section allows easy viewing of the charge indicator.
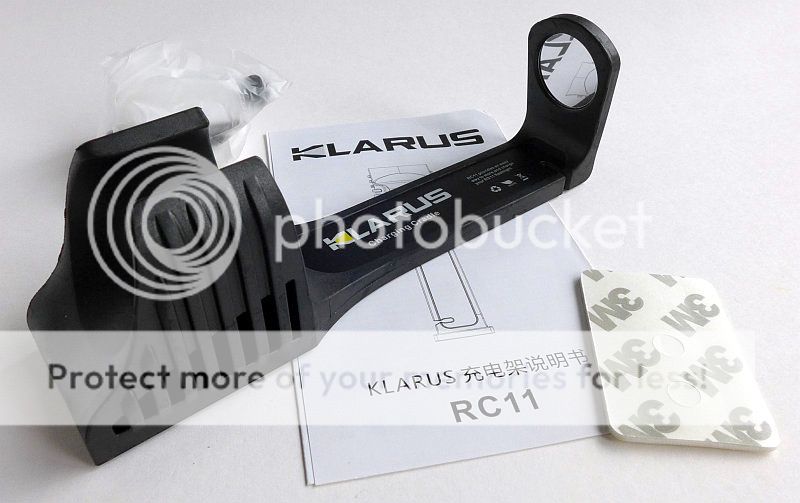
As the RC11 has an adhesive pad for mounting, it is ideal to partner with the car charger to give you a mobile lighting solution that will always be ready to go.

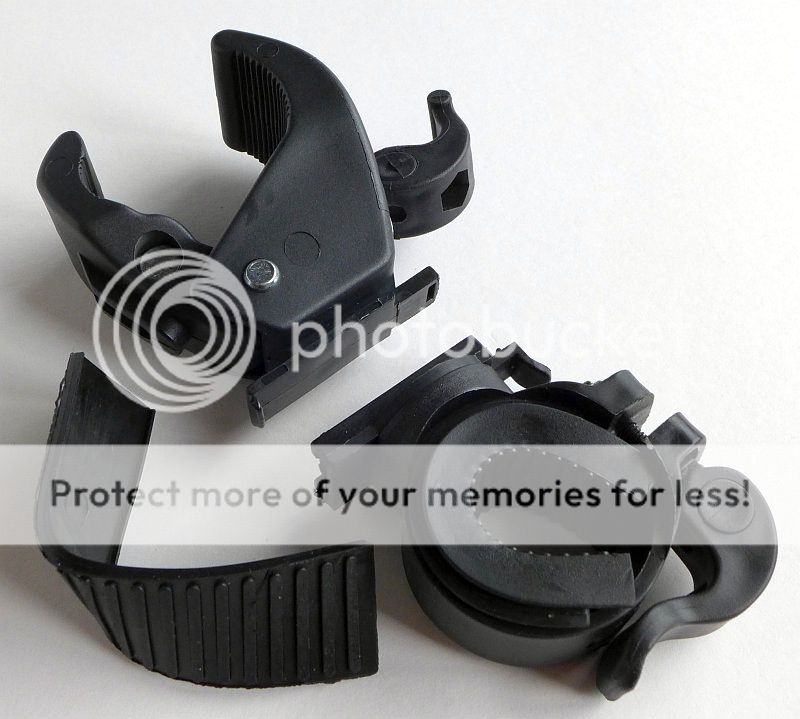
The bike mount appears very tough and has a quick release clamp to allow easy removal of the expensive part (the flashlight in the clamp). Both the bar clamp and flashlight clamp can be done up very securely with cam-type tightening systems.
Now moving to the RS20 itself.
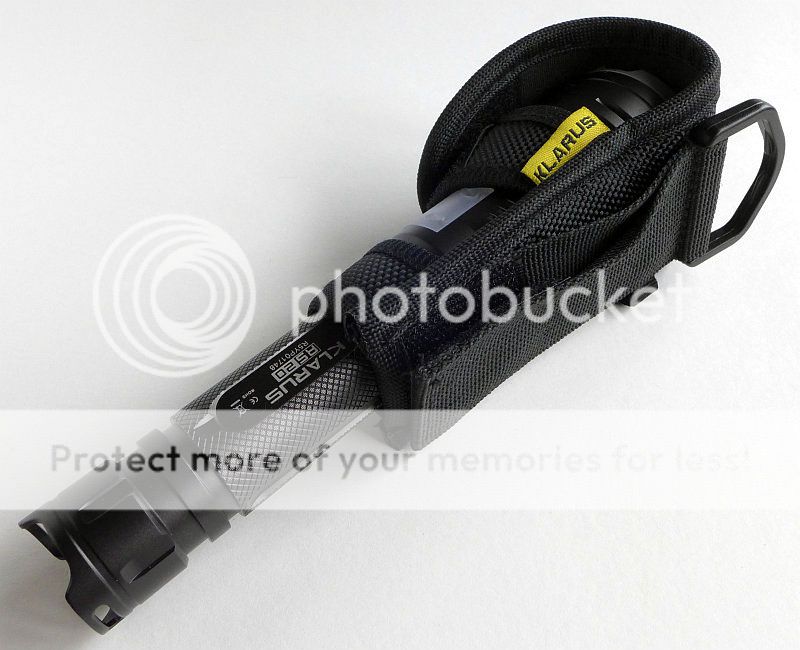
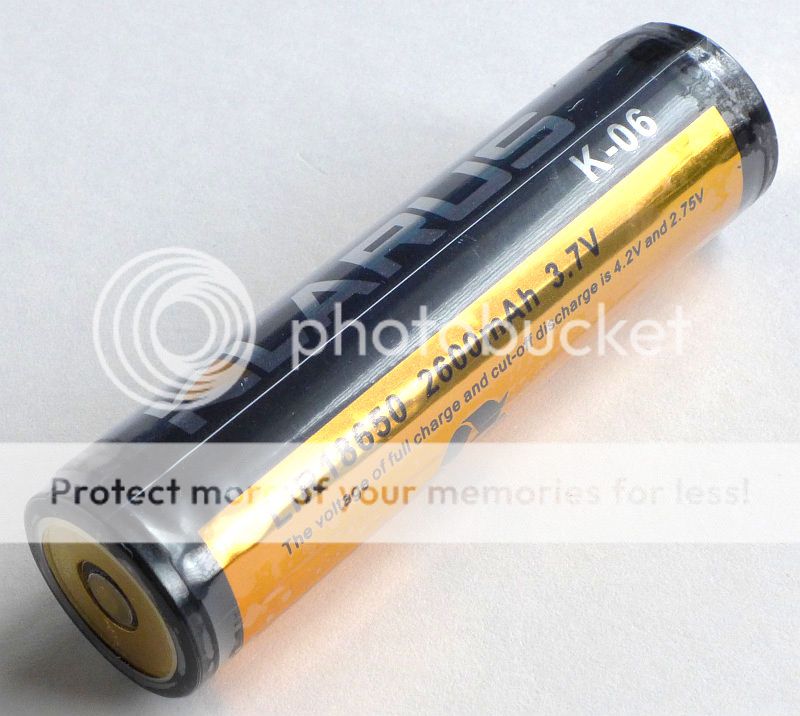
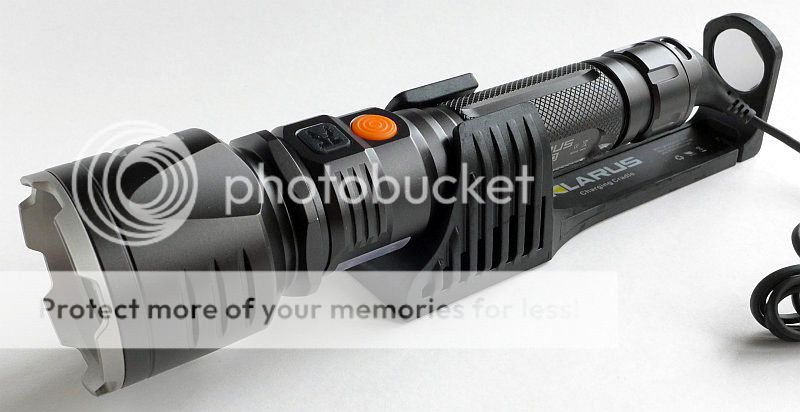
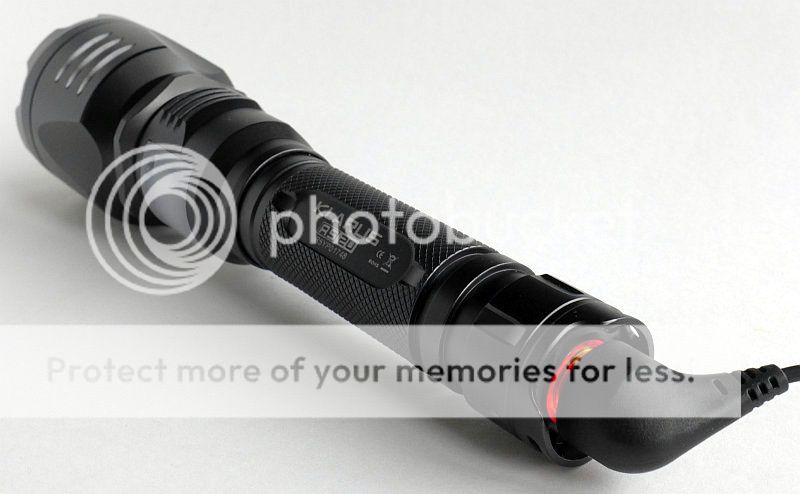
Included with the RS20 is an interesting holster with a cut out for the side light, a lanyard, spare O-ring, and the magnetic USB charger cable. Of course, also included is the proprietary rechargeable 18650, more on this later.
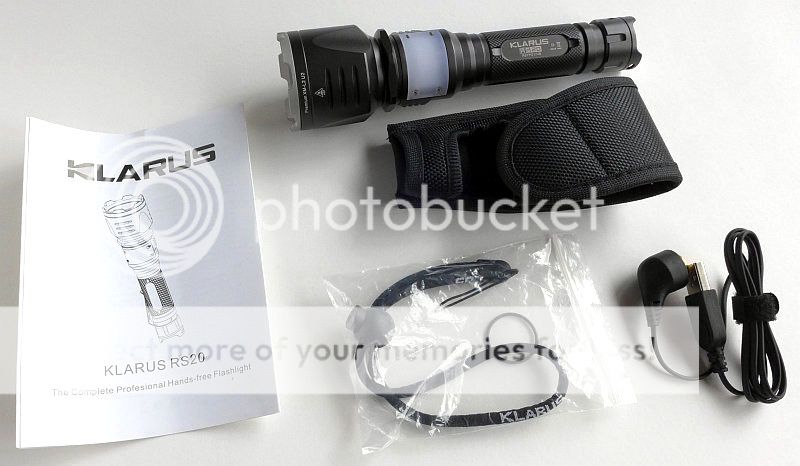
The holster leaves the side LEDs exposed so that you can carry the RS20 in its holster but have the use of this flood light.

There is a fixed and Velcro closing belt loop.
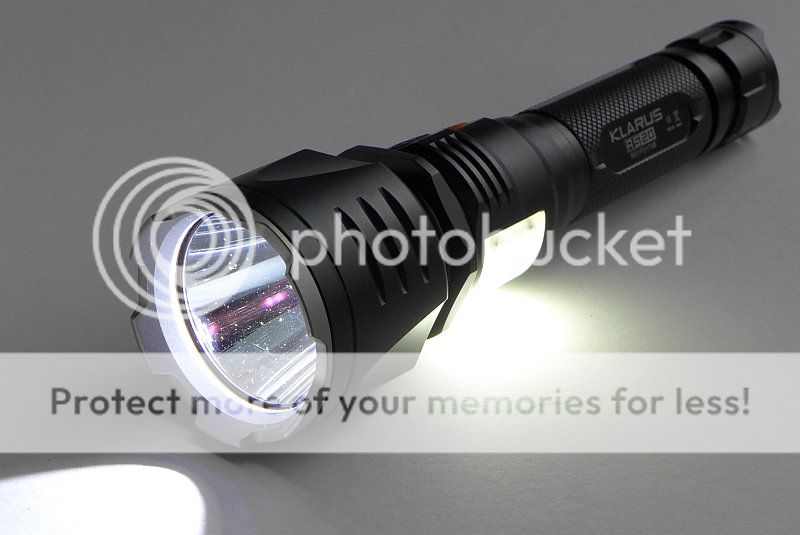
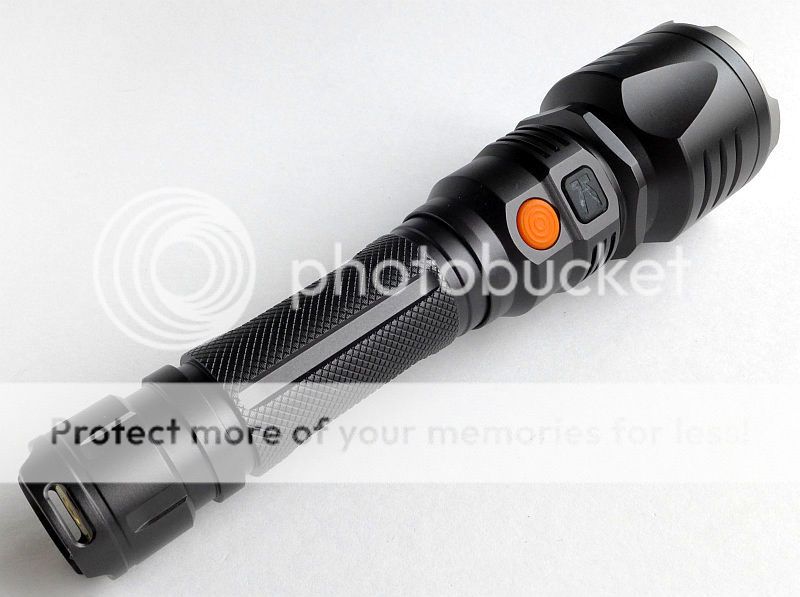
There are two buttons, one for the main beam and the other for the side light.
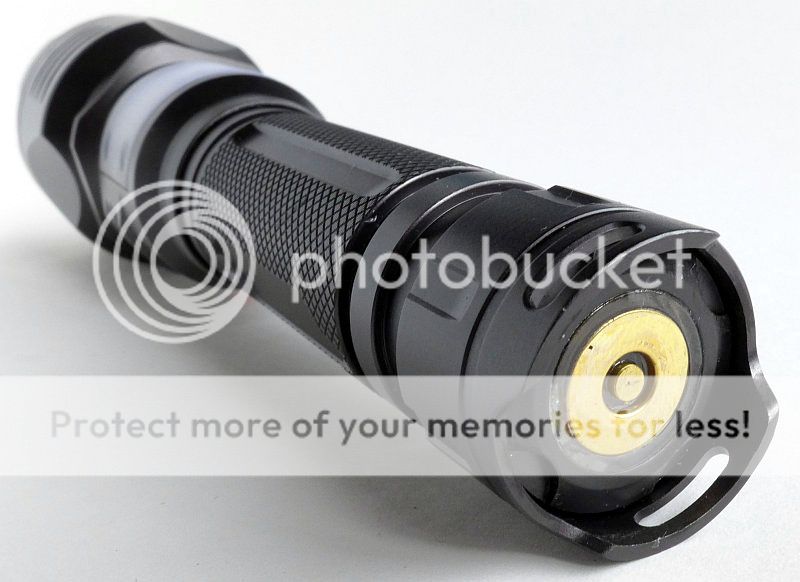
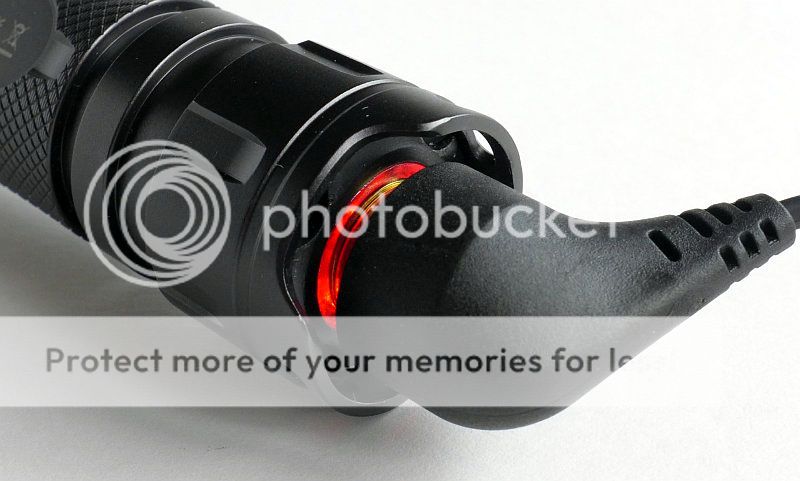
Built into the base are the charging contacts. Surrounding the largest contact ring is a clear window to show the charge indicator light.
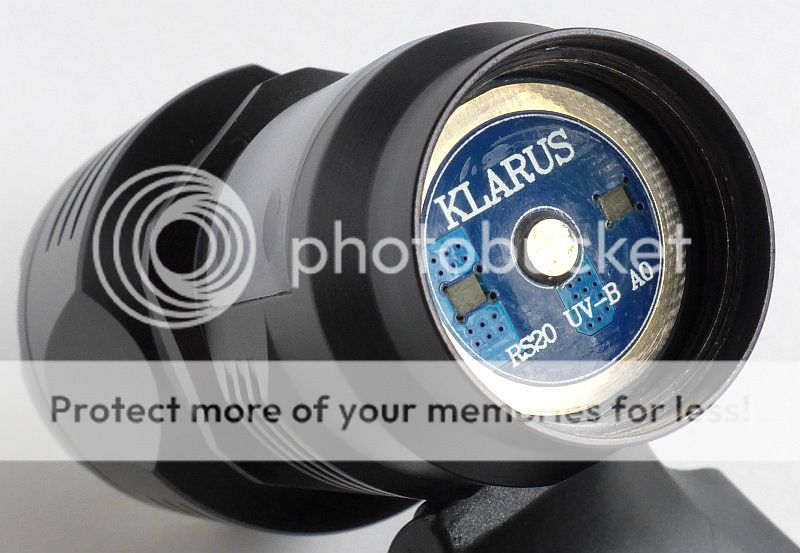
The side light has a frosted diffuser to give maximum smoothing and spread for the beam.
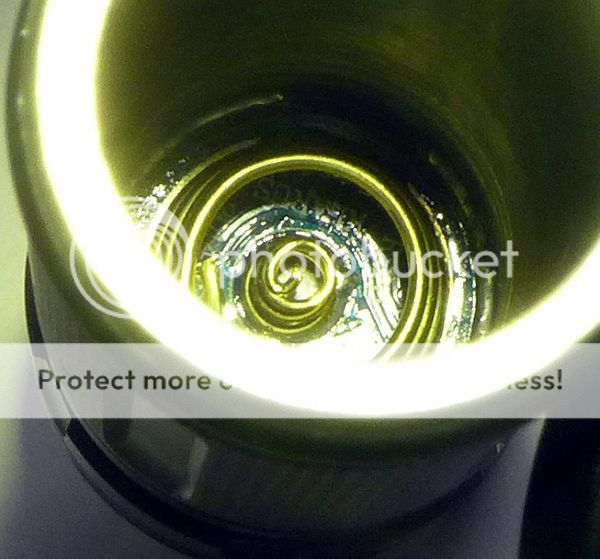
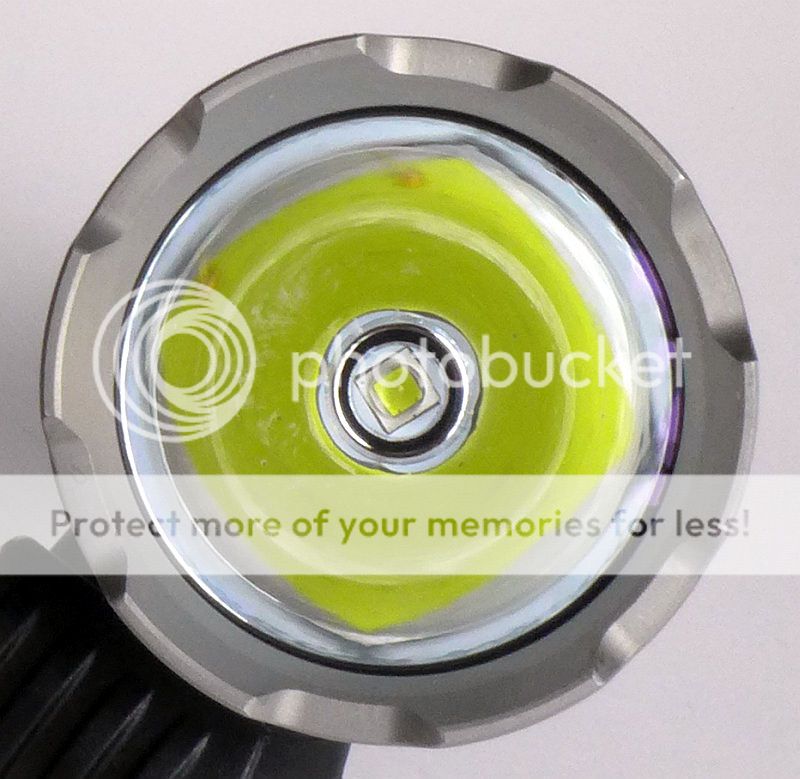
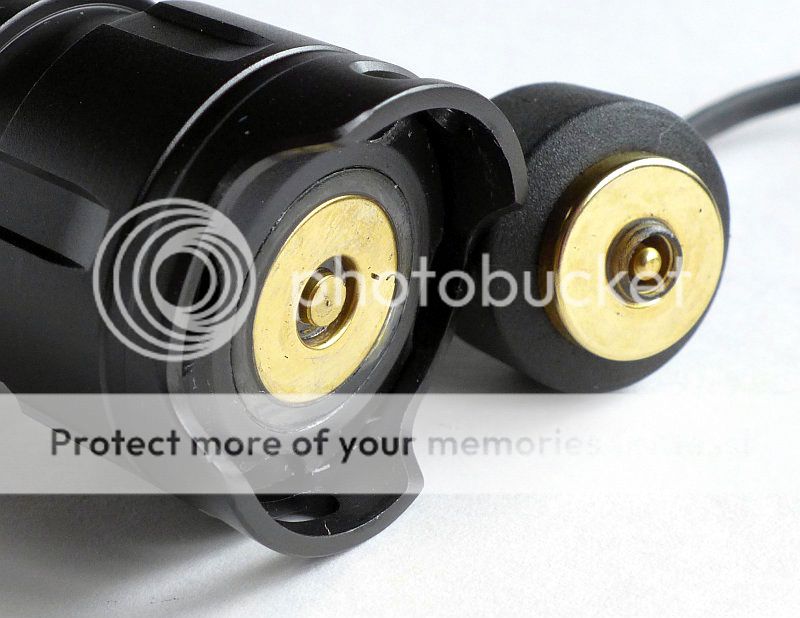
Taking the battery tube off, the contacts in the head can be seen, with the raised central positive contact and circular pad for the battery tube to contact.
The RS20 ships with its rechargeable cell fitted, so KLARUS include a plastic insulator that covers the contacts.

The cell has both positive and negative contacts on each end and will work either way round. Without the twin contacts, the RS20 will not charge the cell that is fitted, so will only charge these special KLARUS 18650 cells. Normal 18650s can be used, but not charged in the RS20.
Like to the previously shown end, there are both positive and negative contacts.

The threads are well finished, anodised and lubricated, standard threads.

Deep inside the battery tube the twin charging contacts can be seen.
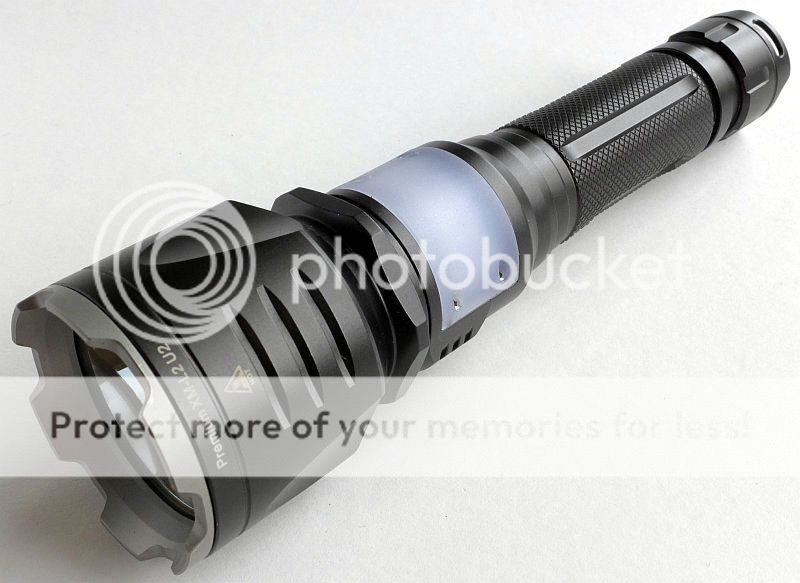
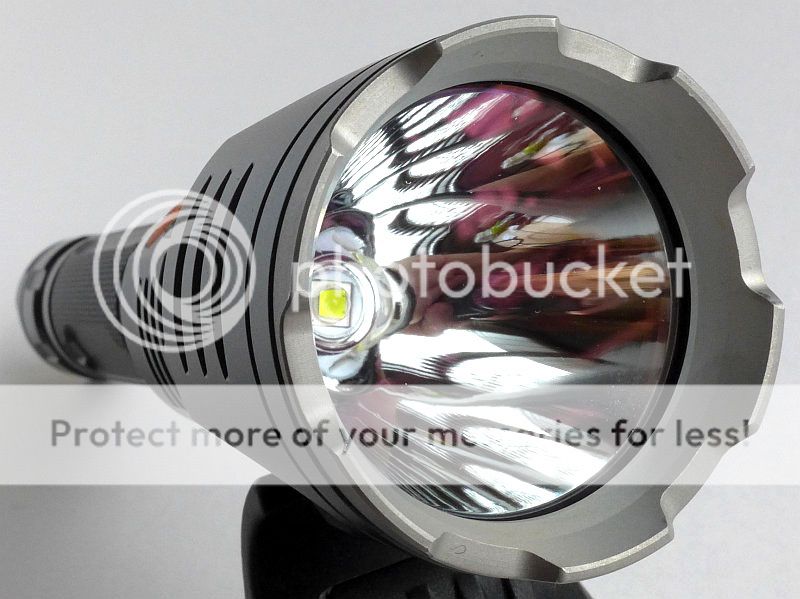
For the main beam there is a XM-L2 LED
A full deep smooth reflector focuses to a defined hotspot.
Mounted in the charging cradle, the RS20 is easy to keep topped up and ready to grab and go.
On the RS20, the charging contacts are fixed. The USB charging head has a fixed outer and sprung inner contact.
When charging the indicator light is red, and this goes green once fully charged.
Overall a very neat charging solution.
The beam
Please be careful not to judge tint based on images you see on a computer screen. Unless properly calibrated, the screen itself will change the perceived tint.
The indoor beamshot is intended to give an idea of the beam shape/quality rather than tint. All beamshots are taken using daylight white balance. The woodwork (stairs and skirting) are painted Farrow & Ball "Off-White", and the walls are a light sandy colour called 'String' again by Farrow & Ball. I don't actually have a 'white wall' in the house to use for this, and the wife won't have one!
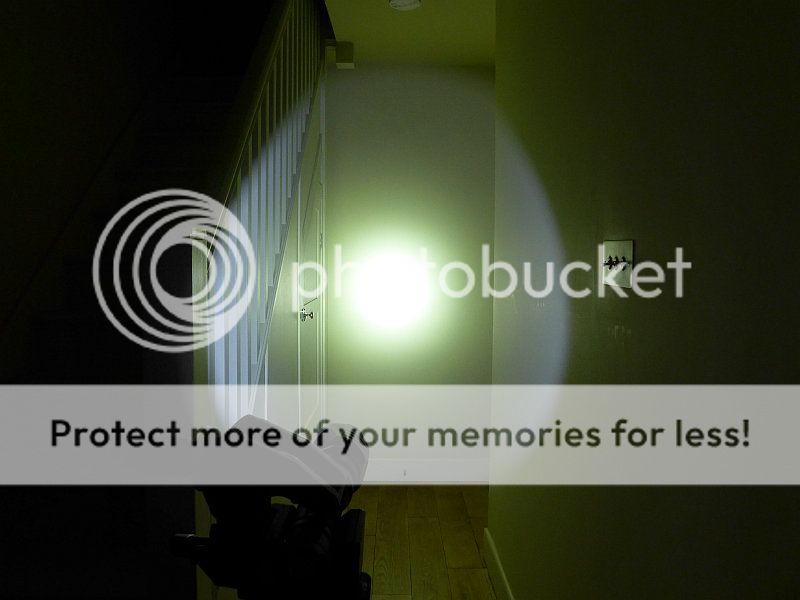
Indoors and starting with the main beam. The spill is relatively narrow on the main beam, but if you want flood, just wait and see!
To see what goes on with the side light, the RS20 has been positioned further away with the main beam still on.
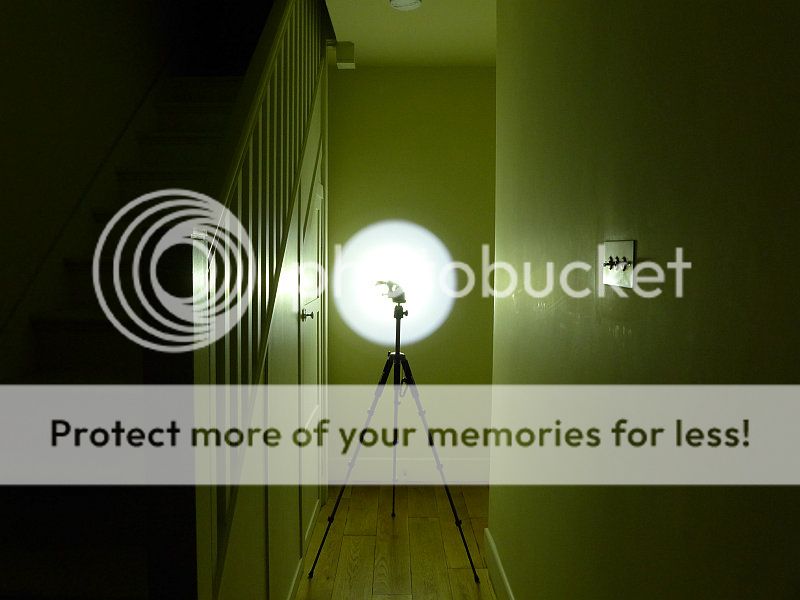
Adding the side light, provides great illumination of the ground. The effect is slightly masked by the 'wall bounce' from the main beam.
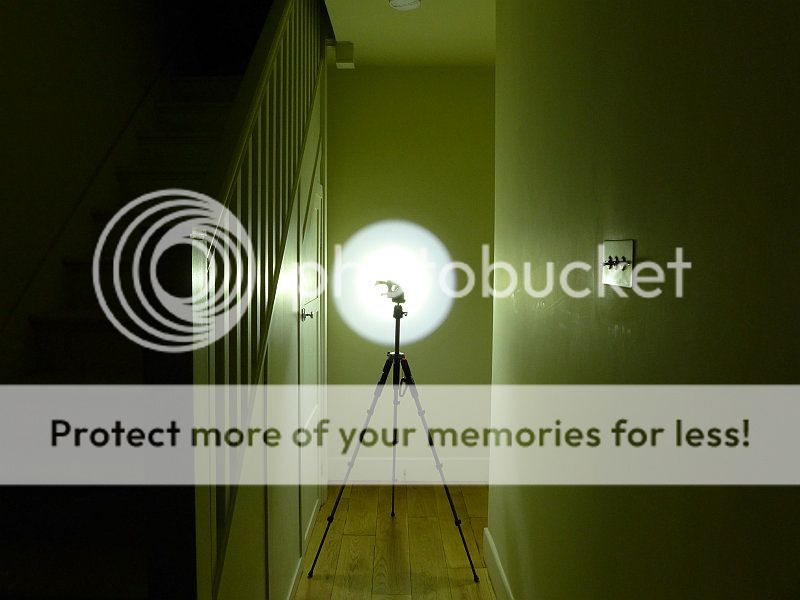
Switching off the main beam and leaving the side light on you can see its effect.

THE NEXT SET OF IMAGES HAVE A DIFFERENT EXPOSURE.
Not meaning to shout, but to be clear the initial photos had one exposure set, but for the side beam comparison I set a different exposure, but it is the same for the next four beamshots.
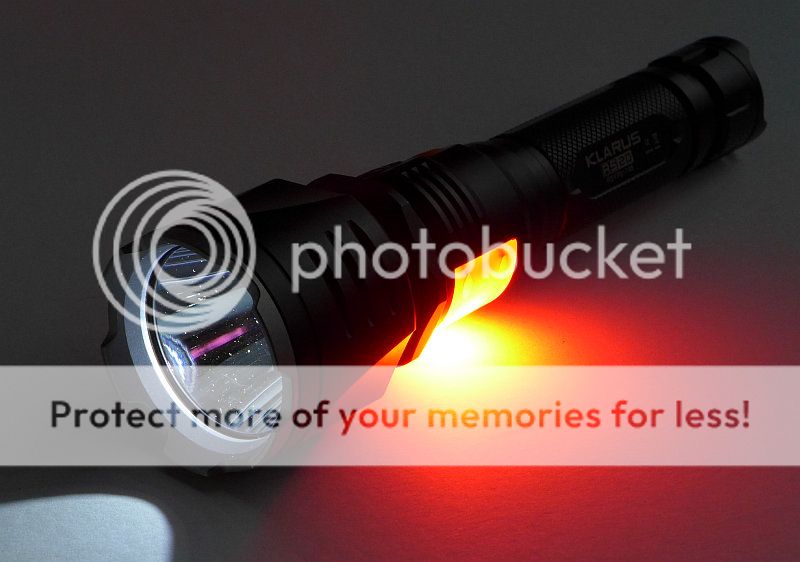
Starting with white

Then the red, and yes it is this bright!

And then the green.
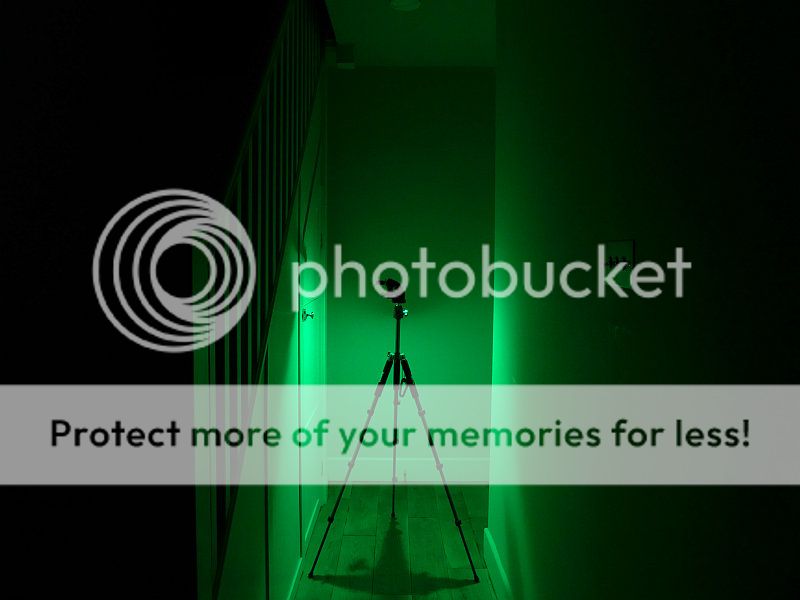
And finally blue. And again I stress these colours really are this bright.

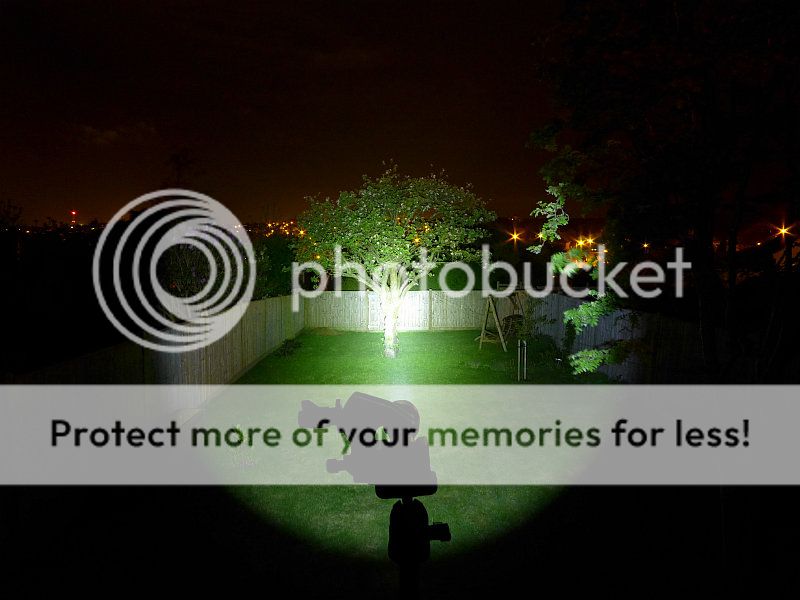
And outdoors the main beam has good punch.
Modes and User Interface:
Having two switches and two 'beams' the RS20 keeps the control of each (mostly) independent.
The main beam has four levels which cycle in this order High -> Medium -> Low -> Moon -> High etc.
To switch ON the main beam, press and hold the black (forward most) switch for 1s. This will latch the beam on. Pressing the switch for less than 1s operates the main beam momentarily allowing you to flash it.
Once ON, you can cycle through the main beam modes with a quick press of the switch. The last used mode is remembered.
To switch OFF the main beam, press and hold the black (forward most) switch for 1s.
Either from OFF, or ON and a steady mode, a double click of the switch enters the flashing modes. It will start on Strobe, then with one more click go to SOS, and one further click to return to the previous state (either OFF or the steady ON mode).
The secondary beam from the side light has many configurations.
The side beam has five levels which cycle in this order White High -> White Low -> Red -> Green -> Blue and back to White High etc.
Just like the main beam, to switch on the side beam, press and hold the orange (rear most) switch for 1s. This will latch the beam on. Pressing the switch for less than 1s operates the side beam momentarily allowing you to flash it on the white output.
Once ON, you can cycle through the side beam modes with a quick press of the switch. The last used mode is remembered HOWEVER, on first pressing the button for the first second the White High output is used, then as the side light latches on it returns to the last white or coloured mode used.
To switch OFF the side beam, press and hold the orange (rear most) switch for 1s.
The flashing modes get a little complex. Starting simply, either from OFF, or ON and steady mode, a double click of the switch enters the flashing modes.
The main beam will start on Strobe, then with one more click go to SOS, and one further click to return to the previous state (either OFF or the steady ON mode).
The side flashing modes function as follows:
From OFF (or with the High White ON), the white strobe will be activated. A single press will return the light to the previous state (OFF or steady ON). If the Low White output was ON, when returning to steady output the High mode will be activated instead of Low.
With the Red output on, a Red SOS will be activated. A further single press goes from Red back to the steady High White output.
This is the same for Green (except that green appears to start flashing SOS but becomes a steady flash every 2s).
Blue does not respond to a double click.
Now finally the reason I said "Having two switches and two 'beams' the RS20 keeps the control of each (mostly) independent."
If either beam is on steady and the other beam is switched to flashing mode, that steady beam is switched off while the second beam is flashing. As soon as the flashing is stopped, the first beam returns to its previous state.
Batteries and output:
To measure actual output, I built an integrating sphere. See here for more detail. The sensor registers visible light only (so Infra-Red and Ultra-Violet will not be measured).
Please note, all quoted lumen figures are from a DIY integrating sphere, and according to ANSI standards. Although every effort is made to give as accurate a result as possible, they should be taken as an estimate only. The results can be used to compare outputs in this review and others I have published.
| ___________________________________________ | ________________________________ | ________________________________ |
| KLARUS RS20 using supplied proprietary 18650 | I.S. measured ANSI output Lumens | PWM frequency or Strobe frequency (Hz) |
| ___________________________________________ | ________________________________ | ________________________________ |
| Main Beam High | 789 | 0 |
| Main Beam Medium | 260 | 1170 |
| Main Beam Low | 9 | 400&243 |
| Main Beam Moon | Below Threshold | 0 |
| Main Beam Strobe | 514 | 6.2 & 16.6 |
| Side White High | 72 | 0 |
| Side White Low | 24 | 950 |
| Side Red | 70 | 0 |
| Side Green | 65 | 0 |
| Side Blue | 91 | 0 |
| Side White Strobe | 51 | 6.2 & 15.3 |
| Main Beam High with Side White High on | 633 | 0 |
Peak Beam intensity measured at 23800lx @1m giving a beam range of 309m.
Parasitic drain is 0.87mA which would fully deplete the supplied 2600mAh cell in 125 days. A simple twist of the battery tube locks out this drain.
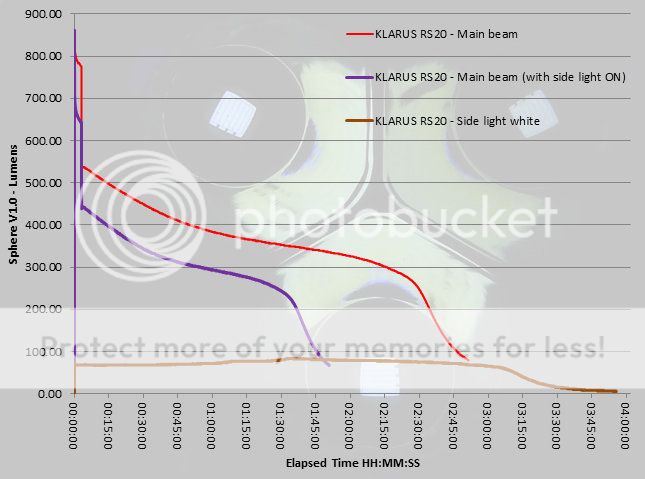
During measurements of the RS20, it the sphere I have, it was not possible to get proper readings for the main and side beams simultaneously. When the RS20 was inserted far enough into the sphere to measure the side beam, the main beam output reading was badly skewed. For this reason the runtime traces shown here have been broken down into three different runs.
The first trace is for the main beam on its own.
The second trace shows the main beam element only, but has the side beam on High White
The third element is the side beam on its own on High White.
Maximum output is maintained for the first three minutes after which output drops for the remaining runtime.
Troubleshooting
This is a new section I am adding to mention any minor niggles I came across during testing, in case the information helps anyone else.
Nothing has come up during testing.
As per the description of this section, this information is provided in case anyone else finds a similar 'issue' that might be fixed in the same way.
The RS20 in use
KLARUS bring serious 'utility' to the RS20 making it a real all-rounder. By combining not only the side and main beams but also giving bright Red, Green and Blue outputs and various flashing modes in white or coloured light, the RS20 has an answer for the majority of lighting requirements.
Flashlight and lantern functionality in an easy to use package with built in charging and the ability to use other standard rechargeable cells (though not charge them), makes the RS20 hugely useful.
KLARUS talk about the RS20 being a flashlight, lantern and bike light in one, but I'm not counting the bike light aspect, as any flashlight can be mounted on a bike. However, the combination of focussed main beam and flood lantern beam that make the RS20 so functional, also makes for a different type of bike lighting. The flood beam lights up the ground area at the front wheel, as well as the main beam lighting the way ahead. This feature is just as useful when walking on uneven ground as it is on a bike. Once you have used the spot and flood beams together like this, you will wonder how you managed without.
With the coloured output being so bright and evenly diffused, it can be used to easily picking out certain features that might otherwise not stand out. Rapidly switching between white and all the colours really highlights any differences.
The choice of a well focussed beam might not be ideal on its own for general use and close ranges, but partnered with the full flood side beam, it gives the RS20 an ideal combination of lighting.
Thanks to the built in USB charging and inclusion of a dedicated cell, the RS20 is a full package and would suit anyone even those who have not yet bought into 18650 li-ion cells.
The KLARUS approach to the charging connection removes the vulnerability of an open charging port. The RS20 is fully sealed, and the connector uses a magnet to attach to the RS20's base. You can almost 'throw' the connector at the RS20 and it will snap into place. The only downside to this is the possibility of attracting metal particles, and depending on how and where you use this it might be a problem or not.
For this general purpose, utility light, having side mounted switches adds to the ergonomics. This is not a tactical light, so an overhand grip is not the order of the day.
On the subject of lanterns, the RS20 solution is refreshing and perfect for my needs. Being very sensitive to glare, I dislike most lanterns with their 360° spray of light, as unless it is positioned behind me or above me, the bright housing/emmitter stabs into my eyes. With the RS20, the lantern beam is an approx. 270° spread giving me a 'safe' area while not taking away from the lantern effect. This is a huge benefit from my personal perspective.
Overall, the RS20 is just a fantastically useful light. Pose it a lighting question and, more often than not, it has an answer. This might just be the Swiss Army Knife of flashlights.
Review Summary
| _______________________________________________ | _______________________________________________ |
| Things I like | What doesn't work so well for me |
| _______________________________________________ | _______________________________________________ |
| Independently controlled Spot and Flood beams | Supplied cell a bit low on capacity at only 2600mAh |
| Easy connect, built-in USB charging | Charging cable magnet can pick up metal particles |
| Strong coloured light output | Relatively high parasitic drain (but can be locked out easily) |
| Side mounted easy to distinguish switches | |
| Spot beam has good throw | |
| Very stable lantern (sitting bezel down) | |
| Lantern/Flood beam has approx. 270° spread |
If you enjoyed my reviews, please remember to 'Like' me on Facebook and follow me on Twitter @Subwoofer_CPF
to get all the latest updates and news.
You can also find exclusive insights on Instagram and Pinterest


to get all the latest updates and news.
You can also find exclusive insights on Instagram and Pinterest
")