
wquiles
Flashaholic
If you have access to a lathe capable of cutting threads, here a guide on how to make a custom 1xD Mag host:
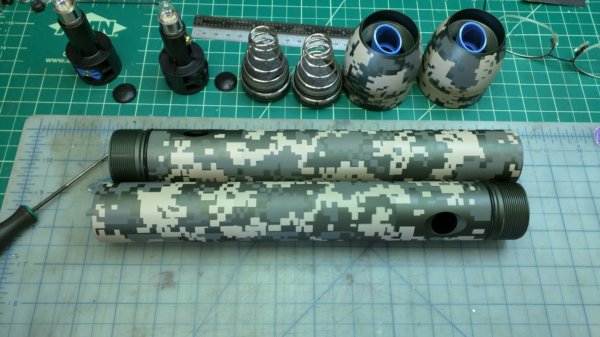
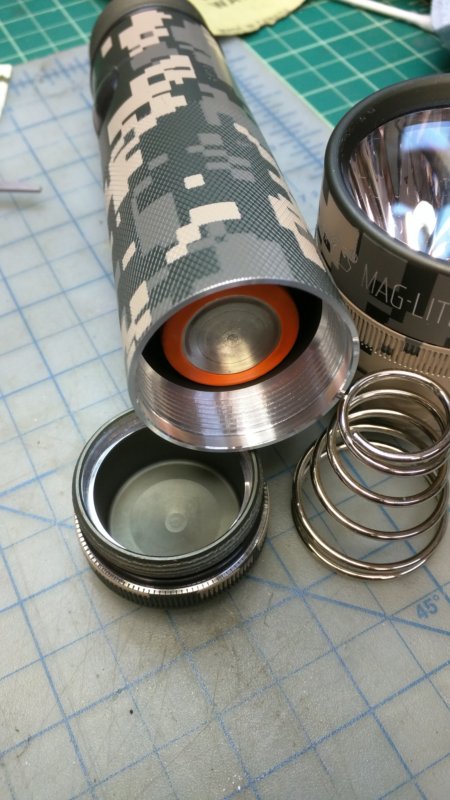
Step 1: Start with a "D" size host, colour of your choice. For this guide my customer asked for 2x Digital Cammo 1xD's, designed for a 32650 "D" size LiIon cell, which is right around 6" in length (see post #2 for length suggestions for different batteries/holders), assuming a deep tailcap mod is used (which is also part of the this guide):
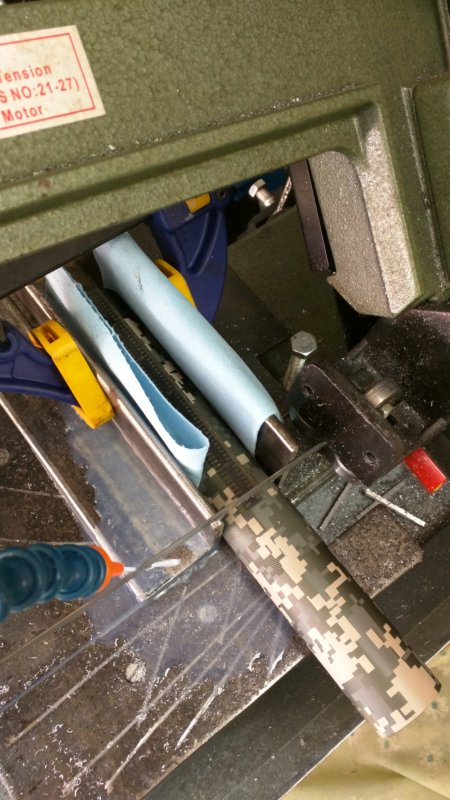
Step 2: Cut to length. Actually, cut about 0.1" longer, since you have to clean up the edge (depending how you cut the tube with):
Step 3 (optional): Almost too late now, but before cutting threads, verify you have enough room for the threads. Insert intended battery, and see if things will line up. At this point you can also note how deep does the spring would have to be move deeper inside the tailcap for the whole thing to fit together.
Step 4: Use two layers of tape (to protect the finish), and chuck the host. Center per your lathe/chuck.
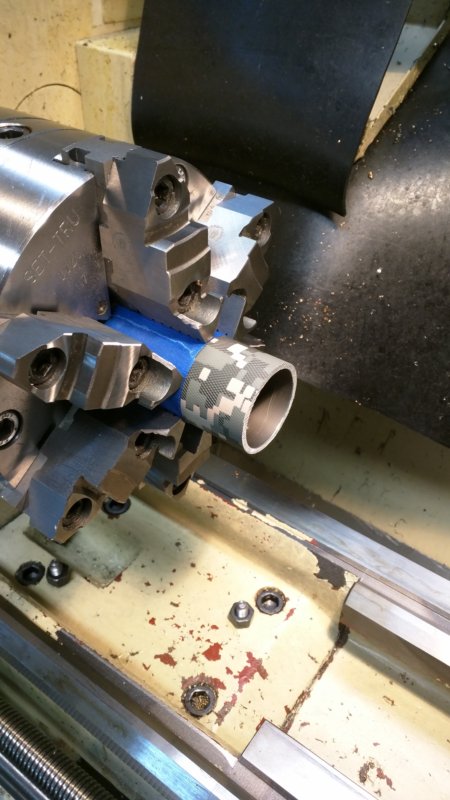
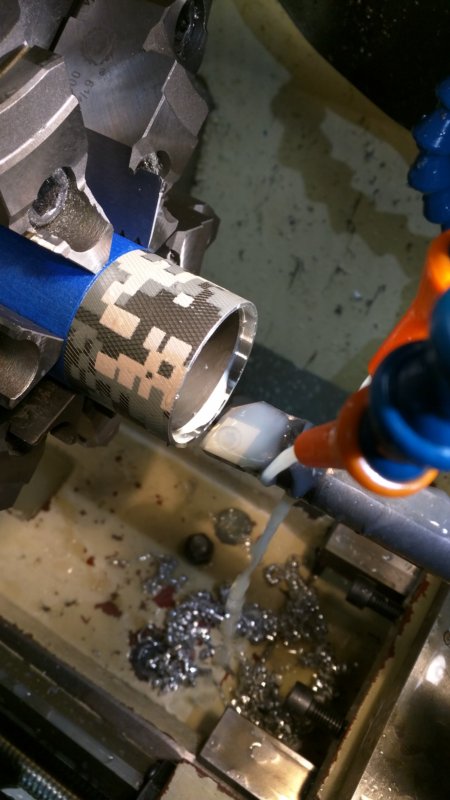
Step 5: Clean up the edge (raw from the bandsaw).
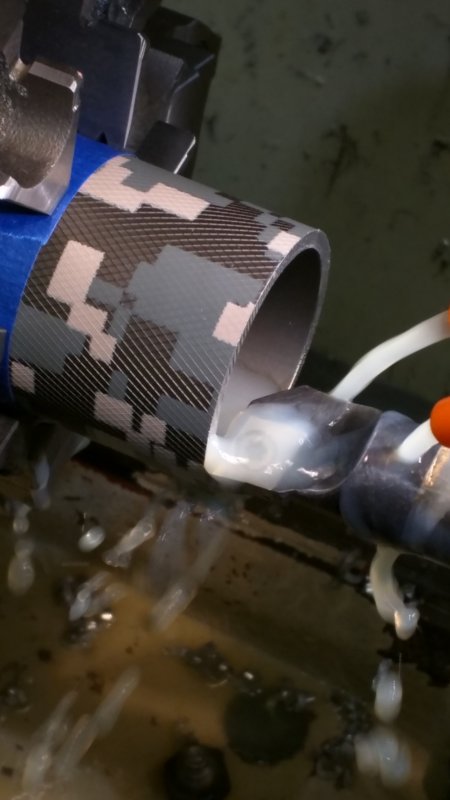
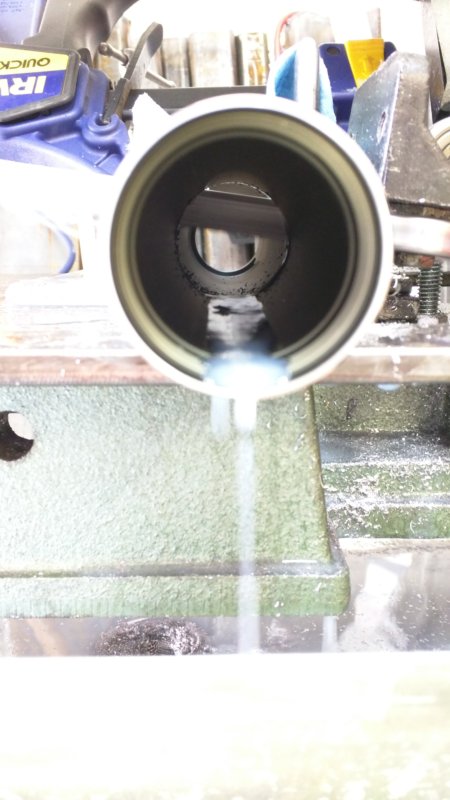
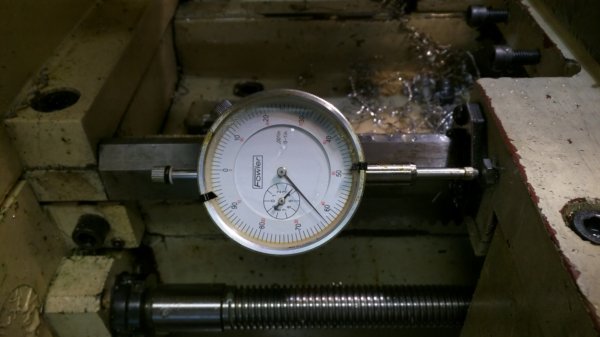
Step 6: Line up boring bar with edge (y-axis), and just barely touching the ID of the host. It goes without saying that having a DRO in the lathe is invaluable!
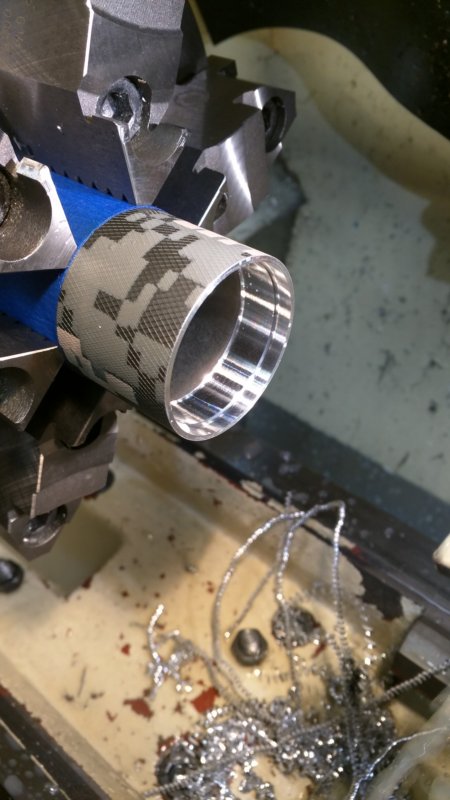
Step 7: Bore into the body 0.050" (total ID change of 0.1"), by .150" deep (towards the chuck). This creates the area for the o-ring to fit once the threading is all done.
Step 8: Without changing the DRO settings from the zero in step 7, now bore 0.022" into the body, by 0.500" deep (towards chuck). Of course, the first 0.150" will do nothing (material removed in step 7), but the next 0.350" will of course be removed. This new surface will be the minor diameter of the new threads being cut.
Step 9: Using the threading tool, create the relief for the start of the thread (beginning of the 0.350" section), and the end of the thread (end of the .350" section).
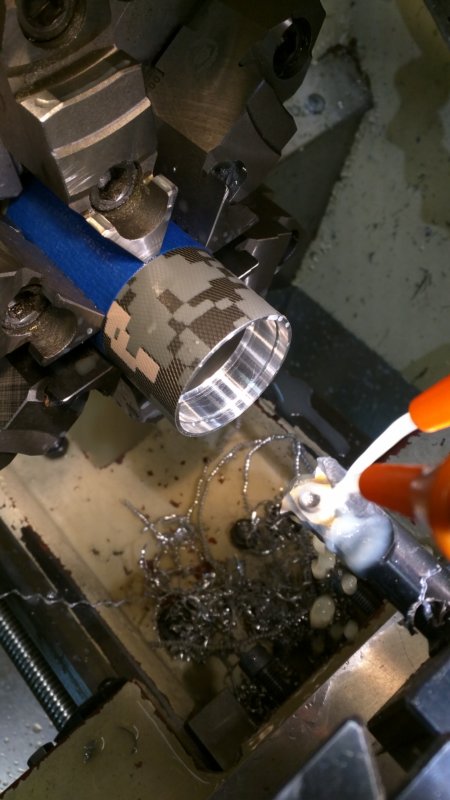
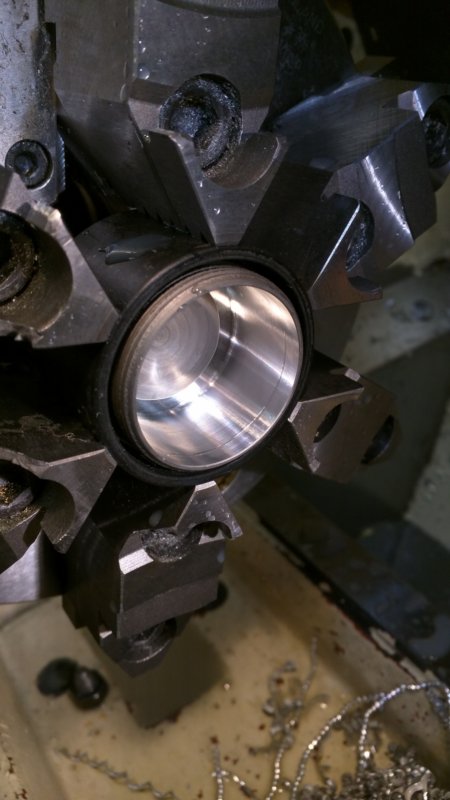
Step 10: Cut the 20TPI thread.

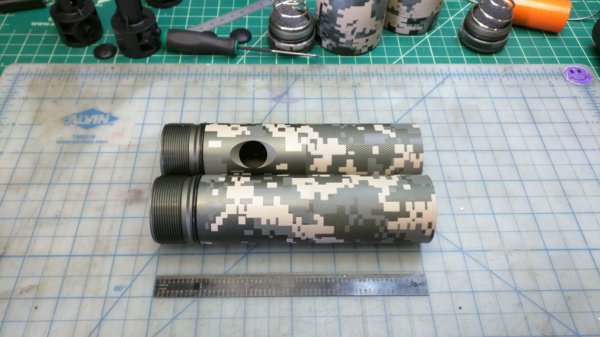
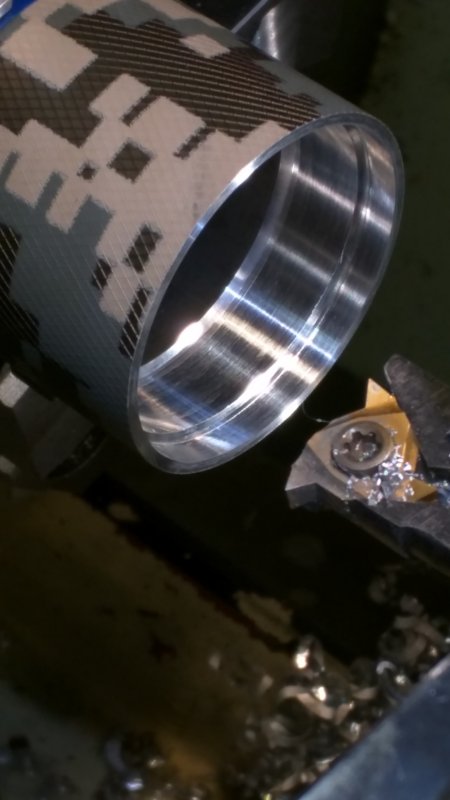
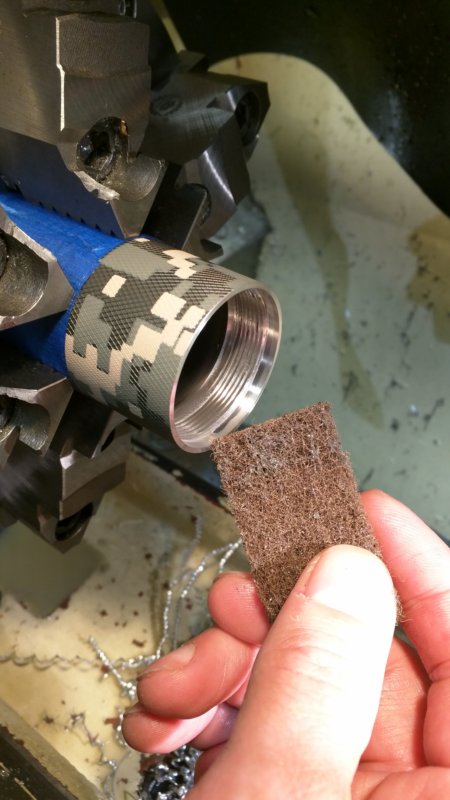
Step 11: Clean up/polish the new threads with an abrasive pad if required:
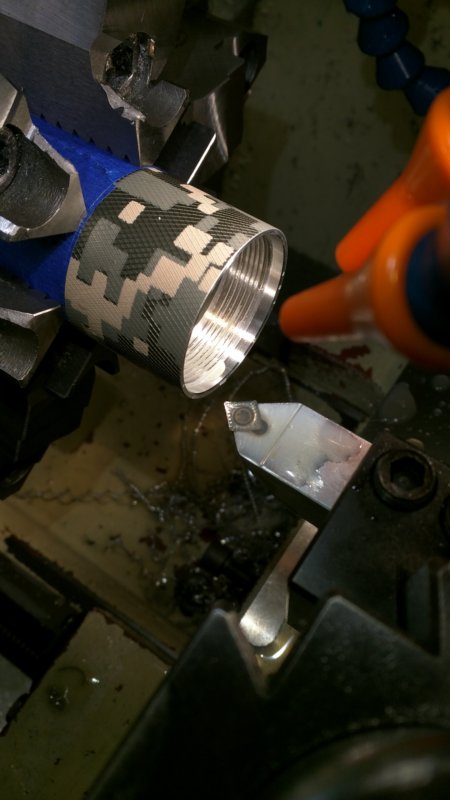
Step 12: Clean up the sharp inside edge, to prevent it from cutting/tearing up the o-ring:
Step 13: Stop. Take a quick/short break, and marvel at your creation:
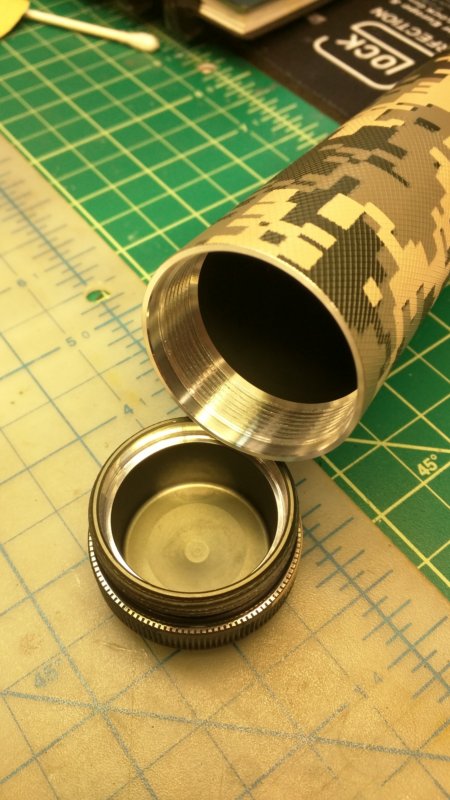
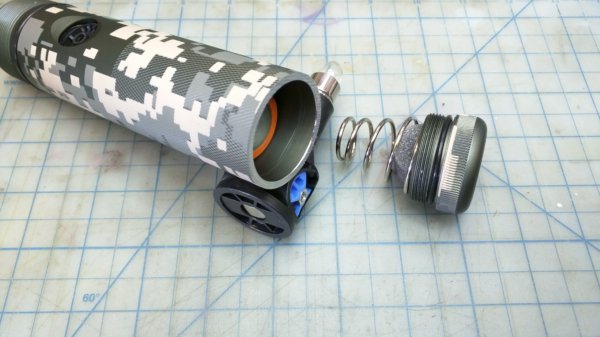
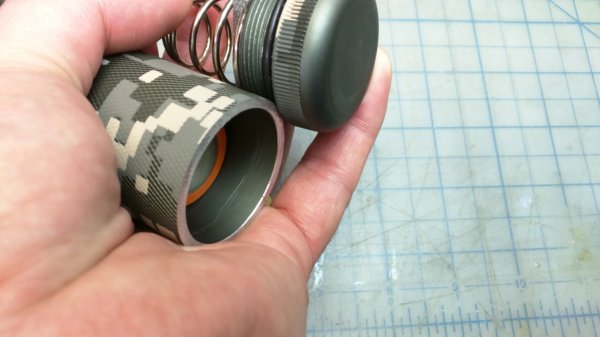
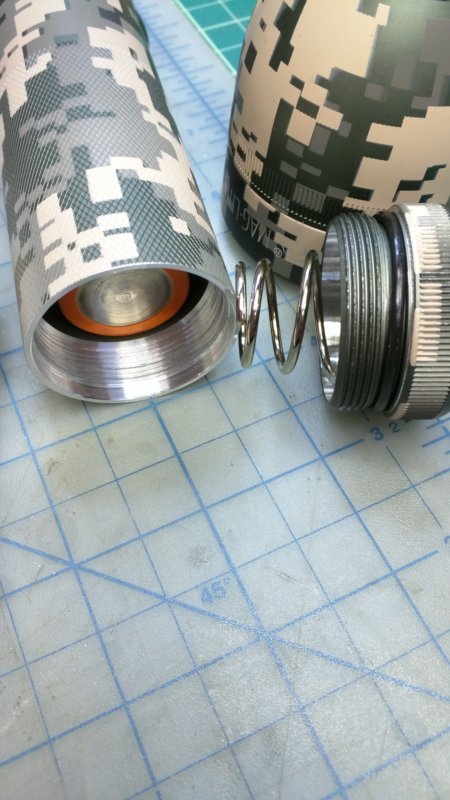
Step 14: Re-assemble host, insert battery, and without the spring, make sure everything fits. This also gives you another chance to see/measure how deep the spring needs to be recessed inside the tailcap:
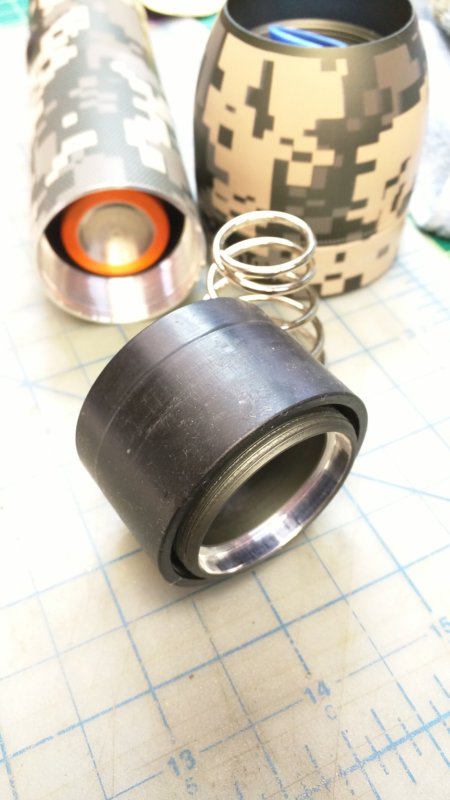
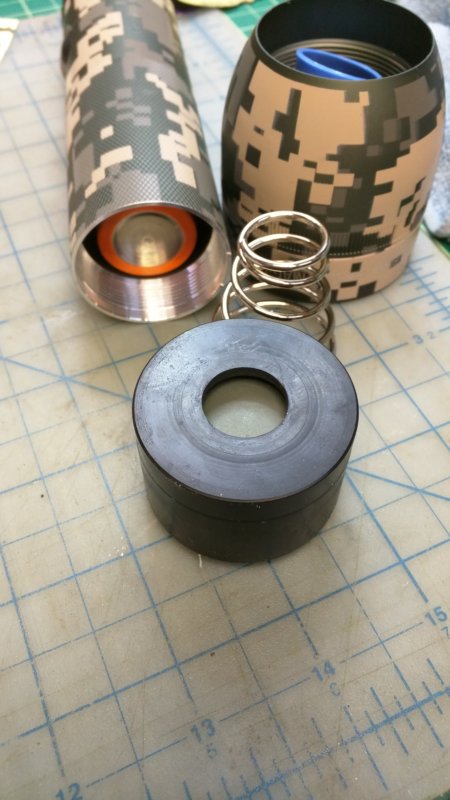
Step 15: To do the deep tailcap mod, I have tried "many" things, and I always messed-up the tailcap finish, so I made my own custom Delrin holder. The tailcap is a "press fit", and with the pressure from the chuck, it does not move while I do the boring operations. When done, push through the built-in hole in the back:
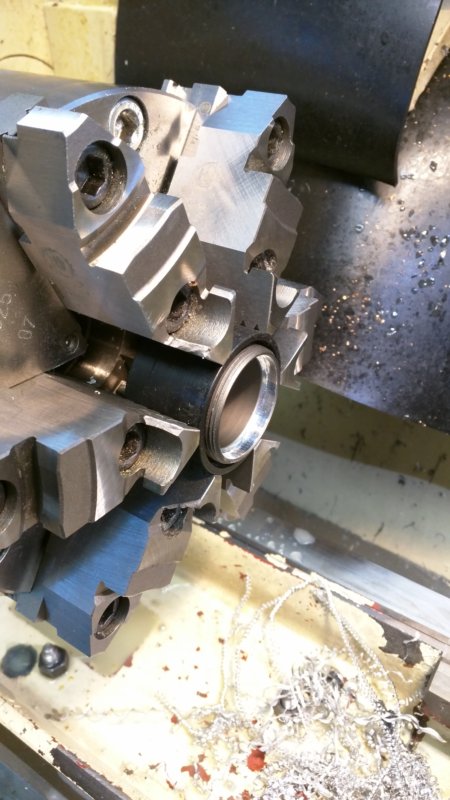
Step 16: Line up boring tool with edge of tailcap (y-axis) , and ID of tailcap (x-axis). Bore 0.600" deep (y-axis) without changing the x-axis:
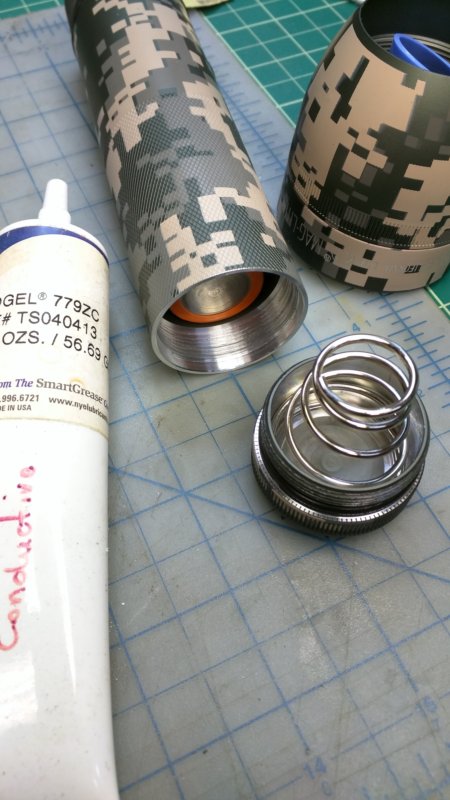
Step 17: Lightly lube new threads (and a tiny bit on the o-ring), and test everything:
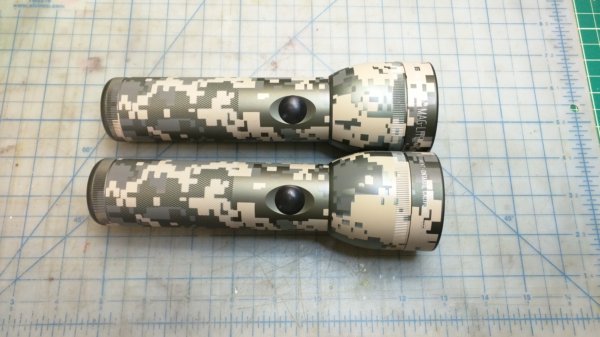
Step 18: Reassembly host & parts. You are done. Enjoy a beer, tee, coffee, whatever you like :twothumbs
I hope this has been helpful.
Will
Step 1: Start with a "D" size host, colour of your choice. For this guide my customer asked for 2x Digital Cammo 1xD's, designed for a 32650 "D" size LiIon cell, which is right around 6" in length (see post #2 for length suggestions for different batteries/holders), assuming a deep tailcap mod is used (which is also part of the this guide):
Step 2: Cut to length. Actually, cut about 0.1" longer, since you have to clean up the edge (depending how you cut the tube with):
Step 3 (optional): Almost too late now, but before cutting threads, verify you have enough room for the threads. Insert intended battery, and see if things will line up. At this point you can also note how deep does the spring would have to be move deeper inside the tailcap for the whole thing to fit together.
Step 4: Use two layers of tape (to protect the finish), and chuck the host. Center per your lathe/chuck.
Step 5: Clean up the edge (raw from the bandsaw).
Step 6: Line up boring bar with edge (y-axis), and just barely touching the ID of the host. It goes without saying that having a DRO in the lathe is invaluable!
Step 7: Bore into the body 0.050" (total ID change of 0.1"), by .150" deep (towards the chuck). This creates the area for the o-ring to fit once the threading is all done.
Step 8: Without changing the DRO settings from the zero in step 7, now bore 0.022" into the body, by 0.500" deep (towards chuck). Of course, the first 0.150" will do nothing (material removed in step 7), but the next 0.350" will of course be removed. This new surface will be the minor diameter of the new threads being cut.
Step 9: Using the threading tool, create the relief for the start of the thread (beginning of the 0.350" section), and the end of the thread (end of the .350" section).
Step 10: Cut the 20TPI thread.
Step 11: Clean up/polish the new threads with an abrasive pad if required:
Step 12: Clean up the sharp inside edge, to prevent it from cutting/tearing up the o-ring:
Step 13: Stop. Take a quick/short break, and marvel at your creation:
Step 14: Re-assemble host, insert battery, and without the spring, make sure everything fits. This also gives you another chance to see/measure how deep the spring needs to be recessed inside the tailcap:
Step 15: To do the deep tailcap mod, I have tried "many" things, and I always messed-up the tailcap finish, so I made my own custom Delrin holder. The tailcap is a "press fit", and with the pressure from the chuck, it does not move while I do the boring operations. When done, push through the built-in hole in the back:
Step 16: Line up boring tool with edge of tailcap (y-axis) , and ID of tailcap (x-axis). Bore 0.600" deep (y-axis) without changing the x-axis:
Step 17: Lightly lube new threads (and a tiny bit on the o-ring), and test everything:
Step 18: Reassembly host & parts. You are done. Enjoy a beer, tee, coffee, whatever you like :twothumbs
I hope this has been helpful.
Will
Last edited:

