
Reviewer's Note: I am very backlogged with lights, so expect less detail than typical in my upcoming reviews. I will keep data comparisons prioritized over text descriptions.
The RS30 is a side-by-side configuration of 2x18650, 2xXM-L2, similar to the Fenix LD50 or a number of other models. In this case, you also get the standard in-light magnetic charging dock common to many Klarus models.
Stock Manufacturer Specifications:
(note: as always, these are simply what the manufacturer provides – scroll down to see my actual testing results).


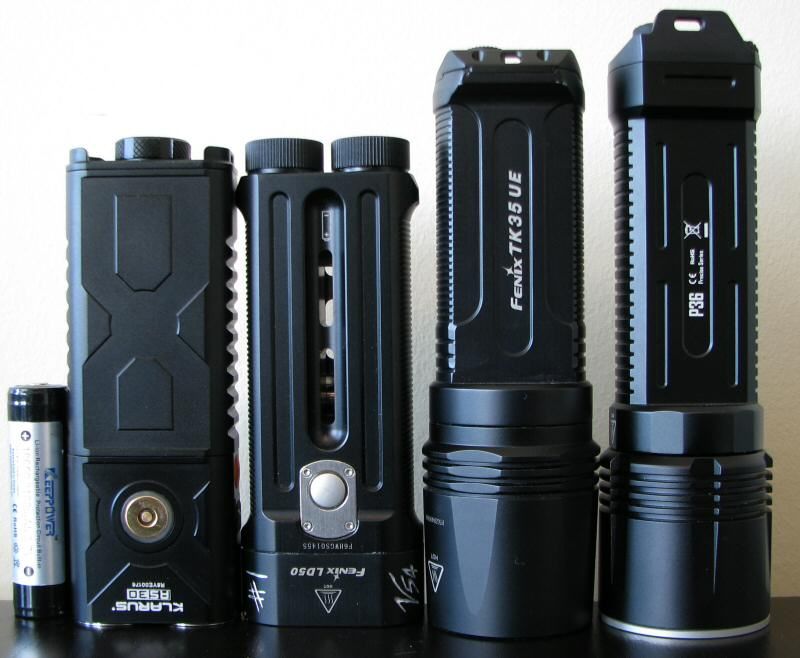
From left to right: Keeppower Protected 18650 3100mAh; Klarus RS30; V54 Fenix LD50vn, TK35UE; Nitecore P36.
All dimensions directly measured, and given with no batteries installed (unless indicated), and without the handle:
Klarus RS30: Weight: 250.8g, Length: 139.8mm, Width (bezel): 27.0mm x 50.2mm
V54 Fenix LD50vn: Weight: 231.2g, Length: 137mm, Width (bezel): 28.2mm x 53.2mm
Fenix TK35UE: Weight 270g, Length 164mm, Width (bezel): 48.6mm
Eagletac SX25L3: Weight: 315.9g, Length: 150.2mm, Weight (bezel): 47.0mm
Nitecore P36: Weight 255.6g, Length 173mm, Width (bezel): 50.0mm
Skilhunt DT-20: Weight 280.0g, Length: 152mm Width (bezel): 72.8mm and 36.8mm
Sunwayman T45C: Weight: 216.6g, Length: 136.0mm, Width (bezel) 40.4mm, Width (widest part): 40.8mm
Rofis TR51: Weight: 242.2g, Length: 146.7mm, Width (bezel) 45.9mm, Width (widest part): 48.1mm
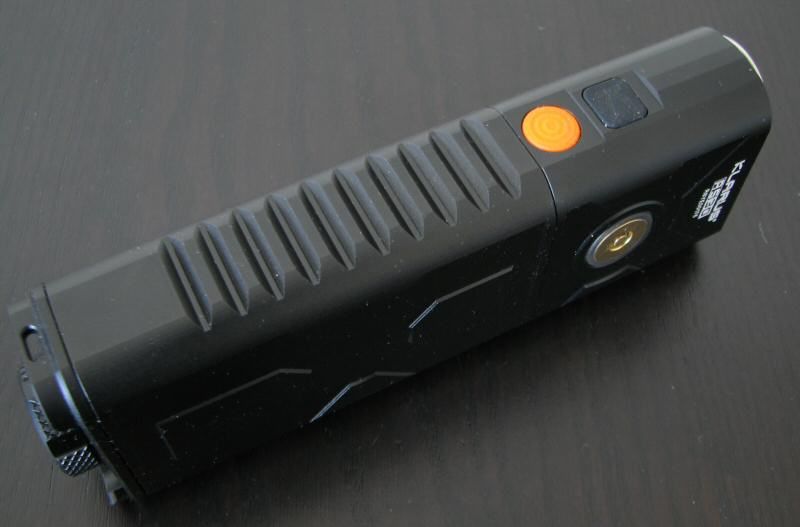
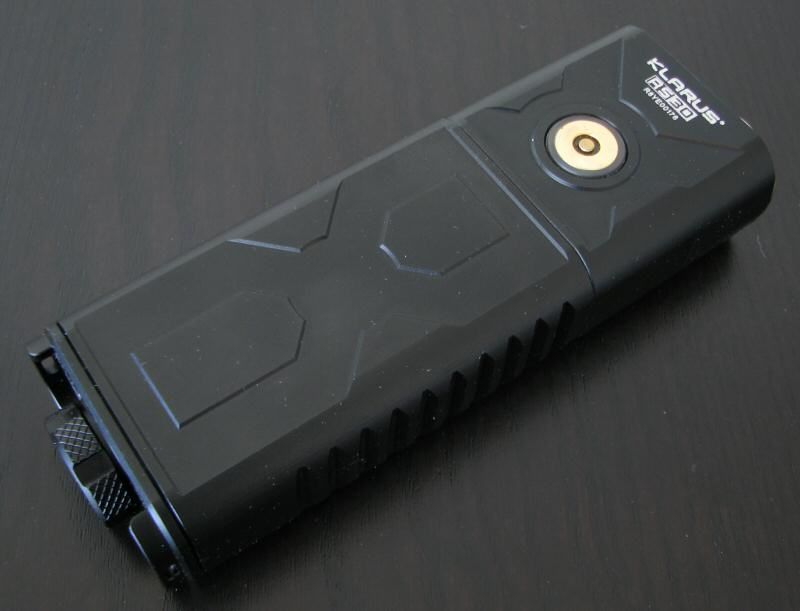
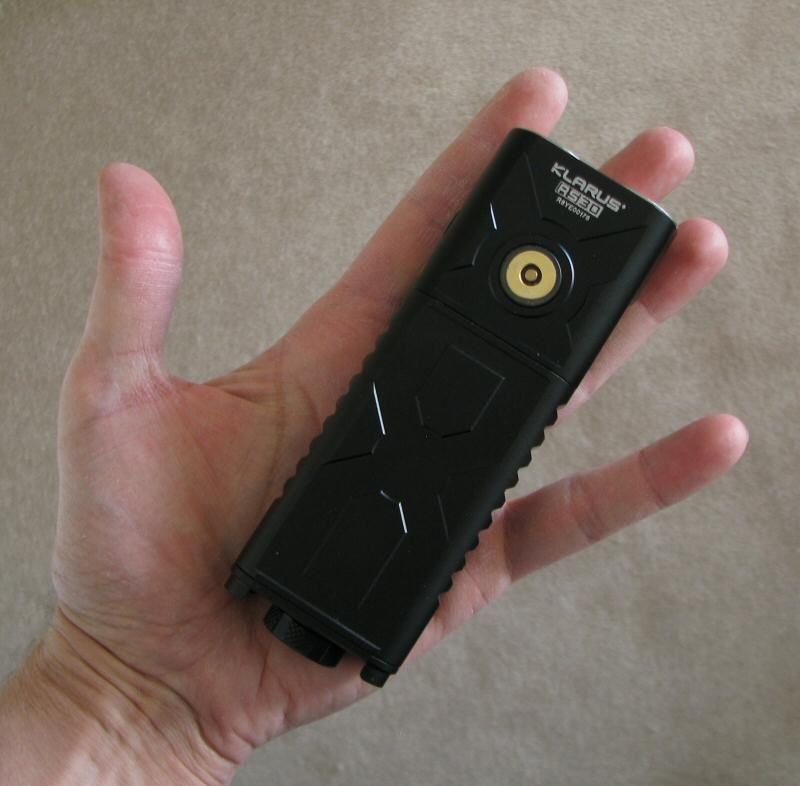
Overall size and dimensions are similar to a number of recent side-by-side 2xXM-L2 lights, like the Fenix LD50 or older Skilhunt DT-20. The light is comfortable to hold and use, with decent grip features.
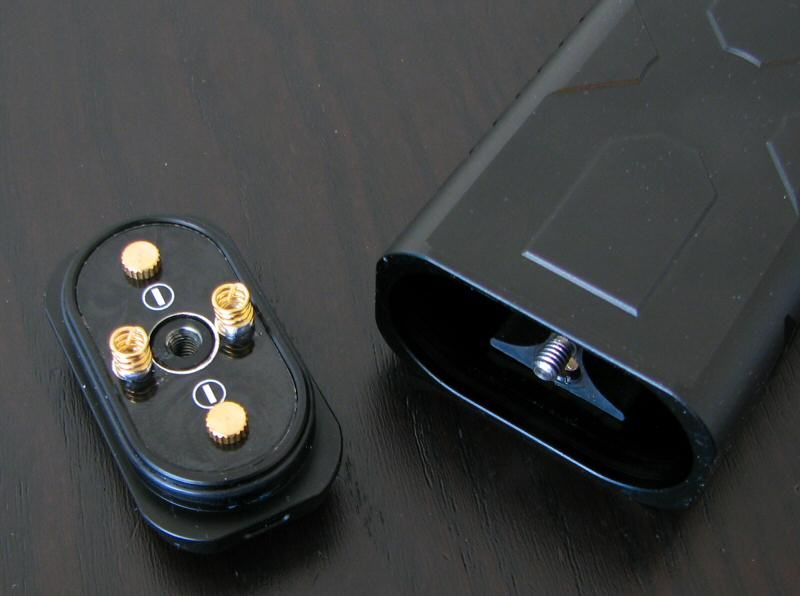
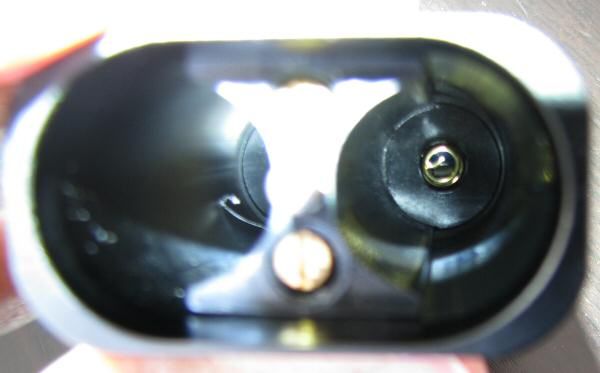
The main difference to most lights is the parallel arrangement of the batteries. While this makes in-light charging a lot safer, it does complicate the tailcap design somewhat. The solution that Klarus went for was to use two small tailcap springs (connecting to two brass screws in the body) to carry the current in the light. As you will see in my commentary at the end, I believe this is design is problematic for consistent operation – at least based on my one sample.
The tailcap is stiff to tighten, and you do need to tighten fully. The built-in wells take all widths of 18650s in my collection, although some are a bit snug. Thanks for the spring in the head of the light, flat top cells will work reliably.
Note that because the wells are independent, you can mix and match 18650 and CR123A (e.g., 1x18650 + 2xCR123A, or 1x/2z18650, or 2x/4xCR123A). This is a nice feature of the design. :thumbsup:
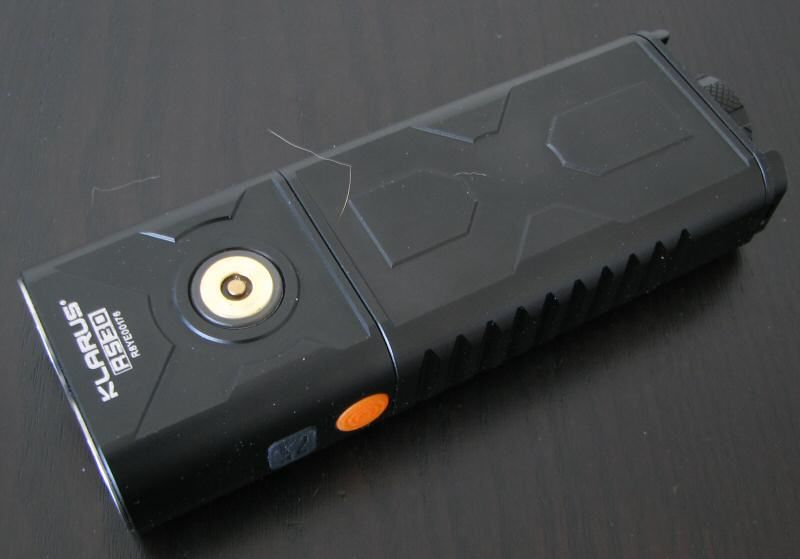
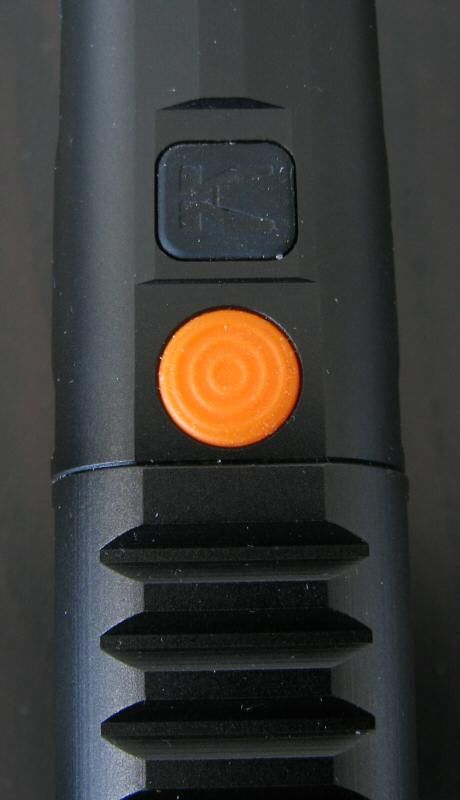
There light is controlled by two switches in the head. See my video overview for instructions on how to use the light. I found the interface is intuitive enough, and worked well (although there is a risk accidental activation of strobe, and only a momentary quick jump to Turbo).
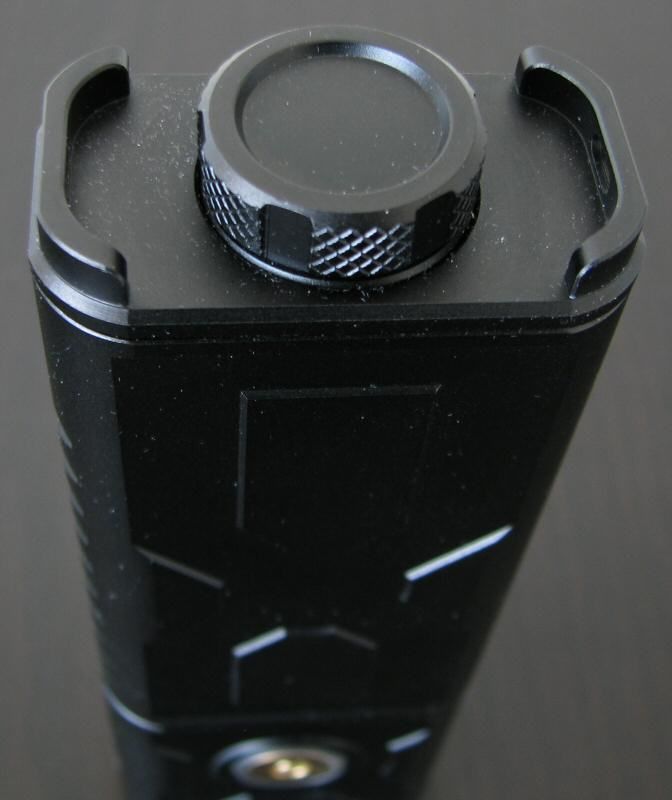
Let's look at the charging setup:
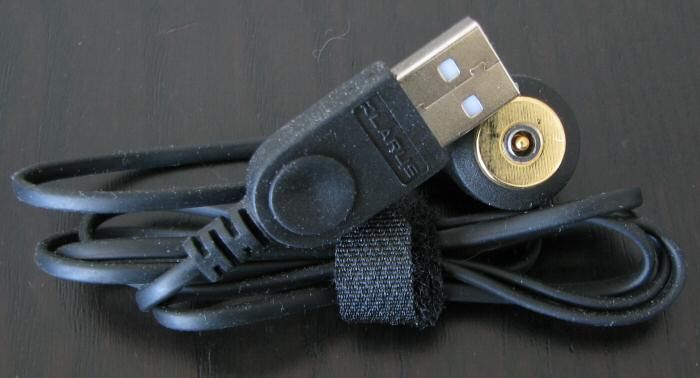

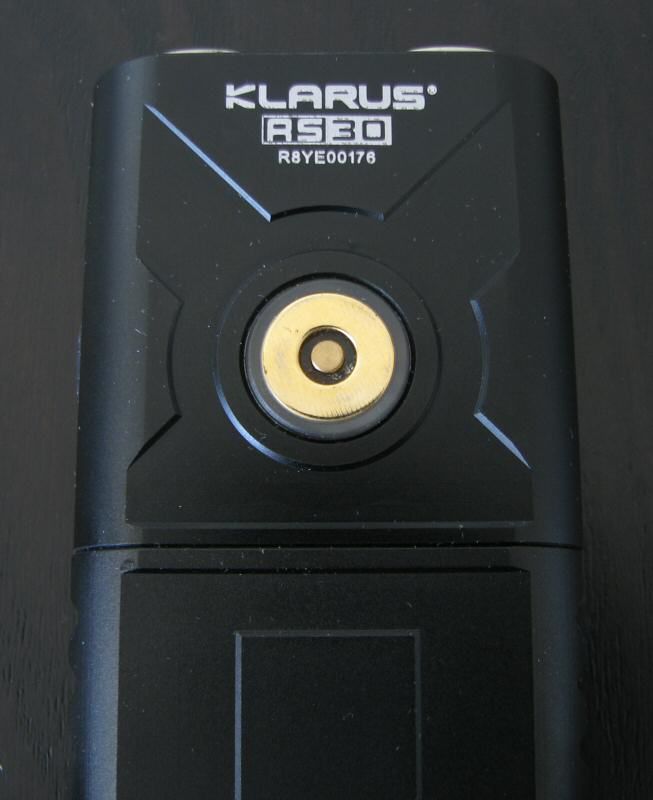
The tail uses a similar magnetic charging dock to other Kalrus lights (with the exact same charging cable). The charging cable directly attaches to the external tailcap contacts through a strong magnetic connection (you can see two metal circular contacts). There is a red/green LED under either side of the contact disc that indicates the charge status of the battery in that well during charging (red charging, green fully charged). As before, I was not able to read a battery voltage at the external tailcap contacts with batteries installed inside the light. This means you don't have to worry about accidentally shorting out a battery inside the light. :thumbsup:
Also as before, there is a raised plastic divider separating the inner and outer magnetic contacts on the charging cable. The divider is important, as you could otherwise potentially short your USB connector if the magnet attracted metal to both contacts simultaneously.
Please scroll down to my new Charging Current section for detailed measures of charging performance.
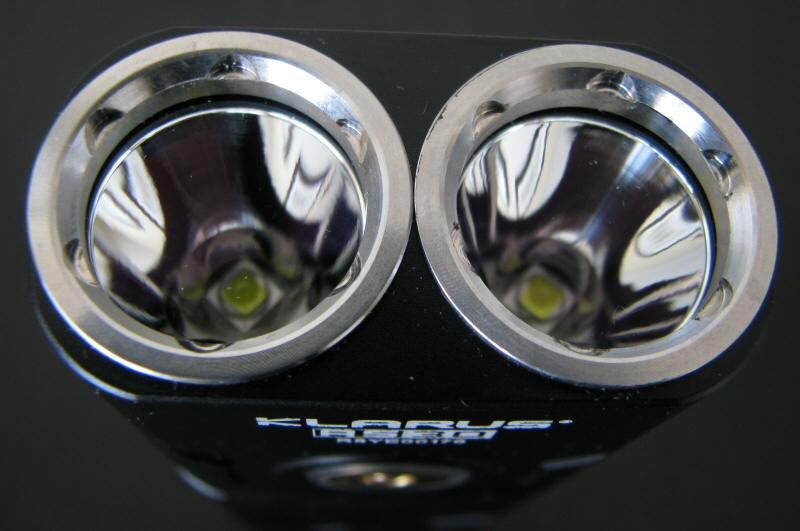
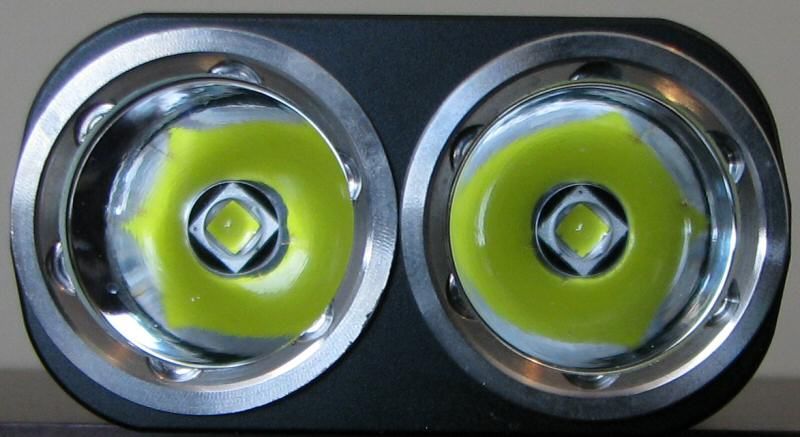
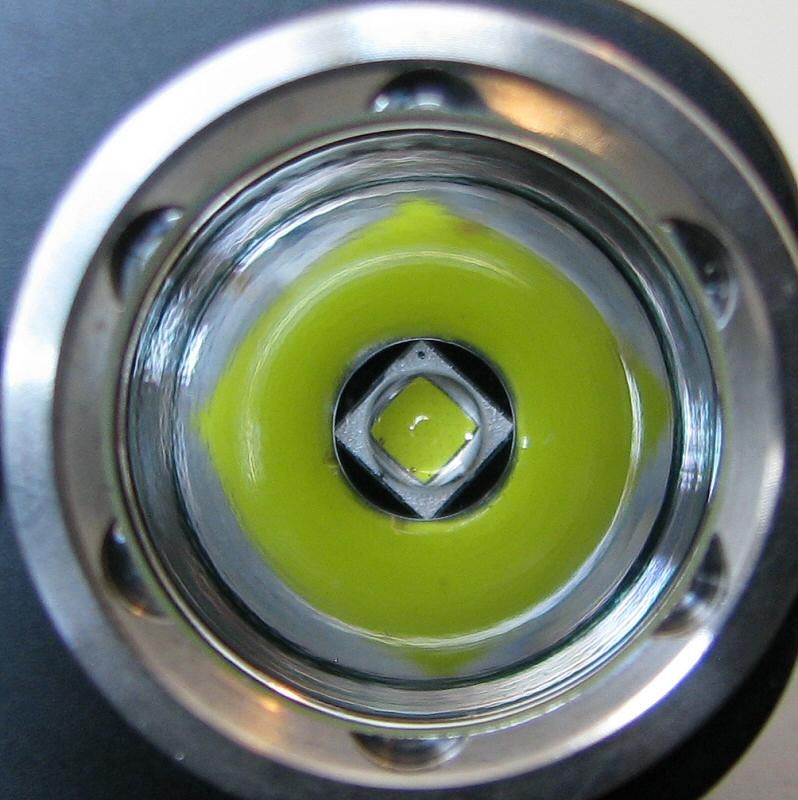
The RS30 features two side-by-side mounted XM-L2 LEDs. At Med, Hi and Turbo, both emitters are lit. At the Low and Moonlight level, only one emitter activates (and it alternates which one, as you power cycle the light).
Scroll down for beamshots and direct intensity measures. :wave:
User Interface
Please see the Video below for a description of the UI.
As with all my videos, I recommend you have annotations turned on. I commonly update the commentary with additional information or clarifications before publicly releasing the video.
PWM/Strobe
There is no sign of flicker or PWM that I can see, at any output level – I believe the light is current-controlled.")
Med level:
Strobe:
Strobe is an oscillating strobe, switching between two frequencies every 2 secs (15.8 Hz and 6.7Hz). Here is a close up of each freq:

And a standard SOS mode:
Charging Current
For these measures, I am using the new Xtar VI01 "USB Detector", which has been reviewed by HKJ here. Charging is done in depleted batteries (<3.2V resting), 3100mAh capacity.
Initial charging current and input voltage was 0.93A and 5.21V. However, only one of the battery wells seemed to be charging in this attempt (i.e., only one LED lit up red, other side was dark). The charging time and currents for this charge cycle was as follows:
1hr: 0.89A (5.29V)
2hr: 0.84A (5.27V)
3hr: 0.50A (5.27V)
4hr: 0.18A (5.25V)
4.5hr: 0.12A (5.29V), quickly drops to zero (green LED), with periodic jumps back up to ~0.12A repeatedly.
Final voltage for the charged cell was 4.16V.
I don't know why the other cell remained uncharged, but I had difficulty getting it to charge inside the light, even when I switched wells. :shrug: Basically, charging would start for a few mins, then terminate with the LED going green (even though the cell was only <3.4V). As you will see below, I had some issues with inconsistent activation of both emitters on my sample – it looks like the sample problem also applies to charging. :thinking:
In any case, I would expect it would take twice as long to fully charge two 3100mAh cells in the light (i.e., 9 hours).
Standby Drain
A standby current drain is inevitable on this light, due to the electronic switches. Given the unusual wiring, I have measured this for a single cell. With a single 18650 installed, the initial standby drain is 3.0mA, which drops within seconds to 0.30mA – and stays there stably. For one 3100mAh battery, that would translate into a little over 14 months. I don't know if that pattern holds for two batteries, but it gives you a general idea that this light falls within a typical range.
There is no physical lock-out, since it is tension on the springs that maintains contact in the tailcap. There is an electronic lockout of the switches, which may reduce the standby drain further (but I have not measured this).
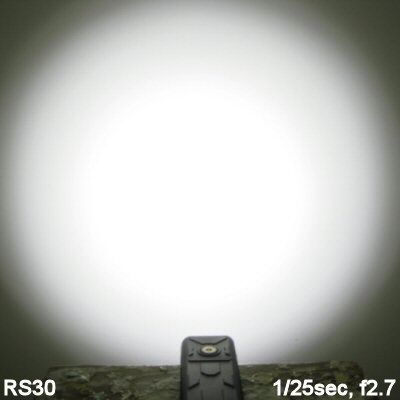
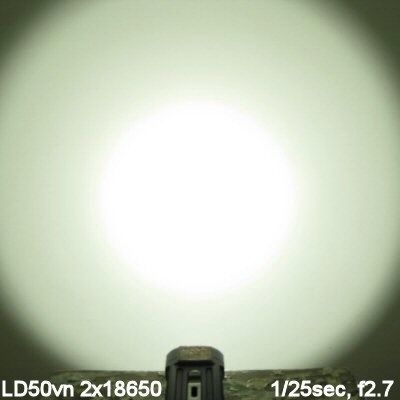
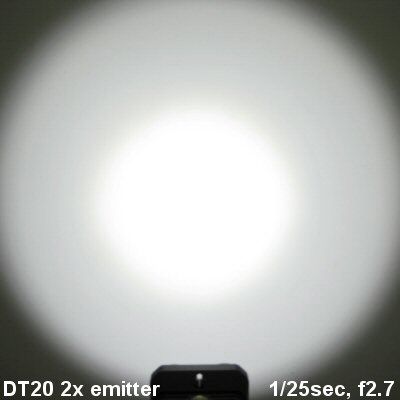
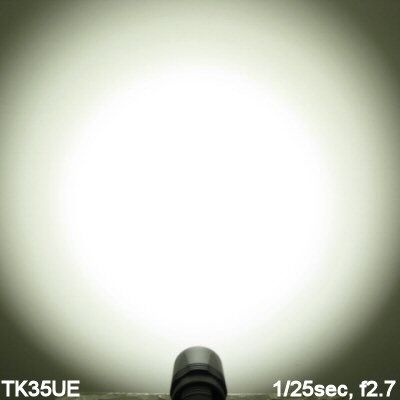
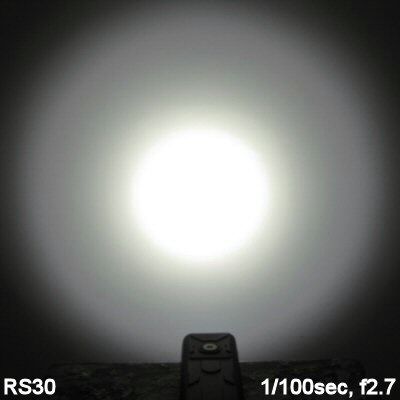
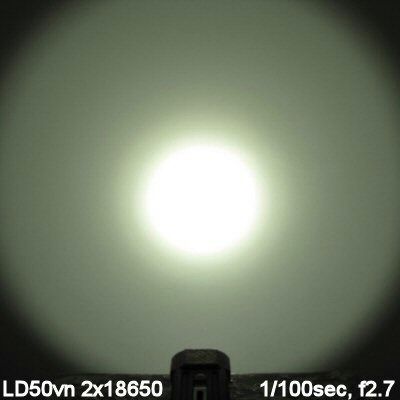
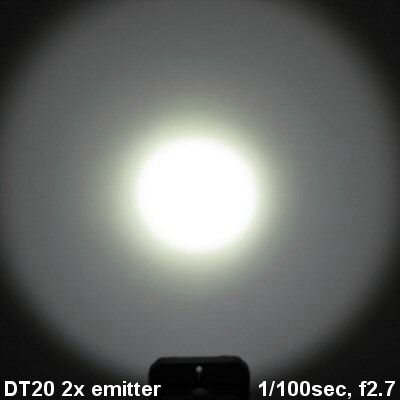
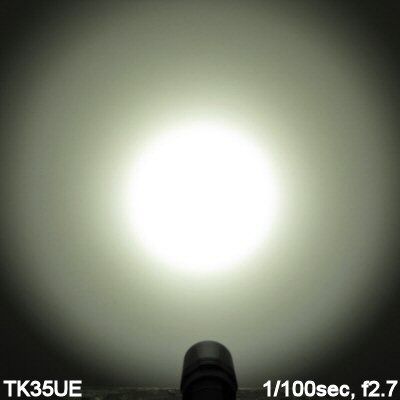
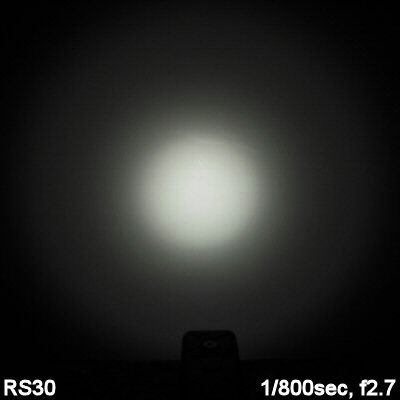
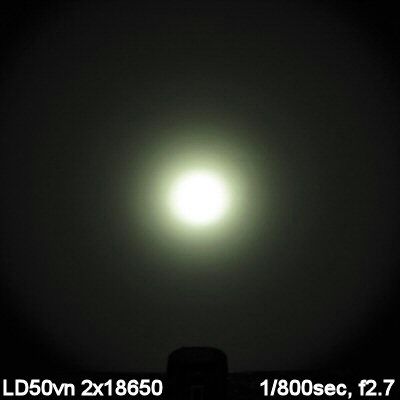
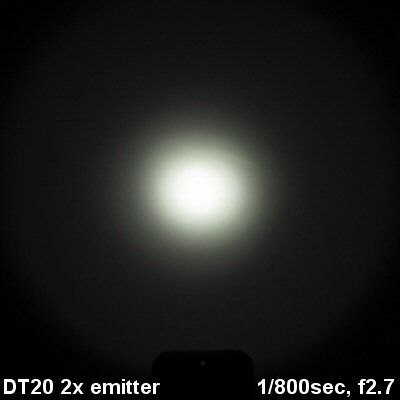
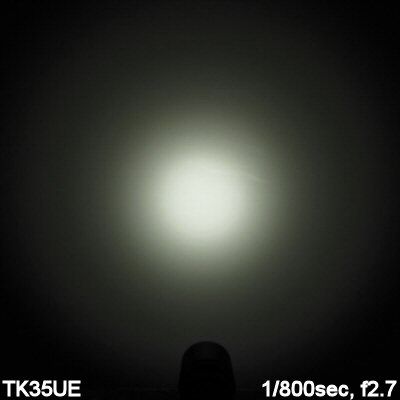
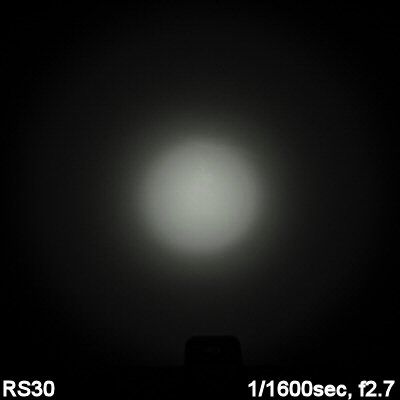
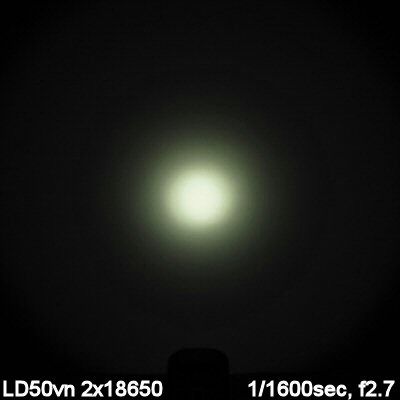
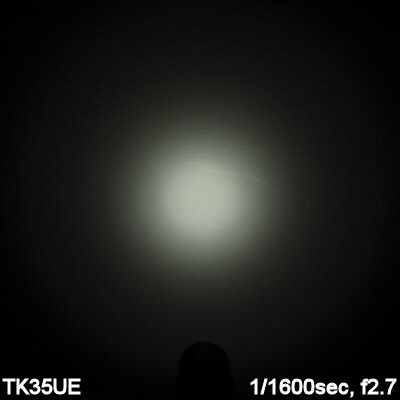
Beamshots:
All lights are on 18650 batteries. Lights are about ~0.75 meter from a white wall (with the camera ~1.25 meters back from the wall). Automatic white balance used on the stock lights (to minimize tint differences), and Daylight white balance used on the V54 modded LD50vn.

Testing Method:
All my output numbers are relative for my home-made light box setup, as described on my flashlightreviews.ca website. You can directly compare all my relative output values from different reviews - i.e. an output value of "10" in one graph is the same as "10" in another. All runtimes are done under a cooling fan, except for any extended run Lo/Min modes (i.e. >12 hours) which are done without cooling.
I have devised a method for converting my lightbox relative output values (ROV) to estimated Lumens. See my How to convert Selfbuilt's Lightbox values to Lumens thread for more info.
Throw/Output Summary Chart:
My summary tables are reported in a manner consistent with the ANSI FL-1 standard for flashlight testing. Please see http://www.flashlightreviews.ca/FL1.htm for a discussion, and a description of all the terms used in these tables. Effective July 2012, I have updated all my Peak Intensity/Beam Distance measures with a NIST-certified Extech EA31 lightmeter (orange highlights).
A reasonably good concordance with other lights in this class, although the RS30 is a bit less throwy than some.

Output/Runtime Graphs:
As always, all runtimes are done under a cooling fan.
There are constant small fluctuations in output on Turbo and Hi levels. These are subtle enough (and gradual enough over time) that you cannot notice them in actual use – but the lightbox does pick up the fluctuations at its 30sec sampling frequency. There are also noticeable "jumps" in output between the step-down levels, as you can see in the Hi mode run especially. Also, overall efficiency is not quite as high as I would like on Hi and Turbo, but seems good on Med.
I expect the issues on Turbo and Hi refer to the contacts problems I noted in the design of the tailcap (i.e., the current has to run through two tiny springs). I will come back to this in my comments below.
Note that in addition to 2x18650, the light supports 1x18650, 4xCR123A and 2xCR123A. You can even mix and match, with 1x18650 and 2xCR123A, due to the independent wells. I have not had a chance to do runtimes on these configurations yet.
Potential Issues
The parallel-cell arrangement (while safer for charging) seems to introduce challenges with consistent operation – at least one my one sample. In this design, the current is carried by two small springs that contact two brass screw heads. I found I needed to clean all surfaces with contact cleaner after every battery change, to ensure somewhat reliable operation of both cells. Even with this cleaning, I still found unexplained drop-outs of one cell/emitter during operation occasionally on my sample.
I also found drop-outs during charging, when one of the cells would terminate unexpectedly (or not initiate charging). However, rather than report an error, the charge indicator incorrectly showed "green" status in most of these cases (i.e., fully charged, even though the cell wasn't).
There were an unusual amount of subtle fluctuations in output on the Hi/Turbo modes (not visible to the eye, but detectable in my lightbox). I suspect these are related to this contact/current issue. There were also visible "jumps" back and forth in the drop-down levels during operation on the Hi/Turbo modes. Finally, overall efficiency was lower than expected on these two modes.
The tailplate is difficult to tighten, given the tension on the batteries. It must be fully tightened to ensure the most consistent operation (and can therefore be very stiff to loosen). Good hand strength is required.
As with all lights with electronic switches, there is a standby drain when a battery is connected, but this is within the normal range for this type of light (i.e., 14 months on a single 18650).
The two control buttons are visually identified, but may be hard to find by touch alone.
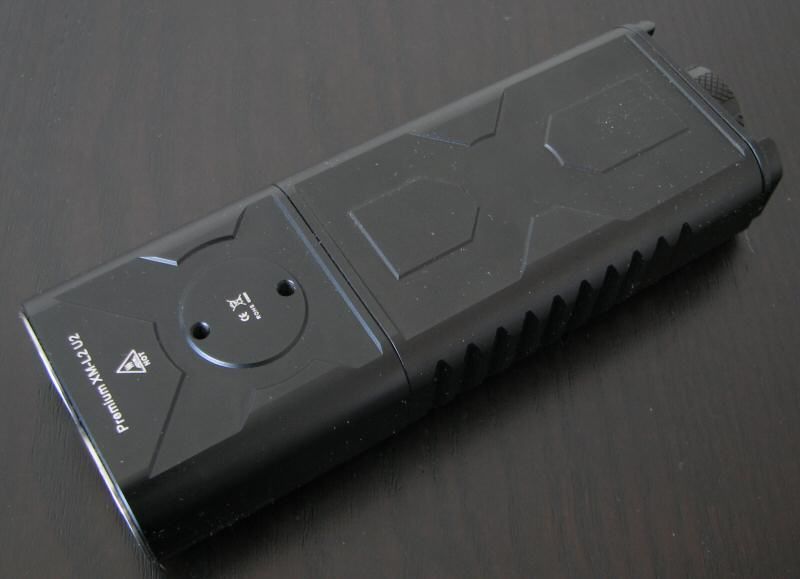
I am unsure about waterproofness, given the two holes on the opposite side from the charging dock. Also, you will need to ensure the tailcap is fully tightened, to prevent potential water entry there.
Preliminary Observations
While not particularly common, I've reviewed a couple of side-by-side 18650, dual-emitter lights (e.g. Skilhunt DT-20, Fenix LD50). These have the advantage of being comfortable to hold and carry, without the enlarged head common to most other side-by-side models.
Typically, the dual emitters can be controlled somewhat independently in these lights, which is potentially useful if you are down to a single battery. The RS30 seems to have the most flexibility in this regard, with the option to support independent battery well configurations.
The dual-switch interface also worked well in my testing, and was reasonably intuitive (although I did accidentally strobe myself a few times). This can get complicated with independent cells and emitters, and I think Klarus did a good job overall on the interface. I also like the inclusion of the classic Klarus magnetic dock charging system. I think the parallel battery arrangement is well suited to in-light charging. :thumbsup:
But any way you do it, this independent battery/emitter design also increases the complexity of operation, and potentially leads to issues with connectivity in all lights that have adopted it. Please see my Potential Issues section above for all issues I experienced during testing of my one RS30 sample. In this case, I believe these all stem from the tail design that requires all the current to pass through two tiny springs that meet with two screw heads. It was fussy to get consistent operation, requiring a lot of contact cleaning between battery changes. Klarus advises that you must also make sure those two screws remain tightly in place. But even when the light worked as expected there were output fluctuations and reduced efficiency observed in my lightbox on Hi/Turbo (again, at least on my one sample). :sigh:
Aside from these issues, I found the overall build and user interface of the light to be acceptable for this style of dual battery, dual emitter light. The emitters were well aligned, and produced the expected beam pattern. Max output and range of output levels were appropriate (and better than most). I also appreciate the constant-current operation (i.e., no PWM). :thumbsup:
I think the overall functionality of the RS30 has promise. But I strongly urge Klarus to consider a re-design of the tail assembly, as I doubt the issues on my sample were a one-off. At a minimum, higher quality springs would likely help prevent these issues from re-occurring. With improved reliability, this model would seem to offer the most functionality for the dual well/dual emitter class. :wave:
----
Klarus RS30 provided by Klarus for review.
The RS30 is a side-by-side configuration of 2x18650, 2xXM-L2, similar to the Fenix LD50 or a number of other models. In this case, you also get the standard in-light magnetic charging dock common to many Klarus models.
Stock Manufacturer Specifications:
(note: as always, these are simply what the manufacturer provides – scroll down to see my actual testing results).
- LED: 2 x CREE XM-L2-U2
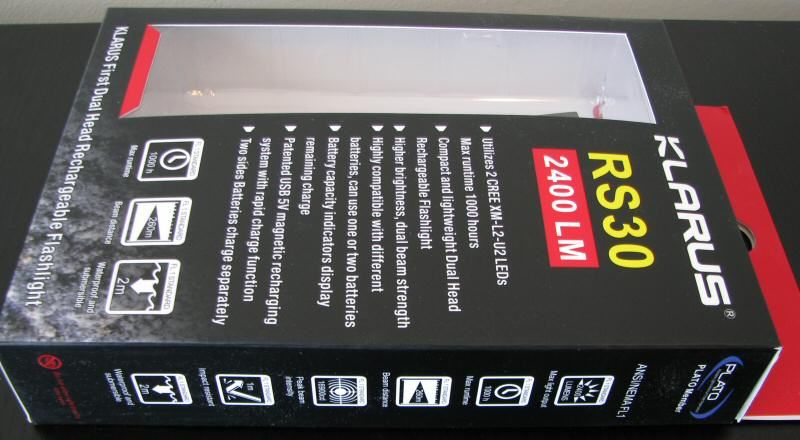
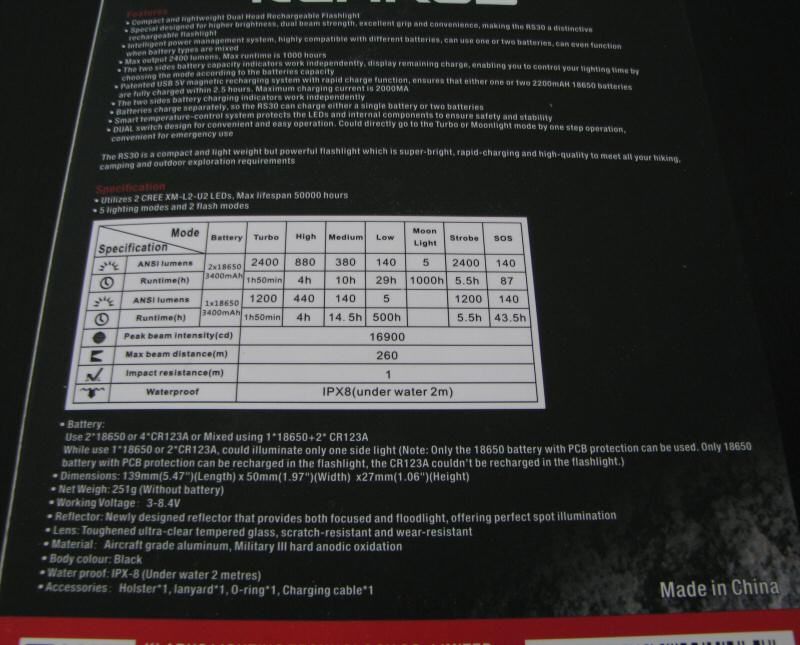
- USING 2 X 18650 OR 4 X CR123A: Turbo: 2400 Lumens - 1 Hour 50 Min, High: 880 Lumens - 4 Hours, Medium: 380 Lumens - 10 Hours, Low: 140 Lumens - 29 Hours, Moonlight: 5 Lumens - 1000 Hours, Strobe: 2400 Lumens - 5 Hours 30 Min, SOS: 140 Lumens - 87 Hours
- USING 1 X 18650 OR 2 X CR123A: Turbo: 1200 Lumens - 1 Hour 50 Min, High: 440 Lumens - 4 Hours, Low: 140 Lumens - 14 Hours 30 Min, Moonlight: 5 Lumens - 500 Hours, Strobe: 1200 Lumens - 5 Hours 30 Min, SOS: 140 Lumens - 43.5 Hours 30 Min
- Max Throw Distance: 260 meters
- Max Beam Intensity: 16900 cd
- Working Voltage: 3-8.4 Volts
- Patented USB 5V magnetic charging system allows for quick and convenient internal charging
- Batteries charge individually, allowing RS30 to charge a single battery or both batteries at once depending on needs
- Aircraft-grade anodized aluminum body is rugged and allows for rapid heat dissipation to prevent overheating
- Tempered glass lens features AM film plating to prevent scratches or other damage
- Reverse-polarity protection and smart temperature control system to protect both battery and flashlight from damage
- Dual Switch Design for convenient and simple operation
- Side switch features specially designed lock function to prevent accidental usage
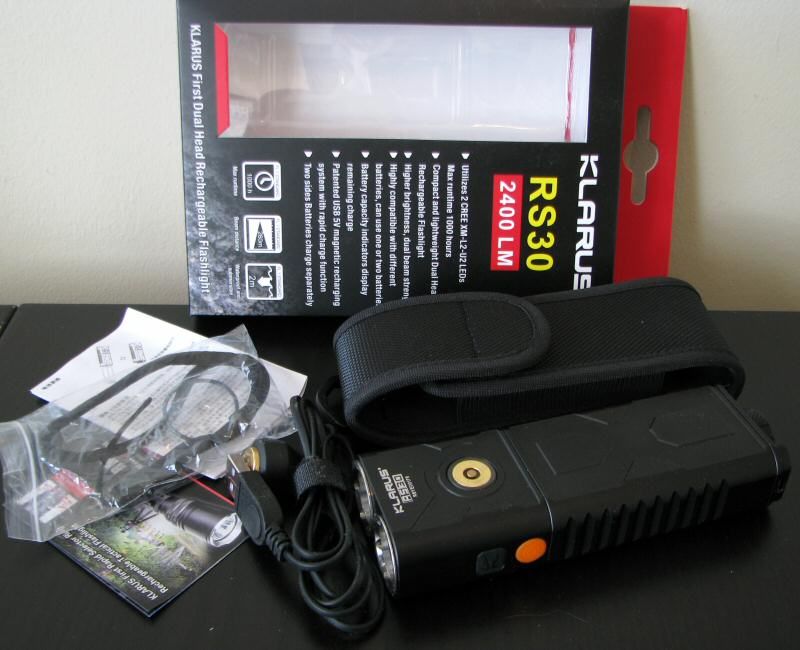
- Included Accessories: 1 x Holster, 1 x Lanyard, 1 x O-Ring, 1 x Charging Cable
- IPX Rating: IPX-8 (Waterproof and submersible up to 2 meters underwater)
- Impact Resistance: 1 meter
- Dimensions: 5.47" (Length) x 1.97" (Width) x 1.06" (Height)
- Weight: 8.85 oz. (Without Battery)
- MSRP: $100
From left to right: Keeppower Protected 18650 3100mAh; Klarus RS30; V54 Fenix LD50vn, TK35UE; Nitecore P36.
All dimensions directly measured, and given with no batteries installed (unless indicated), and without the handle:
Klarus RS30: Weight: 250.8g, Length: 139.8mm, Width (bezel): 27.0mm x 50.2mm
V54 Fenix LD50vn: Weight: 231.2g, Length: 137mm, Width (bezel): 28.2mm x 53.2mm
Fenix TK35UE: Weight 270g, Length 164mm, Width (bezel): 48.6mm
Eagletac SX25L3: Weight: 315.9g, Length: 150.2mm, Weight (bezel): 47.0mm
Nitecore P36: Weight 255.6g, Length 173mm, Width (bezel): 50.0mm
Skilhunt DT-20: Weight 280.0g, Length: 152mm Width (bezel): 72.8mm and 36.8mm
Sunwayman T45C: Weight: 216.6g, Length: 136.0mm, Width (bezel) 40.4mm, Width (widest part): 40.8mm
Rofis TR51: Weight: 242.2g, Length: 146.7mm, Width (bezel) 45.9mm, Width (widest part): 48.1mm
Overall size and dimensions are similar to a number of recent side-by-side 2xXM-L2 lights, like the Fenix LD50 or older Skilhunt DT-20. The light is comfortable to hold and use, with decent grip features.
The main difference to most lights is the parallel arrangement of the batteries. While this makes in-light charging a lot safer, it does complicate the tailcap design somewhat. The solution that Klarus went for was to use two small tailcap springs (connecting to two brass screws in the body) to carry the current in the light. As you will see in my commentary at the end, I believe this is design is problematic for consistent operation – at least based on my one sample.
The tailcap is stiff to tighten, and you do need to tighten fully. The built-in wells take all widths of 18650s in my collection, although some are a bit snug. Thanks for the spring in the head of the light, flat top cells will work reliably.
Note that because the wells are independent, you can mix and match 18650 and CR123A (e.g., 1x18650 + 2xCR123A, or 1x/2z18650, or 2x/4xCR123A). This is a nice feature of the design. :thumbsup:
There light is controlled by two switches in the head. See my video overview for instructions on how to use the light. I found the interface is intuitive enough, and worked well (although there is a risk accidental activation of strobe, and only a momentary quick jump to Turbo).
Let's look at the charging setup:
The tail uses a similar magnetic charging dock to other Kalrus lights (with the exact same charging cable). The charging cable directly attaches to the external tailcap contacts through a strong magnetic connection (you can see two metal circular contacts). There is a red/green LED under either side of the contact disc that indicates the charge status of the battery in that well during charging (red charging, green fully charged). As before, I was not able to read a battery voltage at the external tailcap contacts with batteries installed inside the light. This means you don't have to worry about accidentally shorting out a battery inside the light. :thumbsup:
Also as before, there is a raised plastic divider separating the inner and outer magnetic contacts on the charging cable. The divider is important, as you could otherwise potentially short your USB connector if the magnet attracted metal to both contacts simultaneously.
Please scroll down to my new Charging Current section for detailed measures of charging performance.
The RS30 features two side-by-side mounted XM-L2 LEDs. At Med, Hi and Turbo, both emitters are lit. At the Low and Moonlight level, only one emitter activates (and it alternates which one, as you power cycle the light).
Scroll down for beamshots and direct intensity measures. :wave:
User Interface
Please see the Video below for a description of the UI.
As with all my videos, I recommend you have annotations turned on. I commonly update the commentary with additional information or clarifications before publicly releasing the video.
PWM/Strobe
There is no sign of flicker or PWM that I can see, at any output level – I believe the light is current-controlled.
Med level:
Strobe:
Strobe is an oscillating strobe, switching between two frequencies every 2 secs (15.8 Hz and 6.7Hz). Here is a close up of each freq:
And a standard SOS mode:
Charging Current
For these measures, I am using the new Xtar VI01 "USB Detector", which has been reviewed by HKJ here. Charging is done in depleted batteries (<3.2V resting), 3100mAh capacity.
Initial charging current and input voltage was 0.93A and 5.21V. However, only one of the battery wells seemed to be charging in this attempt (i.e., only one LED lit up red, other side was dark). The charging time and currents for this charge cycle was as follows:
1hr: 0.89A (5.29V)
2hr: 0.84A (5.27V)
3hr: 0.50A (5.27V)
4hr: 0.18A (5.25V)
4.5hr: 0.12A (5.29V), quickly drops to zero (green LED), with periodic jumps back up to ~0.12A repeatedly.
Final voltage for the charged cell was 4.16V.
I don't know why the other cell remained uncharged, but I had difficulty getting it to charge inside the light, even when I switched wells. :shrug: Basically, charging would start for a few mins, then terminate with the LED going green (even though the cell was only <3.4V). As you will see below, I had some issues with inconsistent activation of both emitters on my sample – it looks like the sample problem also applies to charging. :thinking:
In any case, I would expect it would take twice as long to fully charge two 3100mAh cells in the light (i.e., 9 hours).
Standby Drain
A standby current drain is inevitable on this light, due to the electronic switches. Given the unusual wiring, I have measured this for a single cell. With a single 18650 installed, the initial standby drain is 3.0mA, which drops within seconds to 0.30mA – and stays there stably. For one 3100mAh battery, that would translate into a little over 14 months. I don't know if that pattern holds for two batteries, but it gives you a general idea that this light falls within a typical range.
There is no physical lock-out, since it is tension on the springs that maintains contact in the tailcap. There is an electronic lockout of the switches, which may reduce the standby drain further (but I have not measured this).
Beamshots:
All lights are on 18650 batteries. Lights are about ~0.75 meter from a white wall (with the camera ~1.25 meters back from the wall). Automatic white balance used on the stock lights (to minimize tint differences), and Daylight white balance used on the V54 modded LD50vn.
Testing Method:
All my output numbers are relative for my home-made light box setup, as described on my flashlightreviews.ca website. You can directly compare all my relative output values from different reviews - i.e. an output value of "10" in one graph is the same as "10" in another. All runtimes are done under a cooling fan, except for any extended run Lo/Min modes (i.e. >12 hours) which are done without cooling.
I have devised a method for converting my lightbox relative output values (ROV) to estimated Lumens. See my How to convert Selfbuilt's Lightbox values to Lumens thread for more info.
Throw/Output Summary Chart:
My summary tables are reported in a manner consistent with the ANSI FL-1 standard for flashlight testing. Please see http://www.flashlightreviews.ca/FL1.htm for a discussion, and a description of all the terms used in these tables. Effective July 2012, I have updated all my Peak Intensity/Beam Distance measures with a NIST-certified Extech EA31 lightmeter (orange highlights).
A reasonably good concordance with other lights in this class, although the RS30 is a bit less throwy than some.
Output/Runtime Graphs:
As always, all runtimes are done under a cooling fan.
There are constant small fluctuations in output on Turbo and Hi levels. These are subtle enough (and gradual enough over time) that you cannot notice them in actual use – but the lightbox does pick up the fluctuations at its 30sec sampling frequency. There are also noticeable "jumps" in output between the step-down levels, as you can see in the Hi mode run especially. Also, overall efficiency is not quite as high as I would like on Hi and Turbo, but seems good on Med.
I expect the issues on Turbo and Hi refer to the contacts problems I noted in the design of the tailcap (i.e., the current has to run through two tiny springs). I will come back to this in my comments below.
Note that in addition to 2x18650, the light supports 1x18650, 4xCR123A and 2xCR123A. You can even mix and match, with 1x18650 and 2xCR123A, due to the independent wells. I have not had a chance to do runtimes on these configurations yet.
Potential Issues
The parallel-cell arrangement (while safer for charging) seems to introduce challenges with consistent operation – at least one my one sample. In this design, the current is carried by two small springs that contact two brass screw heads. I found I needed to clean all surfaces with contact cleaner after every battery change, to ensure somewhat reliable operation of both cells. Even with this cleaning, I still found unexplained drop-outs of one cell/emitter during operation occasionally on my sample.
I also found drop-outs during charging, when one of the cells would terminate unexpectedly (or not initiate charging). However, rather than report an error, the charge indicator incorrectly showed "green" status in most of these cases (i.e., fully charged, even though the cell wasn't).
There were an unusual amount of subtle fluctuations in output on the Hi/Turbo modes (not visible to the eye, but detectable in my lightbox). I suspect these are related to this contact/current issue. There were also visible "jumps" back and forth in the drop-down levels during operation on the Hi/Turbo modes. Finally, overall efficiency was lower than expected on these two modes.
The tailplate is difficult to tighten, given the tension on the batteries. It must be fully tightened to ensure the most consistent operation (and can therefore be very stiff to loosen). Good hand strength is required.
As with all lights with electronic switches, there is a standby drain when a battery is connected, but this is within the normal range for this type of light (i.e., 14 months on a single 18650).
The two control buttons are visually identified, but may be hard to find by touch alone.
I am unsure about waterproofness, given the two holes on the opposite side from the charging dock. Also, you will need to ensure the tailcap is fully tightened, to prevent potential water entry there.
Preliminary Observations
While not particularly common, I've reviewed a couple of side-by-side 18650, dual-emitter lights (e.g. Skilhunt DT-20, Fenix LD50). These have the advantage of being comfortable to hold and carry, without the enlarged head common to most other side-by-side models.
Typically, the dual emitters can be controlled somewhat independently in these lights, which is potentially useful if you are down to a single battery. The RS30 seems to have the most flexibility in this regard, with the option to support independent battery well configurations.
The dual-switch interface also worked well in my testing, and was reasonably intuitive (although I did accidentally strobe myself a few times). This can get complicated with independent cells and emitters, and I think Klarus did a good job overall on the interface. I also like the inclusion of the classic Klarus magnetic dock charging system. I think the parallel battery arrangement is well suited to in-light charging. :thumbsup:
But any way you do it, this independent battery/emitter design also increases the complexity of operation, and potentially leads to issues with connectivity in all lights that have adopted it. Please see my Potential Issues section above for all issues I experienced during testing of my one RS30 sample. In this case, I believe these all stem from the tail design that requires all the current to pass through two tiny springs that meet with two screw heads. It was fussy to get consistent operation, requiring a lot of contact cleaning between battery changes. Klarus advises that you must also make sure those two screws remain tightly in place. But even when the light worked as expected there were output fluctuations and reduced efficiency observed in my lightbox on Hi/Turbo (again, at least on my one sample). :sigh:
Aside from these issues, I found the overall build and user interface of the light to be acceptable for this style of dual battery, dual emitter light. The emitters were well aligned, and produced the expected beam pattern. Max output and range of output levels were appropriate (and better than most). I also appreciate the constant-current operation (i.e., no PWM). :thumbsup:
I think the overall functionality of the RS30 has promise. But I strongly urge Klarus to consider a re-design of the tail assembly, as I doubt the issues on my sample were a one-off. At a minimum, higher quality springs would likely help prevent these issues from re-occurring. With improved reliability, this model would seem to offer the most functionality for the dual well/dual emitter class. :wave:
----
Klarus RS30 provided by Klarus for review.