
Reviewer's Note: I am very backlogged with lights, so expect less detail than typical in my upcoming reviews.
The XT11S is the latest iteration of the XT11 series from Klarus - and one with some notable updates from the last model I reviewed in 2014.
Manufacturer Reported Specifications:
(note: as always, these are simply what the manufacturer provides – scroll down to see my actual testing results).
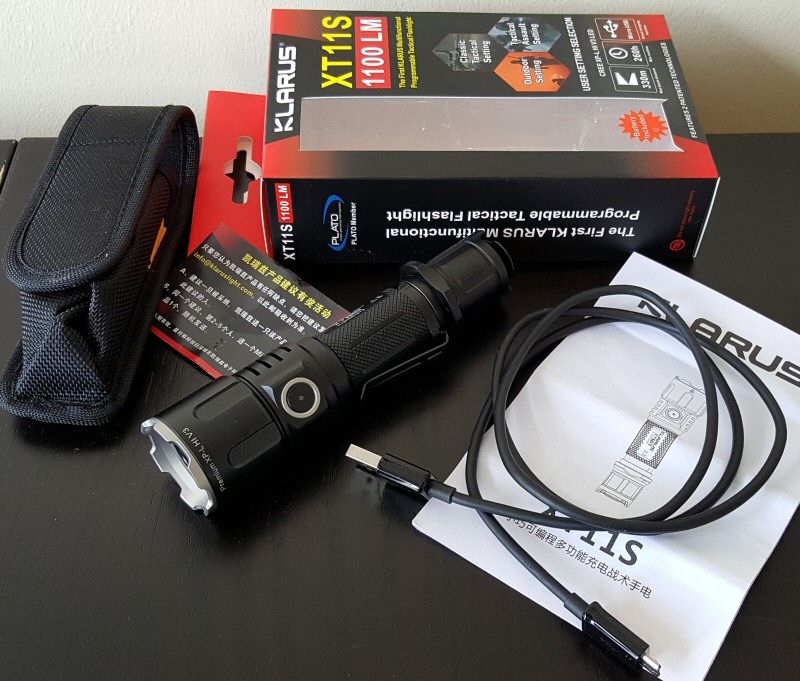
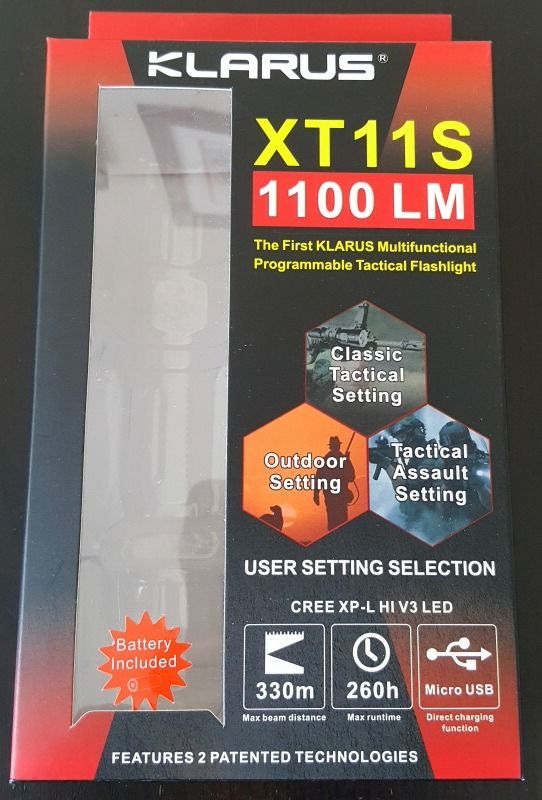
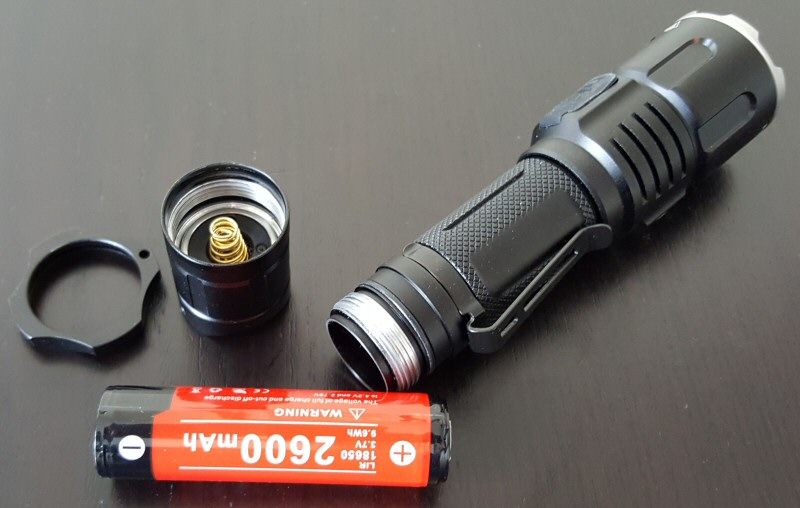
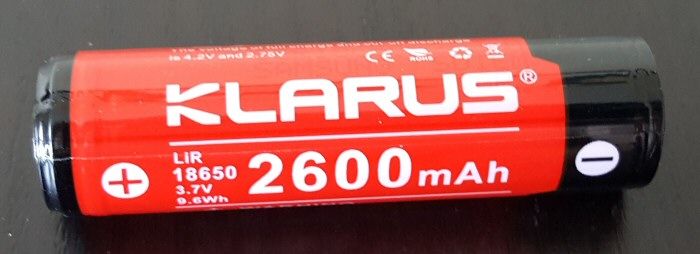
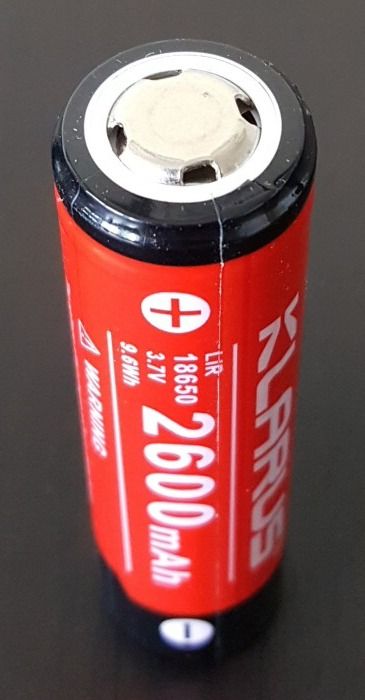
The XT11s comes in fairly typical display packaging as before, will detailed info and specs across the box. The light comes with a micro USB charging cable, manual, spare o-rings, basic wrist strap, removable pocket clip (attached), removable plastic grip ring (attached) and belt holster (with closing flap). A 2600mAh protected 18650 from Klarus was included with my sample.
All dimensions directly measured, and given with no batteries installed:
Klarus XT11S: Weight 130.1g, Length: 141.1mm, Width (bezel): 34.9mm
Klarus XT11-2014: Weight 140.1g, Length: 150.5mm, Width (bezel): 34.8mm
Klarus XT11-2012: Weight 133.0g, Length: 148.8mm, Width (bezel) 35.0mm
Klarus RS11-2014: Weight 151.5g, Length: 159mm, Width (bezel): 34.9mm
Eagletac G25C2-II (stock): Weight 141.0g, Length: 150.6mm, Width: 39.6mm
Eagletac TX25C2: Weight 93.6g, Length: 120.4mm, Width (bezel): 31.6mm
Fenix PD35: Weight: 82.7g, Length: 138.1mm, Width (bezel): 25.4mm
Lumintop SDMini: Weight: 91.1g, Length: 108.7mm, Width (bezel): 31.8mm
Nitecore MH20: Weight: 85.4g, Length: 105.5mm, Width (bezel): 31.8mm
Nitecore MH20GT: Weight: 89.4g, Length: 111.6mm, Width (bezel): 31.9mm
Thrunite TN12-2014: Weight: 80.0g, Length: 140.5mm, Width (bezel): 25.4mm
Zebralight SC600 III: Weight 64.8g, Length: 96.3mm, Width (bezel) 30.1mm
As you can see from above the XT11S is noticeably shorter and lighter than the previous model XT11.
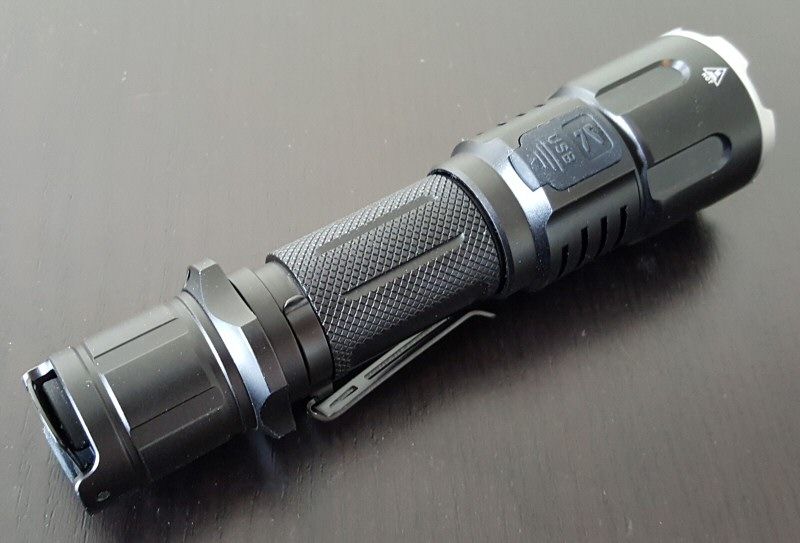

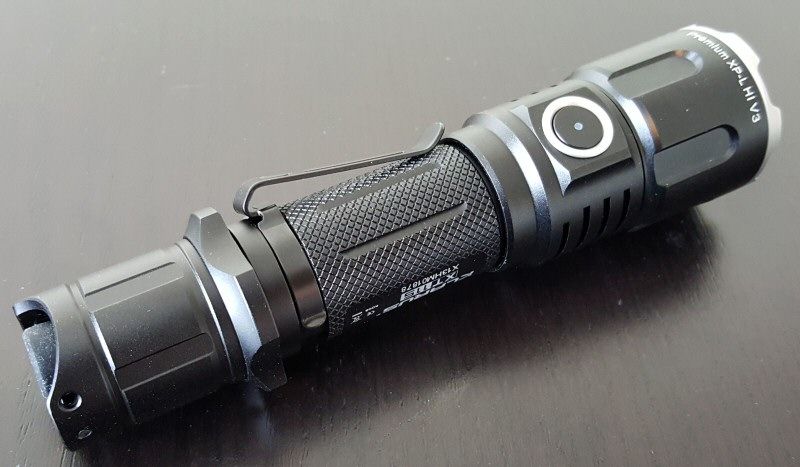
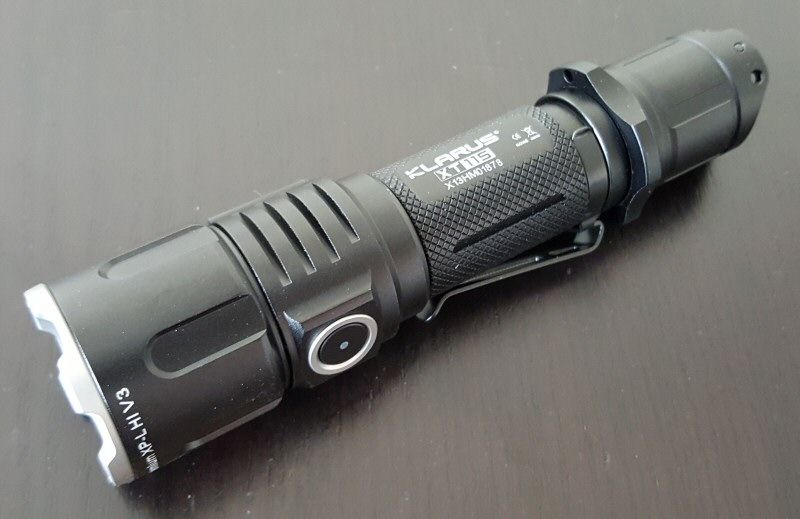
The XT11S is a fully updated build from the XT11-2014 (which wasn't greatly different from the original XT11). The tailcap switch has been updated, the body styling is different, an in-light charging port has been added, and there is a new secondary side switch (with LED underneath).
Anodizing is now a typical black (instead of the old dark grey-brown). No blemishes or flaws on my sample. Labels are clear against the dark background. As before, knurling is still not very aggressive, but all the ridge detail and extra elements around the head and body help with grip.
As before, the clip-on pocket clip is fairly basic, but seems to hold on fairly well (for this type of clip). And again, the clip is head-facing, and not reversible.
The bundled grip seems to be metal now. It can still spin when the tailcap is fully tightened (as with many other lights in this class).
There is still a spring in the head, so all flat-top high capacity cells should fit and work fine in the light.
Screw threads are square-cut, and not anodized. However, physical lock-out of the tailswitches is possible, due to the distinctive way switching is communicated. There is an internal sleeve that carries information from the tailcap, separate from the body threads. A quick turn of the tailcap is all you need to lock out the tailcap. Note that this does not lock out the side switch (scroll down for a discussion).
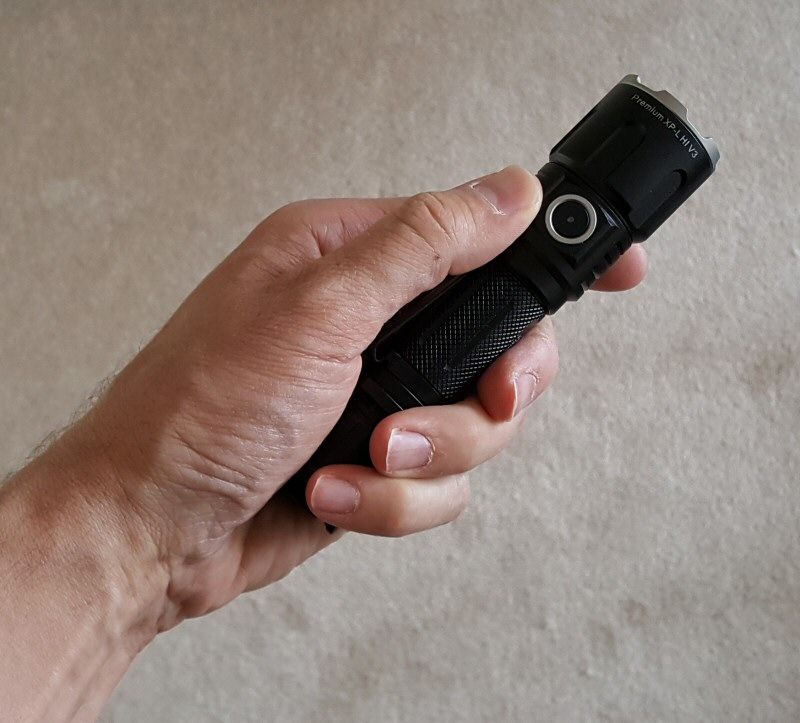
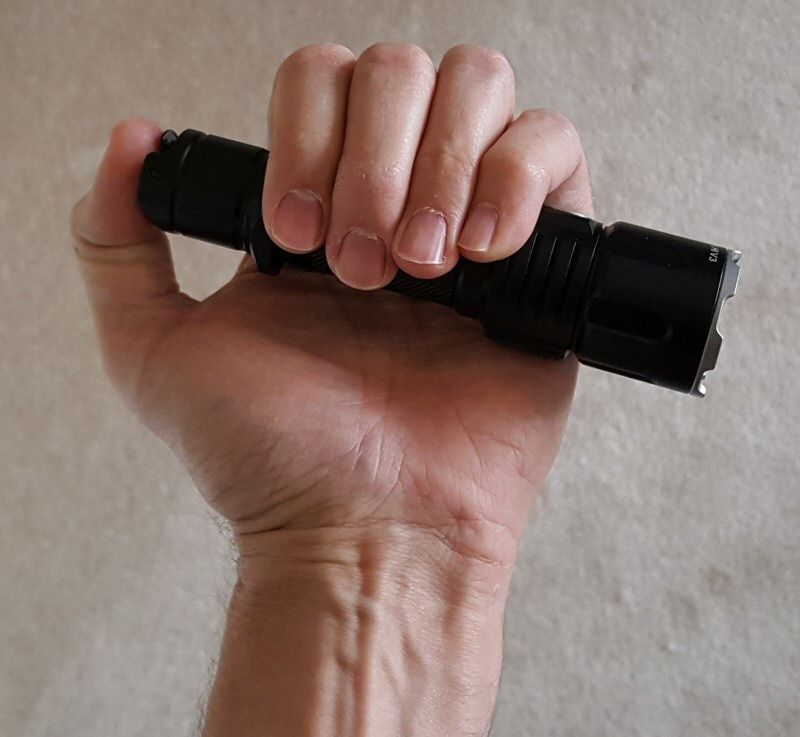
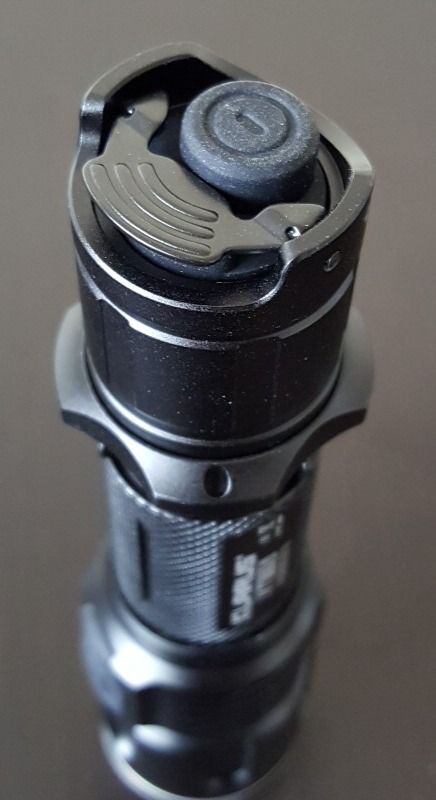
As before, the tailcap has two switches – a primary physical clicky (for off/on) and a secondary electronic switch under a lever cover (for strobe or mode switching). The secondary switch now makes an audible and tactical "click" when pressing all the way down. As always, both switches can be accessed one-handed by the thumb or index finger, in whatever grip style you prefer. Like the last version of the XT11-2014, tail-standing is possible (but a bit wobbly).
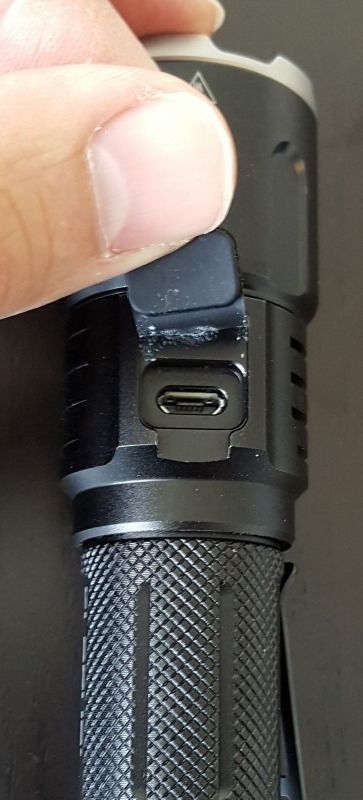
New on this model are an in-light charging port (micro USB), with an attached rubber dust cover. The cover fits well, and should help protect the port when not in use.
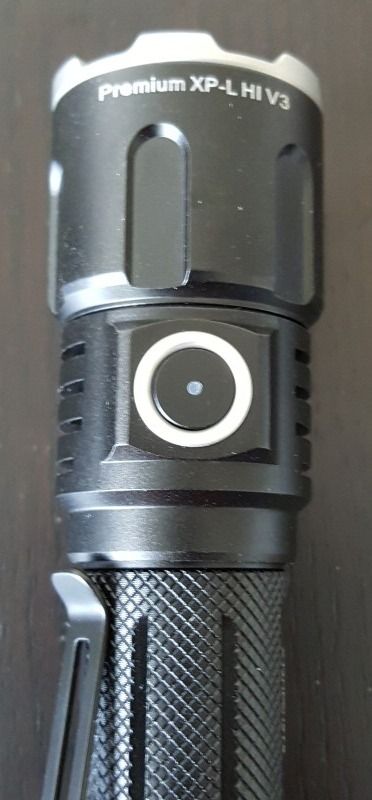
There is now a secondary electronic switch in the head for additional mode changing. There is a visible LED underneath the center of the switch, which lights up to reveal charge/discharge status of the 18650 cell. Please see my User Interface section below for more info.
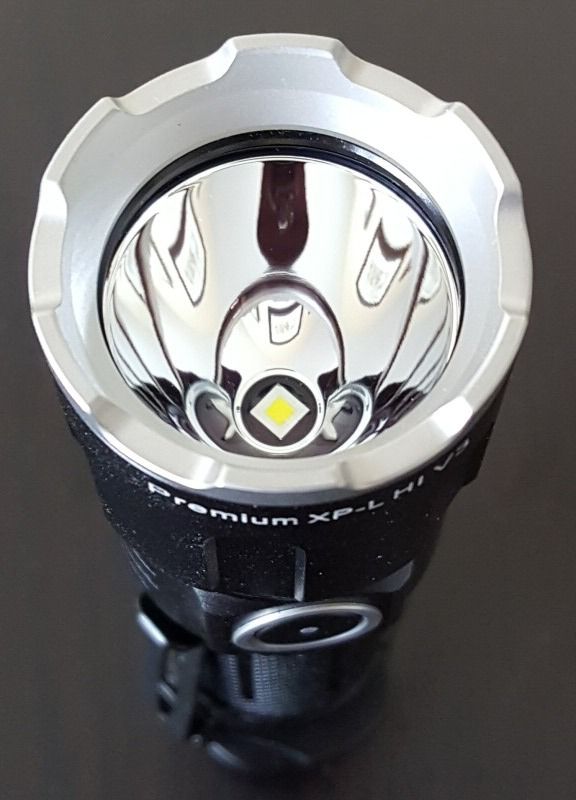
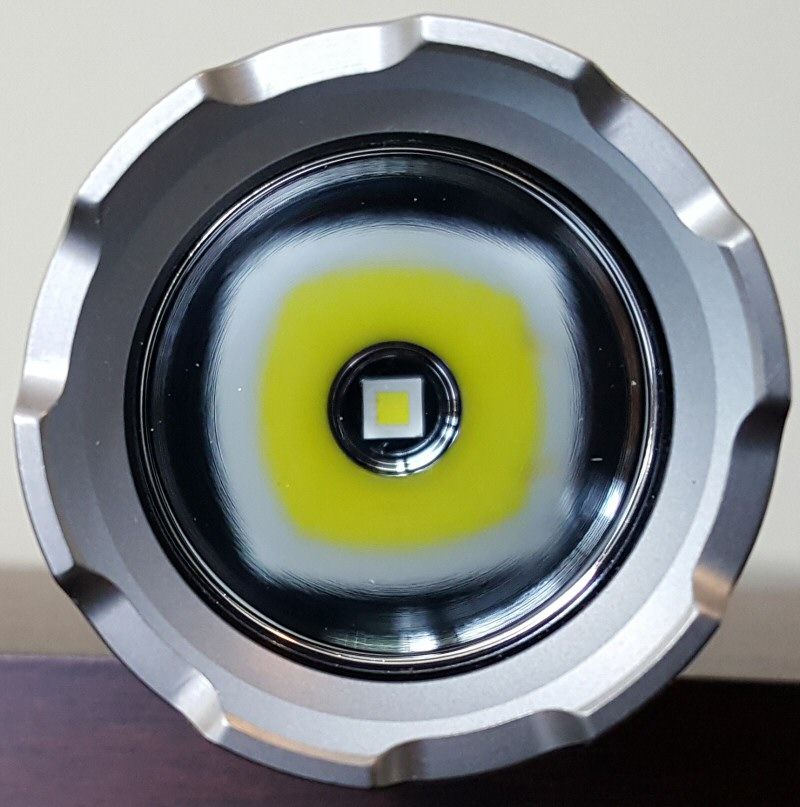
The emitter has been updated to XP-L HI V3, still with a smooth and relatively deep reflector. This should produce very good throw for this class, due to the smaller emitter footprint. Scroll down for beamshots.
User Interface
The user interface of the XT11S is significantly upgraded from the earlier model XT11. There are now 3 selectable User Settings for the light, as described below.
In general terms, like before, press the large forward clicky switch on the tail for on-off (press for momentary, click for locked-on). You can typically change modes by pressing the secondary tailswitch (under the lever), or the secondary side electronic switch (depending on User Setting). Alternatively, the light can be activated – and modes changed – by pressing either of the secondary switches (again, depending on which User Setting you are in).
Select User Setting
The change between the 3 User settings, from Off, hold down the side electronic switch >10 secs. Light will may come on in Low, then flash and turn off (depending on the current User Setting). Regardless, you must keep holding for >10 secs until the light flickers rapidly. Once the flicker begins, you can press the secondary tailswitch to advance through User Settings (do not release the side switch until you are ready to select). The light will flash a number of times upon a press of the secondary tailswitch, to indicate which User Setting number you are in. Just keep pressing the secondary tailswitch to advance through the 3 settings. To select the User Setting you want, simply release the side switch.
User Setting 1: Classic Tactical Setting (default)
Primary switch gives you Turbo output (press for momentary, click for locked on). Click to turn Off
From Off, the secondary tail switch gives you Strobe (momentary if held for under 2 seconds, locked on if held longer). Click again to exit Strobe.
From On, the secondary tail switch can be clicked to cycle output modes in the sequence: Turbo > Hi > Lo, in a repeating loop (note that Med is not available in this setting/switch).
From Off, click the side switch to turn on in last memorized mode (locked on). Click again to advance through modes in sequence: Turbo > Hi > Med > Lo. Press and hold for >1 sec to turn the light Off.
From On, click the side switch to advance through modes in sequence: Turbo > Hi > Med > Lo. Double-click the side switch to activate Strobe. Double-click again to activate SOS. Single-click returns to constant output mode.
Note that when activating the light using one of the secondary switches, clicking the main switch jumps you to Turbo (instead of turning Off).
User Setting 2: Outdoor Setting
Primary switch gives you Turbo output (press for momentary, click for locked on). Click to turn Off.
From Off, the secondary tail switch gives you Low (momentary if held for under 2 seconds, locked on if held longer). Click to advance through modes in sequence Lo > Med > Hi > Turbo, in a repeating loop.
From On, the secondary tail switch can be clicked to cycle output modes in the sequence: Lo > Med > Hi > Turbo, in a repeating loop.
From Off, click the side switch to turn on in last memorized mode (locked on). Click again to advance through modes in sequence: Turbo > Hi > Med > Lo. Press and hold for >1 sec to turn the light Off.
From On, click the side switch to advance through modes in sequence: Turbo > Hi > Med > Lo. Double-click the side switch to activate Strobe. Double-click again to activate SOS. Single-click returns to constant output mode.
Note that when activating the light using one of the secondary switches, clicking the main switch jumps you to Turbo (instead of turning Off).
User Setting 3: Tactical Assault Setting
Primary switch gives you Turbo output (press for momentary, click for locked on). Click to turn Off
From either On or Off, the secondary tail switch gives you Strobe (momentary if held for under 2 seconds, locked on if held longer). Click to exit Strobe.
When in this User Setting, the side switch cannot be used to turn the light on, or change modes. The side switch is effectively disabled.
General Features
Basically, User Setting #3 disables the side switch, and gives you two modes: Turbo or Strobe. User Setting #1 is similar to the older XT11, but with the additional functionality of the new side switch to control modes. User Setting #2 keeps Strobe hidden to a double click of the side switch, and assigns a Lo mode shortcut to the secondary tailswitch. I recommend User Setting #2 for most users.
Due to the unusual current path, you can physically lock out the tailswitch by a simple turn of the tailcap. However, the side switch will continue to function until the tailcap is fully removed.
You can lock out the side switch separately (when in User Setting #1 or 2) by holding the side switch for ~5 secs, until the light first flashes. Letting go at this point locks out the side switch (note the light can still be activated by the tail switches). Triple-click to remove the side switch lockout. Note that you would have to perform both the physical and electronic lock-outs to fully prevent accidental activation.
There is a battery indicator LED under the side switch. When first activating the light, the LED will glow for 5 secs. Green means >70% battery charge remaining. Orange means between 30-70% remaining. Red means <30% remaining. Below <10%, the LED will flash red.
During charging, this LED will illuminate red. It will turn green once charging is complete. If there is a problem with charging, it will flash orange.
Video:
For information on the light, including the build and user interface, please see my video overview:
As with all my videos, I recommend you have annotations turned on. I commonly update the commentary with additional information or clarifications before publicly releasing the video.
PWM/Strobe
Well, here's a pleasant change from all the previous XT11 and RS11 models – there is no sign of pulse width modulation (PWM) any more. Instead, the light is flicker-free at all output modes.
I am not sure how they have managed this, given the complex switch design. But this is a welcome improvement from the ~800 Hz strobe seen on those previous models. :thumbsup:
Strobe:
As before, main locked on strobe is an oscillating strobe that switches between two frequencies every ~2 secs or so. Here is a blow up of each frequency:

As you can see, the strobe switches between 6.7 Hz and 12.7 Hz, which isn't very different from the earlier XT11.
Note that there is a momentary Strobe now:
This one doesn't oscillate, and is instead a constant high frequency strobe (12.7 Hz).
SOS:
There is also a fairly typical SOS mode now.
Standby Drain
Since the secondary tail switch is electronic (as is the side switch), there needs to be a standby current when the tailcap is connected. But the circuit/switch design is complicated, and I can't get a clear reading on it. As with the XT11-2014, the current without the tailcap in place is <1 uA. But I don't know what to expect with the tail installed.
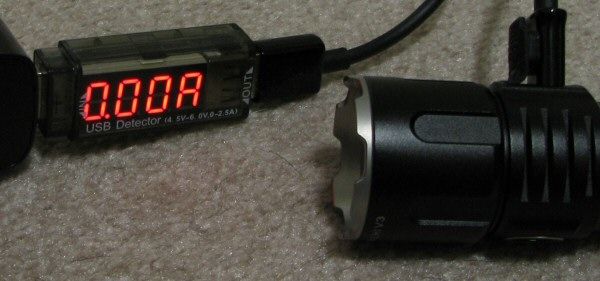
In-Light Charging
Because the light uses a USB charging cable, I was able to take direct measures of the charging parameters using my Xtar VI01 "USB Detector" (basically a specialized USB current/voltage meter). There are many of these on the market now, and this model was favorably reviewed by HKJ here.
For charging tests, I started with a NCR18650A 3100mAh battery (protection circuit tripped). For all these tests, I left the USB detector in place for all readings. Note that the voltage reading on this device refers to the input voltage (i.e., from the USB port).
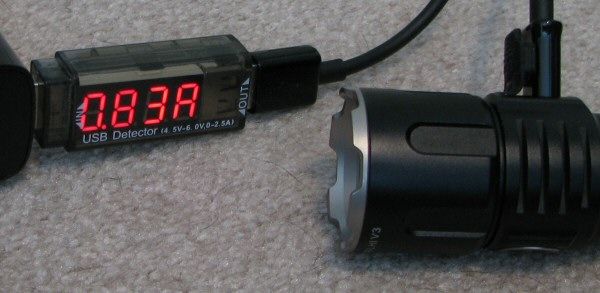
Initial charging current was 0.83A, at 4.80V input voltage. Over the next ~2.5 hours, charging current remained stable, but the input voltage increased to ~4.95V.
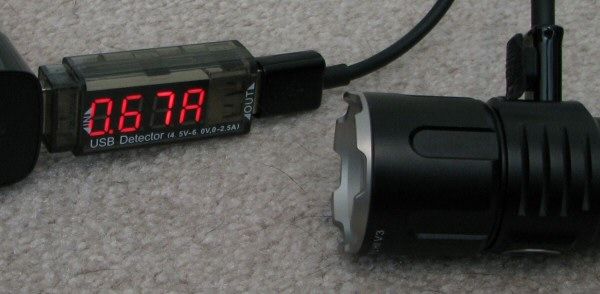
By 3 hrs, charging current dropped to 0.67A. Input voltage was 4.97V.
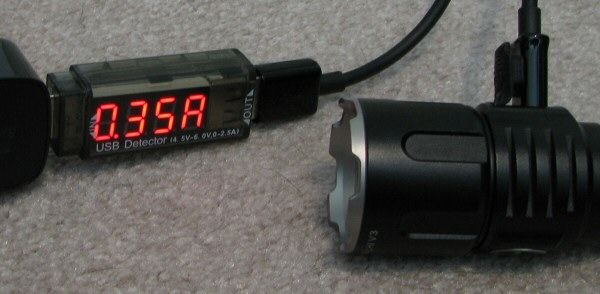
By 3 hrs 30 mins, charging had dropped to 0.35A. Input voltage was 5.03V.

By 4 hrs, charging had dropped to 0.11A. Input voltage was 5.09V.
I didn't note the time that charging terminated, but it was probably somewhere around 4.5 hours.
Beamshots:
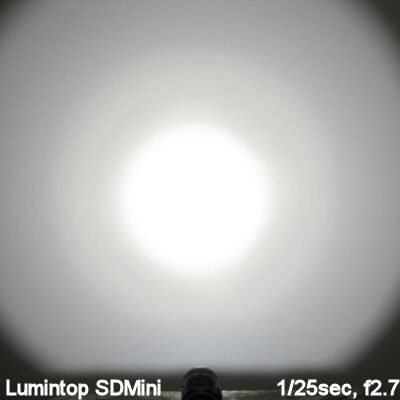
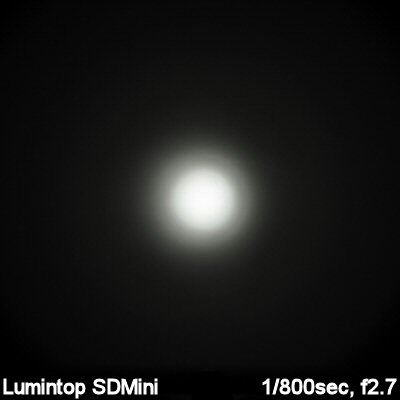
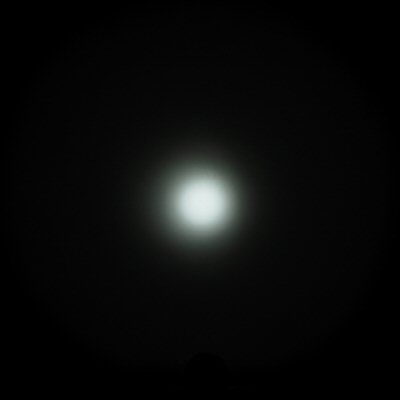
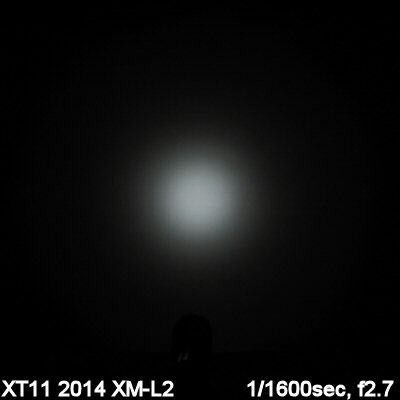
For white-wall beamshots below, all lights are on Max output on an AW protected 18650 battery. Lights are about ~0.75 meter from a white wall (with the camera ~1.25 meters back from the wall). Automatic white balance on the camera, to minimize tint differences.
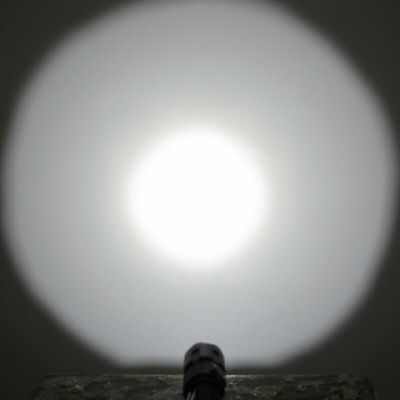

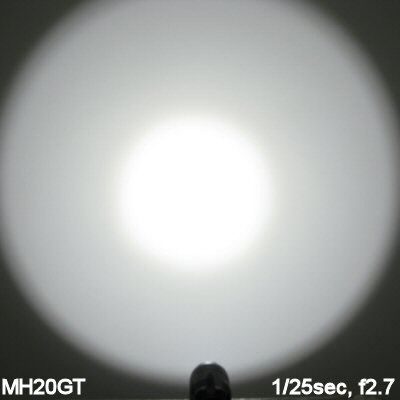
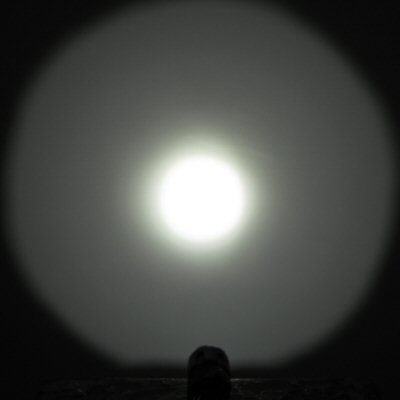
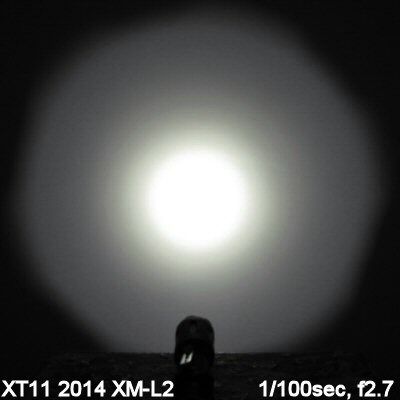
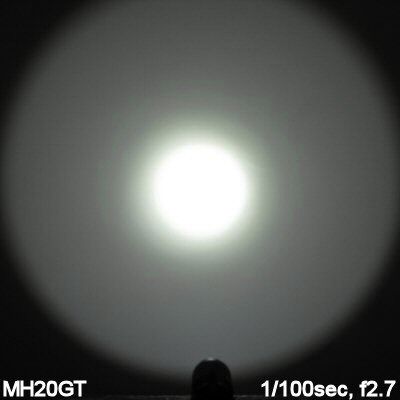


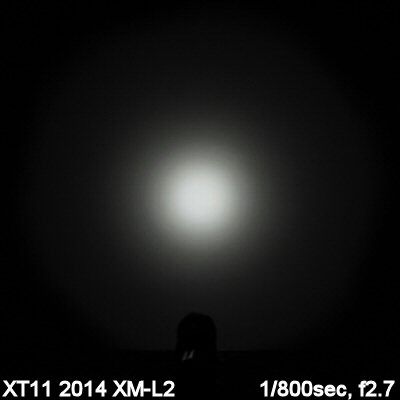
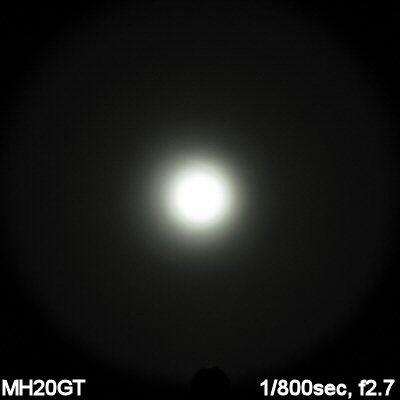
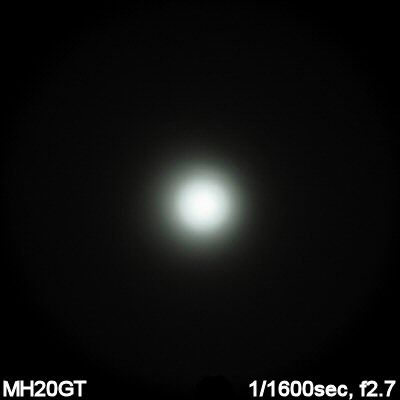
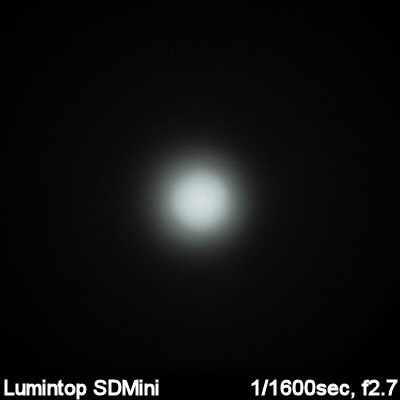
As you would expect, beam pattern is closest to the Nitecore MH20GT that I reviewed recently. Scroll down for actual testing results.
Testing Method:
All my output numbers are relative for my home-made light box setup, as described on my flashlightreviews.ca website. You can directly compare all my relative output values from different reviews - i.e. an output value of "10" in one graph is the same as "10" in another. All runtimes are done under a cooling fan, except for any extended run Lo/Min modes (i.e. >12 hours) which are done without cooling.
I have devised a method for converting my lightbox relative output values (ROV) to estimated Lumens. See my How to convert Selfbuilt's Lightbox values to Lumens thread for more info.
Throw/Output Summary Chart:
My summary tables are reported in a manner consistent with the ANSI FL-1 standard for flashlight testing. Please see http://www.flashlightreviews.ca/FL1.htm for a discussion, and a description of all the terms used in these tables. Effective July 2012, I have updated all my Peak Intensity/Beam Distance measures with a NIST-certified Extech EA31 lightmeter (orange highlights).
As expected, the XT11S is an excellent throw light for the class. Thanks to the XP-L HI emitter, you get much greater throw compared to the previous models. Max output is similar to other recent 1x18650 XP-L HI lights I've tested (e.g. Nitecore MH20GT, Lumintop SD Mini).
The XT11S output levels are pretty consistent with Klarus specs, except for the highest level. I'm glad to see the fairly low Lo here.
Output/Runtime Graphs:
All my current runtimes are done with protected NCR18650A (3100mAh capacity) batteries, under a cooling fan.


Overall runtime patterns and output efficiency are comparable to other current-controlled 1x18650 lights with the new XP-L HI emitter. The XT11S shows a couple of defined step-downs as the batteries are almost exhausted.
Potential Issues
The user interface is complicated by the addition of a second secondary switch (the side switch) and three separate user-selectable settings. As a result, the behavior of the various switches can be difficult to predict. For example, when activating the light using one of the secondary switches, clicking the main switch jumps you to Turbo (instead of turning Off). Similarly, in some cases the secondary switch advances modes from Lo to Turbo, in other cases from Turbo to Lo (and sometimes skipping the Med mode).
The light uses electronic secondary switches, and therefore requires a stand-by current when fully connected. However, this is negligible (<1uA) for the side switch in my testing (note that I cannot measure the drain of the secondary tail switch).
While you can physically lock-out the tail switches with a simply tailcap twist, you would to also have to perform the side switch electronic lock-out to fully prevent accidental activation.
No true Moonlight mode, although Lo is fairly low (i.e., 5 lumens)
Preliminary Observations
The XT11S is a welcomed update to the XT11 line from Klarus. In addition to being slightly more compact, you now have greater throw, greater customization (through the extra side switch and multiple user-selectable settings), constant-current output (i.e., no flicker) and in-light battery charging. :thumbsup: On all fronts, this in an improvement.
The only drawback really is the flip-side to that customization – the role of the various switches can get a little confusing, depending on the User Setting and how you activate the light. Once you settle on a User Setting, then you should eventually get used to the behavior of the various switches. But these can sometimes be a bit counter-intuitive, so it will take a bit of getting used to. To be honest, I'm not really sure why they added the extra side switch – but you could always lock it out, if you don't want to bother with it.
Performance-wise, you get good current-controlled efficiency and output regulation here now (which is a welcomed relief from the visible PWM on the older models). In-light charging is increasingly becoming the norm for 1x18650, so I'm glad to see that feature here (and with a standard micro USB port to boot).
Throw is significantly improved, thanks to the XP-L Hi emitter and the smooth and deep reflector.")
And the "tactical" features of the old model are still there if you want them (and even more so now, depending on the User Setting). That said, I'm personally glad to see User Setting #2, as I am not a fan of accidentally strobing myself.
The XT11S is a great upgrade the XT11. While it may take you a bit of time to customize the settings and get used to them, it does everything the old model did – and has more options and features now. Should be a good choice for general use and "tactical" interests. :wave:
----
Klarus XT11S provided by Klarus for review.
The XT11S is the latest iteration of the XT11 series from Klarus - and one with some notable updates from the last model I reviewed in 2014.
Manufacturer Reported Specifications:
(note: as always, these are simply what the manufacturer provides – scroll down to see my actual testing results).
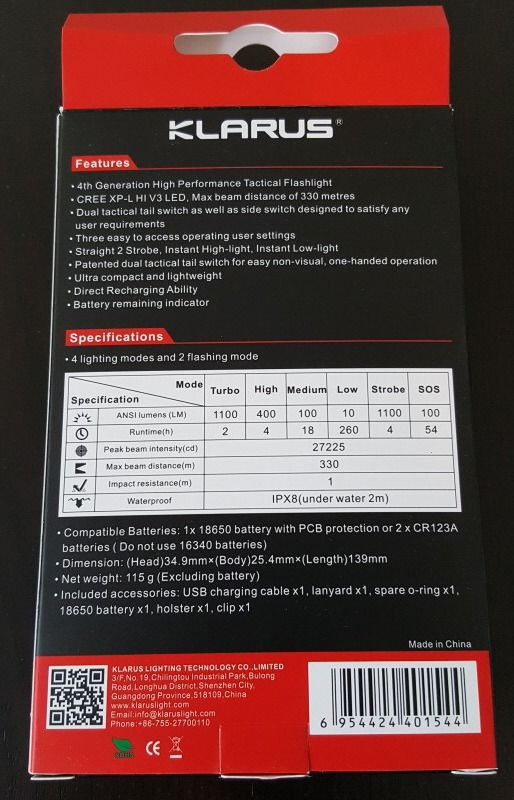
- LED: CREE XP-L HI V3
- Output / Runtime: Turbo: 1100 Lumens / 2 Hours, High: 400 Lumens / 4 Hours, Medium: 100 Lumens / 18 Hours, Low: 10 Lumens / 260 Hours, Strobe: 1100 Lumens / 4 Hours, SOS: 100 Lumens / 54 Hours
- Peak Beam Intensity: 27225cd
- Max Beam Distance: 330 meters
- Three operating modes:
- Conventional Tactical Mode: Standard operating with additional side switch for ease of use
- Hunting Mode: Access to instant high or low modes without strobe mode.
- Ultimate Tactical Mode: Deactivates the side switch and limits modes to turbo and strobe only, with the option of momentary on tactical action.
- Direct recharging function via micro-USB port
- Smart digital charging system charges rapidly and safely
- Smart ITS temperature control system provides stability and optimum performance
- Constant current circuit prevents dimming or flickering
- Side switch lock out
- Battery capacity indicator display
- Dual spring battery compartment improves shock and drop resistance
- Reverse-polarity protection
- Material: Aircraft-grade aluminum 6061-t6
- Type III hard-anodized (black)
- Stainless steel bezel
- Durable tempered glass lens with AR film plating - highly scratch resistant
- Impact Resistance: 1 Meter
- Water Resistance: IPX-8 (Submersible up to 2 meters)
- Working Voltage: 2.5V - 8.4V
- Dimensions: Head Diameter: 34.9mm, Body Diameter: 25.4mm, Length: 139mm
- Weight: 115g (without battery)
- Runs on 2 CR123A or 1 18650
- Included accessories: USB Charging Cable, Lanyard, Spare O-ring, Holster, Pocket Clip, 2600mAh 18650 Rechargeable Li-ion Battery
- MSRP: ~$80
The XT11s comes in fairly typical display packaging as before, will detailed info and specs across the box. The light comes with a micro USB charging cable, manual, spare o-rings, basic wrist strap, removable pocket clip (attached), removable plastic grip ring (attached) and belt holster (with closing flap). A 2600mAh protected 18650 from Klarus was included with my sample.
All dimensions directly measured, and given with no batteries installed:
Klarus XT11S: Weight 130.1g, Length: 141.1mm, Width (bezel): 34.9mm
Klarus XT11-2014: Weight 140.1g, Length: 150.5mm, Width (bezel): 34.8mm
Klarus XT11-2012: Weight 133.0g, Length: 148.8mm, Width (bezel) 35.0mm
Klarus RS11-2014: Weight 151.5g, Length: 159mm, Width (bezel): 34.9mm
Eagletac G25C2-II (stock): Weight 141.0g, Length: 150.6mm, Width: 39.6mm
Eagletac TX25C2: Weight 93.6g, Length: 120.4mm, Width (bezel): 31.6mm
Fenix PD35: Weight: 82.7g, Length: 138.1mm, Width (bezel): 25.4mm
Lumintop SDMini: Weight: 91.1g, Length: 108.7mm, Width (bezel): 31.8mm
Nitecore MH20: Weight: 85.4g, Length: 105.5mm, Width (bezel): 31.8mm
Nitecore MH20GT: Weight: 89.4g, Length: 111.6mm, Width (bezel): 31.9mm
Thrunite TN12-2014: Weight: 80.0g, Length: 140.5mm, Width (bezel): 25.4mm
Zebralight SC600 III: Weight 64.8g, Length: 96.3mm, Width (bezel) 30.1mm
As you can see from above the XT11S is noticeably shorter and lighter than the previous model XT11.
The XT11S is a fully updated build from the XT11-2014 (which wasn't greatly different from the original XT11). The tailcap switch has been updated, the body styling is different, an in-light charging port has been added, and there is a new secondary side switch (with LED underneath).
Anodizing is now a typical black (instead of the old dark grey-brown). No blemishes or flaws on my sample. Labels are clear against the dark background. As before, knurling is still not very aggressive, but all the ridge detail and extra elements around the head and body help with grip.
As before, the clip-on pocket clip is fairly basic, but seems to hold on fairly well (for this type of clip). And again, the clip is head-facing, and not reversible.
The bundled grip seems to be metal now. It can still spin when the tailcap is fully tightened (as with many other lights in this class).
There is still a spring in the head, so all flat-top high capacity cells should fit and work fine in the light.
Screw threads are square-cut, and not anodized. However, physical lock-out of the tailswitches is possible, due to the distinctive way switching is communicated. There is an internal sleeve that carries information from the tailcap, separate from the body threads. A quick turn of the tailcap is all you need to lock out the tailcap. Note that this does not lock out the side switch (scroll down for a discussion).
As before, the tailcap has two switches – a primary physical clicky (for off/on) and a secondary electronic switch under a lever cover (for strobe or mode switching). The secondary switch now makes an audible and tactical "click" when pressing all the way down. As always, both switches can be accessed one-handed by the thumb or index finger, in whatever grip style you prefer. Like the last version of the XT11-2014, tail-standing is possible (but a bit wobbly).
New on this model are an in-light charging port (micro USB), with an attached rubber dust cover. The cover fits well, and should help protect the port when not in use.
There is now a secondary electronic switch in the head for additional mode changing. There is a visible LED underneath the center of the switch, which lights up to reveal charge/discharge status of the 18650 cell. Please see my User Interface section below for more info.
The emitter has been updated to XP-L HI V3, still with a smooth and relatively deep reflector. This should produce very good throw for this class, due to the smaller emitter footprint. Scroll down for beamshots.
User Interface
The user interface of the XT11S is significantly upgraded from the earlier model XT11. There are now 3 selectable User Settings for the light, as described below.
In general terms, like before, press the large forward clicky switch on the tail for on-off (press for momentary, click for locked-on). You can typically change modes by pressing the secondary tailswitch (under the lever), or the secondary side electronic switch (depending on User Setting). Alternatively, the light can be activated – and modes changed – by pressing either of the secondary switches (again, depending on which User Setting you are in).
Select User Setting
The change between the 3 User settings, from Off, hold down the side electronic switch >10 secs. Light will may come on in Low, then flash and turn off (depending on the current User Setting). Regardless, you must keep holding for >10 secs until the light flickers rapidly. Once the flicker begins, you can press the secondary tailswitch to advance through User Settings (do not release the side switch until you are ready to select). The light will flash a number of times upon a press of the secondary tailswitch, to indicate which User Setting number you are in. Just keep pressing the secondary tailswitch to advance through the 3 settings. To select the User Setting you want, simply release the side switch.
User Setting 1: Classic Tactical Setting (default)
Primary switch gives you Turbo output (press for momentary, click for locked on). Click to turn Off
From Off, the secondary tail switch gives you Strobe (momentary if held for under 2 seconds, locked on if held longer). Click again to exit Strobe.
From On, the secondary tail switch can be clicked to cycle output modes in the sequence: Turbo > Hi > Lo, in a repeating loop (note that Med is not available in this setting/switch).
From Off, click the side switch to turn on in last memorized mode (locked on). Click again to advance through modes in sequence: Turbo > Hi > Med > Lo. Press and hold for >1 sec to turn the light Off.
From On, click the side switch to advance through modes in sequence: Turbo > Hi > Med > Lo. Double-click the side switch to activate Strobe. Double-click again to activate SOS. Single-click returns to constant output mode.
Note that when activating the light using one of the secondary switches, clicking the main switch jumps you to Turbo (instead of turning Off).
User Setting 2: Outdoor Setting
Primary switch gives you Turbo output (press for momentary, click for locked on). Click to turn Off.
From Off, the secondary tail switch gives you Low (momentary if held for under 2 seconds, locked on if held longer). Click to advance through modes in sequence Lo > Med > Hi > Turbo, in a repeating loop.
From On, the secondary tail switch can be clicked to cycle output modes in the sequence: Lo > Med > Hi > Turbo, in a repeating loop.
From Off, click the side switch to turn on in last memorized mode (locked on). Click again to advance through modes in sequence: Turbo > Hi > Med > Lo. Press and hold for >1 sec to turn the light Off.
From On, click the side switch to advance through modes in sequence: Turbo > Hi > Med > Lo. Double-click the side switch to activate Strobe. Double-click again to activate SOS. Single-click returns to constant output mode.
Note that when activating the light using one of the secondary switches, clicking the main switch jumps you to Turbo (instead of turning Off).
User Setting 3: Tactical Assault Setting
Primary switch gives you Turbo output (press for momentary, click for locked on). Click to turn Off
From either On or Off, the secondary tail switch gives you Strobe (momentary if held for under 2 seconds, locked on if held longer). Click to exit Strobe.
When in this User Setting, the side switch cannot be used to turn the light on, or change modes. The side switch is effectively disabled.
General Features
Basically, User Setting #3 disables the side switch, and gives you two modes: Turbo or Strobe. User Setting #1 is similar to the older XT11, but with the additional functionality of the new side switch to control modes. User Setting #2 keeps Strobe hidden to a double click of the side switch, and assigns a Lo mode shortcut to the secondary tailswitch. I recommend User Setting #2 for most users.
Due to the unusual current path, you can physically lock out the tailswitch by a simple turn of the tailcap. However, the side switch will continue to function until the tailcap is fully removed.
You can lock out the side switch separately (when in User Setting #1 or 2) by holding the side switch for ~5 secs, until the light first flashes. Letting go at this point locks out the side switch (note the light can still be activated by the tail switches). Triple-click to remove the side switch lockout. Note that you would have to perform both the physical and electronic lock-outs to fully prevent accidental activation.
There is a battery indicator LED under the side switch. When first activating the light, the LED will glow for 5 secs. Green means >70% battery charge remaining. Orange means between 30-70% remaining. Red means <30% remaining. Below <10%, the LED will flash red.
During charging, this LED will illuminate red. It will turn green once charging is complete. If there is a problem with charging, it will flash orange.
Video:
For information on the light, including the build and user interface, please see my video overview:
As with all my videos, I recommend you have annotations turned on. I commonly update the commentary with additional information or clarifications before publicly releasing the video.
PWM/Strobe
Well, here's a pleasant change from all the previous XT11 and RS11 models – there is no sign of pulse width modulation (PWM) any more. Instead, the light is flicker-free at all output modes.
I am not sure how they have managed this, given the complex switch design. But this is a welcome improvement from the ~800 Hz strobe seen on those previous models. :thumbsup:
Strobe:
As before, main locked on strobe is an oscillating strobe that switches between two frequencies every ~2 secs or so. Here is a blow up of each frequency:
As you can see, the strobe switches between 6.7 Hz and 12.7 Hz, which isn't very different from the earlier XT11.
Note that there is a momentary Strobe now:
This one doesn't oscillate, and is instead a constant high frequency strobe (12.7 Hz).
SOS:
There is also a fairly typical SOS mode now.
Standby Drain
Since the secondary tail switch is electronic (as is the side switch), there needs to be a standby current when the tailcap is connected. But the circuit/switch design is complicated, and I can't get a clear reading on it. As with the XT11-2014, the current without the tailcap in place is <1 uA. But I don't know what to expect with the tail installed.
In-Light Charging
Because the light uses a USB charging cable, I was able to take direct measures of the charging parameters using my Xtar VI01 "USB Detector" (basically a specialized USB current/voltage meter). There are many of these on the market now, and this model was favorably reviewed by HKJ here.
For charging tests, I started with a NCR18650A 3100mAh battery (protection circuit tripped). For all these tests, I left the USB detector in place for all readings. Note that the voltage reading on this device refers to the input voltage (i.e., from the USB port).
Initial charging current was 0.83A, at 4.80V input voltage. Over the next ~2.5 hours, charging current remained stable, but the input voltage increased to ~4.95V.
By 3 hrs, charging current dropped to 0.67A. Input voltage was 4.97V.
By 3 hrs 30 mins, charging had dropped to 0.35A. Input voltage was 5.03V.
By 4 hrs, charging had dropped to 0.11A. Input voltage was 5.09V.
I didn't note the time that charging terminated, but it was probably somewhere around 4.5 hours.
Beamshots:
For white-wall beamshots below, all lights are on Max output on an AW protected 18650 battery. Lights are about ~0.75 meter from a white wall (with the camera ~1.25 meters back from the wall). Automatic white balance on the camera, to minimize tint differences.
As you would expect, beam pattern is closest to the Nitecore MH20GT that I reviewed recently. Scroll down for actual testing results.
Testing Method:
All my output numbers are relative for my home-made light box setup, as described on my flashlightreviews.ca website. You can directly compare all my relative output values from different reviews - i.e. an output value of "10" in one graph is the same as "10" in another. All runtimes are done under a cooling fan, except for any extended run Lo/Min modes (i.e. >12 hours) which are done without cooling.
I have devised a method for converting my lightbox relative output values (ROV) to estimated Lumens. See my How to convert Selfbuilt's Lightbox values to Lumens thread for more info.
Throw/Output Summary Chart:
My summary tables are reported in a manner consistent with the ANSI FL-1 standard for flashlight testing. Please see http://www.flashlightreviews.ca/FL1.htm for a discussion, and a description of all the terms used in these tables. Effective July 2012, I have updated all my Peak Intensity/Beam Distance measures with a NIST-certified Extech EA31 lightmeter (orange highlights).
As expected, the XT11S is an excellent throw light for the class. Thanks to the XP-L HI emitter, you get much greater throw compared to the previous models. Max output is similar to other recent 1x18650 XP-L HI lights I've tested (e.g. Nitecore MH20GT, Lumintop SD Mini).
The XT11S output levels are pretty consistent with Klarus specs, except for the highest level. I'm glad to see the fairly low Lo here.
Output/Runtime Graphs:
All my current runtimes are done with protected NCR18650A (3100mAh capacity) batteries, under a cooling fan.
Overall runtime patterns and output efficiency are comparable to other current-controlled 1x18650 lights with the new XP-L HI emitter. The XT11S shows a couple of defined step-downs as the batteries are almost exhausted.
Potential Issues
The user interface is complicated by the addition of a second secondary switch (the side switch) and three separate user-selectable settings. As a result, the behavior of the various switches can be difficult to predict. For example, when activating the light using one of the secondary switches, clicking the main switch jumps you to Turbo (instead of turning Off). Similarly, in some cases the secondary switch advances modes from Lo to Turbo, in other cases from Turbo to Lo (and sometimes skipping the Med mode).
The light uses electronic secondary switches, and therefore requires a stand-by current when fully connected. However, this is negligible (<1uA) for the side switch in my testing (note that I cannot measure the drain of the secondary tail switch).
While you can physically lock-out the tail switches with a simply tailcap twist, you would to also have to perform the side switch electronic lock-out to fully prevent accidental activation.
No true Moonlight mode, although Lo is fairly low (i.e., 5 lumens)
Preliminary Observations
The XT11S is a welcomed update to the XT11 line from Klarus. In addition to being slightly more compact, you now have greater throw, greater customization (through the extra side switch and multiple user-selectable settings), constant-current output (i.e., no flicker) and in-light battery charging. :thumbsup: On all fronts, this in an improvement.
The only drawback really is the flip-side to that customization – the role of the various switches can get a little confusing, depending on the User Setting and how you activate the light. Once you settle on a User Setting, then you should eventually get used to the behavior of the various switches. But these can sometimes be a bit counter-intuitive, so it will take a bit of getting used to. To be honest, I'm not really sure why they added the extra side switch – but you could always lock it out, if you don't want to bother with it.
Performance-wise, you get good current-controlled efficiency and output regulation here now (which is a welcomed relief from the visible PWM on the older models). In-light charging is increasingly becoming the norm for 1x18650, so I'm glad to see that feature here (and with a standard micro USB port to boot).
Throw is significantly improved, thanks to the XP-L Hi emitter and the smooth and deep reflector.
And the "tactical" features of the old model are still there if you want them (and even more so now, depending on the User Setting). That said, I'm personally glad to see User Setting #2, as I am not a fan of accidentally strobing myself.
The XT11S is a great upgrade the XT11. While it may take you a bit of time to customize the settings and get used to them, it does everything the old model did – and has more options and features now. Should be a good choice for general use and "tactical" interests. :wave:
----
Klarus XT11S provided by Klarus for review.
Last edited:
