
milkyspit
Flashlight Enthusiast
Milky\'s RayoFlood Mod
One of the fondest memories of my childhood was my father using his old-school big, red Eveready 6V lantern... you know, the type made from molded plastic, with the squared off sides, big reflector in front, handle on top, and a nice, big pushbutton switch mounted for pressing by thumb. For some reason I really loved that light, and although I don't know what became of it over the sands of time, I've had a burning desire to treat myself to the closest equivalent I could find in this day and age.
Of course, now that y'all have perverted me to flashaholism, I also wanted to endow it with a really nice beam. /ubbthreads/images/graemlins/wink.gif
After much tinkering and several false starts (including a few 6V lantern purchases that turned out not to be so great), I took the simple approach, and settled on the Rayovac 6V lantern that's available almost for free (with battery no less!) at Walmart and other places...
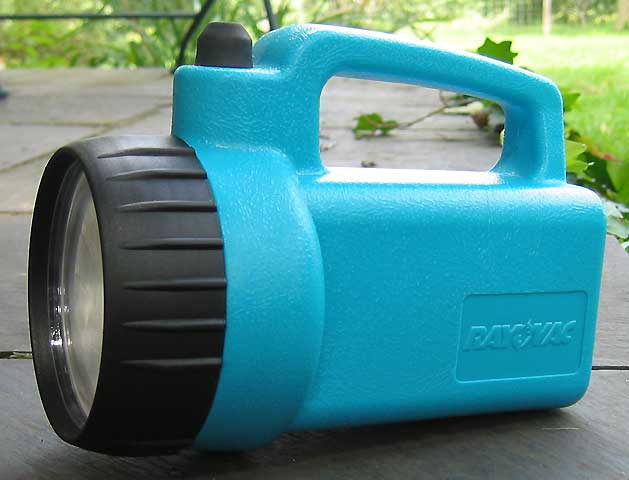
This light is smallish in size for the 6V lantern format and IMHO embodies the spirit of that big ol' red Eveready lantern of my father's. It's got the pushbutton switch, the simple, squared off form; and the clean, old-school look. But of course, something had to be done with the beam itself, which in stock form was pretty artifacty and not all that useful.
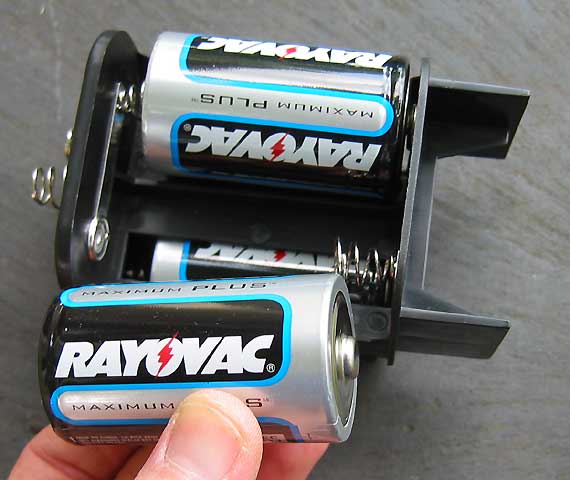
My first step was to try an EverLED replacement bulb in the light, but the battery polarity was backwards for it to work. (A common problem with 6V lanterns.) To resolve this problem in the simplest manner, I bought a 4D to 6V adapter from Digikey, but installed the D cells BACKWARDS... in other words, putting the positive side on the springs and the negative side against the positive contact plates. Hopefully this photo will show what I mean better than my meager attempts to explain it...
It worked great! At first I was happy, but some of the artifacts still remained, which continued to annoy me. I considered sputtering the reflector, but then, in a moment of clarity (pretty rare for me!) /ubbthreads/images/graemlins/icon15.gif I realized that I wanted this to be a WORK lantern, or what some might call a UTILITY lantern. Basically, I wasn't looking for a narrow, long throw beam out of this light, but rather, the type of light that'll put out plenty of nice, even spill over a broad area, perfect for closeup work, and run pretty much forever between battery changes. So I decided to place a diffuser in front of the lens. Problem was, WriteRight sheets are too small to fit over the entire lens, and I didn't want to get into trying to cut and position multiple sheets!
The answer was close at hand, and the price (free!) was right, too. In an Amazon.com package arriving that day, they had used some of those air pillow inserts to cushion the contents of the box. Here are a couple shown in front of the light...
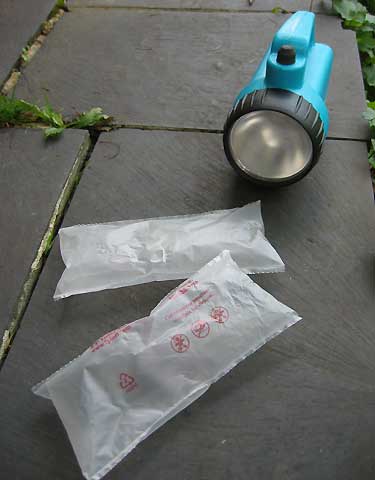
Remarkably, these were just wide enough to cut a circle out of exactly the same diameter as the lens, and they seemed to allow plenty of light to pass through. Perfect! But now, how to mount it?
/ubbthreads/images/graemlins/thinking.gif
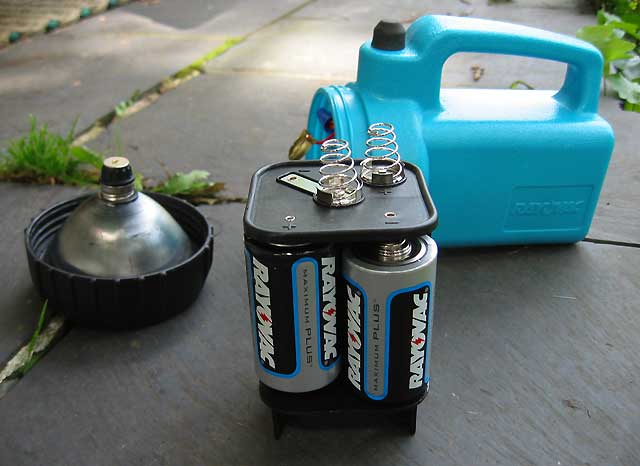
I finally decided to mount the diffusing plastic INSIDE the light, behind the lens, held in place by the reflector itself once pressed tight against the lens. That way the diffuser stayed put and wasn't susceptible to damage. As icing on the cake, it made for a really professional looking job. /ubbthreads/images/graemlins/grin.gif
In the photo below, the reflector to the left has just been pressed back into place (it pops out with a gentle tug) after positioning the diffusing plastic under it...
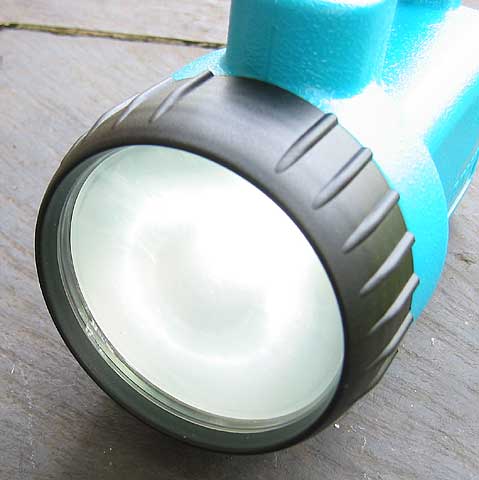
Now to reassemble the light and see how it runs! It worked! It worked! /ubbthreads/images/graemlins/blush.gif Although it was daylight when I took these photos, please trust me when I say that the result was exactly what I had hoped, a terrific utility flood lantern with long, regulated runtime and gobs of beautiful white light. Here's a look at the lens with the light turned on (all I could really get to show the output in the daytime, sorry) /ubbthreads/images/graemlins/frown.gif
Bottom line, the EverLED isn't all that cheap, but the lantern itself plus the 4D to 6V adapter are, and the diffusing material is free. The modding itself is pretty simple, and the result is a light well worth having, that's useful for any number of purposes and completely different from the other lights in my collection. Success at last! Yippee!
/ubbthreads/images/graemlins/party.gif
One of the fondest memories of my childhood was my father using his old-school big, red Eveready 6V lantern... you know, the type made from molded plastic, with the squared off sides, big reflector in front, handle on top, and a nice, big pushbutton switch mounted for pressing by thumb. For some reason I really loved that light, and although I don't know what became of it over the sands of time, I've had a burning desire to treat myself to the closest equivalent I could find in this day and age.
Of course, now that y'all have perverted me to flashaholism, I also wanted to endow it with a really nice beam. /ubbthreads/images/graemlins/wink.gif
After much tinkering and several false starts (including a few 6V lantern purchases that turned out not to be so great), I took the simple approach, and settled on the Rayovac 6V lantern that's available almost for free (with battery no less!) at Walmart and other places...
This light is smallish in size for the 6V lantern format and IMHO embodies the spirit of that big ol' red Eveready lantern of my father's. It's got the pushbutton switch, the simple, squared off form; and the clean, old-school look. But of course, something had to be done with the beam itself, which in stock form was pretty artifacty and not all that useful.
My first step was to try an EverLED replacement bulb in the light, but the battery polarity was backwards for it to work. (A common problem with 6V lanterns.) To resolve this problem in the simplest manner, I bought a 4D to 6V adapter from Digikey, but installed the D cells BACKWARDS... in other words, putting the positive side on the springs and the negative side against the positive contact plates. Hopefully this photo will show what I mean better than my meager attempts to explain it...
It worked great! At first I was happy, but some of the artifacts still remained, which continued to annoy me. I considered sputtering the reflector, but then, in a moment of clarity (pretty rare for me!) /ubbthreads/images/graemlins/icon15.gif I realized that I wanted this to be a WORK lantern, or what some might call a UTILITY lantern. Basically, I wasn't looking for a narrow, long throw beam out of this light, but rather, the type of light that'll put out plenty of nice, even spill over a broad area, perfect for closeup work, and run pretty much forever between battery changes. So I decided to place a diffuser in front of the lens. Problem was, WriteRight sheets are too small to fit over the entire lens, and I didn't want to get into trying to cut and position multiple sheets!
The answer was close at hand, and the price (free!) was right, too. In an Amazon.com package arriving that day, they had used some of those air pillow inserts to cushion the contents of the box. Here are a couple shown in front of the light...
Remarkably, these were just wide enough to cut a circle out of exactly the same diameter as the lens, and they seemed to allow plenty of light to pass through. Perfect! But now, how to mount it?
/ubbthreads/images/graemlins/thinking.gif
I finally decided to mount the diffusing plastic INSIDE the light, behind the lens, held in place by the reflector itself once pressed tight against the lens. That way the diffuser stayed put and wasn't susceptible to damage. As icing on the cake, it made for a really professional looking job. /ubbthreads/images/graemlins/grin.gif
In the photo below, the reflector to the left has just been pressed back into place (it pops out with a gentle tug) after positioning the diffusing plastic under it...
Now to reassemble the light and see how it runs! It worked! It worked! /ubbthreads/images/graemlins/blush.gif Although it was daylight when I took these photos, please trust me when I say that the result was exactly what I had hoped, a terrific utility flood lantern with long, regulated runtime and gobs of beautiful white light. Here's a look at the lens with the light turned on (all I could really get to show the output in the daytime, sorry) /ubbthreads/images/graemlins/frown.gif
Bottom line, the EverLED isn't all that cheap, but the lantern itself plus the 4D to 6V adapter are, and the diffusing material is free. The modding itself is pretty simple, and the result is a light well worth having, that's useful for any number of purposes and completely different from the other lights in my collection. Success at last! Yippee!
/ubbthreads/images/graemlins/party.gif
