Dinotte 5W mod

FluffyTapeworm

Newly Enlightened
Joined
Jan 27, 2006
Messages
16
Location
CA
I've had a pair of Dinotte 5W lights for a while now. They're pretty nice but don't really have enough punch for higher speed road riding due to their floodiness, so I've been supplementing them with a thrower flashlight in a lockblock. I've been wanting to upgrade them for a while but without a drop in substitute for the Lux V not much to be done. I logged into CPF for the first time in a while and saw the MC-E available and can be wired 2S2P, so I thought maybe it's time.

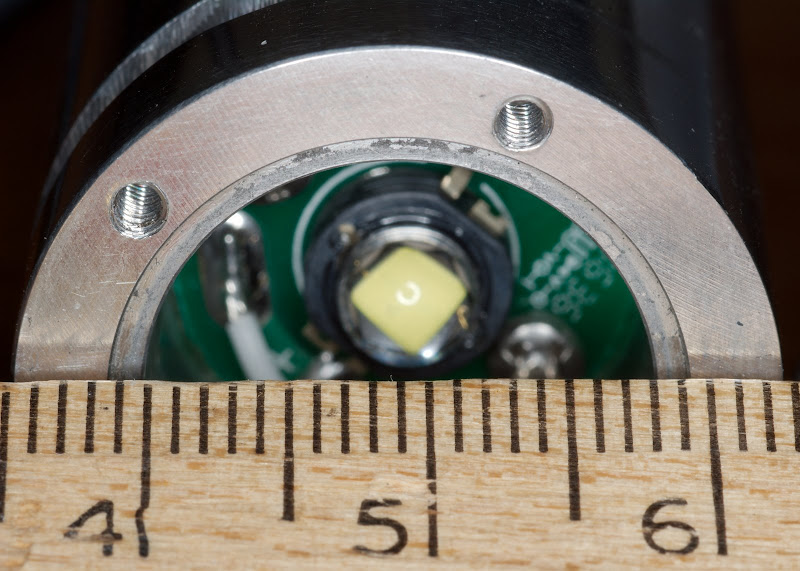
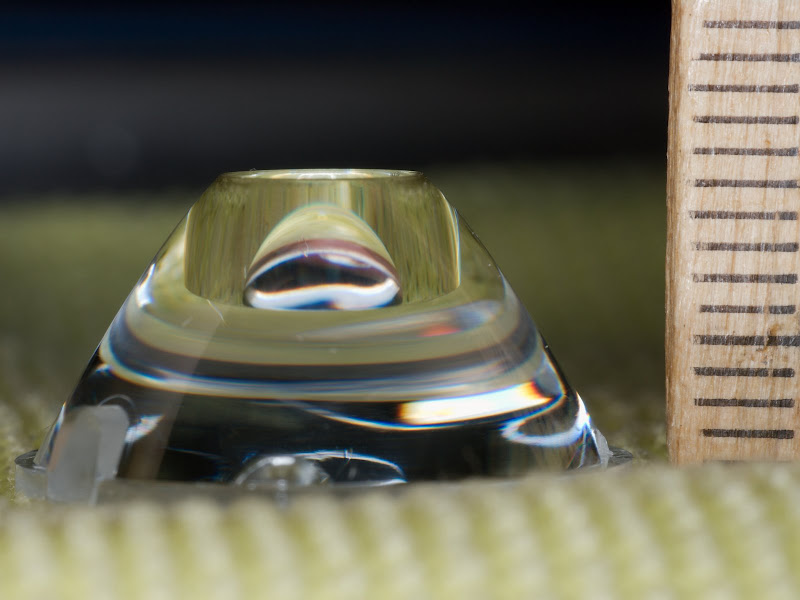
First off, to verify whether it's even feasible. I disassembled the light to see and it looks very doable. Only need to replace the optic (seems like a Carclo 20mm to my untrained eyes), and shim up the led a bit to properly mate with the optic. If I'm reading the LuxV and MCE datasheets correctly I think I need a shim of about 1.12-1.15mm thickness (and around the same size as the MC-E base.)

I've got an MC-E and some optics ordered, does anyone have a suggestion where to get an appropriate shim, or an easy way to make one?


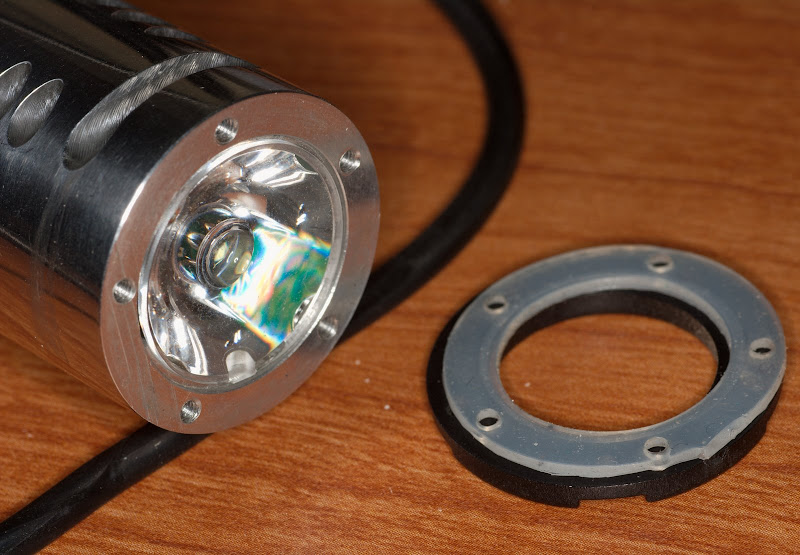
I took some pictures while I was checking it out, so now I present for your enjoyment: The Dissection of a Dinotte.

pre-surgery
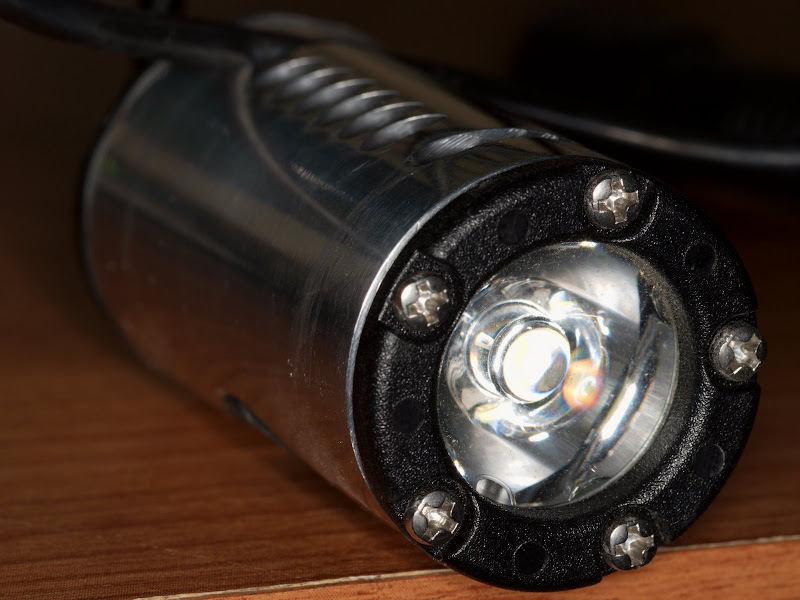
IMGP5304_1.jpg


Bezel and washer removed.
IMGP5306_1.jpg


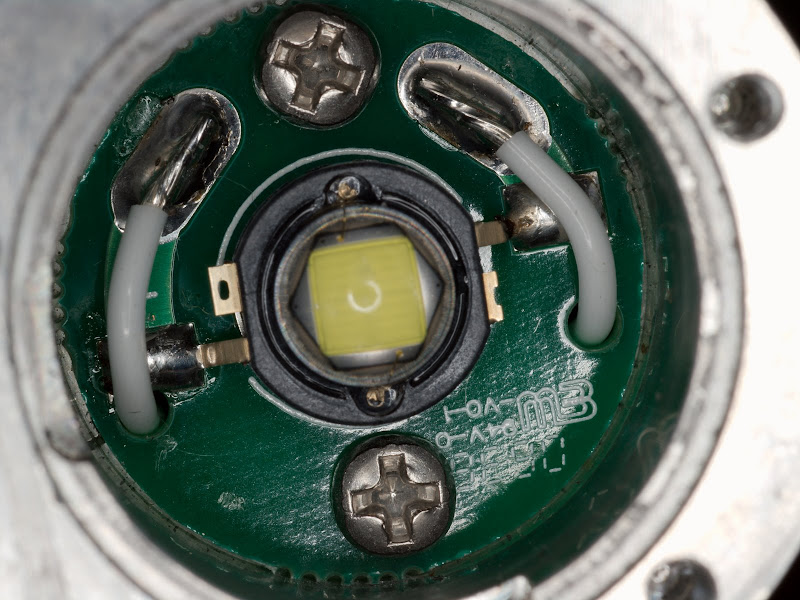
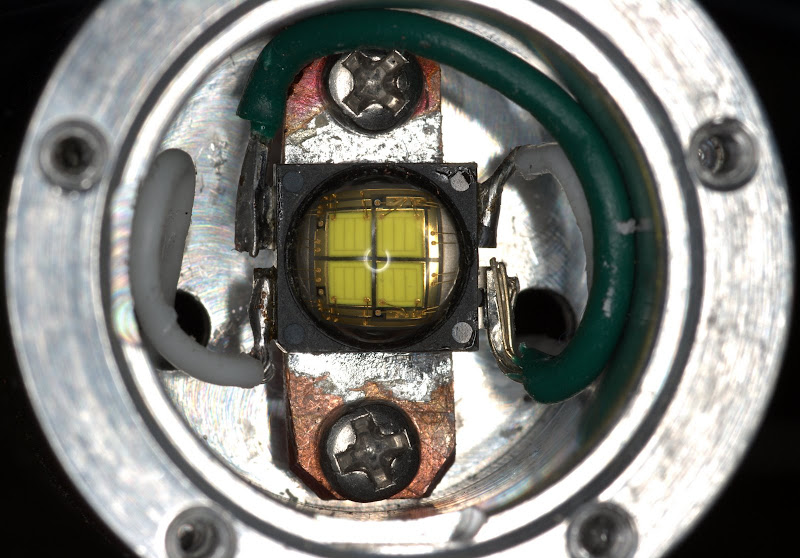
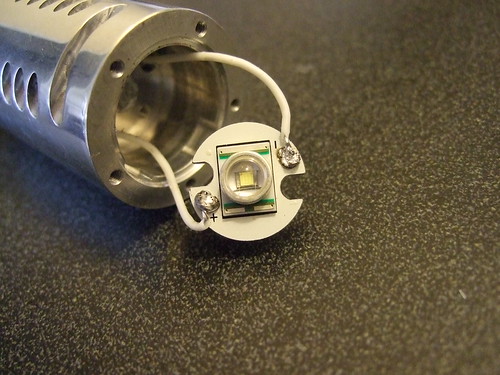
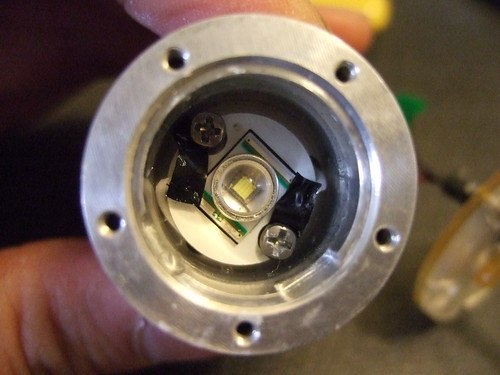
Exposed led.
IMGP5311_1.jpg


~18mm inner diameter, ~20.5mm lip.
IMGP5313.jpg


The optic is ~10mm tall.
IMGP5318.jpg


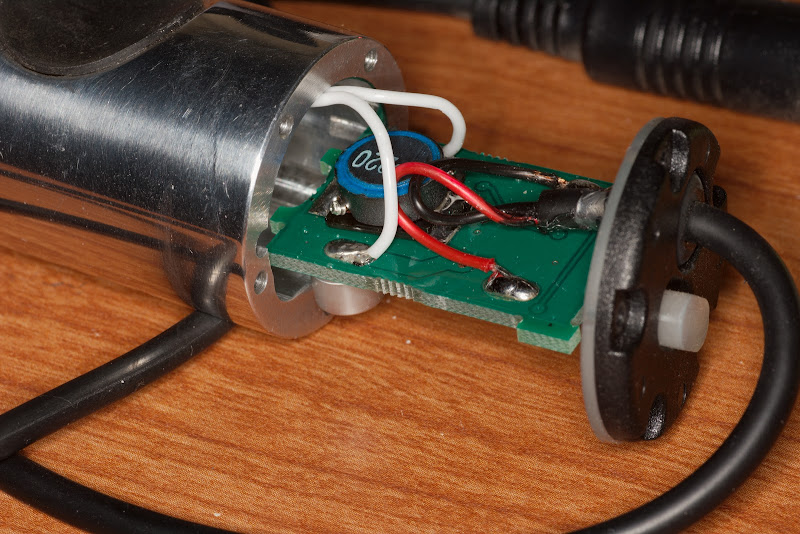
Driver board back side.
IMGP5320.jpg


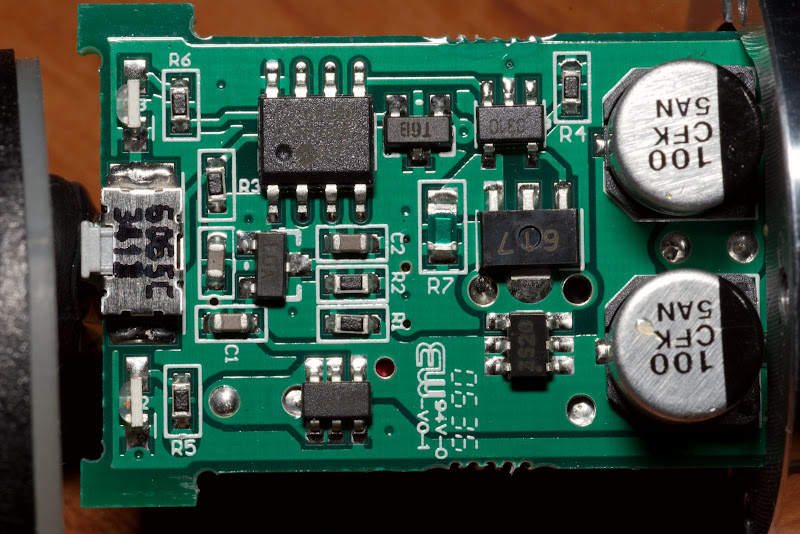
Driver board front side.
IMGP5324.jpg


Driver board slot.
IMGP5325.jpg


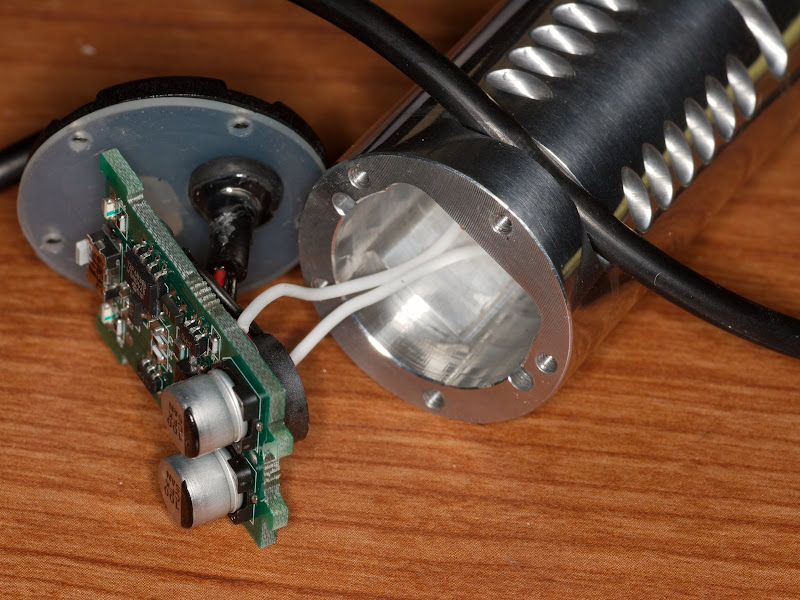
Driver board fully exposed.
IMGP5328.jpg


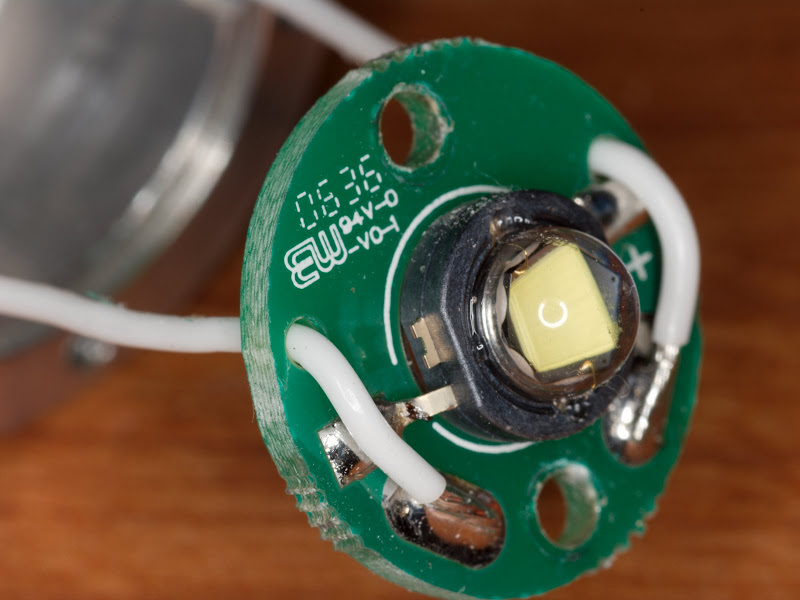
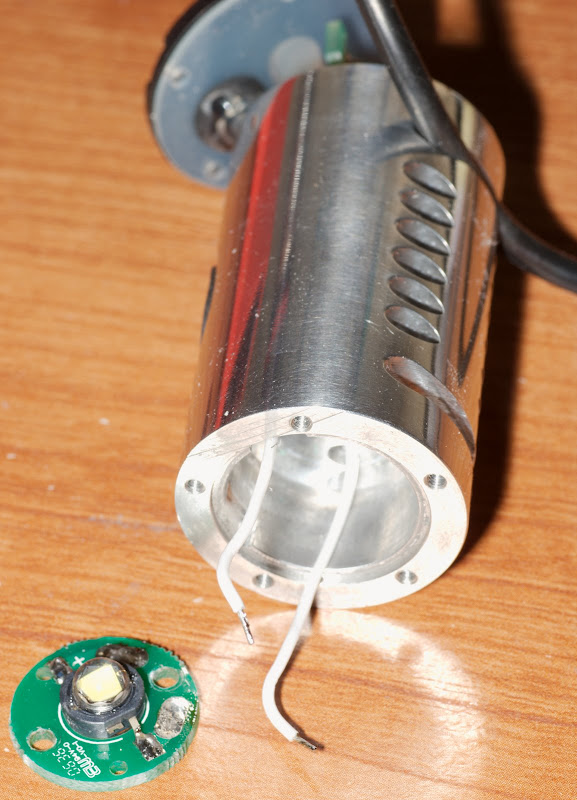
LED & "star" removed.
IMGP5329.jpg


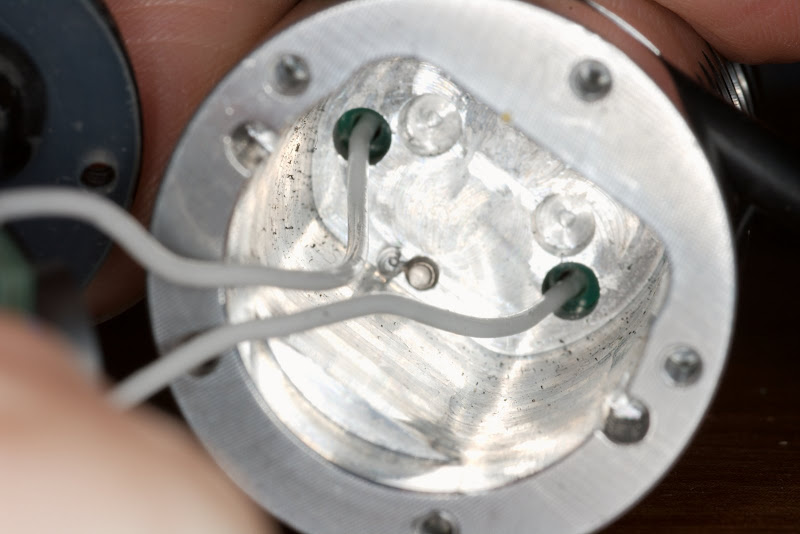
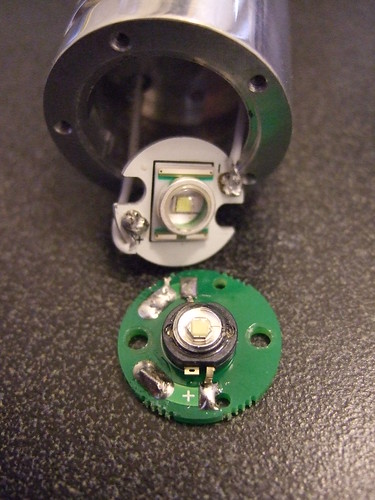
Reverse side of LED & "star". Note the hole for direct thermal connection between led and the body of the light.
IMGP5331.jpg


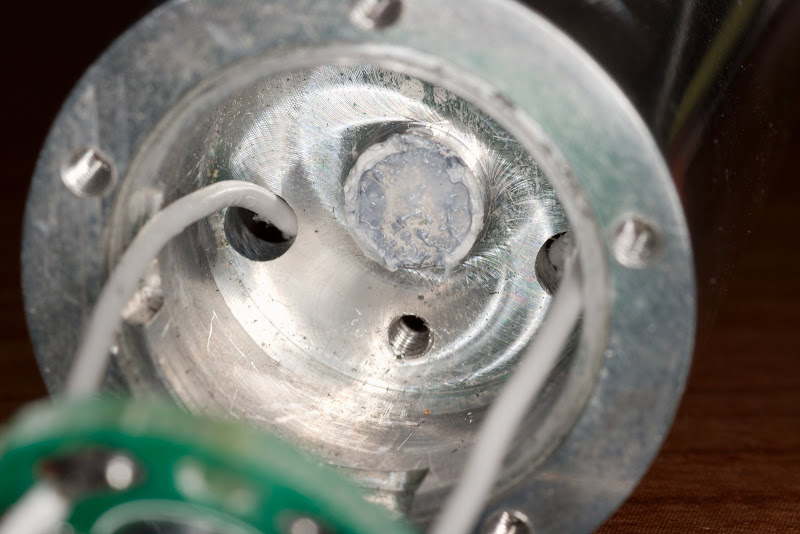
LED thermal path.
IMGP5332.jpg

 
That optic *may* work with the MC-E, since it's already designed around a 4-die emitter. How big is the opening in the bottom of the optic? The dome on the MC-E is .250" at its base. You could try to sand/machine the front surface down instead of shimming the MC-E up.
 
It's a bit smaller than .25". The Carclo datasheet for their luxeon optics says it has a 6.2mm opening (.244"), which seems right. Not a big deal since new optics aren't terribly expensive.

I'd like to avoid having to modify the body since it's probably a bit outside my ability and tools, and I'd rather avoid irrevocable changes too if possible.
 
Looking forward to updates.. I've a couple of 5W, I may follow in your footsteps.........:goodjob:
 
I have been wanting to see this mod ever since I realized the MC-E can be used as a direct replacement for the Lux V. 120 lumens to 430 lumens should be great. When I originally placed my order for an MC-E with cutter I had the option of a 17mm diameter star so that would work with the 18mm internal diameter. What a cool thermal mounting solution Dinotte used with the raised bit and hole in the PCB, too bad it will be hard to use it. Maybe you can just sand a standard star to make it a little thinner and just place the star on top of the raised portion to make up the 1.15mm gap. It would be super slick to get a PCB made, would solve every thing really. It could be made just the right thickness to avoid shimming, it could also have a hole in the back like the original, and it could be wired 2s2p. That would really be somthing. If this mod works you sure will have a small bright light.
 
Still waiting on my order from Cutter, but I got my backup order of parts in Friday (370 Lumen WF bin MC-E from Endeavour, optics from Future Electronics) and finished the mod this weekend. The optics have a little stub on one side that needs to be sanded down before they fit in the light.

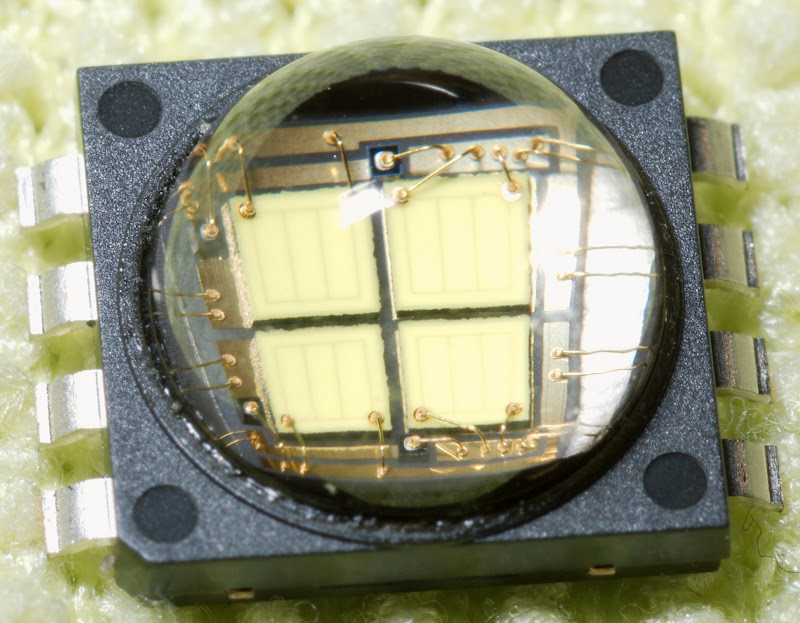
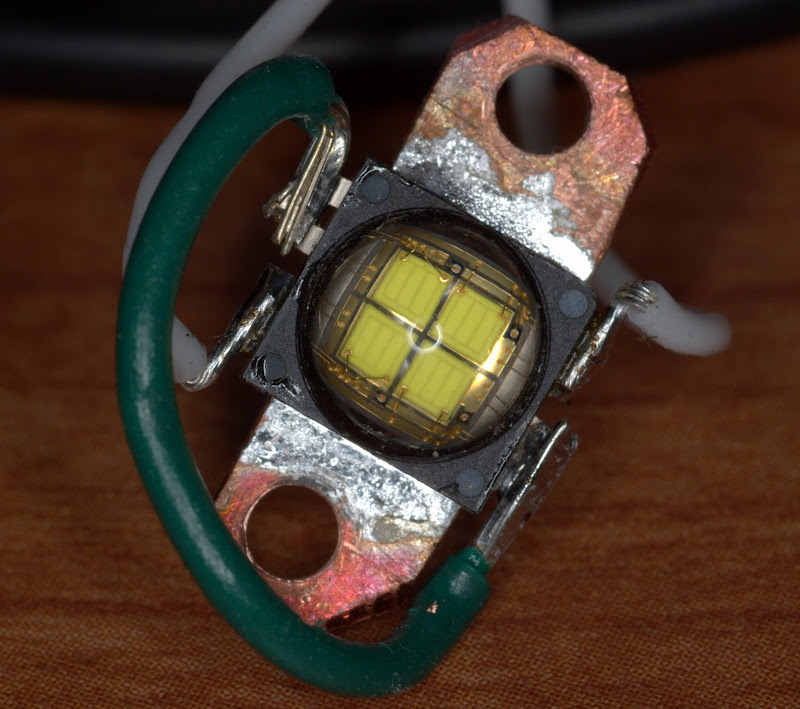
Gratuitous shot of LED:
IMGP5350.jpg


Remember to note which wire is positive and negative before un-soldering the old LED. Luckily I had my pictures to go back and look at. ;)
IMGP5349.jpg


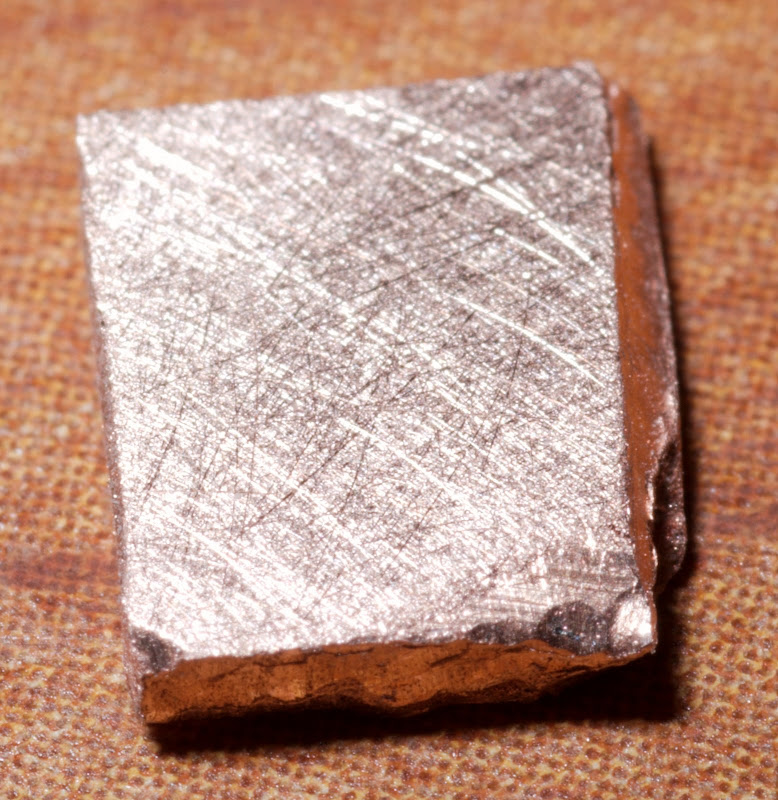
For the shim I found a copper sheet sample pack at onlinemetals.com which had 5 thicknesses of copper sheet. I tried the two thicker sheets (.043" and .064".) I cut some approx 6x7mm rectangles of each with some Wiss metal snips. I think this is not the greatest way to do it, they ended up a bit bent and I had to straighten them as well as I could with pliers then sand them down flat again.
IMGP5360.jpg


Once I did that I tested the height in the body with the led and optic on top. The shorter one did not appear to be tall enough as the optic flanges were resting on the body, so I decided to go with the thicker one to ensure pressure for heat transfer. The optic sticks out a tiny bit more, but the silicone washer conforms enough that it still should be waterproof.

I used Arctic Silver between the led and shim and body. Then worked on getting everything back together. This was probably the hardest part, with the led and shim not actually attached and the wires fighting where I wanted to position the led. Once I got the led and shim in roughly the right place I put the optic on top and used that to push things into position, and screwed the front back on. The first try ended up with the led being not quite centered. I was able to correct it with some finagling. Sorry no pictures of the assembling, it didn't want to sit still that long.

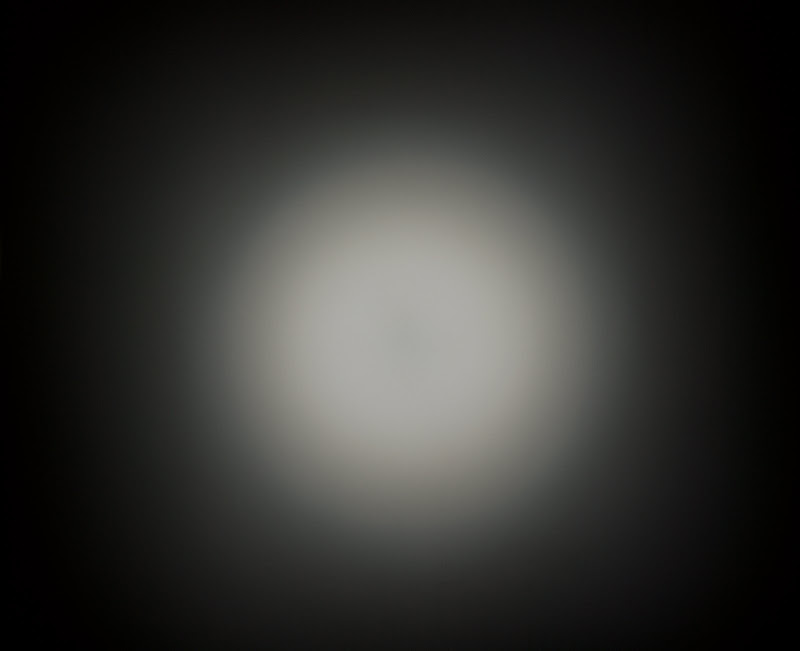
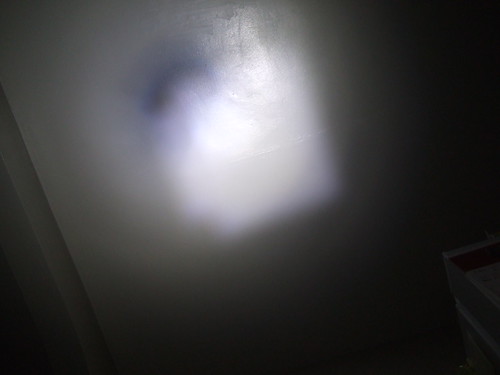
Here are white-wall beamshots, light about 4 feet from the wall. (All are ISO 100, f3.5, 1/45s. These images should all be the same height, but will probably appear a bit off size due to being resized to a constant width. Oops. I'll re-crop and upload some better ones later.)

Standard Dinotte 5W (Luxeon V)
IMGP5379.jpg


Dinotte MC-E w/plain tight optic (10193), off center led
IMGP5366.jpg


Dinotte MC-E w/plain tight optic (10193), somewhat better centered (I had it on low by accident for this shot.)
IMGP5369.jpg


Dinotte MC-E w/frosted narrow optic (10194)
IMGP5380.jpg


Conclusion: plain tight optic is really nasty, frosted is pretty nice though fairly wide beam. Still much brighter than the old LuxV. The mod isn't too hard but I'd really like a better way of centering the LED, since the optics have a wider than necessary hole depending on that isn't sufficient.
 
Thanks for the update - I had been curious how it was going, since I have an old Ultra 3 that I would like to mod. I noticed that the height of the Luxeon III emitter alone seems to be .5mm taller than the height of a Cree Q5 on the 16mm star ( 5.86mm vs 5.33mm), so I am thinking that maybe I can just put a the 16mm star in there and pick up a Carclo Cree optic and see how it goes.
Can I ask where did you ordered the optic from?
 
My original order was from Cutter but I got tired of waiting and made backup orders, the optics were from Future Electronics. I used the part numbers from Cutter to search for them. The optics at Future are pretty cheap ($1.41) but if that's all you're ordering the shipping is a bit silly. I filled my order out with some unrelated stuff to offset it.

You could try that, I'm not sure how much difference having the optic .5mm away makes, if any. If you do that I would recommend using some thermal epoxy/glue rather than just grease since the optic won't be putting any pressure on the led. Well, maybe you can get some longer screws and reuse the case screw holes if they happen to line up with screw holes on the star? :) - Actually I just took a look and the screws that were holding the star in are pretty long already, it looks like they might just work as is.

Now that I think about it, I guess this could even be a better way of doing the MCE mod. I could just cut out a longer section of copper sheet, drill holes in it, and use the screws to hold it in place. Would have to epoxy the led onto the copper to keep it from sliding around, but that would solve the centering problems.. (I haven't seen any smaller MC-E stars yet.)
 
Last edited:
Great post! It's interesting to see that Dinotte uses a beefed up Zetex driver. There's lots of data floating around on this circuit on CPF if you ever plan on doing mods.

Paul
 
Great mod and excellent photos, but don't you have done any photo of the end of the mod? with the solders of the MC-E led . Would come with 2p2s in star?

Thanks

msxtr
 
Nice mod. How do you find it after a couple of months, has it run reliably? How have run times been affected? Would you do the mod again?
Thanks.
 
I finally got around to modding my second one. This time I used the idea I mentioned before of using a rectangular shim and drilling holes for the screws to use the existing screw holes in the body. Had to redo some parts a few times since I'm still a newbie at some of this modding stuff, but the end result turned out well.


MC-E soldered onto copper shim with screw holes.
IMGP5550.jpg


Screwed into Dinotte 5W body:
IMGP5553.jpg
 
Great mod and excellent photos, but don't you have done any photo of the end of the mod? with the solders of the MC-E led . Would come with 2p2s in star?

Just posted some pics from my second mod. :)

It is 2p2s. You could theoretically use a star, but I haven't seen any MC-E stars smaller than the standard 21mm, which won't fit.

Nice mod. How do you find it after a couple of months, has it run reliably? How have run times been affected? Would you do the mod again?
Thanks.

Haven't had any problems with reliability. I don't do long enough rides to judge whether it's had any affect on the battery life but I don't see any reason why it would. Well, since low is now as bright or brighter than high was before, you could get a lot longer life if you don't use high as much. :)

I would do it again (just modded my other one actually.) I think the second one actually took longer since it required some more skills I hadn't done much or at all before. Would probably be a lot faster a second time around now that I know what I'm doing.
 
How do you solder the star to the plate?
Heat it up on an element with solder, when it melts put the star on really carefully?
 
How do you solder the star to the plate?
Heat it up on an element with solder, when it melts put the star on really carefully?

Spread a bit of solder paste on the plate, place LED on top, hold in place with helping hands. Heat up with heat gun until it melts, keep heat on for a bit to ensure a good solder. (First time I took heat off too quick and only one side had flowed. Second time I didn't use helping hands and after the solder flowed the LED started sliding around and ended up in the wrong place. I think I also had too much solder paste on there. I sucked off some of the solder with a solder wick and then for the third time I positioned the LED with the helping hands before heating. :))
 
FluffyTapeworm, thanks for the detailed picture, very nice job, above all on the solder...:twothumbs

Greetings - Saludos

msxtr
 
FluffyTapeworm,

Great mod, quick question, what would be the best thickness for the rectangular copper piece with the holes in it used in the second mod that is screwed directly to the body? Would it make any difference which optic was used (for calculating copper thickness)

Thanks in advance
 
I was inspired by FluffyTapeworm's mod to go and mod my old Dinotte 3W commuter light. I picked up a Cree Q5 on a 16mm star from DealExtreme and just swapped it for the old Luxeon. The 16mm star is pretty thin, and the XR-E looked (from the spec sheet) to be lower in height than the Luxeon, so I thought i could get by just using the 16mm star. It works, but not perfectly as you will see.

Here's the Dinotte with the new Cree:
3117609166_6601bb6221.jpg


( The soldering is embarassing, I know. I'm going to have to improve it before I start the next project :crazy:)

Here's a photo of the original and the new emitter:
3116782753_1fcac96899.jpg


Notice the difference in position of the screw holes on the original PCB vs the new star. If I screw down the emitter using the notches on the upgraded star board, the screw head will likely touch the electrical contacts.

I ended up just putting some electrical tape down to protect the contacts from the screw head:
3116781223_390085fc22.jpg


So it went in, and the LED behaves well. You can't see it, but I put a load of arctic alumina grease on the underside - getting the star back in there turned out to be more of a hassle than soldering. Eventually it all went back together but the optic doesn't quite sit right on the new LED, and the beam pattern is a little wonky:
3116781491_81810953a8.jpg


Its a potentially useful pattern - if you orient the light so that point of the triangle is pointing "up" as you look forward, you get a lot of spill down on the road surface, with a bright, wide hotspot pointing straight ahead, with relatively little spill going up in the trees. Useful for road riding.

I didn't bother with a before beam shot, instead I noticed that the original Dinotte 3W had pretty much the same brightness as the 4W VB16 (CPF Special lights), with differences coming down to beam pattern. They both run the Luxeon 3 from what I understand, except the VB16 was driving it at 4W instead of 3W - the extra watt didn't seem to make much of a difference to my eye. But anyway, I did a side by side beamshot of the Dinotte 3W Cree Q5 against the 4W VB16, both set to high.
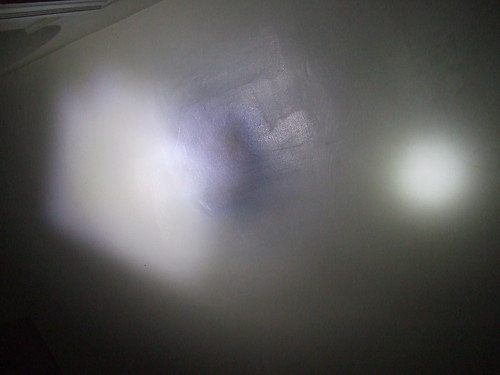
3117661698_9c5401449f.jpg


As you can see, the modified Dinotte has a pretty huge hotspot, a cooler tint, and is significantly brighter. The Dinotte on low is comparable to the VB16 on high.

All in all, a pretty nice upgrade for $6.67 + some soldering time. I had noticed that the optic can be setup to provide a cleaner hotspot, but I would need to shim the bezel and optic so that it is a little higher. Right now, I think I'll run with it. However, if someone know a North American distributor for the Carclo 20mm Cree optics, please let me know. Ordering it from Cutter would cost a lot more in postage than the optic itself, and Future Electronics doesn't seem to stock the XR-E optics.

Thanks FluffyTapeworm for the idea of mod my old light. Its was fun, and a lot cheaper than sending it back to Dinotte for $75 to upgrade to the 200L.

Steve
 
FluffyTapeworm,

Great mod, quick question, what would be the best thickness for the rectangular copper piece with the holes in it used in the second mod that is screwed directly to the body? Would it make any difference which optic was used (for calculating copper thickness)

Thanks in advance

The copper sheet I used was .064" thick. It's a bit thicker than necessary but the silicone washer on the front of the light can take up the slack.

Going by the datasheets the ideal thickness should be 1.15mm, but my other choice of thickness was .043" which isn't quite enough. (Well, in my first mod I was using the optic pressure to get heat transfer, with the second mod that isn't necessary so a slightly too thin shim might work just lose a little bit of light?)

The thickness of the shim is dependent on the optic height (since you want the optic to completely fit over the dome on the LED, and the lip of the light body restricts the optic from going further into the case.) I think all Carclo 20mm optics are the same height, though. I dunno about other brands.

I was inspired by FluffyTapeworm's mod to go and mod my old Dinotte 3W commuter light. I picked up a Cree Q5 on a 16mm star from DealExtreme and just swapped it for the old Luxeon. The 16mm star is pretty thin, and the XR-E looked (from the spec sheet) to be lower in height than the Luxeon, so I thought i could get by just using the 16mm star. It works, but not perfectly as you will see.

Did you consider using an SSC P4? They are much closer to Luxeon III in form factor and beam pattern, so it might be a better match with the existing optic (Haven't compared the exact measurements though.)
 
Did you consider using an SSC P4? They are much closer to Luxeon III in form factor and beam pattern, so it might be a better match with the existing optic (Haven't compared the exact measurements though.)

Yes, picking up one of the U2 binned P4 emitters would have been ideal, but I wasn't hot on the idea of trying to resolder the bare emitter onto anything, and since I was ordering some other things from DX, I figured that the $7 was worth it just to see what happens (I've spent more on a bad movie, after all).

I'll probably upgrade the VB16's with the P4's. The question that is coming up is, what am I going to do with all these Luxeon III's leftover from the upgrade?
 

Latest posts

Top