Shandstech
Newly Enlightened
- Joined
- Dec 2, 2008
- Messages
- 24
Switch disassembly:
remove o-ring and boot:
remove switch from tail of light with snap ring pliers or similar:

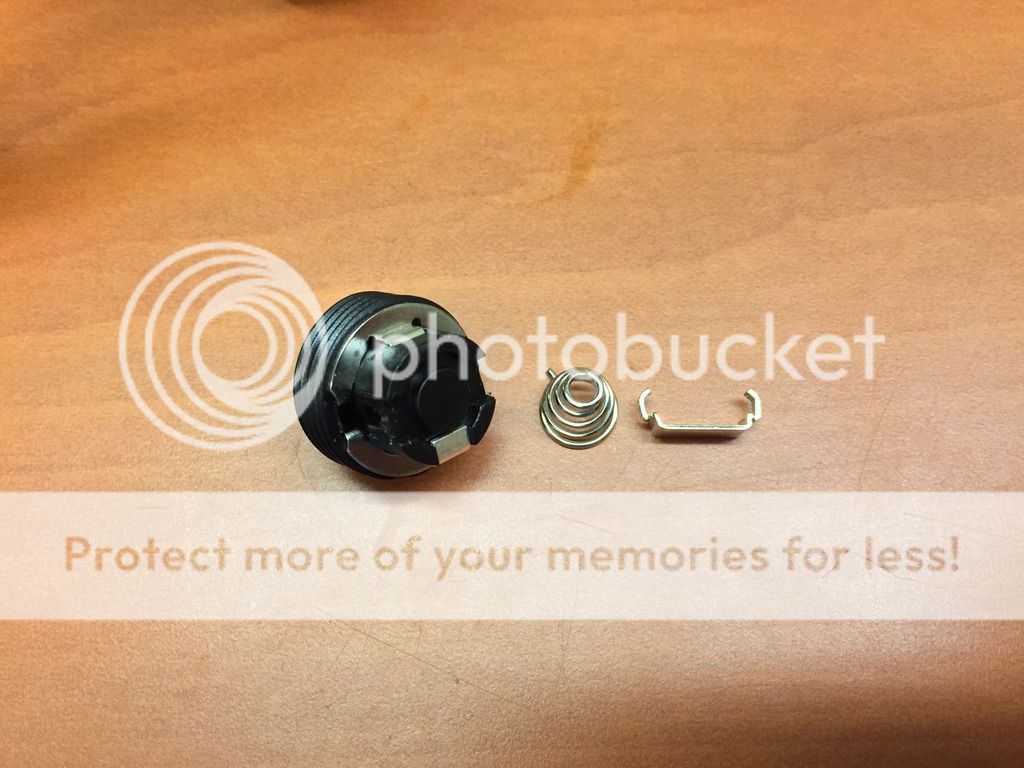
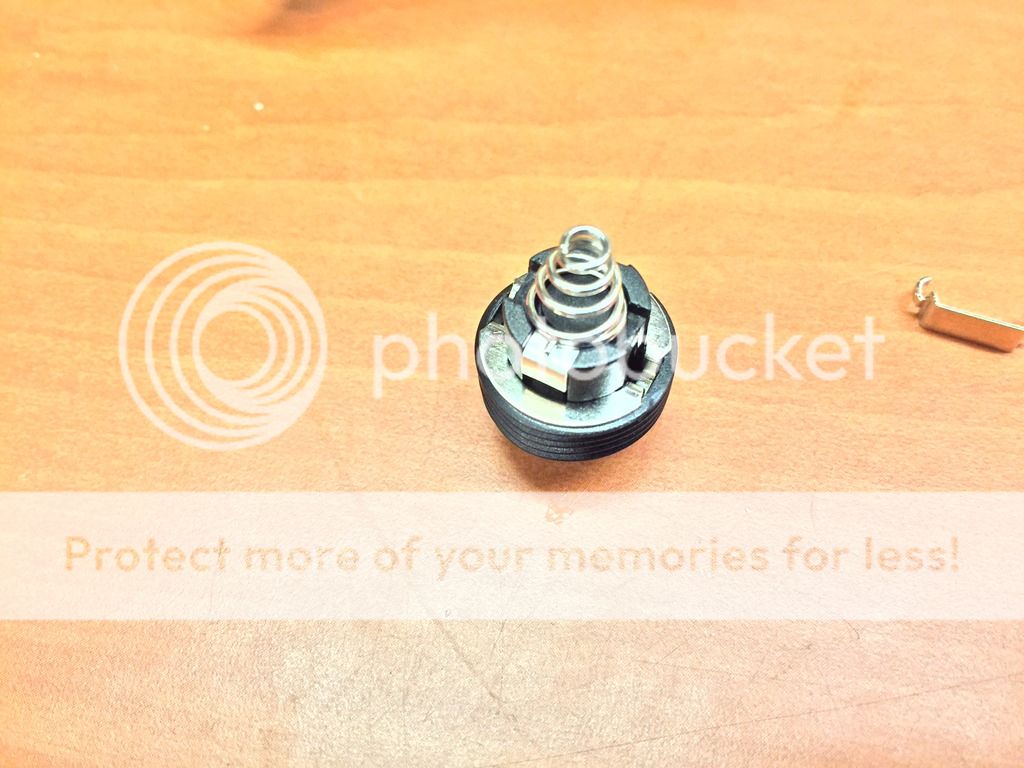
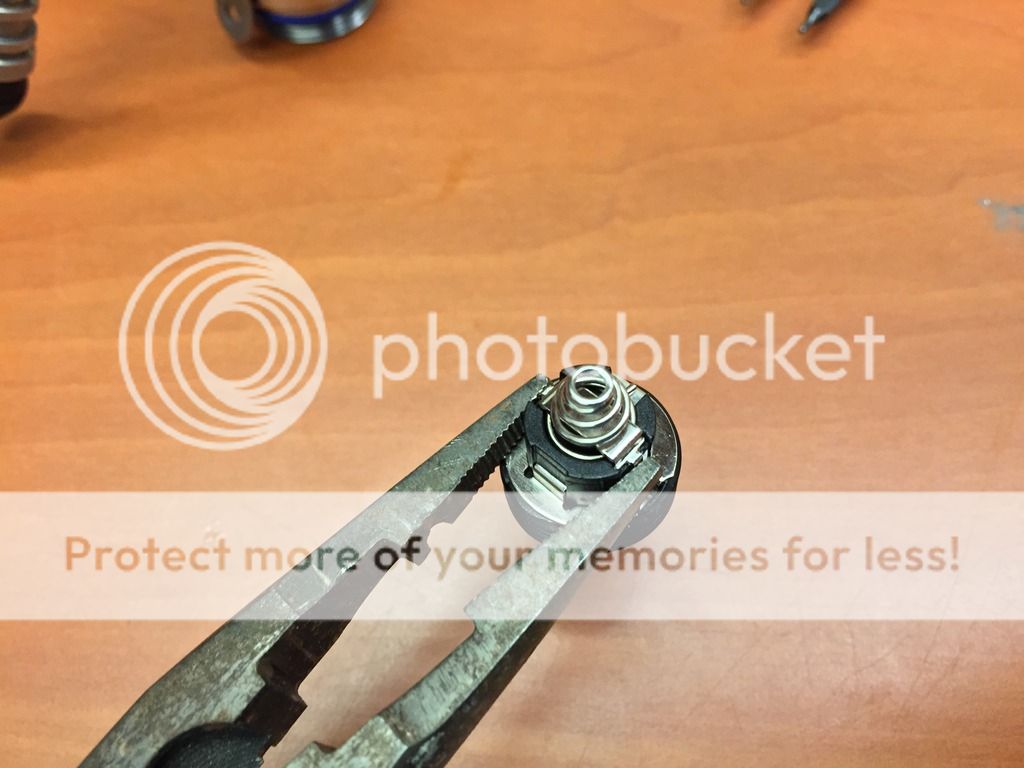
Using something small, a flat head screwdriver here, gently pry these metal tabs away from plastic. Be careful not to pry too much as it only takes a little bit of movement to release these tabs from the switch assembly. This clip is what holds the spring in place. Note the orientation of the spring as it will need to go back in the same way.


This is what you are left with. The last coil on the bottom of the spring that has the nipple sticking out, will need to be on the metal tab at the bottom of the switch in this picture when re-assembling. More on that later.
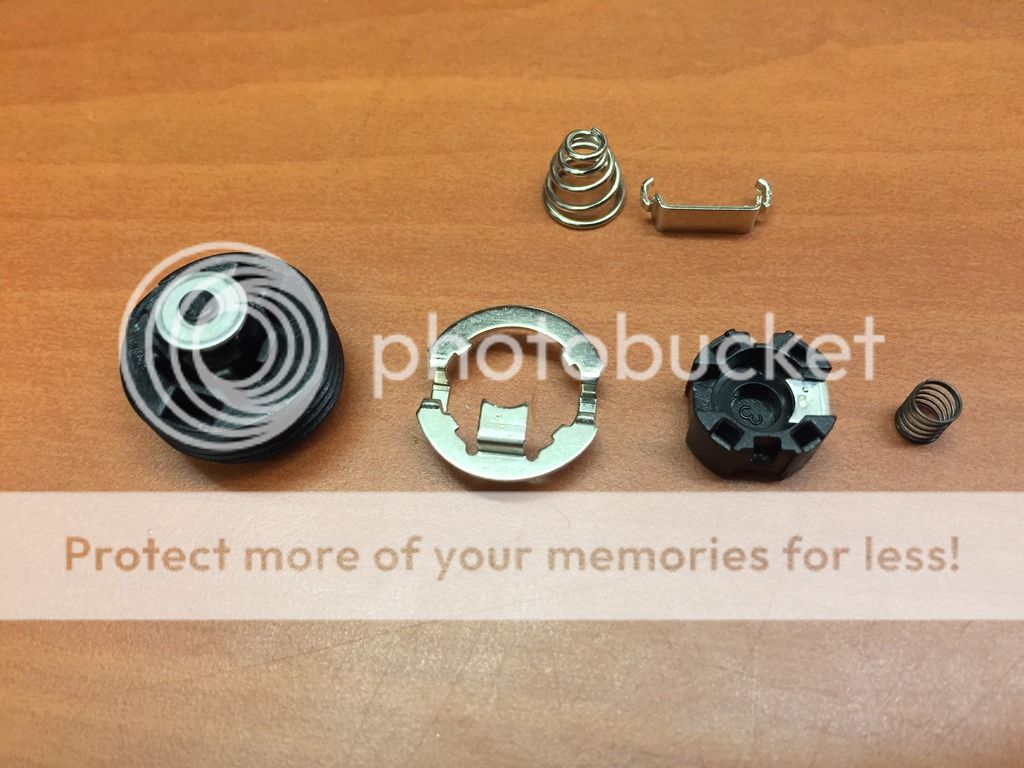
Next, go around the edges with something small and flat and pry the two pieces in half making sure not to pry too much on one side at a time or the prongs holding it together might break.
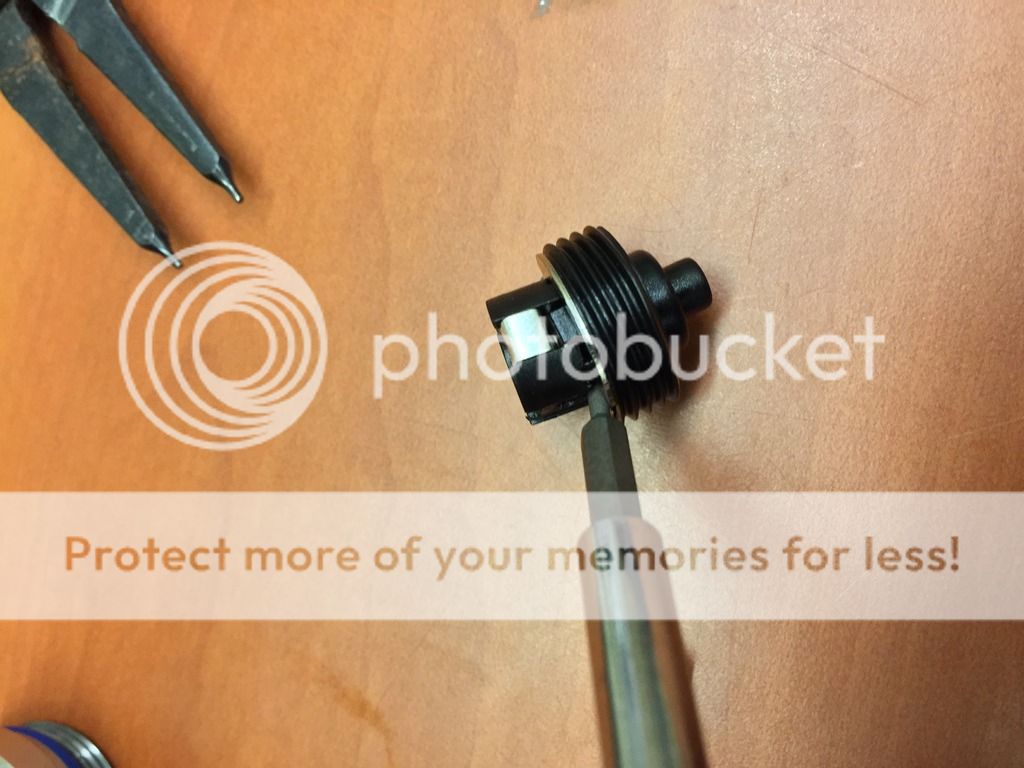


Once they are all the way apart, you will be left with this. Be careful as there is a small spring in there you don't want to lose.
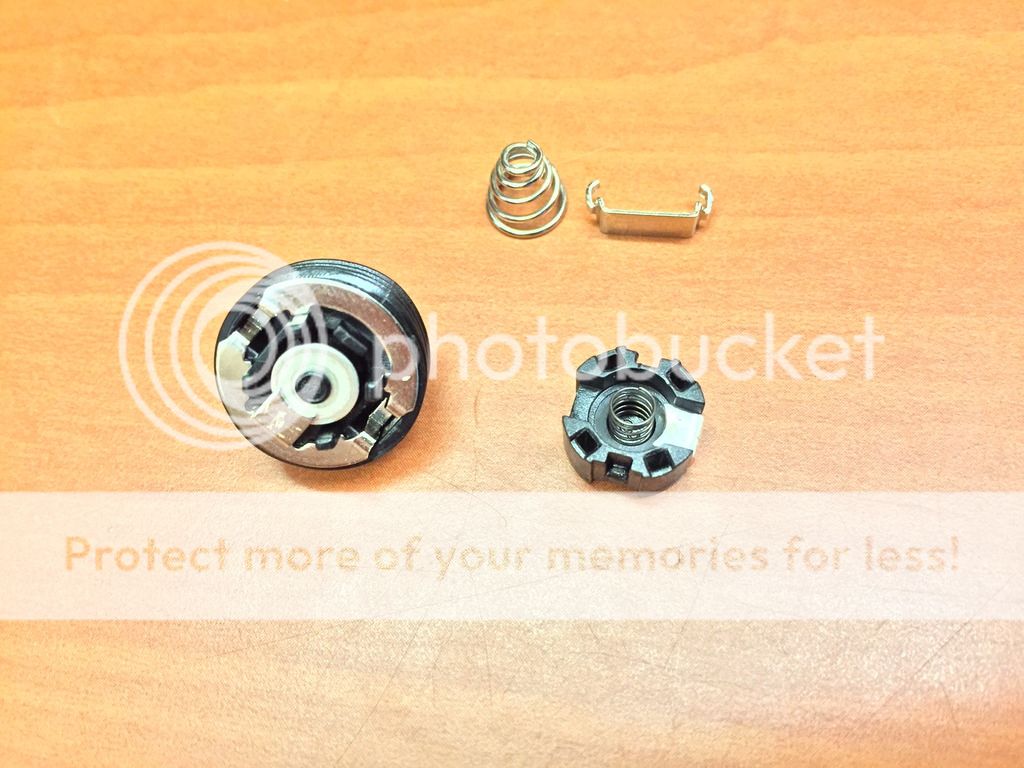
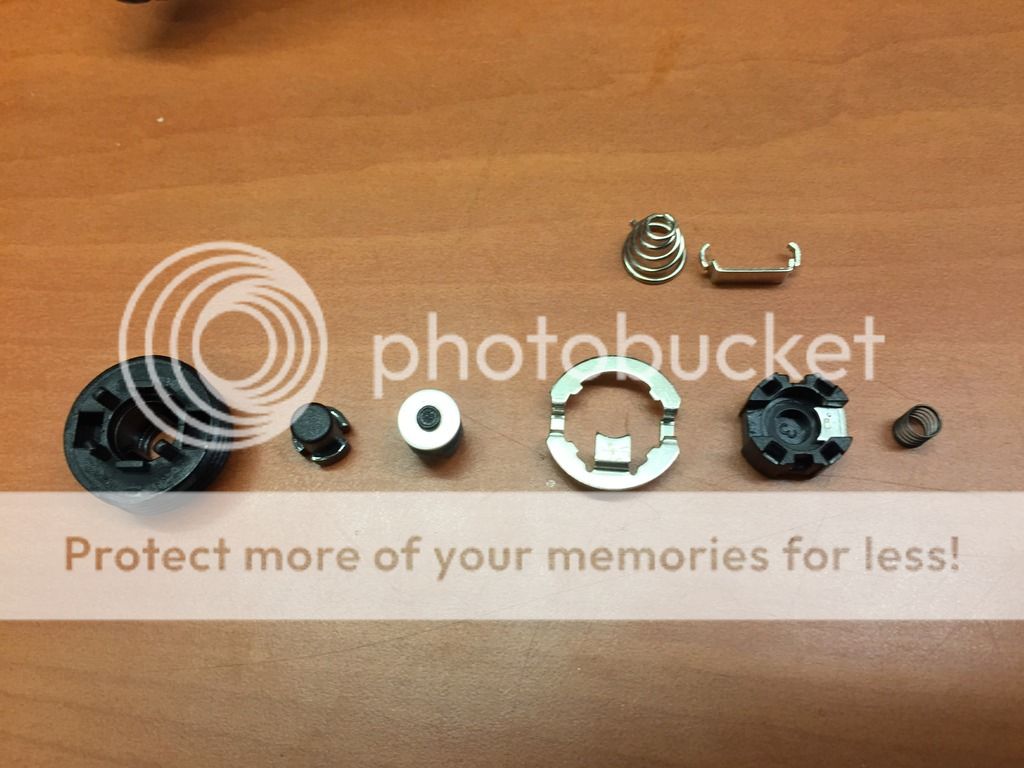
From there you can pry the metal ring off of the plastic and you'll be left with this.
Once the large ring is removed the small ring that is attached to a rod that goes into the actual button just slides out. It will have lubricant on the inside, mine seemed to have an excessive amount so I cleaned some of it off.
at this point I cleaned everything with CRC electrical grade contact cleaner.

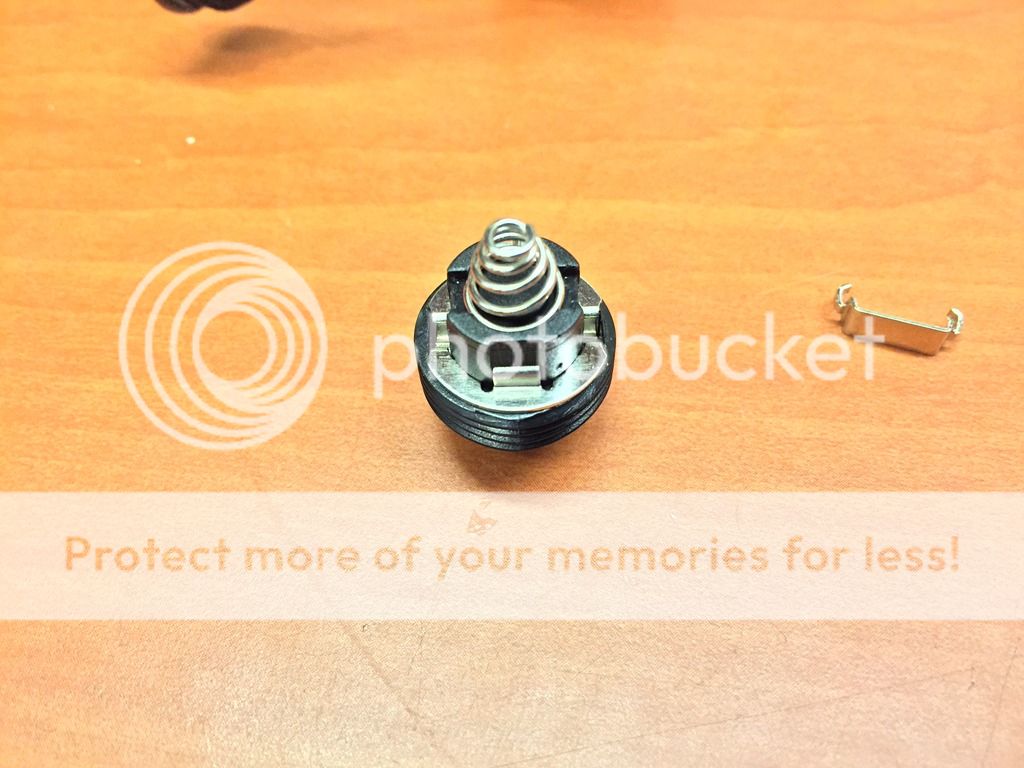
after that, reassemble in reverse. Note that the large coil on the bottom of the spring with the nipple coming off is on top of the metal contact.
Other side
then put the spring retaining clip back on and crimp it back into place using needle nose pliers.
Put boot and O-ring back on and you should be good to go.

I hope this helps some of you guys out there. Message me if you have any questions.
Travis
remove o-ring and boot:
remove switch from tail of light with snap ring pliers or similar:

Using something small, a flat head screwdriver here, gently pry these metal tabs away from plastic. Be careful not to pry too much as it only takes a little bit of movement to release these tabs from the switch assembly. This clip is what holds the spring in place. Note the orientation of the spring as it will need to go back in the same way.


This is what you are left with. The last coil on the bottom of the spring that has the nipple sticking out, will need to be on the metal tab at the bottom of the switch in this picture when re-assembling. More on that later.

Next, go around the edges with something small and flat and pry the two pieces in half making sure not to pry too much on one side at a time or the prongs holding it together might break.


Once they are all the way apart, you will be left with this. Be careful as there is a small spring in there you don't want to lose.

From there you can pry the metal ring off of the plastic and you'll be left with this.

Once the large ring is removed the small ring that is attached to a rod that goes into the actual button just slides out. It will have lubricant on the inside, mine seemed to have an excessive amount so I cleaned some of it off.

at this point I cleaned everything with CRC electrical grade contact cleaner.

after that, reassemble in reverse. Note that the large coil on the bottom of the spring with the nipple coming off is on top of the metal contact.

Other side

then put the spring retaining clip back on and crimp it back into place using needle nose pliers.

Put boot and O-ring back on and you should be good to go.

I hope this helps some of you guys out there. Message me if you have any questions.
Travis
Last edited: