Greetings,
Today's review will be dedicated to an interesting and somewhat unique flashlight from Imalent, the DDT40.
So, What's so special about this light?
1. A real universal lighting solution. 4 XM-L2 LED's for spot light, and two XP-L's on the sides for flood light. The claimed brightness is the summary of all the light options, that's 4000 lumens for spot and 1180 for the flood side LEDs.
2. The flashlight can be controlled with the bundled remote control, from a distance of up to 10 meters. The remote controls all the flashlight functions, the flashlight has 2 sensors for the remote control operation.
3. Smooth brightness control with a lot of brightness modes.
4. Multifunctional OLED screen, that displays a lot of information, including flashlight's temperature, batteries voltage and even a compass!
5. Built in charger, with conjunction of the screen makes it somewhat like Xtar VP1/VP2/VP4.
6. Temperature-controlled step-down, and not time-based like on most lights.
Features


So, shall we begin?

The flashlight is being sold in a carton box, that can be used for convenient storage.


Nicely packed ...

There is a good quality holster in the package (like on Nitecore and JetBEAM flashlights), spare o-rings and screen protector, charger, user manual and warranty card.


The holster fits the flashlight very tight, I hope it will become a little loose after some more usage.


Here is the charger, o-rings and screen protector. 5 volts and 2A ... the manufacturer decided not to go the micro-usb path.


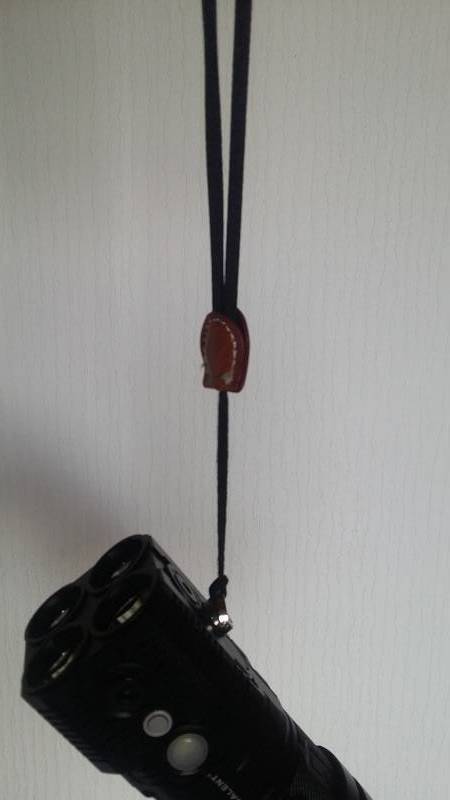
User manual, the remote control. The remote control is near my car keys, so you could understand the size better. By the way the chrome feels like real metal and not plastic, which is a very nice touch.
In order to use the remote control, the flashlight has to be turned on from the keys. What I mean is, when it's off you can't just turn it on with the remote, but after you turned the flashlight on you can control all the functions from the remote, including turning it on and off.
There is a button for power, two buttons for the brightness and the mode key. The mode key changes modes in the following order: throw->flood->strobe->beacon->SOS->throw.... and so on.


Here it is. The flashlight feels nice in the hand, nicely balanced. The buttons have no labels, and are hard to feel in darkness. Please note that the flashlight also has tripod hole. I have no complains for the built quality - I think it's just like Nitecore.

No problem standing in candle mode, the tail is flat.


No problems with the reflectors, the anti-reflex coating can be clearly seen.


The batteries are being connected in parallel, the flashlight can be operated with 1,2,3 batteries in case of an emergency. I am glad that there is no cassette involved.

The threads are square cut, and came richly lubricated. The number of revolutions that I had to make in order to close the flashlight complete was the largest I remember - I counted 7.5 !


Here we can see the different information on the display. The maximum temperature that I saw was 57 Celsius, after that the brightness was reduced to 2000 lumens. Right after the stepdown you can max the brightness, but the flashlight will reduce it very soon. It's very interesting to see the voltage drop under a load - fully charged batteries are dropping to 3.56 volts when the flashlight is in 4k lumens mode.


Here are the minimum modes. The setting says 5 lumens for both the flood and the spot modes, but I actually think that it is much lower (which is good in my opinion).
The red LEDs on the sides show where the brightness changing buttons ar, and are being lit when the flashlight is charging batteries or the batteries have to be charged/replaced. Also, any keypress on the remote results in the red leds light.
In flood mode both the side LEDs work, you can't control only one.


This is how it looks like in my pretty small hand.


In comparison with Olight SRmini. Note that the SRmini uses 3 18650 cells connected in series electrically.
Controls
The big black button is responsible for turning the flashlight on and off. A short press turns the flashlight on in the last mode and brightness in case of flood mode and on max in case of spot mode. Keeping the button press for a while (less than 0.5 second) turns the flashlight off.
The silver button above Imalent writing is responsible for the information on display in this order: brightness (lumens)->voltage->compass->temperature->off. Note that the display can be also operated when the flashlight is off.
The silver button above DDT40 writing changes the flashlight modes - short press changes from flood to spot, and keeping it pressed turns on the different strobe modes - strobe->sos->beacon. Note that in this flashlight the brightness setting of the strobe modes can also be changed.
Pressing both the silver keys together turns all electronic lock from accidental turning on the flashlight - it is also deactivate by pressing the two buttons together.
Two "mode" buttons above and below the screen are responsible for changing the brightness. Please note that these are "touch" keys, and in order to operate the flashlight in gloves you will have to use special gloves, like the ones you have to use with smartphone touch screens.
Some numbers (lux from meter)
Not bad at all. There is a huge hotspot and a lot of sidespill. I did not notice any tint to the light, the light is a regular cold light, no blue or purple or green involved.
The minimum mode is really dim, my luxmeter can't even measure it.
Let's see it in action


Conclusion
I hope you liked the review - if there are any questions/suggestions I would be happy to assist.
I would like to thank Imalent for providing the flashlight sample for review.
Today's review will be dedicated to an interesting and somewhat unique flashlight from Imalent, the DDT40.
So, What's so special about this light?
1. A real universal lighting solution. 4 XM-L2 LED's for spot light, and two XP-L's on the sides for flood light. The claimed brightness is the summary of all the light options, that's 4000 lumens for spot and 1180 for the flood side LEDs.
2. The flashlight can be controlled with the bundled remote control, from a distance of up to 10 meters. The remote controls all the flashlight functions, the flashlight has 2 sensors for the remote control operation.
3. Smooth brightness control with a lot of brightness modes.
4. Multifunctional OLED screen, that displays a lot of information, including flashlight's temperature, batteries voltage and even a compass!
5. Built in charger, with conjunction of the screen makes it somewhat like Xtar VP1/VP2/VP4.
6. Temperature-controlled step-down, and not time-based like on most lights.
Features
So, shall we begin?
The flashlight is being sold in a carton box, that can be used for convenient storage.
Nicely packed ...
There is a good quality holster in the package (like on Nitecore and JetBEAM flashlights), spare o-rings and screen protector, charger, user manual and warranty card.
The holster fits the flashlight very tight, I hope it will become a little loose after some more usage.
Here is the charger, o-rings and screen protector. 5 volts and 2A ... the manufacturer decided not to go the micro-usb path.
User manual, the remote control. The remote control is near my car keys, so you could understand the size better. By the way the chrome feels like real metal and not plastic, which is a very nice touch.
In order to use the remote control, the flashlight has to be turned on from the keys. What I mean is, when it's off you can't just turn it on with the remote, but after you turned the flashlight on you can control all the functions from the remote, including turning it on and off.
There is a button for power, two buttons for the brightness and the mode key. The mode key changes modes in the following order: throw->flood->strobe->beacon->SOS->throw.... and so on.
Here it is. The flashlight feels nice in the hand, nicely balanced. The buttons have no labels, and are hard to feel in darkness. Please note that the flashlight also has tripod hole. I have no complains for the built quality - I think it's just like Nitecore.
No problem standing in candle mode, the tail is flat.
No problems with the reflectors, the anti-reflex coating can be clearly seen.
The batteries are being connected in parallel, the flashlight can be operated with 1,2,3 batteries in case of an emergency. I am glad that there is no cassette involved.
The threads are square cut, and came richly lubricated. The number of revolutions that I had to make in order to close the flashlight complete was the largest I remember - I counted 7.5 !
Here we can see the different information on the display. The maximum temperature that I saw was 57 Celsius, after that the brightness was reduced to 2000 lumens. Right after the stepdown you can max the brightness, but the flashlight will reduce it very soon. It's very interesting to see the voltage drop under a load - fully charged batteries are dropping to 3.56 volts when the flashlight is in 4k lumens mode.
Here are the minimum modes. The setting says 5 lumens for both the flood and the spot modes, but I actually think that it is much lower (which is good in my opinion).
The red LEDs on the sides show where the brightness changing buttons ar, and are being lit when the flashlight is charging batteries or the batteries have to be charged/replaced. Also, any keypress on the remote results in the red leds light.
In flood mode both the side LEDs work, you can't control only one.
This is how it looks like in my pretty small hand.
In comparison with Olight SRmini. Note that the SRmini uses 3 18650 cells connected in series electrically.
Controls
The big black button is responsible for turning the flashlight on and off. A short press turns the flashlight on in the last mode and brightness in case of flood mode and on max in case of spot mode. Keeping the button press for a while (less than 0.5 second) turns the flashlight off.
The silver button above Imalent writing is responsible for the information on display in this order: brightness (lumens)->voltage->compass->temperature->off. Note that the display can be also operated when the flashlight is off.
The silver button above DDT40 writing changes the flashlight modes - short press changes from flood to spot, and keeping it pressed turns on the different strobe modes - strobe->sos->beacon. Note that in this flashlight the brightness setting of the strobe modes can also be changed.
Pressing both the silver keys together turns all electronic lock from accidental turning on the flashlight - it is also deactivate by pressing the two buttons together.
Two "mode" buttons above and below the screen are responsible for changing the brightness. Please note that these are "touch" keys, and in order to operate the flashlight in gloves you will have to use special gloves, like the ones you have to use with smartphone touch screens.
Some numbers (lux from meter)
| Flashlight/Mode | Low | Mid | High | Turbo |
| Imalent DDT40 Main | 0 | - | - | 34000 |
| Imalent DDT40 Side | 0 | - | - | 113 |
| Sky-Ray King | - | 3600 | - | 13000 |
| Olight SR mini | 2100 | 4320 | 8000 | 13500 |
Not bad at all. There is a huge hotspot and a lot of sidespill. I did not notice any tint to the light, the light is a regular cold light, no blue or purple or green involved.
The minimum mode is really dim, my luxmeter can't even measure it.
Let's see it in action
Conclusion
I hope you liked the review - if there are any questions/suggestions I would be happy to assist.
I would like to thank Imalent for providing the flashlight sample for review.
Last edited:
")