Mechanical Modding Services

precisionworks

Flashaholic
Joined
Apr 19, 2007
Messages
6,623
Location
Benton Illinois
Barry - are those 4-40 screws? Also, not that it matters but do u use Ti screws or SS when sending them back?

Those are Lundsford Racing Ti screws & should be installed & removed only with a Thorp MIP driver. Use a hardware store Allen key at your own risk.

Thread size is 4-40
 

bartko09

Enlightened
Joined
Apr 11, 2015
Messages
535
Those are Lundsford Racing Ti screws & should be installed & removed only with a Thorp MIP driver. Use a hardware store Allen key at your own risk.

Thread size is 4-40

Thorp who? I use Phillips #2 right? [emoji23][emoji23][emoji23] kidding of course
 

precisionworks

Flashaholic
Joined
Apr 19, 2007
Messages
6,623
Location
Benton Illinois
Thorp who? I use Phillips #2 right?
Cold chisel :)


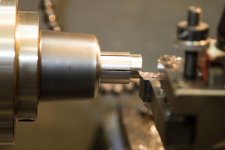
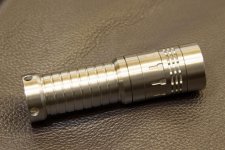
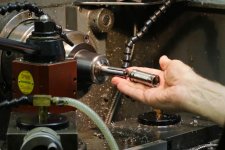
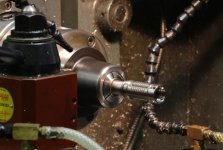
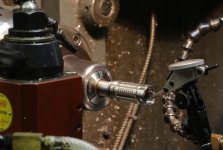
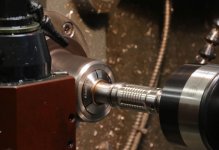
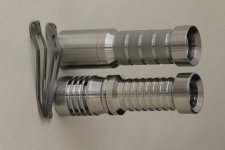
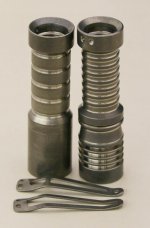
A V10R Ti with spa treatment ...
  • Sanitize the bezel & body
  • Groove the body to match customer supplied photo
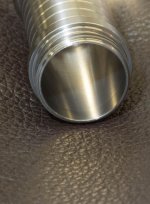
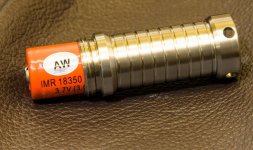
  • Bore for 18350

Skim cut bezel to remove etching
V10R T1 1 (1 of 1).jpg

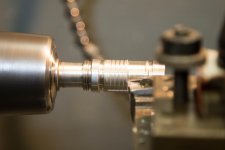
Starting to smooth off body
V10R T1 2 (1 of 1).jpg


Body ready to groove
V10R T1 3 (1 of 1).jpg

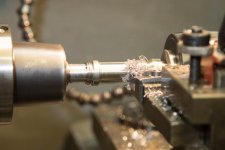
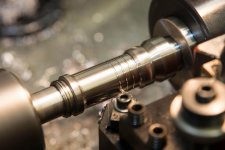
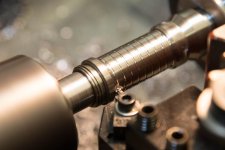
Cutting the first grooves
V10R T1 4 (1 of 1).jpg
 

brand0n

Newly Enlightened
Joined
Mar 18, 2014
Messages
4
But did you see the multi color Ti bead ... :crackup:

On another topic, I've found out that the low cost titanium EagleTac D25A (single AA) is about the right size for my pocket. Smaller than a CR123 light & larger than a AAA makes it a useful size - for me at least. But it isn't perfect as it comes from the factory:

Image-9853934-239332083-2-Web_0_817b8073082081d64f401d349e808b7d_1


The clip is easy enough to reshape on a grinder - but it isn't titanium. Stainless, probably 304, is my guess. The the body is grooved for better purchase:

Image-9853934-239331789-2-Web_0_ce89ec7e0d25019fad215534270c870d_1


Note the split ring used to attach the lanyard. The factory uses an end mill to cut out the attachment holes & the edges are razor sharp:

Image-9853934-239331855-2-Web_0_93f5b86514faa2d8eaf37d074921f452_1


Using a split ring guarantees long lanyard life.

A nice little titanium light for $65, multiple modes & multiple output levels are user selectable. Rechargeable Sanyo Eneloop XX cells, 2450 mAh, do a good job at very low net cost over time.

I wish this light had a different interface. wish it had momentary on with press of clicky
 

precisionworks

Flashaholic
Joined
Apr 19, 2007
Messages
6,623
Location
Benton Illinois
I wish this light had a different interface. wish it had momentary on with press of clicky
There's no way to modify the software on this light. The high dollar customs (J Hanko, Oveready, etc.) sometimes have software that can be changed but the price of admission starts at over $300


(Drum roll please) All lights have been machined & returned to their owners.

Teaching machining for the spring semester ended May 13 & I've been working non stop to get caught up. I'd let my shop become a disaster & there were tools scattered everywhere. Not one clean workbench anywhere & the shop is 2100 square foot (195 square meter) ... meaning it took most of a week to do a major clean up & reorganization. I found stuff that had "been lost" for a long time.
My work truck was just as disorganized until the cab was emptied out, the big Knaack 4830 Job Box was cleaned out & everything was put back in order.

It feels like a weight is off my shoulders & I hope to never get so far behind again.

If you send in a light or lights right now the turn around should be not more than two weeks.
 
Last edited:

bartko09

Enlightened
Joined
Apr 11, 2015
Messages
535
I wish this light had a different interface. wish it had momentary on with press of clicky

I've modified a ton of different lights and this is the first one that I destroyed beyond repair within minutes. If it's a first generation, it can't be done. The pill is press fitted in and taking it out pretty much ruins ur day.
 

precisionworks

Flashaholic
Joined
Apr 19, 2007
Messages
6,623
Location
Benton Illinois
Starting a V10R Ti.

Expanding mandrel & V10R ready to mount:
v1 (1 of 1).jpg

Body mounted on mandrel:
v2 (1 of 1).jpg

Checking runout with indicator. 0.00 mm is perfect but 0.01 mm is acceptable.
v3 (1 of 1).jpg

Tailstock support brought into position. Titanium is easily deflected away from the tool (Young's modulus) & deflection isn't desirable.
v4 (1 of 1).jpg
 

precisionworks

Flashaholic
Joined
Apr 19, 2007
Messages
6,623
Location
Benton Illinois
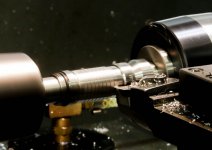
Rough turning the body smooth:
v5 (1 of 1).jpg

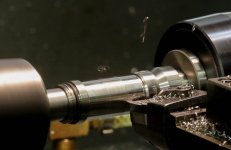
Final turning. Note the tiny chips in the air.
v6 (1 of 1).jpg

Machining the grooves:
v7 (1 of 1).jpg

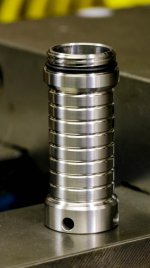
Grooving finished, body deburred with nonwoven pad & buffed with 600 grit paper:
v8 (1 of 1).jpg
 

precisionworks

Flashaholic
Joined
Apr 19, 2007
Messages
6,623
Location
Benton Illinois
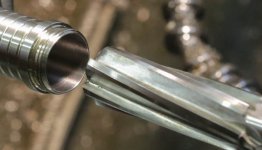
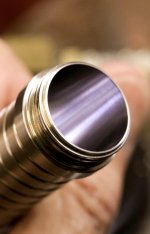
After boring, first reaming & final reaming. Good surface finish off the tool:
v9 (1 of 1).jpg

Next step is ball honing - coarse/medium/fine to remove tool marks & blend the surface:
v10 (1 of 1).jpg

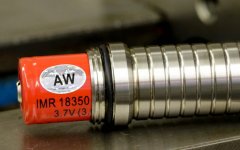
I test half a dozen AW 18350 high drain protected cells (800 mAh, 15C). Cell diameter varies so you'll need to select for best fit. E-series lights (as well as lights that share E-series dimensions) are bored to minimum diameter that will accommodate most 18350's:
v11 (1 of 1).jpg

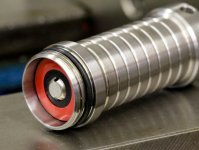
The money shot :)
v12 (1 of 1).jpg
 

precisionworks

Flashaholic
Joined
Apr 19, 2007
Messages
6,623
Location
Benton Illinois
A few more operations on the V10R. Images enlarge nicely on my iPhone5 & hopefully they'll work on your mobile device:

Scribe hole locations (look closely to see scribe marks):
100A2706.jpg


Use 45X centering scope to pick up hole centers:
100A2708.jpg


Use solid carbide drill to make hole:
100A2712.jpg


Set up tapping head:
100A2715.jpg


All done:
100A2720.jpg
 

precisionworks

Flashaholic
Joined
Apr 19, 2007
Messages
6,623
Location
Benton Illinois
It seems like a hundred years ago that I read an article titled "Titanium, not difficult just different". Like most machinists new to Ti I experimented, read everything I could find, spoke with other flashlight machinists & knife makers (same stuff in a different application). Eventually figured out enough that I'm able to work with it. Short tool life (which adds to the cost of every titanium job) is something that's a given.

Here's a before & after stonewash ...

Before stonewash.jpg

After Stone wash (1 of 1).jpg

Someone please tell me why some of my images show as horizontal when they are shot vertical?
 
Last edited:

precisionworks

Flashaholic
Joined
Apr 19, 2007
Messages
6,623
Location
Benton Illinois
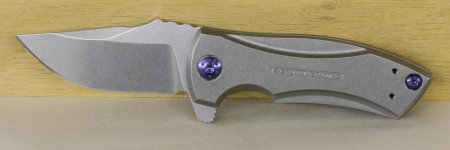
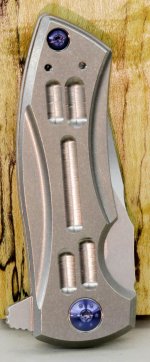
Quite a few flashaholics like knves & Zero Tolerance brought one out last year that's a real winner. The ZT0900 has a 2.7" blade & that makes it legal in states that allow 3" or less. The blade is wide with lots of usable edge & the handle is comfortable. But ...

The factory jimping is ugly IMHO. The Zero Tolerance logo on the presentation scale does nothing for looks. So:
  • The jimping was ground away with my 8" bench grinder, freehand, & smoothed out on the Burr King contact wheel running a ScotchBrite belt.
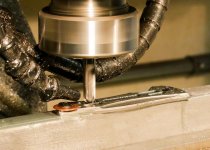
  • The logo was removed using a ball end mill. Two additional "grip grooves" were added at the same time.
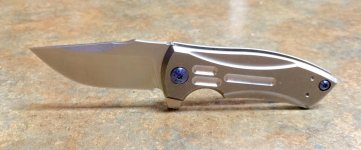
To me the improvement in look & feel is significant but you be the judge.

Stock knife except for custom Ti screws from https://ticonnector.com/product/zt-0900-les-george/

ZT0900e (1 of 1).jpg

After mods:
zt0900iphone.jpg

From the lock side:
ZT0900h (1 of 1).jpg

Clip is from MXG Gear: http://mxggear.com/products/custom-made-titanium-pocket-clip-for-zero-tolerance-zt0900


Prices:
  • Grind off jimping & blend out smooth - $55 + $7 shipping
  • Mill grooves - $55 + $7 shipping
  • Both at one time are $107 shipped CONUS, saving you a good bit.
 

precisionworks

Flashaholic
Joined
Apr 19, 2007
Messages
6,623
Location
Benton Illinois
Thank you for your kind words.
The more I looked at & handled the knife the more it said "more grooves" :devil:

Clamped down on the fixture block (MIC-6 cast aluminum jig plate). Blower nozzle is applying micro droplets of coolant.
ZT0900i (1 of 1).jpg

With new grooves for better symmetry.
ZT0900j (1 of 1).jpg

This image also shows where the jimping was ground away:
ZT0900k (1 of 1).jpg

If you think the lower right groove looks wider that's a slip up on my part & it is wider than the other four. Ah well, this one's for sale to fund another ZT0900 mule.

One of these days I'll stop wearing Birkenstocks when titanium chips are flying. Still trying to extract one from the bottom of my left
foot :poof:
 
Last edited:

precisionworks

Flashaholic
Joined
Apr 19, 2007
Messages
6,623
Location
Benton Illinois
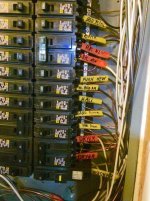
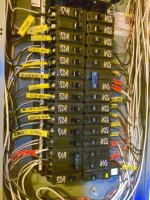
Spent the last week in a toasty warm attic doing a whole house rewire. My partner worked for an hour or so & came out of the attic so I could go in for an hour. Fun stuff, happy to be done. Images show my OCD :devil:

Electric1.jpg

Electric2.jpg

I did all the breaker box wiring, replaced 8 fuses with 30 breakers.
 
Top