This pictorial shows how to modify a Pierce M10 flashlight with a Seoul P4 LED. The upgraded Pierce puts out an amazing amount of light for such a small package. Do not attempt this mod if you are not comfortable with your modding skills, or do not have the proper tools. I will not be held responsible for any damages to your light if you choose to do this modification based upon the information contained herein. Proceed at your own risk.
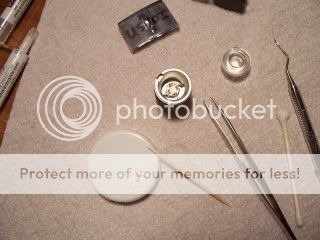
The tools and materials necessary for this mod are:
Seoul P4 LED
Arctic Alumina thermal adhesive
Dental picks, or other prying tools
Fine tipped tweezers
Soldering station, or soldering iron (30W minimum)
Fine rosin core solder
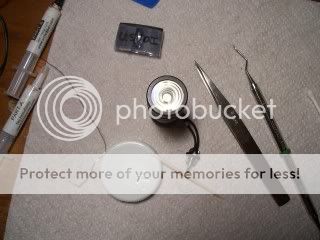
Here is an unmodified Pierce M10 with the stock wide angle optic


Remove the head, and clean the threads. Wrap a paper towe,l or soft cloth around the threads and twist the bezel off. Do not touch the lens. Remove the optic to get to the Luxeon.

Unsolder the wires on the leads of the Luxeon. If your leads are not color coded, wrap tape around the head of the light, and mark the polarity with a sharpie.

TIP: Before trying to remove the stock LED, use a sharp tool or pin to scribe a reference mark around the circumference of the LED. This will be your alignment for centering the Seoul.
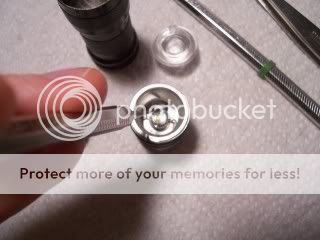
Use dental tools or similar to remove the Luxeon LED. Pry under the edges until it pops from the epoxy at the base.

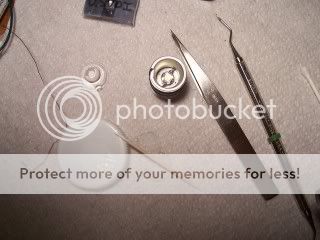
Luxeon removed

If the epoxy "pad" is thin enough, it can stay in place as an insulator. If it is ragged, or too thick, it must be removed.

Clean the area with alcohol.

Prepare the Arctic Alumina and the LED. I like to lightly sand the base of the LED with some 600 grit wet/dry sandpaper. Clean the base with alcohol, too.

Place a small drop of AA within the scribed area. Place the Seoul emitter onto the AA, noting the polarity of the LED. Press the LED into AA, and rotate it back and forth to ensure good thermal contact. Don't press too hard! Check for continuity using a multi meter. Continuity = bad. Adjust the LED if necessary. Center the LED within the scribed circle.

Once the AA sets up a bit, check the centering within the optic. If you have the Seoul within the ring of the scribe, things are looking really good right now.

Resolder the leads. Check for any solder bridges to the light body with your DMM.

You are now done!

Put things back together, and fire it up. Do not look at the business end of this light now!

So how did it turn out?
http://www.cpfmarketplace.com/mp/showthread.php?t=167275
Have fun!
datiLED
The tools and materials necessary for this mod are:
Seoul P4 LED
Arctic Alumina thermal adhesive
Dental picks, or other prying tools
Fine tipped tweezers
Soldering station, or soldering iron (30W minimum)
Fine rosin core solder
Here is an unmodified Pierce M10 with the stock wide angle optic


Remove the head, and clean the threads. Wrap a paper towe,l or soft cloth around the threads and twist the bezel off. Do not touch the lens. Remove the optic to get to the Luxeon.

Unsolder the wires on the leads of the Luxeon. If your leads are not color coded, wrap tape around the head of the light, and mark the polarity with a sharpie.

TIP: Before trying to remove the stock LED, use a sharp tool or pin to scribe a reference mark around the circumference of the LED. This will be your alignment for centering the Seoul.
Use dental tools or similar to remove the Luxeon LED. Pry under the edges until it pops from the epoxy at the base.

Luxeon removed

If the epoxy "pad" is thin enough, it can stay in place as an insulator. If it is ragged, or too thick, it must be removed.

Clean the area with alcohol.

Prepare the Arctic Alumina and the LED. I like to lightly sand the base of the LED with some 600 grit wet/dry sandpaper. Clean the base with alcohol, too.

Place a small drop of AA within the scribed area. Place the Seoul emitter onto the AA, noting the polarity of the LED. Press the LED into AA, and rotate it back and forth to ensure good thermal contact. Don't press too hard! Check for continuity using a multi meter. Continuity = bad. Adjust the LED if necessary. Center the LED within the scribed circle.

Once the AA sets up a bit, check the centering within the optic. If you have the Seoul within the ring of the scribe, things are looking really good right now.

Resolder the leads. Check for any solder bridges to the light body with your DMM.

You are now done!

Put things back together, and fire it up. Do not look at the business end of this light now!

So how did it turn out?
http://www.cpfmarketplace.com/mp/showthread.php?t=167275
Have fun!
datiLED
Last edited:


