
Warning: pic heavy, as usual. :sweat:
The K50 is a high-output "thrower" light from SupBeam, featuring many of the classic SupBeam features (e.g., in-light charging through a magnetic dock). But in form and function, it is also very similar the TN3x series from Thrunite (especially the TN31 and TN32).
Given the XM-L2 emitter coupled with a very large reflector, you can expect this light be quite the thrower. Let's see how it compares to the competition …
Manufacturer's Specifications:
Note: as always, these are only what the manufacturer reports. To see my actual testing results, scroll down the review.
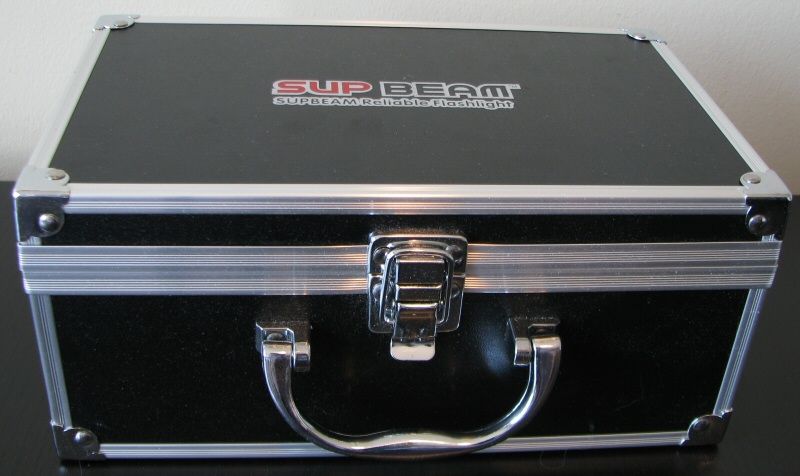
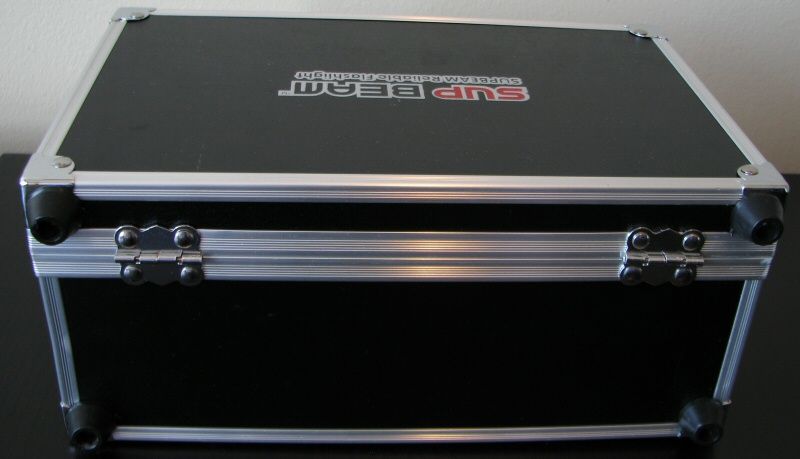

My K50 came in a display-style presentation case with metal closing clasps and hinges. Along with the light was a holster, extra o-rings, spare boot switch cover, decent quality wrist strap, USB charging cable as AC adapter, 12V DC car adapter, warranty card, and manual.

From left to right: AW protected 18650 2200mAh; SupBeam K50; Thrunite TN32; Fenix TK61; Niwalker BK-FA01.
All dimensions are directly measured, and given with no batteries installed:
SupBeam K50: Weight: 645.0g, Length: 230mm, Width (bezel): 90.1mm
ArmyTek Barracuda (XM-L2): Weight 400.8g, Length 264mm, Width (bezel): 64.0mm
Fenix TK61: Weight: 605.7g (790g with 4x18650), Length: 218mm, Width (bezel): 96.0mm
Fenix TK75: Weight: 516.0g (700g with 4x18650), Length: 184mm, Width (bezel): 87.5mm
Niwalker BK-FA01 (XM-L2): Weight: 682.3g (864g with 4x18650), Length: 209mm, Width (bezel): 80.0mm, Width (tailcap): 50.3mm
Thrunite TN32 (XM-L2): Weight: 655.9g (808g with 3x18650), Length: 201mm, Width (bezel): 79.0mm
Skilhunt K30-GT (SBT-90): Weight: 635.9g (773g with 3x18650), Length: 199m, Width (bezel): 76.0mm

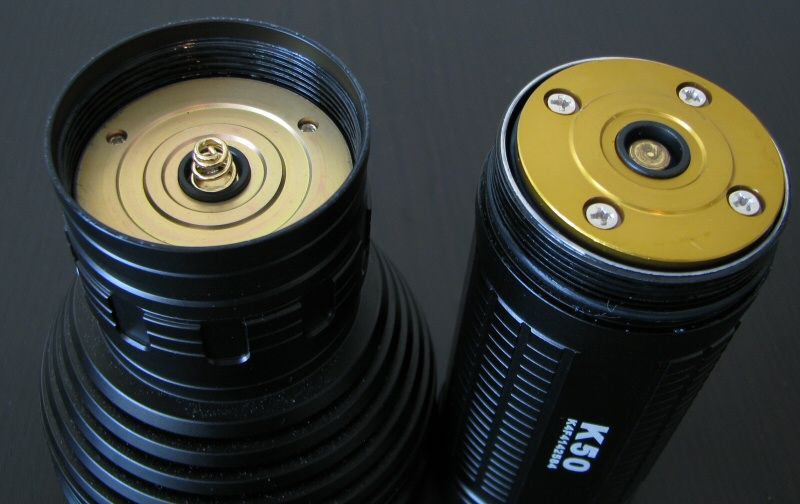
The K50 build is most reminiscent of the Thrunite TN3x-series lights – but with a tailcap and battery carrier similar to the SupBeam X40.
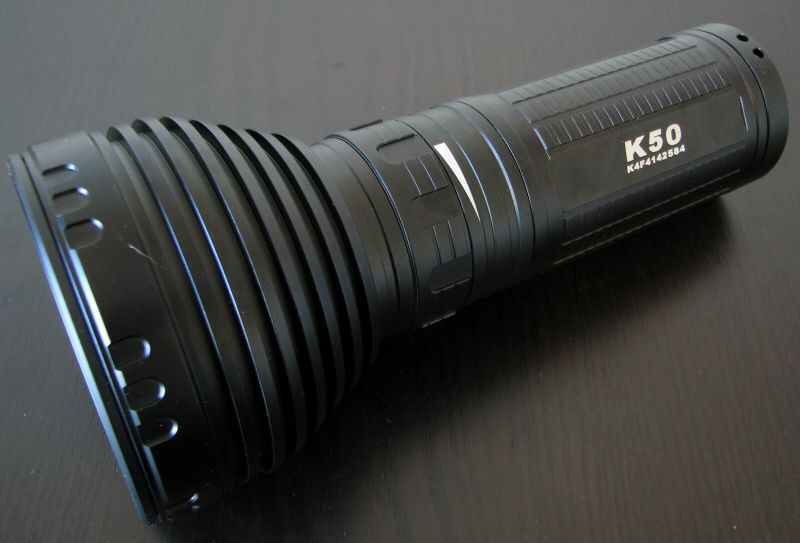
Anodizing is a flat black, and seems to be in very good shape on my sample. Labels are sharp and clear, and include a serial number.
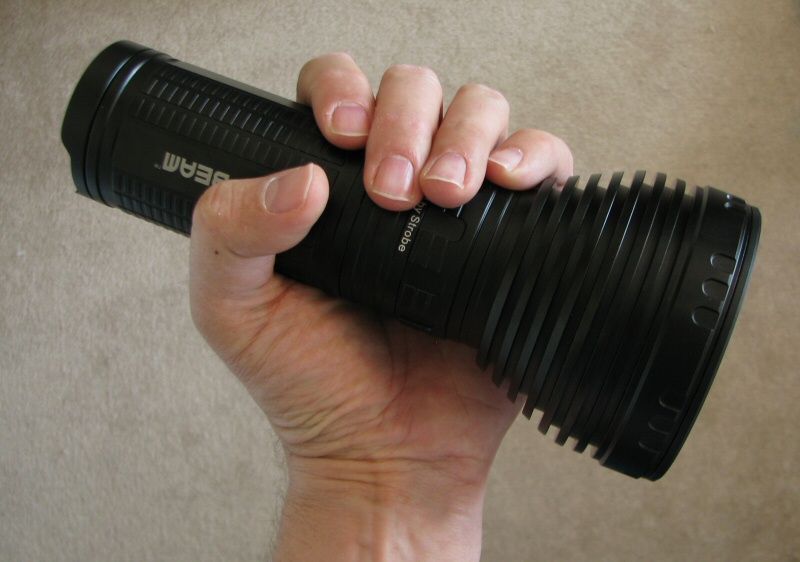
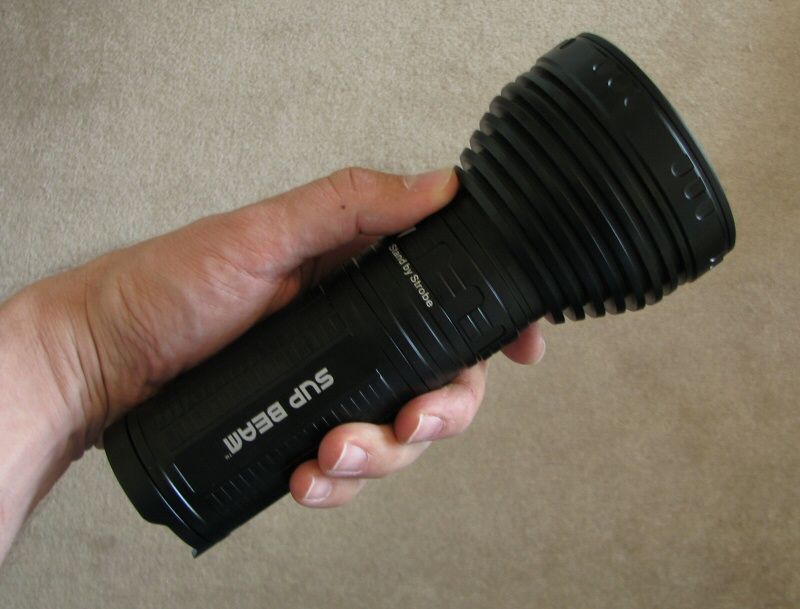
Rather than traditional knurling, the handle has a checkered pattern. Combined with the ridge detail on the control ring and head, overall grip is pretty good. The light can roll easily however.
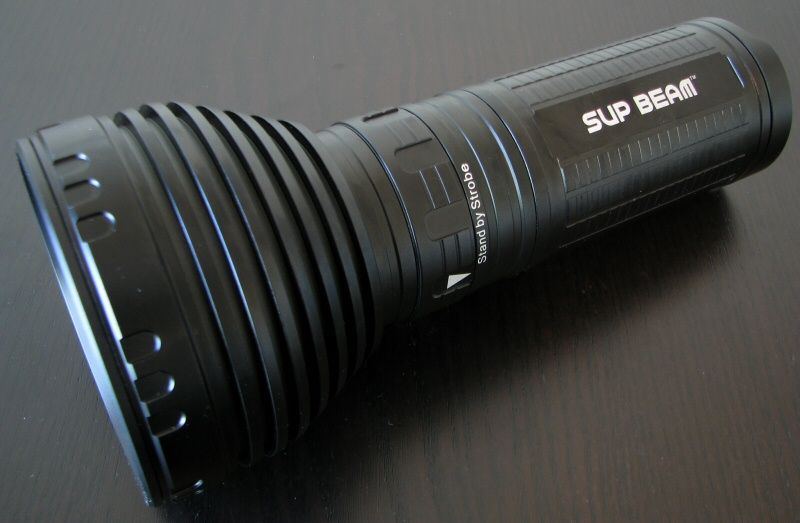
The control ring feels and looks more like the Thrunite TN3x series than the typical X40/X60-series SupBeam lights. All black, there are slight indents (and raised checkered regions) on the control ring to help with feel. There is a label mark on the control ring that lines up with the labels on the head. The six constant output modes are not individually labeled, but there is a graded output bar pictogram over the first four levels (i.e., shows the direction to turn to raise or lower the output). There are firm detents at each level, with a slight click as you enter into each one.
Screw threads are traditional triangular cut, but seem of good quality. They could use a little more lube on shipping, as mine have something of a squeak when tightening. They are anodized, allowing you to lock out the light by a simple twist of the head.
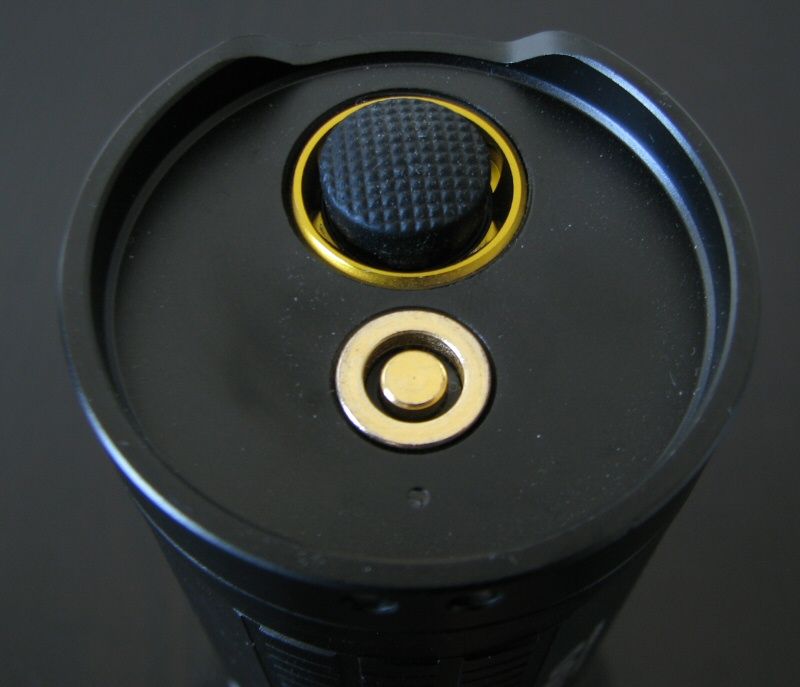
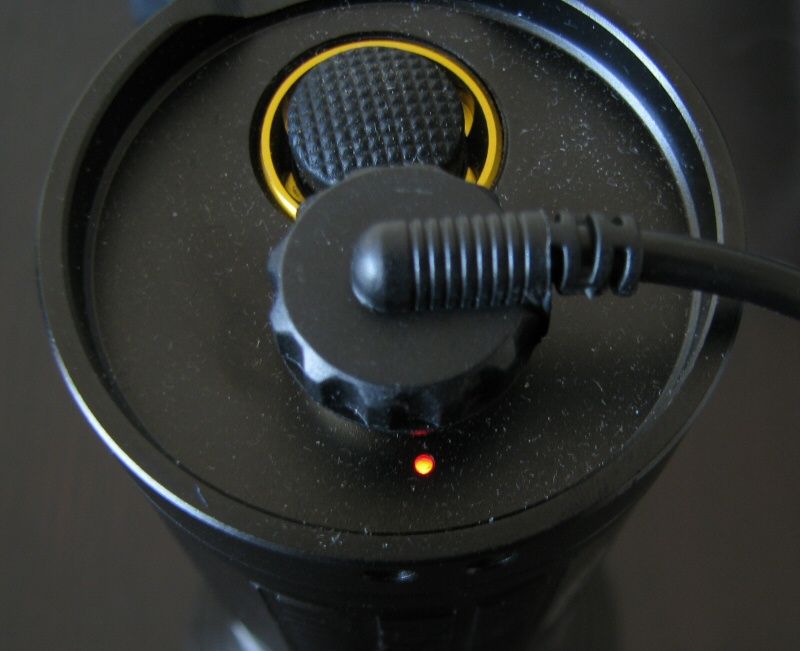
The light can tailstand. Tailcap looks the same as the X40, with cut-outs to facilitate access to the switch. Switch is a forward clicky switch (i.e., press for momentary, click for locked-on). Switch feel is identical to the X40, and has a slightly longer traverse than typical, but with a definite click. There is a charging dock in the tail that connects to the supplied USB/AC charging cable. See below for a discussion.
There is also a small LED indicator next to the charging dock. It is green when the light is on and the batteries are well charged (or, when charging, if the batteries are fully charged). It is orange when on and the batteries are partially discharged. It is red when on and the batteries are running low (or when batteries are being charged), and flashing red when the on and the batteries are <10% (or if there is a fault when charging and the charger has shut-off).
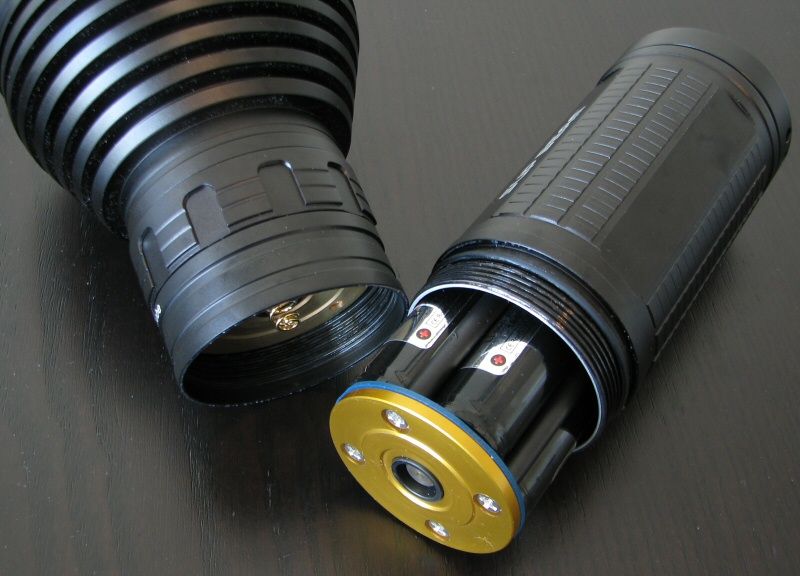
Let's take a closer look at the battery carrier:


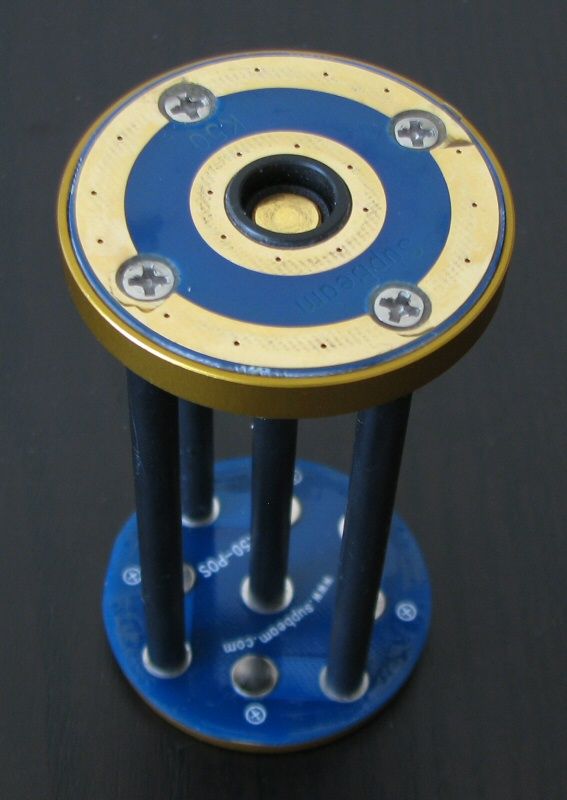
The carrier looks similar to the X40, only holding 4x18650 now instead of 3x. The positive contact points inside the carrier are slightly raised, so all types of 18650 cells should work fine (i.e., true flat-tops, wide and small button-tops). There seems to be plenty of room in the carrier for length, so longer cells should fit fine. All the cells point the same way here (i.e., negative terminals at the base, positive terminals toward the head).
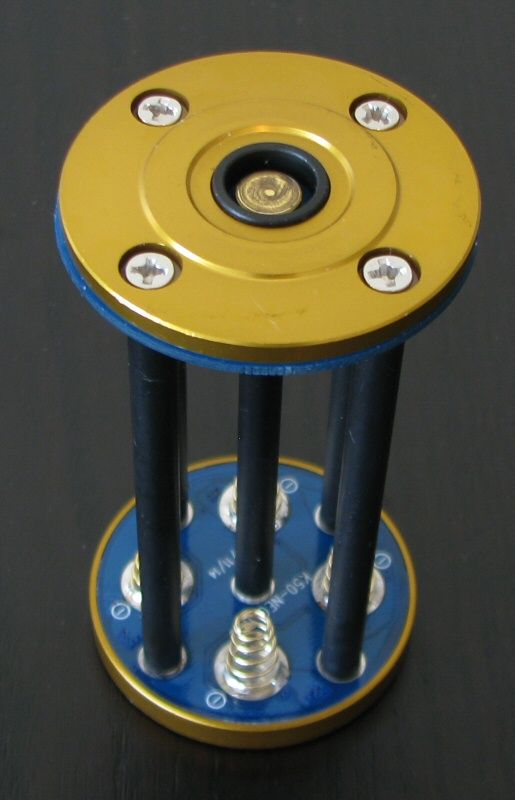
As with the other SupBeam lights, there is a unique dual-connection feature built-in to the charger. Despite how the carrier looks, the cells are actually arranged in a 4s1p arrangement when running the light (i.e., all cells in series, none parallel). The negative current path is carried by the body of the light, and the positive path connects through the spring in the head unit – when running the light. The situation is a lot more complex when charging, as I'll explain below.
There is a triple set of springs in the base of the battery tube that make contact with the carrier. Normally, a single spring would be needed for simple operation, and two springs for in-series charging. The addition of a third spring (along with a more complex wiring design inside the carrier) allows the light to actually charge the cells in parallel, not series. This is a much safer way to charge cells, so kudos to SupBeam for developing this innovative dual-wiring design: :thumbsup:
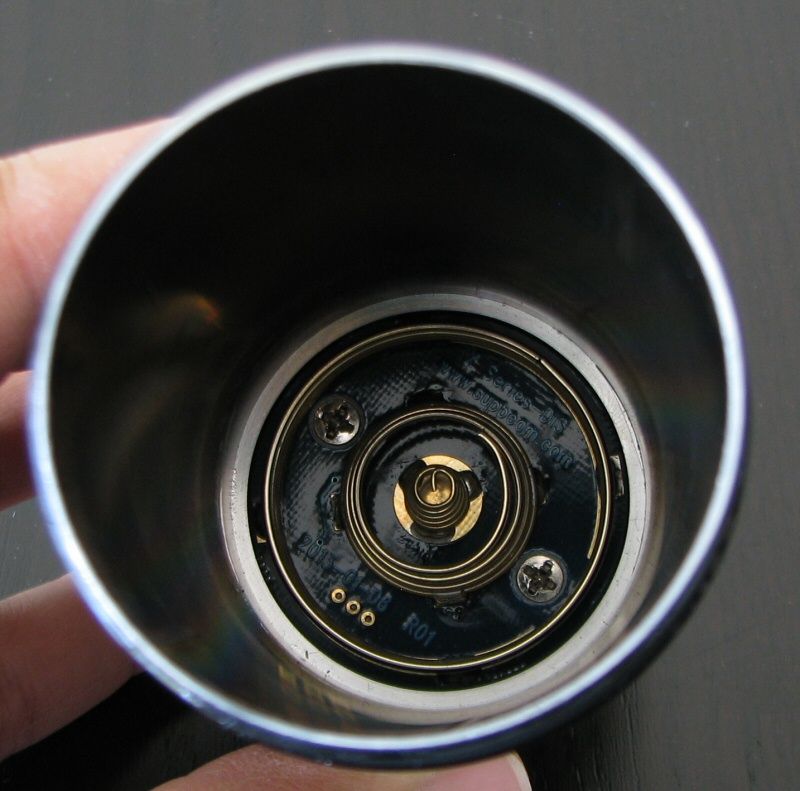
The external charging dock is unchanged from the X40. The charging dock is magnetic and there is no open voltage at the tail (i.e., no risk of shorting when cells are loaded). What you see at the exterior base are two metal circular contacts – these are connected to the terminals of the carrier through the springs. The charging cable directly attaches to the external contacts through a strong magnetic connection.
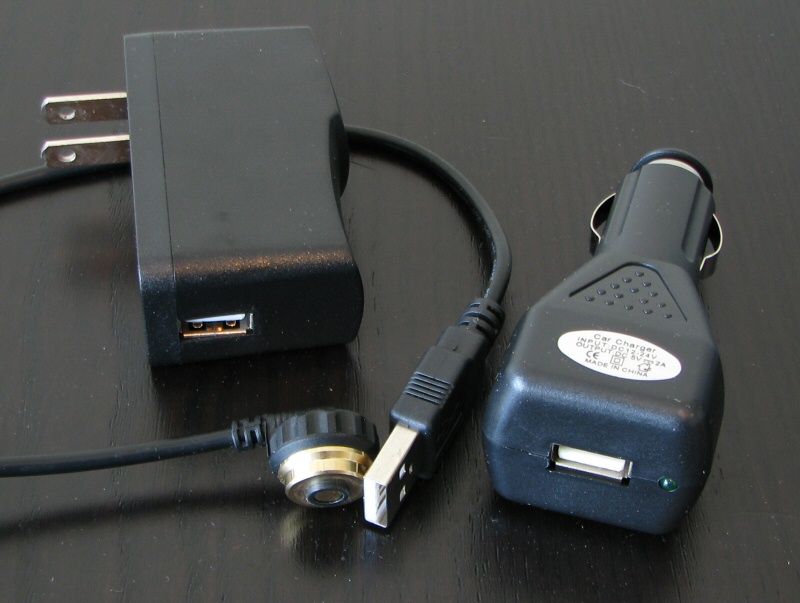
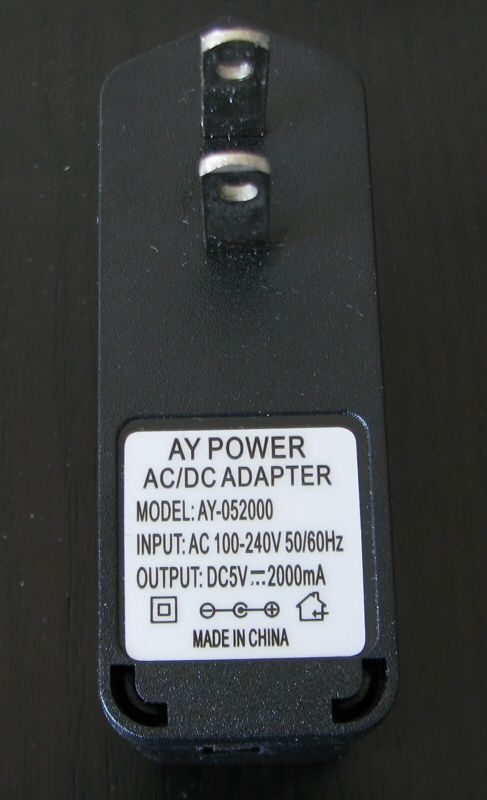
The light comes with a USB charging cable, but you have to plug the USB port into either included AC adapter or the 12VDC adapter to charge cells inside the light. Due to the parallel-charging design, the 500mA charging limit of USB 2.0 is just not going to cut it.
Please scroll down for some detailed charging current measures later in this review. :wave:
Because of the strong magnetic pull of the charging cable head (i.e., it will attach itself to anything made of metal), I generally recommend you connect the head to the flashlight before you connect the AC/DC outlet. The risk of accidentally shorting the cable is quite low, as there is a raised plastic divider separating the inner and outer contacts on the head. But given that the magnet is fairly strong, I wouldn't want to trust that tiny bit of plastic to rule out the potential for even a momentary short.
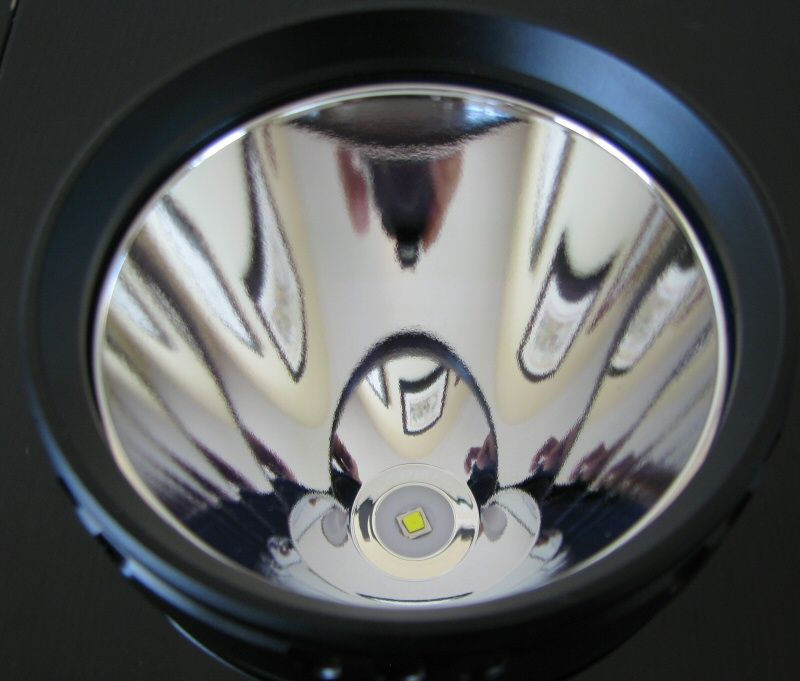
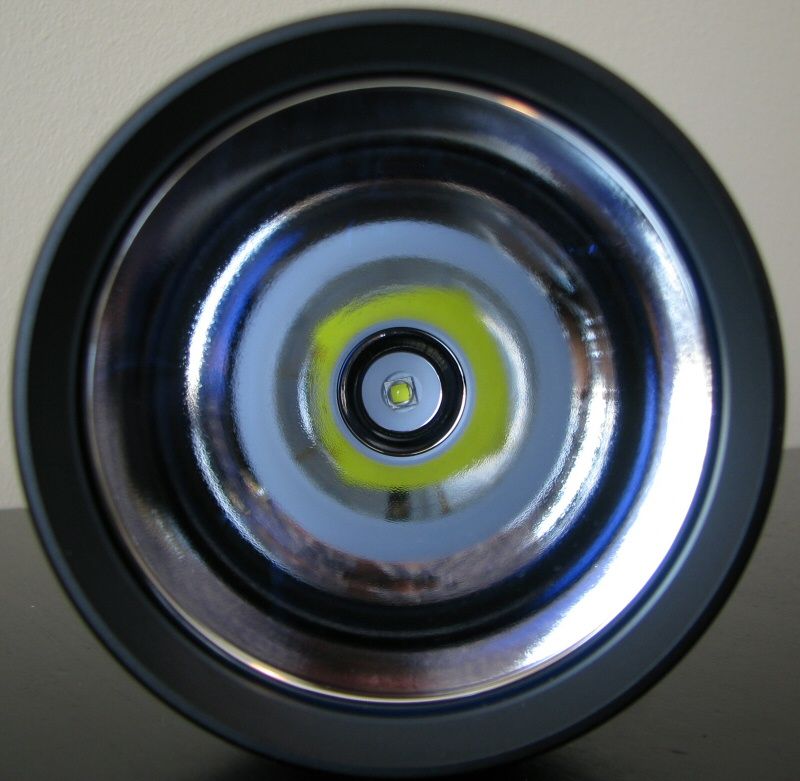
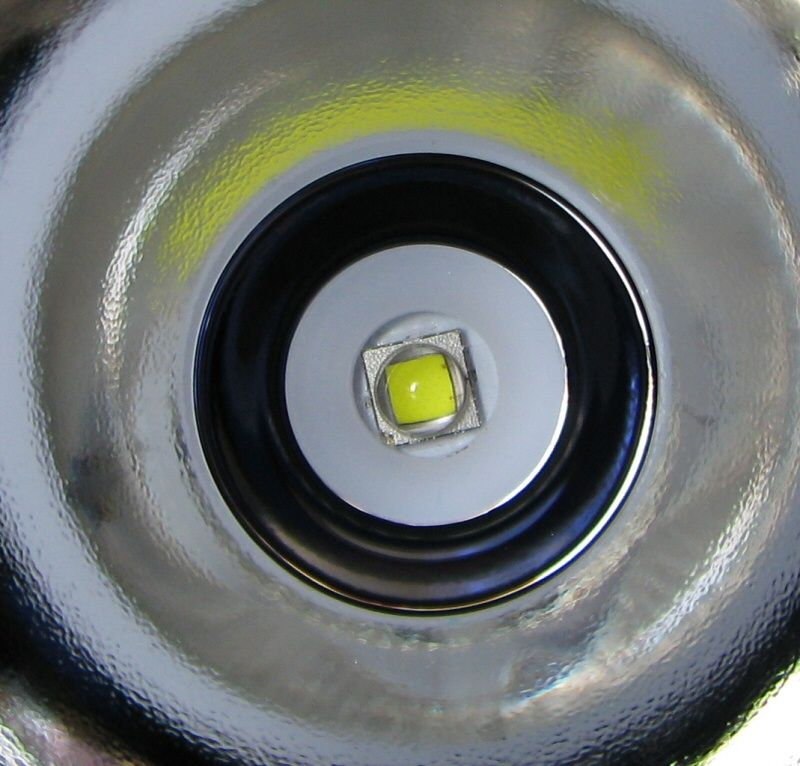
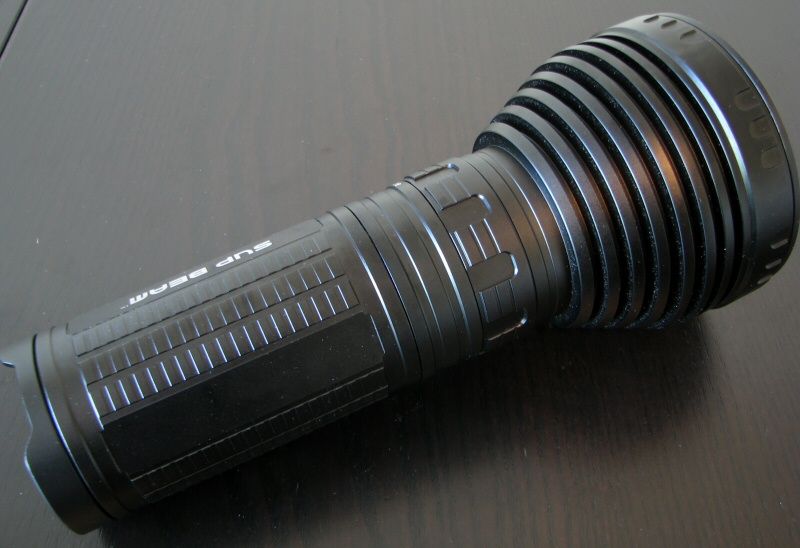
The K50 head is quite impressive – very large and deep, you should get outstanding throw. The reflector has a fine texturing to it, but it is generally more similar to most smooth reflectors. The XM-L2 emitter was well centered on my sample. Scroll down for sample beamshots.
User Interface
Turn the light off/on by the tailcap clicky – press for momentary, press and release (i.e., click) for constant on.
Change output modes by turning the control ring in the head. Arranged from left-to-right (looking down at the light, held in traditional flashlight carry), the modes are level 1 > level 2 > level 3 > level 4 > level 5 > level 6 (max) > standby > tactical strobe.
No light is produced on standby, but a miniscule current will be drawn to allow the circuit to respond to a ring turn (see below). As always, I recommend you store the light clicked-off at the tailcap, or locked-out by a head twist.
To charge the light, simply attached the magnetic charging dock to the port on the back of the light, and connect the other end of the cable to AC or DC power. Scroll down for an analysis of the charging current.
Video:
For more information on the light, including the build and user interface, please see my video overview:
As with all my videos, I recommend you have annotations turned on. I commonly update the commentary with additional information or clarifications before publicly releasing the video.
Strobe
There is no sign of PWM on any level – I believe the light is current-controlled. :thumbsup:

The K50 uses an oscillating strobe design, switching between two frequencies every ~0.55secs or so. Here is a blow up of the two frequencies:
As you can see, it rapidly switches between 15.0Hz and 6.5Hz.
Charging Current
Because the AC charger uses a USB connector to the charging cable, I was able to take direct measures of the charging parameters. For these measures, I am using the new Xtar VI01 "USB Detector" (basically a specialized USB current/voltage meter). This model has recently been favorably reviewed by HKJ here.
For charging tests, I started with discharged AW protected 18650 cells, measuring ~3.0-3.4V at rest. For all these tests, I removed the USB detector after each reading was taken. Note that the voltage reading on this device refers to the input voltage (i.e., from the charging brick).
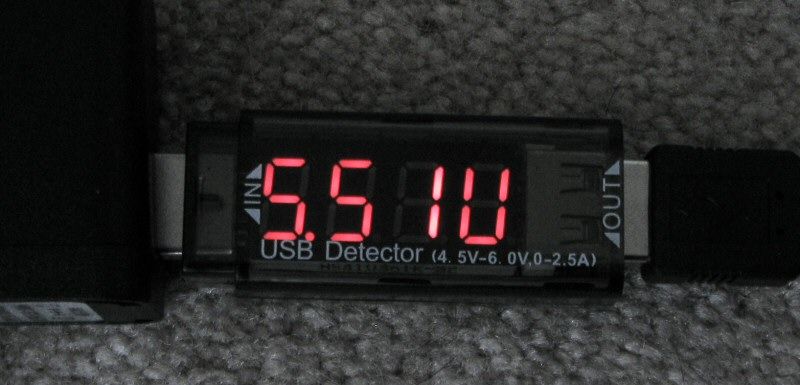
Initial charging current and input voltage:
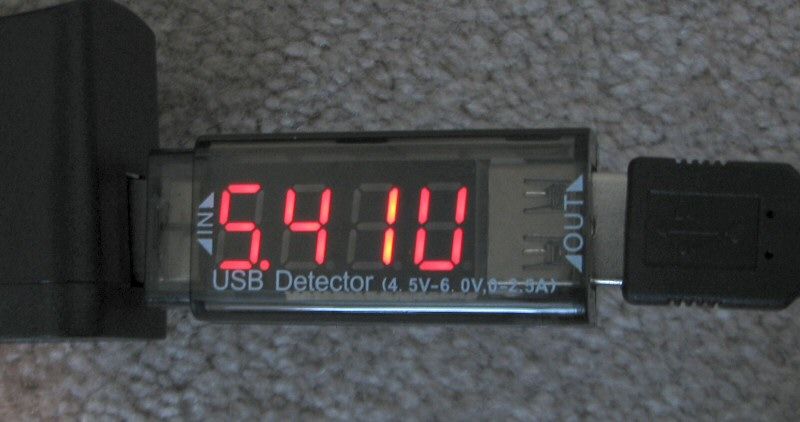
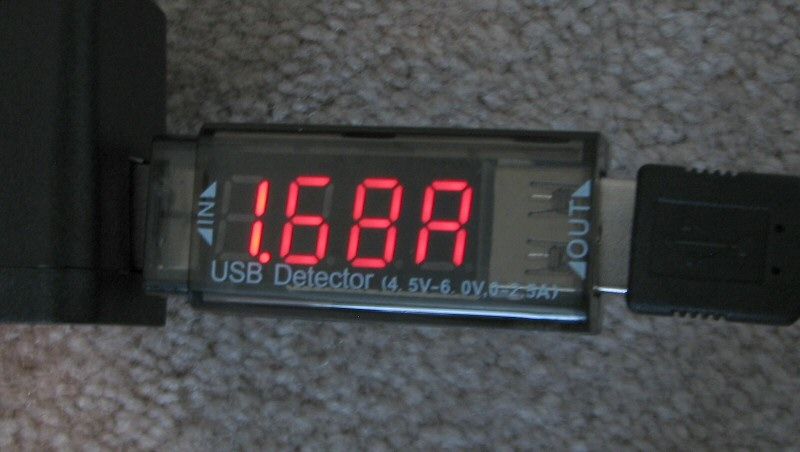
As you can see, charging started at 1.68A with a typical USB 5.41V input voltage ("U" is meant to represent Volts on the top display above). This is reasonable given all the cells were not fully discharged. Recall that the AC adapter has a max charging rate of 2A and 5VDC.
After 4 hours of charging, I re-measured charging current and input voltage:
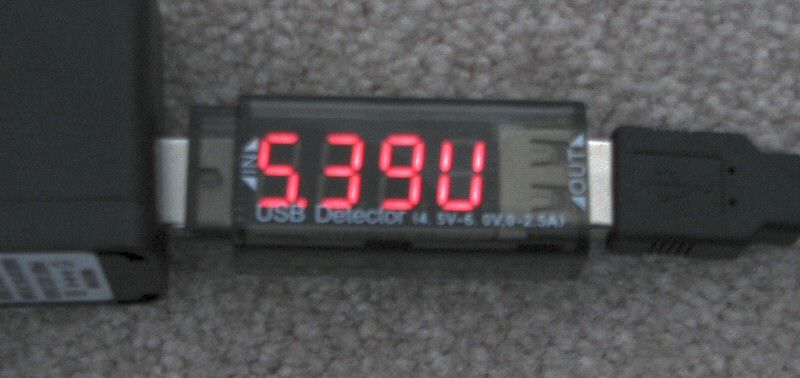
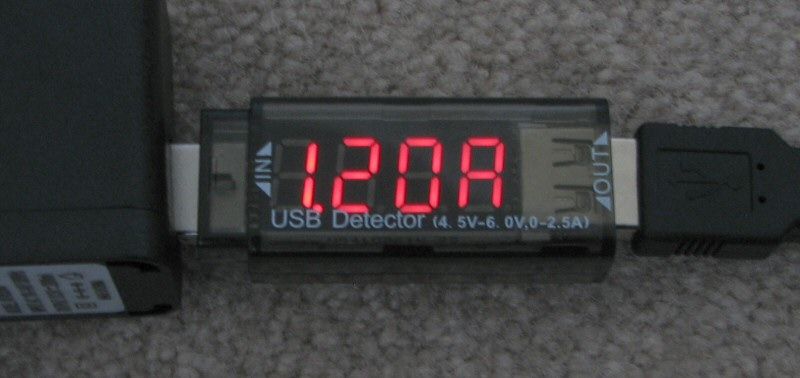
As you can see, the charging current has dropped down to 1.20A at this point, with a consistent input voltage, as expected.
After 5 hours and 20 mins of charging:
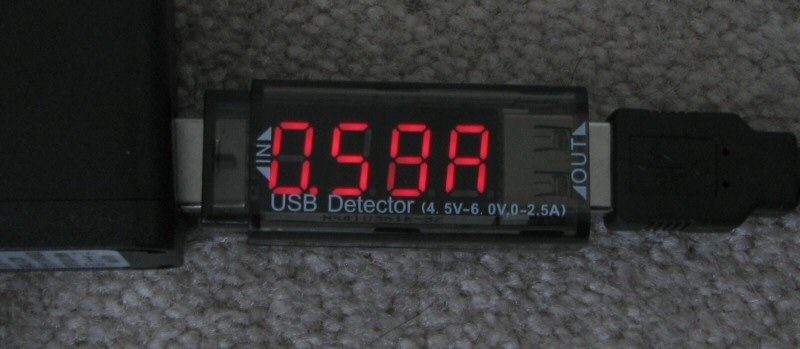
Charging current has now dropped to 0.59A, still with a fairly consistent input voltage. As you might expect, it won't be long until charging terminates.
In my testing, the charging indicator went green ~10 mins later, for a total charging time of 5hr 30mins. Resting voltage of the AW 2200mAh batteries was ~4.16-4.22V.
This is very reasonable charging time and acceptable resting voltage at termination.
Standby Drain
I don't see any evidence of a current drain between the head and carrier when the clicky switch is off. However, on other lights that use a similar design (e.g., Thrunite TN3x series), I know there is an additional circuit to assist the switch when high current draw is required. This necessitates a secondary circuit in the tailcap that has its own standby drain when connected to the carrier. Typically, these are in the uA range and not a concern in practice (although it would be additive to the carrier drain below when fully connected). Note that to break this current, you would need to actually remove the carrier from the handle.
Due to the rather complex dual serial and parallel arrangement inside the carrier (controlled by an internal circuit), there is also a small standby drain internal to the carrier. I measured this current as a tiny 7.5uA on the K50. I am not sure if that measurement refers to an in-series or in-parallel current, but either way it would be pretty negligible. Note that this tiny current is present whenever batteries are installed in the carrier (whether it is inside the light or not).
The above currents are pretty minimal and not a concern in practice.
Finally, there must be a standby drain when the clicky switch is turned on and the light is in standby position of the control ring. I measured this traditional standby current as 67uA on four cells. This is similar to my Thrunite TN32, and not a major concern. Assuming that the standby drain is for the cells in series (given that the light runs with cells series), that would take almost 5.3 years to fully drain 3100mAh cells (although you would need to factor in the above two minor contributions as well, to get a more reliable estimate).
Beamshots:
And now, what you have all been waiting for. All lights are on their respective 18650 battery sources, about ~0.75 meter from a white wall (with the camera ~1.25 meters back from the wall). Automatic white balance on the camera, to minimize tint differences.

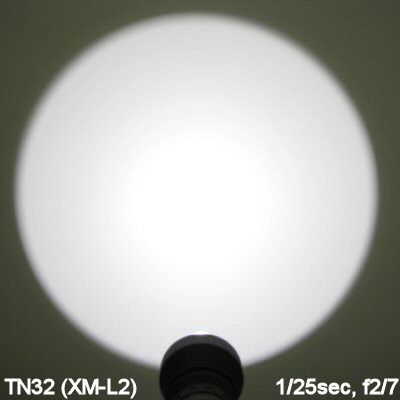
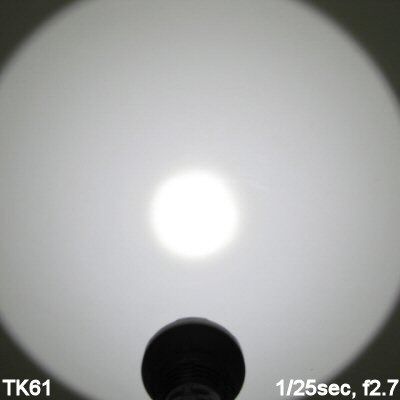
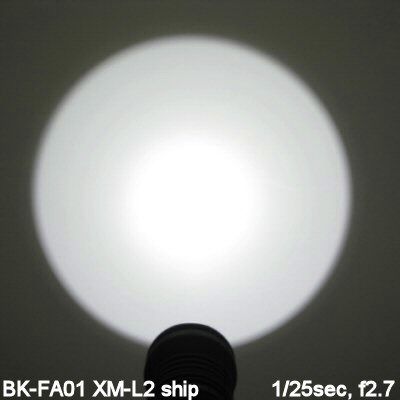
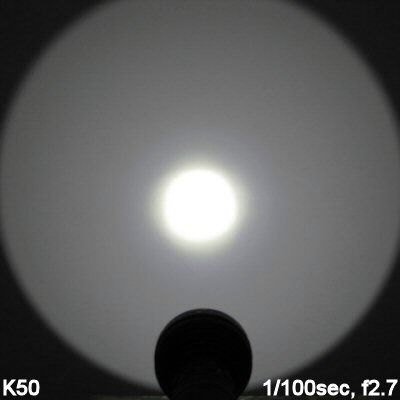
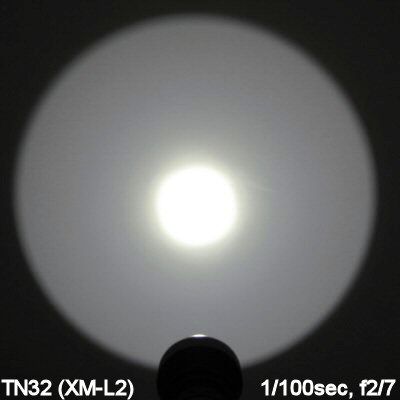
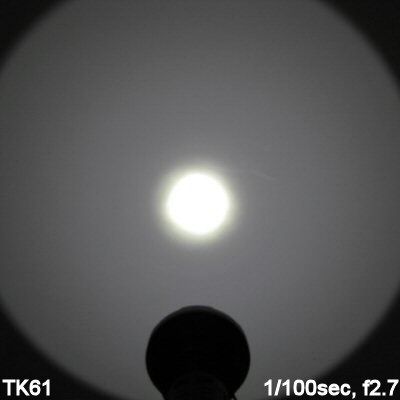
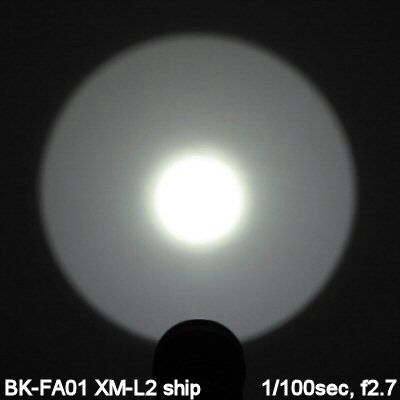
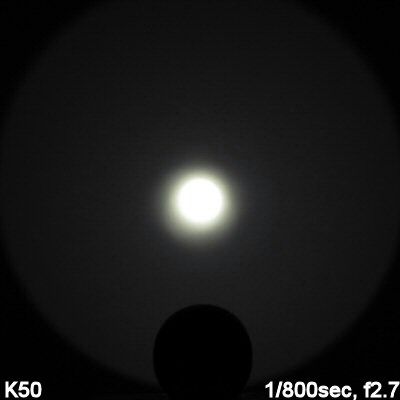
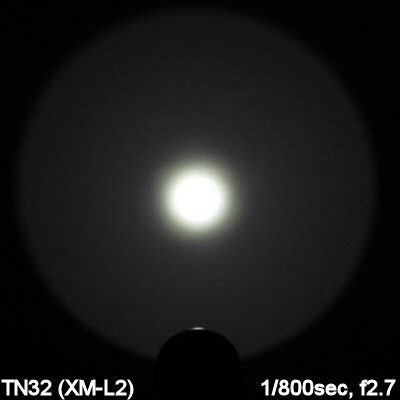
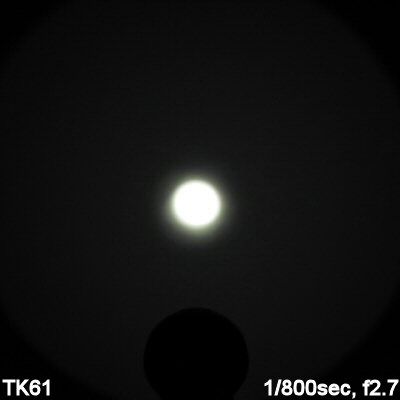
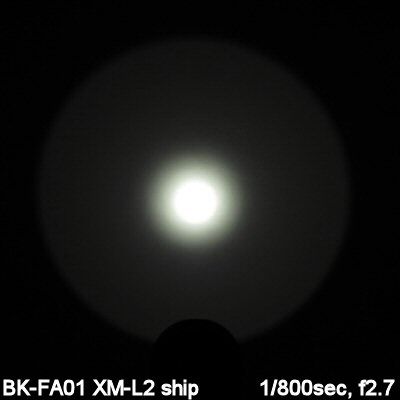
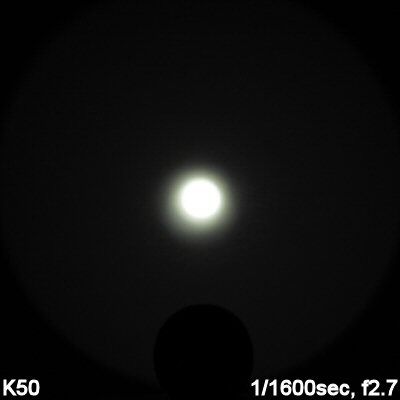
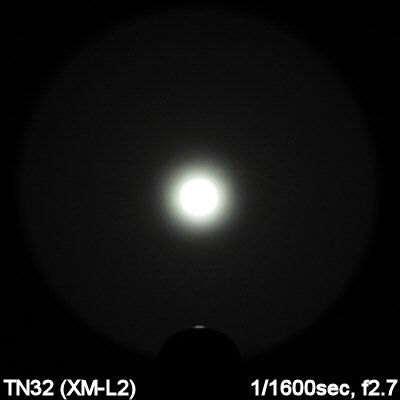
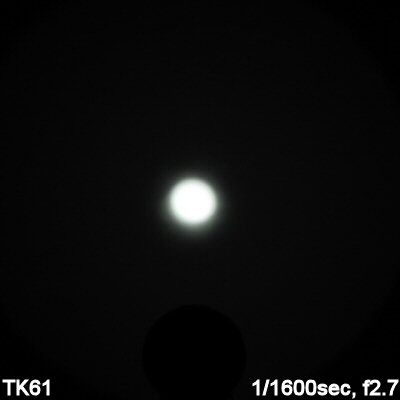
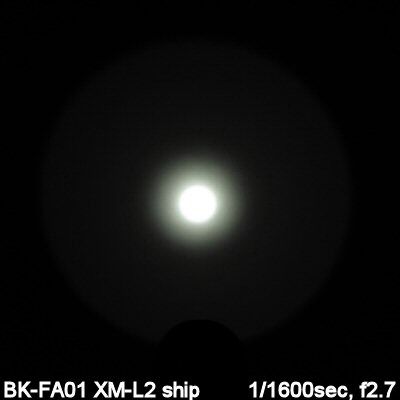
Obviously, it's hard to tell much at such ridiculously close distances. The most obvious observation is that overall beam pattern and throw appear intermediate to the Thrunite TN32 and Fenix TK61. This is what you would expect, given the overall reflector size and design. To tell more, we are going to have to go out to further distances ...
As always, these outdoor shots are done in the style of my earlier 100-yard round-up review. Please see that thread for a discussion of the topography (i.e. the road dips in the distance, to better show you the corona in the mid-ground).
These results are consistent with the indoor beamshots. Overall output is closer to the TN32 than the TK61 (but still not quite as high at the TN32). However, peak intensity is pretty much the same between these two lights (thanks to the larger reflector on the L50). Scroll down for direct beam measurements.
Testing Method:
All my output numbers are relative for my home-made light box setup, as described on my flashlightreviews.ca website. You can directly compare all my relative output values from different reviews - i.e. an output value of "10" in one graph is the same as "10" in another. All runtimes are done under a cooling fan, except for any extended run Lo/Min modes (i.e. >12 hours) which are done without cooling.
I have devised a method for converting my lightbox relative output values (ROV) to estimated Lumens. See my How to convert Selfbuilt's Lightbox values to Lumens thread for more info.
Throw/Output Summary Chart:
My summary tables are reported in a manner consistent with the ANSI FL-1 standard for flashlight testing. Please see http://www.flashlightreviews.ca/FL1.htm for a discussion, and a description of all the terms used in these tables. Effective July 2012, I have updated all my Peak Intensity/Beam Distance measures with a NIST-certified Extech EA31 lightmeter (orange highlights).
Max output of the K50 is a bit less than my Thrunite TN32 or Catapult V5 – but still quite high for this class. It is certainly brighter than most other throwy examples (e.g. Fenix TK61, Armytek Baracuda). Nevertheless, peak intensity throw is just a slight touch below the class-leading TN32, likely due to the larger reflector here. Of course, it is a different matter with lights modified for max output and throw.
Let's see how the K50 measures across output modes:
My estimated output scale is just that – an estimate based on other lights in my collection. The official specs seem to consistently slightly exceed my relative measures, but the difference isn't great.
Output/Runtime Comparison:
As always, please recall that I use 2200mAh AW Protected 18650 cells in all my standard runtimes.
It's hard to compare lights with different number of cells, but the K50 is definitely a well-regulated performer for this class. Runtime certainly seems fairly consistent with the 4x18650 Fenix TK61, when matched for output.
Note there is a periodic off flash once the light falls out of regulation. The advantage to this design is that you are never left abruptly without light.
Potential Issues
The light has a stand-by current when in the "Stand By" mode of the control ring. But this current is very low (67uA), and will not be problem for regular use. And you can easily break this current by clicking the tailswitch off, or loosening the head a quarter turn.
There is a standby current internal to the carrier, due to the unusual dual series and parallel connections. This current drain is negligible at 7.5uA in my testing however. Finally, there is likely a tertiary current for circuit assist to the physical switch. I have not disassembled to confirm, but these are typically in low uA range (and so again not a concern).
The magnetic charging cable worked well in my testing, with no open voltage reading at the tailcap (and so no risk of shorting your battery inside the light). Like other recent SupBeam lights, the K50 also uses an innovative carrier that supports in-series running of the light, but in-parallel charging. This is good news for in-light charging, as in-series is not recommended for multiple cells.
Only 18650 Li-ion cells may be used in the light (i.e., doesn't support multiple CR123A primary cells)
Preliminary Observations
The K50 is another worthy competitor in the high-output "thrower" space. Like other recent multi-cell XM-L2 lights, you get a lot of throw here.
Physically, the K50 seems like a hybrid cross between the Supbeam X40 and the Thrunite TN32 (only with 4x18650 instead of 3). This means you get a slightly larger build, including a larger head (which helps for both throw and spillbeam width). The Fenix TK61 would thus be another comparable – but the K50 has greater overall output than that light, and the popular control ring/clicky switch interface of the TN32.
I have long been a fan of control ring interfaces (when combined with clicky switches). The revised ring design on the K50 worked well in my testing – although it looks and feels more like the Thrunite TN3x-series lights than the SupBeam X-series models. The ring has clear and firm detents, and the output levels are well spaced.
The K50 also has the advantage of in-light charging, with SupBeam's excellent in-parallel charging system and magnetic dock. :thumbsup: This charging system/carrier is one of the most distinctive features of SupBeam. Featuring both parallel and series connections, you get the best of both worlds - efficient high-voltage running of the light in-series, and safer in-parallel charging. Included are both a high current AC adapter and 12VDC car adapter.
As with other Supbeam lights I've tested, output/runtime performance was excellent for the K50. The current-control circuitry certainly seems to be on par with the Fenix TK61. Stabilization was quite good at all levels, with perfectly flat regulation (after a minor step-down on max). As the cells near exhaustion and the light falls out of regulation, you continue to get useable levels of light for some time (with a flashing low voltage warning).
The beam is good for a "thrower" XM-L2 light, with excellent throw and a reasonable size and brightness spillbeam. The K50 is one of the further throwing stock 1xXM-L2 lights I've tested.
The K50 is a strong contender in this class. The innovative in-light, in-parallel series charging alone may be enough for this model to knock off some of its competitors. That said, it is not exactly a petite light – and carry options are something you need to consider (at least it comes with a holster). Hopefully the comparisons in this review will help you decide.
----
K50 provided by SupBeam for review.
The K50 is a high-output "thrower" light from SupBeam, featuring many of the classic SupBeam features (e.g., in-light charging through a magnetic dock). But in form and function, it is also very similar the TN3x series from Thrunite (especially the TN31 and TN32).
Given the XM-L2 emitter coupled with a very large reflector, you can expect this light be quite the thrower. Let's see how it compares to the competition …
Manufacturer's Specifications:
Note: as always, these are only what the manufacturer reports. To see my actual testing results, scroll down the review.
- LED: Cree XM-L2 LED
- Lumens: Max 1610 lumens
- General mode: Level 1: 0.9lm/3100hrs - Level 2: 30lm/320hrs - Level 3: 245lm/35hrs - Level 4: 620lm/16hrs - Level 5: 1050lm/6.9hrs - Level 6: 1610lm/3.2hrs
- Flashing mode: 1610 lumens
- Dimming mode: magnetic ring
- Working voltage: 10V - 17V
- Max Runtime: 3100 Hour
- Max beam distance: 832meters
- Peak beam intensity: 173400lux
- Regarding Charging: Input : 5V DC Output : 4.2V DC/500MA *4 MAX
- Charging time: depend on the capacity of the batteries , Charging time = battery capacity/500mA + 0.5 hour
- momentary forward click tactical switch.
- strobe mode for tactical and emergency use
- highly focused beam for maximum distance
- tactical knurling for firm grip.
- streammlined body design.
- mechanical reversed polarity protection design for battery carrier
- intelligent highly efficient circuit board design for max performance and long run time
- mechanical reversed polarity protection design
- battery carrier intelligent highly efficient circuit
- board design for max performance and long run time
- Impact resistant: 1.2meters
- Waterproofing grade: IPX8 standsrd,2M
- Material: aircraft grade aluminum body structure.
- Premiun type III hard anodized anti-abrasive finish
- Reflector: ultra-clear tempered glass lens with antl-refiective coating
- Lens: smooth reflector for max light output; highly focused beam for maximum distance
- Size: 203.5mm length*90.2mm bezel diameter*52.5(body dia)
- Weight: 564g without battery
- Battery: 4 X 18650 Batteries (the K50 not include the battery)
- Pack List: 1*Nice gift packing box, 1*Rubber button cap, 2*O-rings, 1*AC charger 220V-250V, 1*DC car charger, 1*USB line, 1*Lanyard, 1*User Manual
- MSRP: ~$200
My K50 came in a display-style presentation case with metal closing clasps and hinges. Along with the light was a holster, extra o-rings, spare boot switch cover, decent quality wrist strap, USB charging cable as AC adapter, 12V DC car adapter, warranty card, and manual.
From left to right: AW protected 18650 2200mAh; SupBeam K50; Thrunite TN32; Fenix TK61; Niwalker BK-FA01.
All dimensions are directly measured, and given with no batteries installed:
SupBeam K50: Weight: 645.0g, Length: 230mm, Width (bezel): 90.1mm
ArmyTek Barracuda (XM-L2): Weight 400.8g, Length 264mm, Width (bezel): 64.0mm
Fenix TK61: Weight: 605.7g (790g with 4x18650), Length: 218mm, Width (bezel): 96.0mm
Fenix TK75: Weight: 516.0g (700g with 4x18650), Length: 184mm, Width (bezel): 87.5mm
Niwalker BK-FA01 (XM-L2): Weight: 682.3g (864g with 4x18650), Length: 209mm, Width (bezel): 80.0mm, Width (tailcap): 50.3mm
Thrunite TN32 (XM-L2): Weight: 655.9g (808g with 3x18650), Length: 201mm, Width (bezel): 79.0mm
Skilhunt K30-GT (SBT-90): Weight: 635.9g (773g with 3x18650), Length: 199m, Width (bezel): 76.0mm
The K50 build is most reminiscent of the Thrunite TN3x-series lights – but with a tailcap and battery carrier similar to the SupBeam X40.
Anodizing is a flat black, and seems to be in very good shape on my sample. Labels are sharp and clear, and include a serial number.
Rather than traditional knurling, the handle has a checkered pattern. Combined with the ridge detail on the control ring and head, overall grip is pretty good. The light can roll easily however.
The control ring feels and looks more like the Thrunite TN3x series than the typical X40/X60-series SupBeam lights. All black, there are slight indents (and raised checkered regions) on the control ring to help with feel. There is a label mark on the control ring that lines up with the labels on the head. The six constant output modes are not individually labeled, but there is a graded output bar pictogram over the first four levels (i.e., shows the direction to turn to raise or lower the output). There are firm detents at each level, with a slight click as you enter into each one.
Screw threads are traditional triangular cut, but seem of good quality. They could use a little more lube on shipping, as mine have something of a squeak when tightening. They are anodized, allowing you to lock out the light by a simple twist of the head.
The light can tailstand. Tailcap looks the same as the X40, with cut-outs to facilitate access to the switch. Switch is a forward clicky switch (i.e., press for momentary, click for locked-on). Switch feel is identical to the X40, and has a slightly longer traverse than typical, but with a definite click. There is a charging dock in the tail that connects to the supplied USB/AC charging cable. See below for a discussion.
There is also a small LED indicator next to the charging dock. It is green when the light is on and the batteries are well charged (or, when charging, if the batteries are fully charged). It is orange when on and the batteries are partially discharged. It is red when on and the batteries are running low (or when batteries are being charged), and flashing red when the on and the batteries are <10% (or if there is a fault when charging and the charger has shut-off).
Let's take a closer look at the battery carrier:
The carrier looks similar to the X40, only holding 4x18650 now instead of 3x. The positive contact points inside the carrier are slightly raised, so all types of 18650 cells should work fine (i.e., true flat-tops, wide and small button-tops). There seems to be plenty of room in the carrier for length, so longer cells should fit fine. All the cells point the same way here (i.e., negative terminals at the base, positive terminals toward the head).
As with the other SupBeam lights, there is a unique dual-connection feature built-in to the charger. Despite how the carrier looks, the cells are actually arranged in a 4s1p arrangement when running the light (i.e., all cells in series, none parallel). The negative current path is carried by the body of the light, and the positive path connects through the spring in the head unit – when running the light. The situation is a lot more complex when charging, as I'll explain below.
There is a triple set of springs in the base of the battery tube that make contact with the carrier. Normally, a single spring would be needed for simple operation, and two springs for in-series charging. The addition of a third spring (along with a more complex wiring design inside the carrier) allows the light to actually charge the cells in parallel, not series. This is a much safer way to charge cells, so kudos to SupBeam for developing this innovative dual-wiring design: :thumbsup:
The external charging dock is unchanged from the X40. The charging dock is magnetic and there is no open voltage at the tail (i.e., no risk of shorting when cells are loaded). What you see at the exterior base are two metal circular contacts – these are connected to the terminals of the carrier through the springs. The charging cable directly attaches to the external contacts through a strong magnetic connection.
The light comes with a USB charging cable, but you have to plug the USB port into either included AC adapter or the 12VDC adapter to charge cells inside the light. Due to the parallel-charging design, the 500mA charging limit of USB 2.0 is just not going to cut it.
Please scroll down for some detailed charging current measures later in this review. :wave:
Because of the strong magnetic pull of the charging cable head (i.e., it will attach itself to anything made of metal), I generally recommend you connect the head to the flashlight before you connect the AC/DC outlet. The risk of accidentally shorting the cable is quite low, as there is a raised plastic divider separating the inner and outer contacts on the head. But given that the magnet is fairly strong, I wouldn't want to trust that tiny bit of plastic to rule out the potential for even a momentary short.
The K50 head is quite impressive – very large and deep, you should get outstanding throw. The reflector has a fine texturing to it, but it is generally more similar to most smooth reflectors. The XM-L2 emitter was well centered on my sample. Scroll down for sample beamshots.
User Interface
Turn the light off/on by the tailcap clicky – press for momentary, press and release (i.e., click) for constant on.
Change output modes by turning the control ring in the head. Arranged from left-to-right (looking down at the light, held in traditional flashlight carry), the modes are level 1 > level 2 > level 3 > level 4 > level 5 > level 6 (max) > standby > tactical strobe.
No light is produced on standby, but a miniscule current will be drawn to allow the circuit to respond to a ring turn (see below). As always, I recommend you store the light clicked-off at the tailcap, or locked-out by a head twist.
To charge the light, simply attached the magnetic charging dock to the port on the back of the light, and connect the other end of the cable to AC or DC power. Scroll down for an analysis of the charging current.
Video:
For more information on the light, including the build and user interface, please see my video overview:
As with all my videos, I recommend you have annotations turned on. I commonly update the commentary with additional information or clarifications before publicly releasing the video.
Strobe
There is no sign of PWM on any level – I believe the light is current-controlled. :thumbsup:
The K50 uses an oscillating strobe design, switching between two frequencies every ~0.55secs or so. Here is a blow up of the two frequencies:
As you can see, it rapidly switches between 15.0Hz and 6.5Hz.
Charging Current
Because the AC charger uses a USB connector to the charging cable, I was able to take direct measures of the charging parameters. For these measures, I am using the new Xtar VI01 "USB Detector" (basically a specialized USB current/voltage meter). This model has recently been favorably reviewed by HKJ here.
For charging tests, I started with discharged AW protected 18650 cells, measuring ~3.0-3.4V at rest. For all these tests, I removed the USB detector after each reading was taken. Note that the voltage reading on this device refers to the input voltage (i.e., from the charging brick).
Initial charging current and input voltage:
As you can see, charging started at 1.68A with a typical USB 5.41V input voltage ("U" is meant to represent Volts on the top display above). This is reasonable given all the cells were not fully discharged. Recall that the AC adapter has a max charging rate of 2A and 5VDC.
After 4 hours of charging, I re-measured charging current and input voltage:
As you can see, the charging current has dropped down to 1.20A at this point, with a consistent input voltage, as expected.
After 5 hours and 20 mins of charging:
Charging current has now dropped to 0.59A, still with a fairly consistent input voltage. As you might expect, it won't be long until charging terminates.
In my testing, the charging indicator went green ~10 mins later, for a total charging time of 5hr 30mins. Resting voltage of the AW 2200mAh batteries was ~4.16-4.22V.
This is very reasonable charging time and acceptable resting voltage at termination.
Standby Drain
I don't see any evidence of a current drain between the head and carrier when the clicky switch is off. However, on other lights that use a similar design (e.g., Thrunite TN3x series), I know there is an additional circuit to assist the switch when high current draw is required. This necessitates a secondary circuit in the tailcap that has its own standby drain when connected to the carrier. Typically, these are in the uA range and not a concern in practice (although it would be additive to the carrier drain below when fully connected). Note that to break this current, you would need to actually remove the carrier from the handle.
Due to the rather complex dual serial and parallel arrangement inside the carrier (controlled by an internal circuit), there is also a small standby drain internal to the carrier. I measured this current as a tiny 7.5uA on the K50. I am not sure if that measurement refers to an in-series or in-parallel current, but either way it would be pretty negligible. Note that this tiny current is present whenever batteries are installed in the carrier (whether it is inside the light or not).
The above currents are pretty minimal and not a concern in practice.
Finally, there must be a standby drain when the clicky switch is turned on and the light is in standby position of the control ring. I measured this traditional standby current as 67uA on four cells. This is similar to my Thrunite TN32, and not a major concern. Assuming that the standby drain is for the cells in series (given that the light runs with cells series), that would take almost 5.3 years to fully drain 3100mAh cells (although you would need to factor in the above two minor contributions as well, to get a more reliable estimate).
Beamshots:
And now, what you have all been waiting for.
All lights are on their respective 18650 battery sources, about ~0.75 meter from a white wall (with the camera ~1.25 meters back from the wall). Automatic white balance on the camera, to minimize tint differences.
Obviously, it's hard to tell much at such ridiculously close distances.
The most obvious observation is that overall beam pattern and throw appear intermediate to the Thrunite TN32 and Fenix TK61. This is what you would expect, given the overall reflector size and design. To tell more, we are going to have to go out to further distances ... As always, these outdoor shots are done in the style of my earlier 100-yard round-up review. Please see that thread for a discussion of the topography (i.e. the road dips in the distance, to better show you the corona in the mid-ground).
These results are consistent with the indoor beamshots. Overall output is closer to the TN32 than the TK61 (but still not quite as high at the TN32). However, peak intensity is pretty much the same between these two lights (thanks to the larger reflector on the L50). Scroll down for direct beam measurements.
Testing Method:
All my output numbers are relative for my home-made light box setup, as described on my flashlightreviews.ca website. You can directly compare all my relative output values from different reviews - i.e. an output value of "10" in one graph is the same as "10" in another. All runtimes are done under a cooling fan, except for any extended run Lo/Min modes (i.e. >12 hours) which are done without cooling.
I have devised a method for converting my lightbox relative output values (ROV) to estimated Lumens. See my How to convert Selfbuilt's Lightbox values to Lumens thread for more info.
Throw/Output Summary Chart:
My summary tables are reported in a manner consistent with the ANSI FL-1 standard for flashlight testing. Please see http://www.flashlightreviews.ca/FL1.htm for a discussion, and a description of all the terms used in these tables. Effective July 2012, I have updated all my Peak Intensity/Beam Distance measures with a NIST-certified Extech EA31 lightmeter (orange highlights).
Max output of the K50 is a bit less than my Thrunite TN32 or Catapult V5 – but still quite high for this class. It is certainly brighter than most other throwy examples (e.g. Fenix TK61, Armytek Baracuda). Nevertheless, peak intensity throw is just a slight touch below the class-leading TN32, likely due to the larger reflector here. Of course, it is a different matter with lights modified for max output and throw.
Let's see how the K50 measures across output modes:
My estimated output scale is just that – an estimate based on other lights in my collection. The official specs seem to consistently slightly exceed my relative measures, but the difference isn't great.
Output/Runtime Comparison:
As always, please recall that I use 2200mAh AW Protected 18650 cells in all my standard runtimes.
It's hard to compare lights with different number of cells, but the K50 is definitely a well-regulated performer for this class. Runtime certainly seems fairly consistent with the 4x18650 Fenix TK61, when matched for output.
Note there is a periodic off flash once the light falls out of regulation. The advantage to this design is that you are never left abruptly without light.
Potential Issues
The light has a stand-by current when in the "Stand By" mode of the control ring. But this current is very low (67uA), and will not be problem for regular use. And you can easily break this current by clicking the tailswitch off, or loosening the head a quarter turn.
There is a standby current internal to the carrier, due to the unusual dual series and parallel connections. This current drain is negligible at 7.5uA in my testing however. Finally, there is likely a tertiary current for circuit assist to the physical switch. I have not disassembled to confirm, but these are typically in low uA range (and so again not a concern).
The magnetic charging cable worked well in my testing, with no open voltage reading at the tailcap (and so no risk of shorting your battery inside the light). Like other recent SupBeam lights, the K50 also uses an innovative carrier that supports in-series running of the light, but in-parallel charging. This is good news for in-light charging, as in-series is not recommended for multiple cells.
Only 18650 Li-ion cells may be used in the light (i.e., doesn't support multiple CR123A primary cells)
Preliminary Observations
The K50 is another worthy competitor in the high-output "thrower" space. Like other recent multi-cell XM-L2 lights, you get a lot of throw here.
Physically, the K50 seems like a hybrid cross between the Supbeam X40 and the Thrunite TN32 (only with 4x18650 instead of 3). This means you get a slightly larger build, including a larger head (which helps for both throw and spillbeam width). The Fenix TK61 would thus be another comparable – but the K50 has greater overall output than that light, and the popular control ring/clicky switch interface of the TN32.
I have long been a fan of control ring interfaces (when combined with clicky switches). The revised ring design on the K50 worked well in my testing – although it looks and feels more like the Thrunite TN3x-series lights than the SupBeam X-series models. The ring has clear and firm detents, and the output levels are well spaced.
The K50 also has the advantage of in-light charging, with SupBeam's excellent in-parallel charging system and magnetic dock. :thumbsup: This charging system/carrier is one of the most distinctive features of SupBeam. Featuring both parallel and series connections, you get the best of both worlds - efficient high-voltage running of the light in-series, and safer in-parallel charging. Included are both a high current AC adapter and 12VDC car adapter.
As with other Supbeam lights I've tested, output/runtime performance was excellent for the K50. The current-control circuitry certainly seems to be on par with the Fenix TK61. Stabilization was quite good at all levels, with perfectly flat regulation (after a minor step-down on max). As the cells near exhaustion and the light falls out of regulation, you continue to get useable levels of light for some time (with a flashing low voltage warning).
The beam is good for a "thrower" XM-L2 light, with excellent throw and a reasonable size and brightness spillbeam. The K50 is one of the further throwing stock 1xXM-L2 lights I've tested.
The K50 is a strong contender in this class. The innovative in-light, in-parallel series charging alone may be enough for this model to knock off some of its competitors. That said, it is not exactly a petite light – and carry options are something you need to consider (at least it comes with a holster). Hopefully the comparisons in this review will help you decide.
----
K50 provided by SupBeam for review.
Last edited: