
leukos
Flashlight Enthusiast
Surefire A2 Aviator
There are a lot of questions about DIY improvements for this light :hairpull: , so I am attempting to put most of it in one thread, with pictures and links, so it can serve as an easy reference guide for questions. Please feel free to add links or post suggestions.")
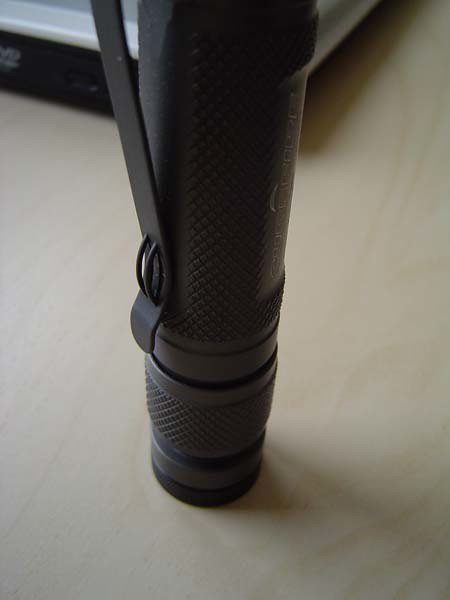
1. How to tighten the pocket clip?
First, remove the bezel.
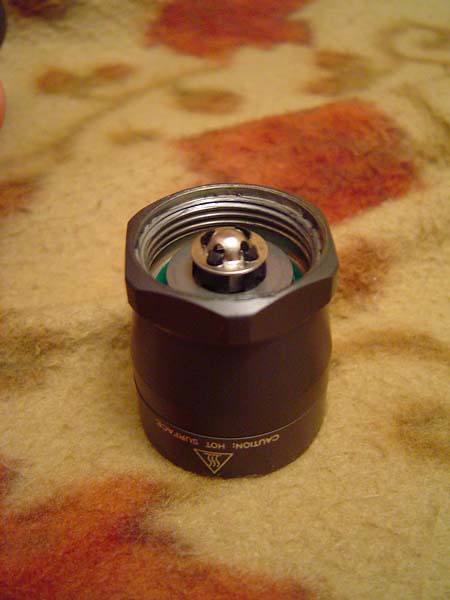
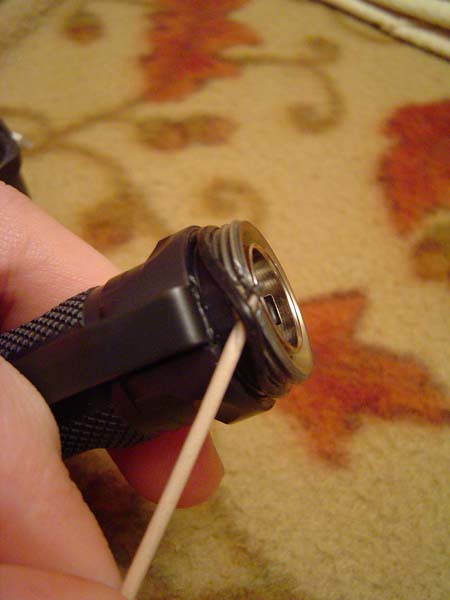
Next, carefully remove the bezel o-ring with a toothpick.
To remove the lanyard ring, see this thread: http://candlepowerforums.com/vb/showthread.php?p=1438244#post1438244
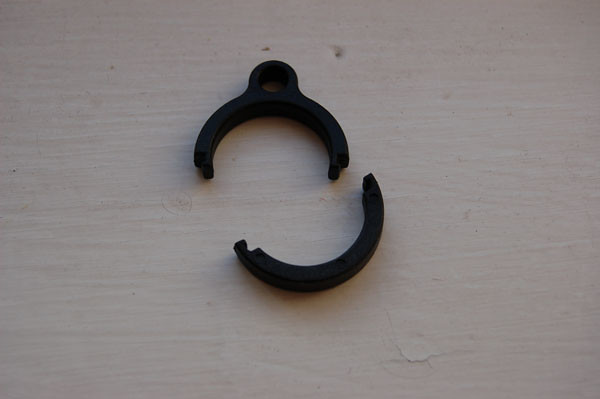
Here's a pic of it disassembled if that helps to know how it is held together:
Grab that SF lanyard you have laying around.....
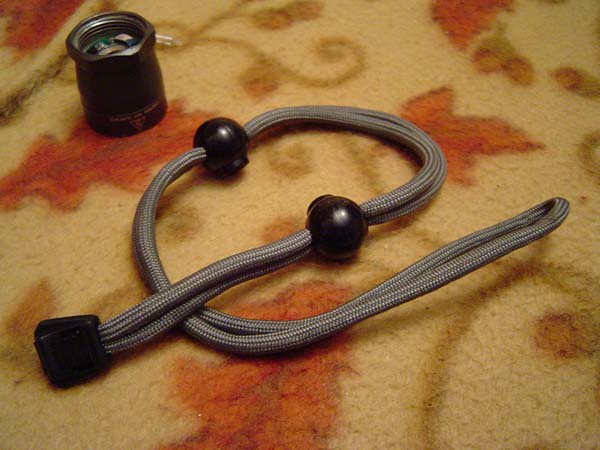
....and loop it around the clip.
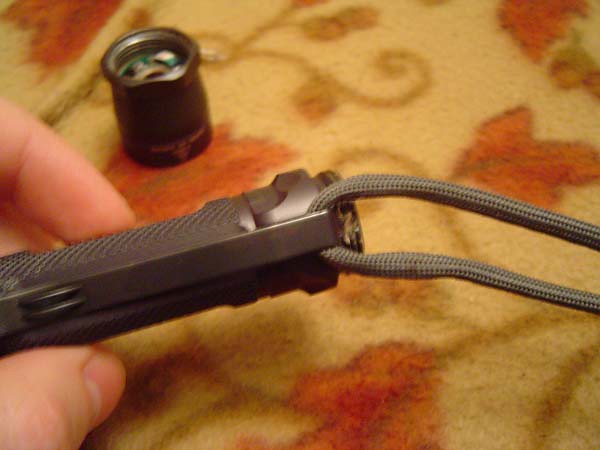
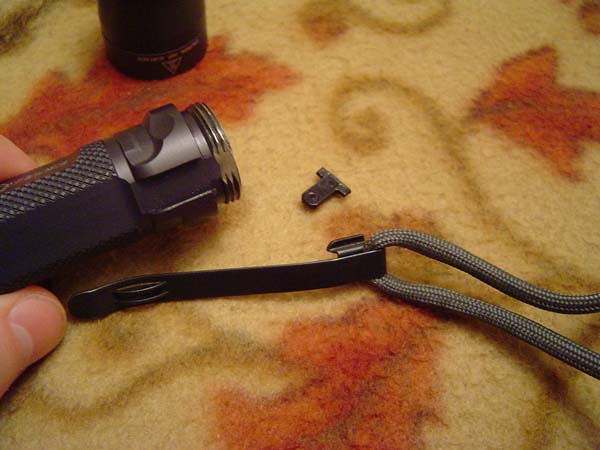
Pull carefully and take care that the small black plastic insert below the clip does not go flying!
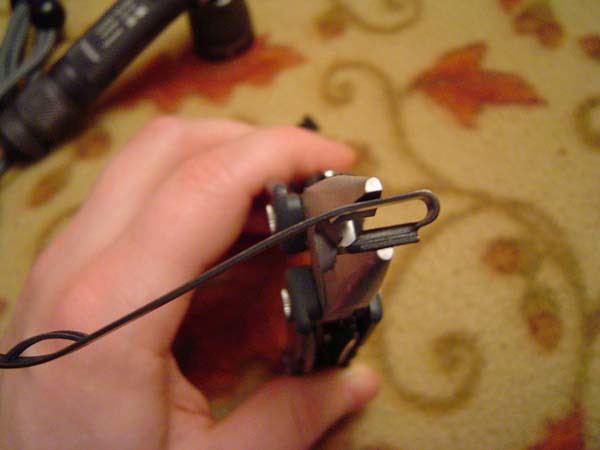
Use a pair of pliers and squeeze carefully as shown until the the parts touch.
Then reassemble to enjoy your tighter pocket clip!!! You may have to wiggle the clip a little to get it back in it's slot depending on how much you bend the clip. If it is hard to push back in, try pushing it against the edge of a table, that usually does the trick for me.
2. How to sand LEDs for a smoother beam?
(This mod is simple to do, but it is at your own risk as it may void SF's warranty.)
Stock A2's with white LEDs have a fairly diffused beam; the colored LEDs do not and actually have a rather ringy beam pattern similar to the olympic rings symbol. Many CPFers have found that sanding or scuffing these LEDs gives them a much smoother, diffused beam that is preferrable for just about every application. White LEDs can be sanded as well to get rid of the 'angry blue' but some throw is lost.
First,unscrew the bezel and pull out the lamp.
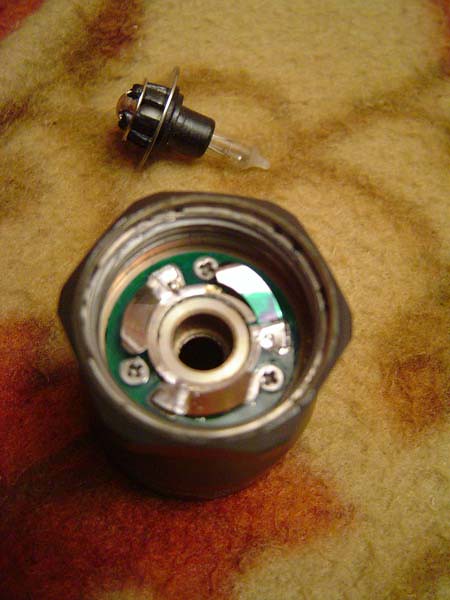
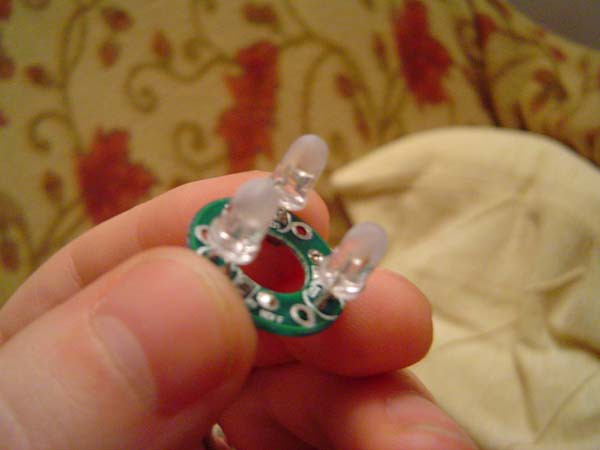
Next, remove the three screws with a mini phillips screwdriver (take care not to lose them, they are small). Carefully remove the LED ring from the bezel. Usually it will just fall out with a slight tap, but it may require gentle use of pliers.

With a pair of needle nose pliers and a sponge sanding block (fine grit), carefully sand each of the LEDs to your own liking. Hold the LED firmly with the pliers and take care not to twist or cause the solder to break. White LEDs may need very little sanding as they are fairly diffused, colored LEDs may require more scuffing depending on how diffused you wish the beam to be.

When finished, the LEDs should look cloudy all around the top half of the dome. Be sure to brush off the dust to make sure there are no remaining clear spots. The next two pictures attempt to show sanded LEDs, though I appologize for the quality.

Again, before reassembling, make sure you remove all dust, lint, etc as you don't want to get debris in your A2 bezel. When replacing the screws, you may need to use your pliers to get them into position. Remember the bezel is only aluminum, so do not overtighten the screws. They should be snug though for proper contact. If after reassembly one or more of the LEDs are not lit, check to make sure the screws are snug as this is commonly the cause.
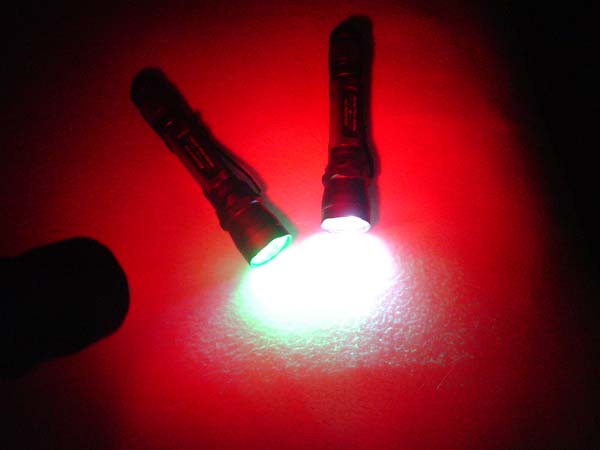
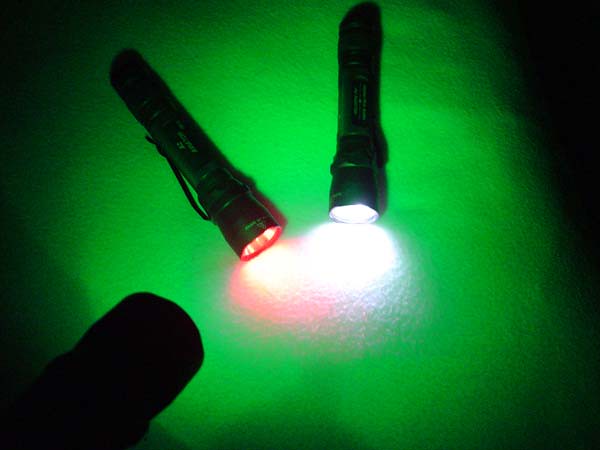
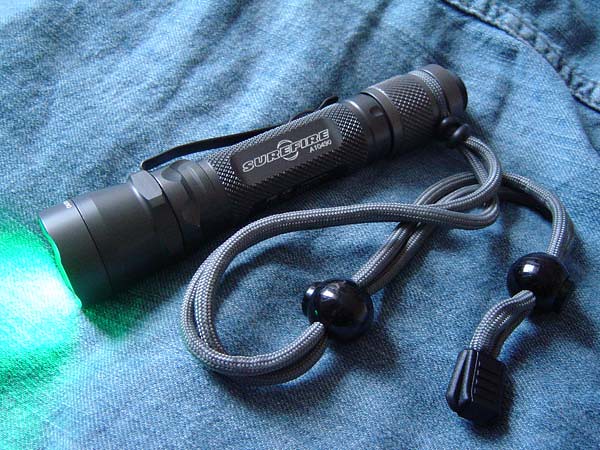
Test your A2 in LED mode to see if the beam pattern is as diffused as you wanted it, if not, sand them a little more until you are satisfied. Below are beamshots of my red, green, and white A2's with sanded LEDs. Notice how evenly the light is diffused (sorry, no before and after pictures, but if you want an excellent review of the colored varieties of the A2, see greenLED's thread: http://candlepowerforums.com/vb/showthread.php?t=119758&page=1&pp=30 ).

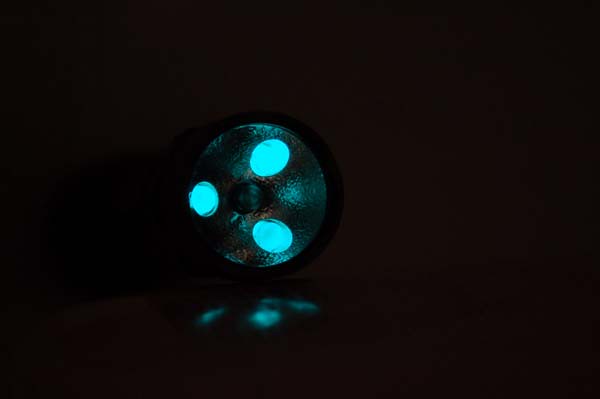
3. GITD? (glow in the dark)
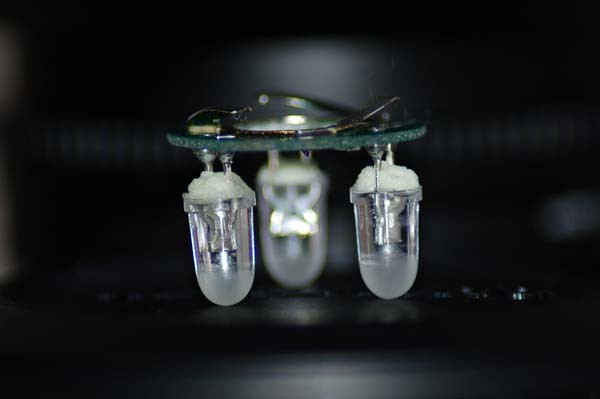
If you purchase some glow powder, glow paint, or tritium vials, you can make your A2 LEDs glow in the dark! For greenLED's mod with tritium vials, see this thread: http://candlepowerforums.com/vb/showthread.php?t=120034
Paint and powder can be purchased here: http://www.glowinc.com/ (I prefer the Ultra Blue). I used glow powder and mixed it with Uhu brand glue to make a paste. I then applied it to the back of my A2 LED's with a toothpick. Colored LEDs do not charge GITD that well (white LEDs work best), though one quick blast from the incandescent and they will glow all night! Here's a few pics:
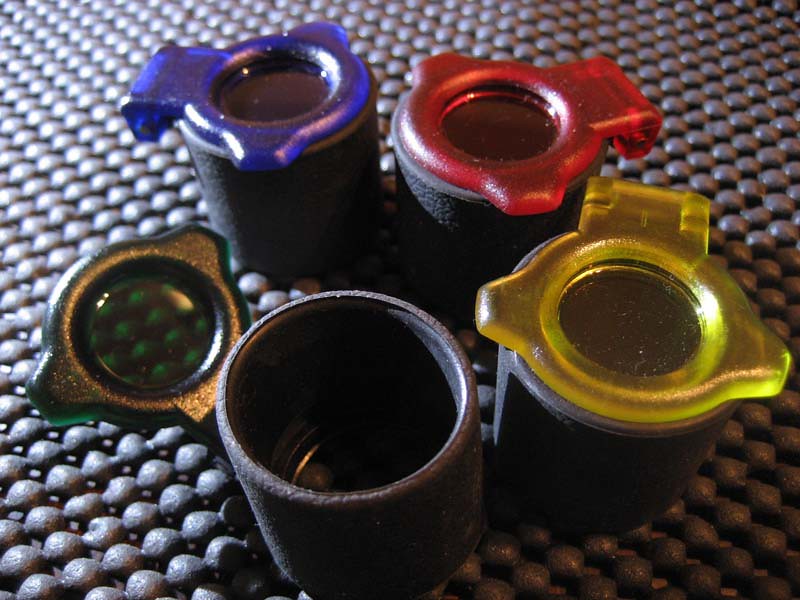
4. Colored Filters?
The older style SF 'E' series flip-up filters fit (snuggly), but not the newer hex-style. Here's a picture of SF's F05 flip-up filter stretched over the A2 bezel:
This style filter is no longer available from SF, but is made by Bushwacker and can be ordered here (size 1):
http://www.midsouthshooterssupply.c...TS&dept3=ACCESSORIES&dept4=UNIVERSAL&vendors=
or here:
http://www.quakeinc.com/optic.html
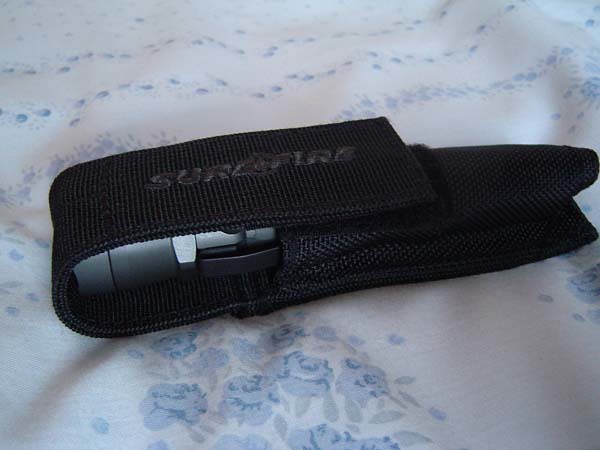
5. Holster?
SF's V20 holster seems the best fit to me, YMMV.
6. Differences in A2 models?
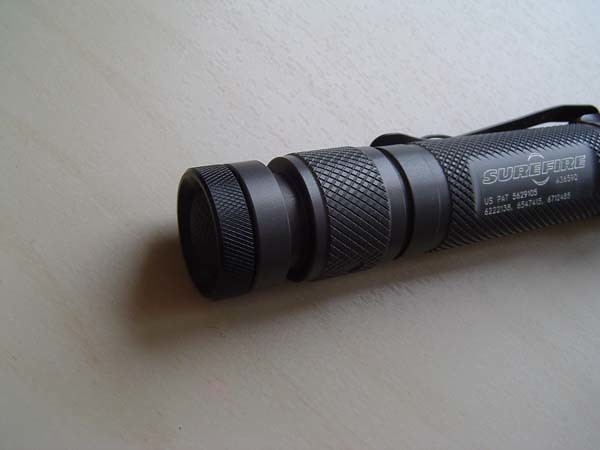
Older A2 models had square bodies with four flat sides, newer models have a rounder body with three smooth sides. Older models had a short clip, while newer models have a longer one. Also, older models had a smooth bezel, whereas the newer bezel is scallopped.
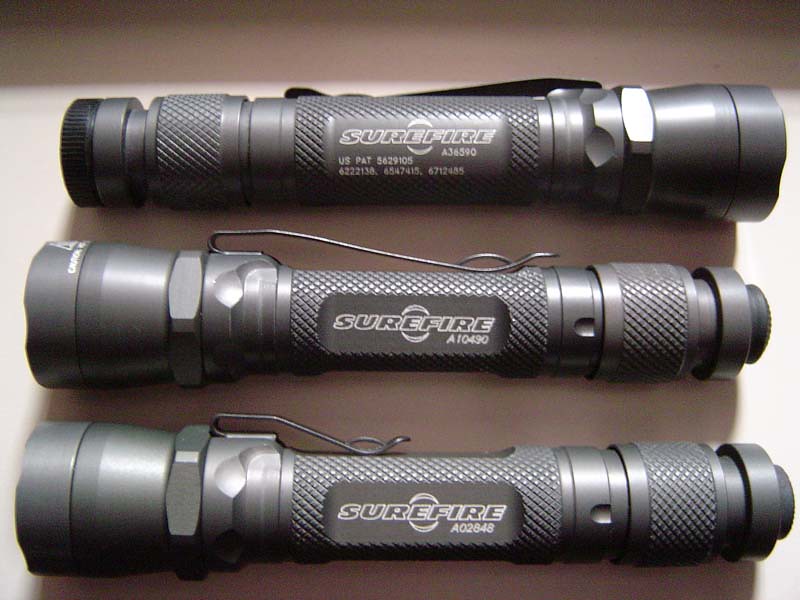
7. Tail standing?
The A2 in the top of the previous picture has a delrin tailcap guard-ring that allows for tail standing and provides some protection against drops. CPF'er oregonshooter makes an excellent quality tail guard-ring that looks sharp and functions better than any other tailcap ring I have used (pictured in the next two photos). When available, you can purchase one here: http://store.oregonshooter.com/ These can also be purchased from Malkoff here: http://www.jsburlysflashlights.com/...hroud&cat=flashlights&catstr=HOME:flashlights
8. Better way to attach the lanyard?
Get rid of that lanyard ring and attach an o-ring! Seriously, if you don't have need for the break-away feature of the stock lanyard ring, then use a thick doubled-up o-ring with the lanyard for a much easier and more secure means of keeping track of your A2.
9. Adjusting the incandescent beam?
The A2 has a slightly oval incandescent beam that can be adjusted somewhat to suit your usage and preference. This is done by removing the bezel and rotating the A2 lamp to reposition the filament. My preference is to align the filament vertically with the pocket clip, this way I know that the beam will be veritcally oriented when I hold by A2 in my usual 'cigar' grip. I prefer a sharper oval beam because it tends to be more consentrated and produces the furthest throw. However, the lamp can also be rotated to align the filament with one of the LEDs which seems to round the beam a little more. This preference is popular among many A2 owners as well. Experiment to see what suits your needs best!
There is also a great after market lamp available from Lumens Factory that is a little brighter for less $$: http://www.lumensfactory.com/cart.php?cat_id=8
CPFer FiveMega has also made a bi-pin adapter for use with the Streamlight Strion bulb. These are no longer in production, but a very nice upgrade if you can find one: https://www.candlepowerforums.com/threads/184556&page=2
10. How to swap the LEDs?
Here's a wonderful thread with illustrations on how to mod the A2 LED ring with the LEDs of your choice:
http://candlepowerforums.com/vb/showthread.php?t=92993&highlight=a2
11. Use with rechargeables?
I have cycled rechargeables through my green A2 150+ times now with no issues, but caution should be taken since these are unprotected Li-ions. Currently there are no protected Li-ions that fit in the A2, only unprotected. CPFers have asked if the cell AW sells for the L2 will work in the A2. I have not tried it, but based on my limited knowledge of the circuitry in the A2, it appears to be a buck circuit that pushes the voltage down to 4.5 volts or so to power the lamp. One Li-ion does not have enough voltage to power the incandescent lamp, so yes, you must use two Li-ions for it to work. Again, this is at your own risk and also probably voids SF's warranty.
http://candlepowerforums.com/vb/showthread.php?t=87768&page=1&pp=30
see also:
http://candlepowerforums.com/vb/showthread.php?t=95230
12. Anything else you ever wanted to know about the A2....
Here is the most extensive post written yet about the Surefire A2:
http://candlepowerforums.com/vb/showthread.php?t=107943&page=1&pp=30
Also, here's an equally amazing comparison of the various beams of each color of the A2 as well as some with modded LED's: http://candlepowerforums.com/vb/showthread.php?t=119758&page=1&pp=30
And if you haven't read enough yet, here is an excellent thread index collected by Atomic_Chicken, the designer of the Aviatrix: http://candlepowerforums.com/vb/showthread.php?t=165635
Enjoy!
There are a lot of questions about DIY improvements for this light :hairpull: , so I am attempting to put most of it in one thread, with pictures and links, so it can serve as an easy reference guide for questions. Please feel free to add links or post suggestions.
1. How to tighten the pocket clip?
First, remove the bezel.
Next, carefully remove the bezel o-ring with a toothpick.
To remove the lanyard ring, see this thread: http://candlepowerforums.com/vb/showthread.php?p=1438244#post1438244
Here's a pic of it disassembled if that helps to know how it is held together:
Grab that SF lanyard you have laying around.....
....and loop it around the clip.
Pull carefully and take care that the small black plastic insert below the clip does not go flying!
Use a pair of pliers and squeeze carefully as shown until the the parts touch.
Then reassemble to enjoy your tighter pocket clip!!! You may have to wiggle the clip a little to get it back in it's slot depending on how much you bend the clip. If it is hard to push back in, try pushing it against the edge of a table, that usually does the trick for me.
2. How to sand LEDs for a smoother beam?
(This mod is simple to do, but it is at your own risk as it may void SF's warranty.)
Stock A2's with white LEDs have a fairly diffused beam; the colored LEDs do not and actually have a rather ringy beam pattern similar to the olympic rings symbol. Many CPFers have found that sanding or scuffing these LEDs gives them a much smoother, diffused beam that is preferrable for just about every application. White LEDs can be sanded as well to get rid of the 'angry blue' but some throw is lost.
First,unscrew the bezel and pull out the lamp.
Next, remove the three screws with a mini phillips screwdriver (take care not to lose them, they are small). Carefully remove the LED ring from the bezel. Usually it will just fall out with a slight tap, but it may require gentle use of pliers.
With a pair of needle nose pliers and a sponge sanding block (fine grit), carefully sand each of the LEDs to your own liking. Hold the LED firmly with the pliers and take care not to twist or cause the solder to break. White LEDs may need very little sanding as they are fairly diffused, colored LEDs may require more scuffing depending on how diffused you wish the beam to be.
When finished, the LEDs should look cloudy all around the top half of the dome. Be sure to brush off the dust to make sure there are no remaining clear spots. The next two pictures attempt to show sanded LEDs, though I appologize for the quality.
Again, before reassembling, make sure you remove all dust, lint, etc as you don't want to get debris in your A2 bezel. When replacing the screws, you may need to use your pliers to get them into position. Remember the bezel is only aluminum, so do not overtighten the screws. They should be snug though for proper contact. If after reassembly one or more of the LEDs are not lit, check to make sure the screws are snug as this is commonly the cause.
Test your A2 in LED mode to see if the beam pattern is as diffused as you wanted it, if not, sand them a little more until you are satisfied. Below are beamshots of my red, green, and white A2's with sanded LEDs. Notice how evenly the light is diffused (sorry, no before and after pictures, but if you want an excellent review of the colored varieties of the A2, see greenLED's thread: http://candlepowerforums.com/vb/showthread.php?t=119758&page=1&pp=30 ).
3. GITD? (glow in the dark)
If you purchase some glow powder, glow paint, or tritium vials, you can make your A2 LEDs glow in the dark! For greenLED's mod with tritium vials, see this thread: http://candlepowerforums.com/vb/showthread.php?t=120034
Paint and powder can be purchased here: http://www.glowinc.com/ (I prefer the Ultra Blue). I used glow powder and mixed it with Uhu brand glue to make a paste. I then applied it to the back of my A2 LED's with a toothpick. Colored LEDs do not charge GITD that well (white LEDs work best), though one quick blast from the incandescent and they will glow all night! Here's a few pics:
4. Colored Filters?
The older style SF 'E' series flip-up filters fit (snuggly), but not the newer hex-style. Here's a picture of SF's F05 flip-up filter stretched over the A2 bezel:
This style filter is no longer available from SF, but is made by Bushwacker and can be ordered here (size 1):
http://www.midsouthshooterssupply.c...TS&dept3=ACCESSORIES&dept4=UNIVERSAL&vendors=
or here:
http://www.quakeinc.com/optic.html
5. Holster?
SF's V20 holster seems the best fit to me, YMMV.
6. Differences in A2 models?
Older A2 models had square bodies with four flat sides, newer models have a rounder body with three smooth sides. Older models had a short clip, while newer models have a longer one. Also, older models had a smooth bezel, whereas the newer bezel is scallopped.
7. Tail standing?
The A2 in the top of the previous picture has a delrin tailcap guard-ring that allows for tail standing and provides some protection against drops. CPF'er oregonshooter makes an excellent quality tail guard-ring that looks sharp and functions better than any other tailcap ring I have used (pictured in the next two photos). When available, you can purchase one here: http://store.oregonshooter.com/ These can also be purchased from Malkoff here: http://www.jsburlysflashlights.com/...hroud&cat=flashlights&catstr=HOME:flashlights
8. Better way to attach the lanyard?
Get rid of that lanyard ring and attach an o-ring! Seriously, if you don't have need for the break-away feature of the stock lanyard ring, then use a thick doubled-up o-ring with the lanyard for a much easier and more secure means of keeping track of your A2.
9. Adjusting the incandescent beam?
The A2 has a slightly oval incandescent beam that can be adjusted somewhat to suit your usage and preference. This is done by removing the bezel and rotating the A2 lamp to reposition the filament. My preference is to align the filament vertically with the pocket clip, this way I know that the beam will be veritcally oriented when I hold by A2 in my usual 'cigar' grip. I prefer a sharper oval beam because it tends to be more consentrated and produces the furthest throw. However, the lamp can also be rotated to align the filament with one of the LEDs which seems to round the beam a little more. This preference is popular among many A2 owners as well. Experiment to see what suits your needs best!
There is also a great after market lamp available from Lumens Factory that is a little brighter for less $$: http://www.lumensfactory.com/cart.php?cat_id=8
CPFer FiveMega has also made a bi-pin adapter for use with the Streamlight Strion bulb. These are no longer in production, but a very nice upgrade if you can find one: https://www.candlepowerforums.com/threads/184556&page=2
10. How to swap the LEDs?
Here's a wonderful thread with illustrations on how to mod the A2 LED ring with the LEDs of your choice:
http://candlepowerforums.com/vb/showthread.php?t=92993&highlight=a2
11. Use with rechargeables?
I have cycled rechargeables through my green A2 150+ times now with no issues, but caution should be taken since these are unprotected Li-ions. Currently there are no protected Li-ions that fit in the A2, only unprotected. CPFers have asked if the cell AW sells for the L2 will work in the A2. I have not tried it, but based on my limited knowledge of the circuitry in the A2, it appears to be a buck circuit that pushes the voltage down to 4.5 volts or so to power the lamp. One Li-ion does not have enough voltage to power the incandescent lamp, so yes, you must use two Li-ions for it to work. Again, this is at your own risk and also probably voids SF's warranty.
http://candlepowerforums.com/vb/showthread.php?t=87768&page=1&pp=30
see also:
http://candlepowerforums.com/vb/showthread.php?t=95230
12. Anything else you ever wanted to know about the A2....
Here is the most extensive post written yet about the Surefire A2:
http://candlepowerforums.com/vb/showthread.php?t=107943&page=1&pp=30
Also, here's an equally amazing comparison of the various beams of each color of the A2 as well as some with modded LED's: http://candlepowerforums.com/vb/showthread.php?t=119758&page=1&pp=30
And if you haven't read enough yet, here is an excellent thread index collected by Atomic_Chicken, the designer of the Aviatrix: http://candlepowerforums.com/vb/showthread.php?t=165635
Enjoy!
Last edited:
