
3rd_shift
Flashlight Enthusiast
Also see my newer and harder 3c Cree XRE Maglite modding with a megabyte of pics to show you how.
See that 4D magled at the top?
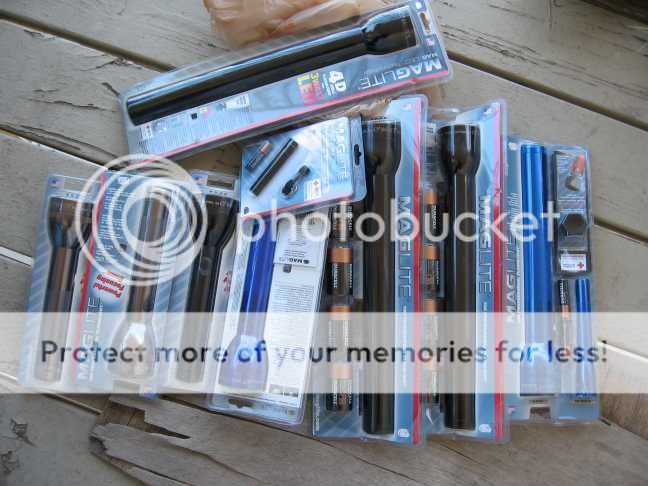
That's the one getting modded today.
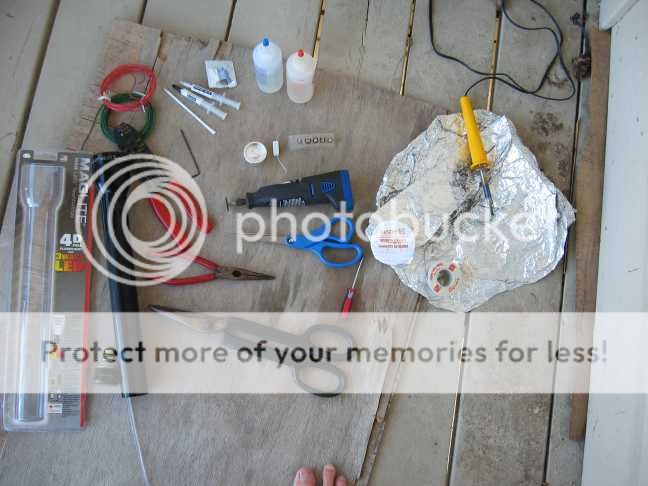
Time to get some tools out.
You need to make your reflector look like this nice and neat.

Take off the switch boot without tearing it up.

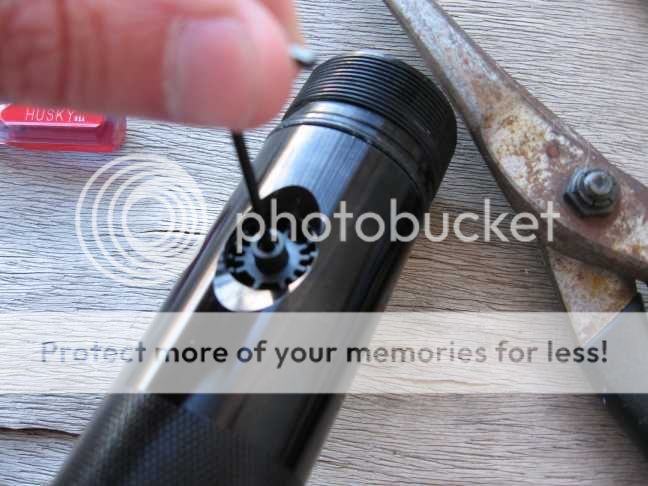
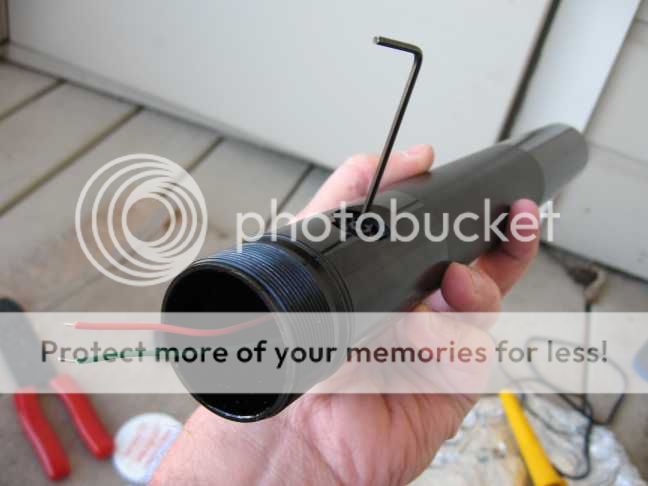
Use a 5/64rths allen wrench to loosen the switch assembly like this.
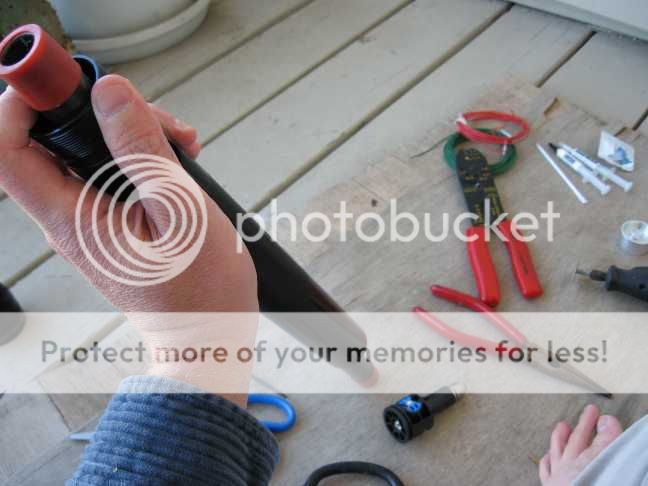
Use something long to gently send the loosened switch assembly down and out of the barrel.
Use that 5/64 allen wrench again to take off the switch assembly roller.

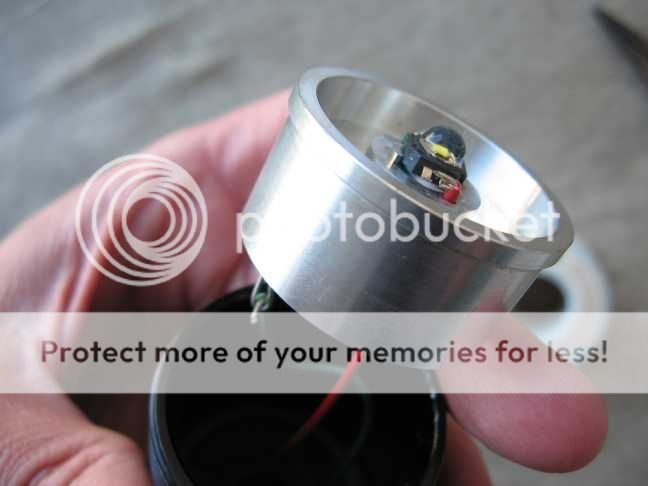
The bulb holder guts easily come out now.
Cut off the top of the plastic bulb tower and bend the (-) tab over like this.
I already pre-soldered it for a later step.
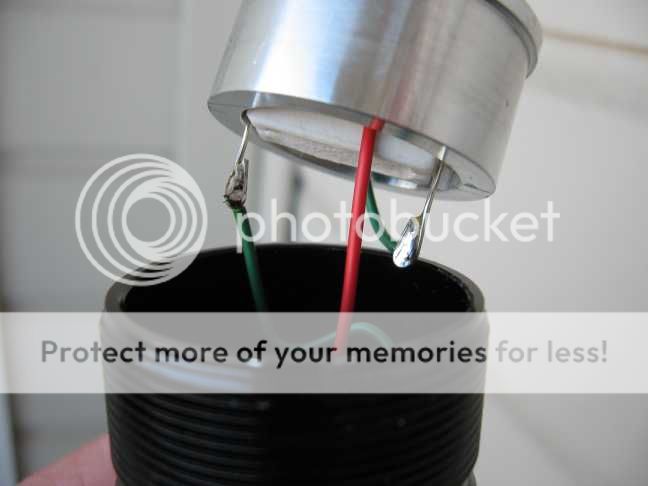
Cut a 4 inch (-) wire and a 5 inch (+) 22-24 guage wires of different colors.
Strip off thier ends leaving about 3-5 millimeters of bare wire.
This is important.
Get some extra rosin flux and and apply it to where the wires are going.
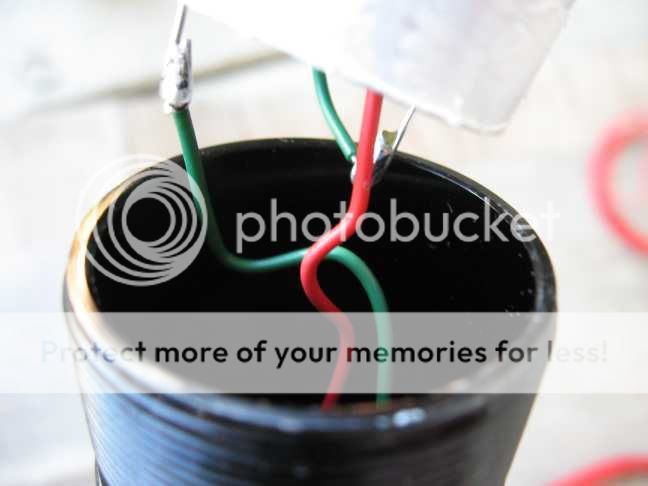
Solder the wires to the chopped switch assembly like this.

These parts now need to come together.
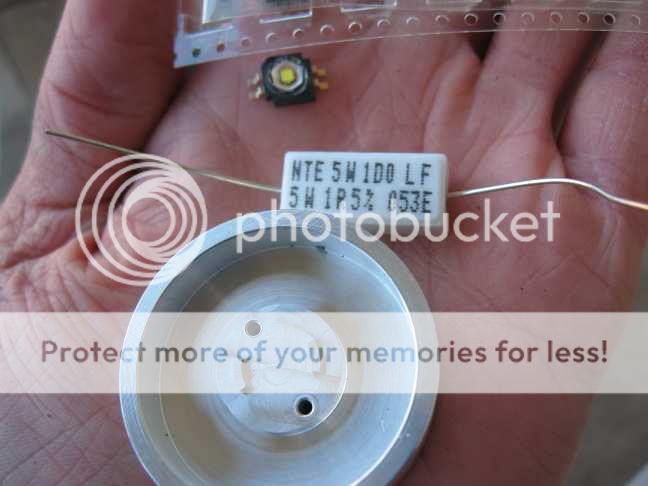
A 5 watt 1 ohm resistor is being used this time around.
The UWON bin K2 led came from member photonfanatic in the dealers' corner.
Here is his home website. www.photonfanatic.com
The heatsink came from here by member H22A.
https://www.candlepowerforums.com/threads/120417
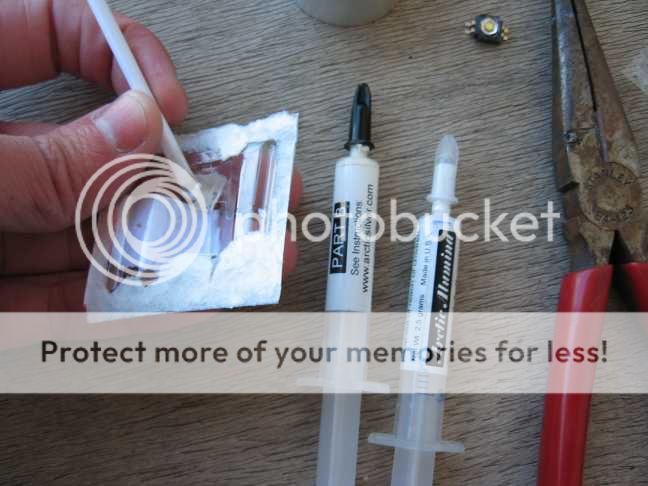
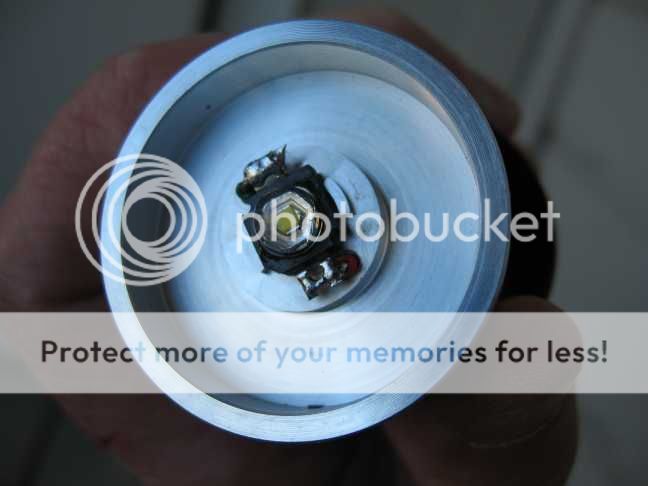
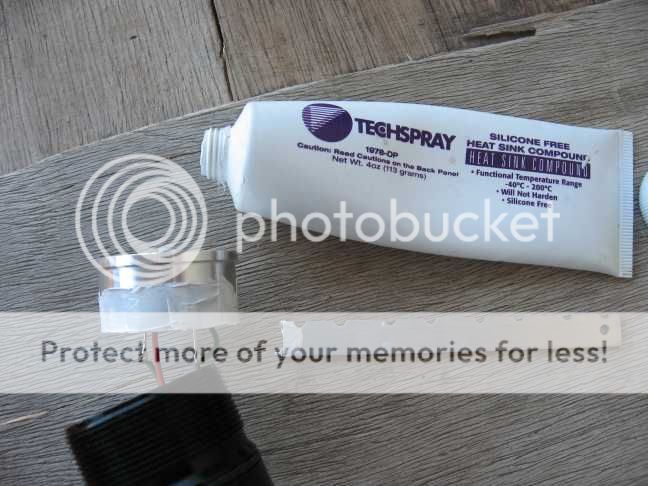
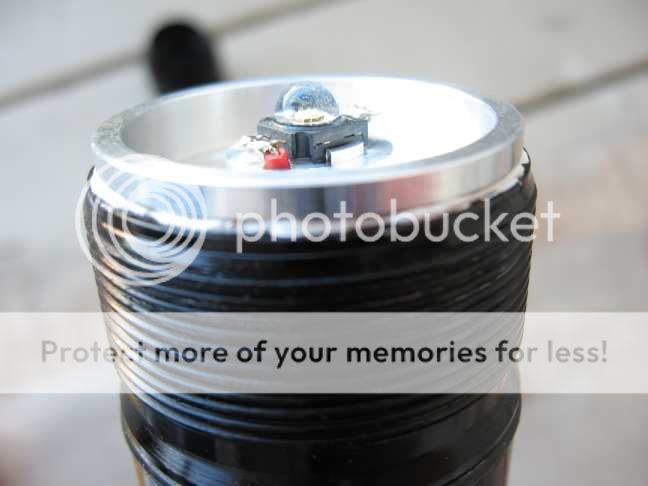
Mix up some Arctic Alumina and apply it to the center of the heatsink where the led is going and stick on the led.
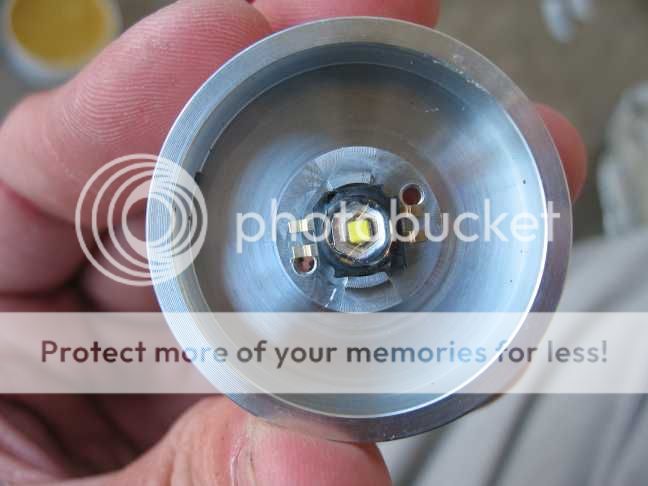
Make sure to "bulls-eye" the led dead center like this when sticking it on and let the adhesive set.
Re-install the wired switch assembly.
Cut another 2 inch piece of 22-24 guage wire and strip off 3-5 millimeters off it's ends.

Bend the led's leads well clear of the heatsink.
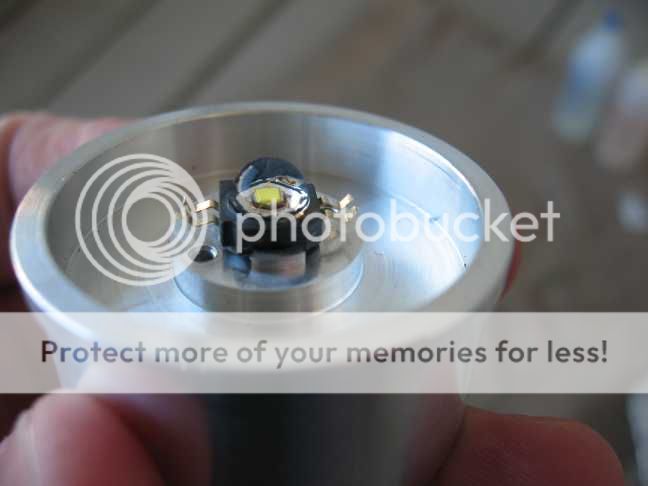
Without shorting the battery, use a 3 volt battery to find out the led's polarity if you don't already know it.
Put that 2 inch pice of wire through the heatsink on the (-) side of the led like this.
 .
.
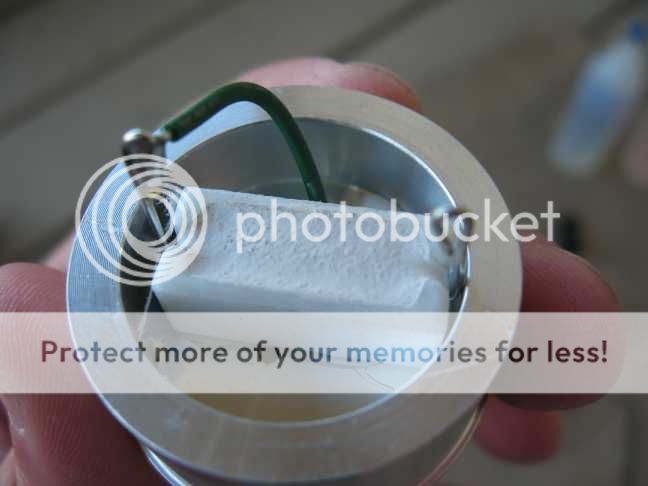
Watch how the resistor was installed.
Regular 2 part epoxy was used.
The (-) input side is closest to the heatsink.
The (-) going to the led is cautiously away from the heatsink with a piece of paper inserted over there.
The other end of that 2 inch wire then got soldered to the resistor's "output" side leading to the led's (-).
Allow the resistor's adhesive time to set.
Time to put the heatsink assembly into the flashlight.
Put the red wire through the heatsink to be soldered to the led's (+) on top.
Solder the (-) wire to the resistor's (-) input side nearest the heatsink.
Solder the red wire to the led's (+).
"Deep breath"
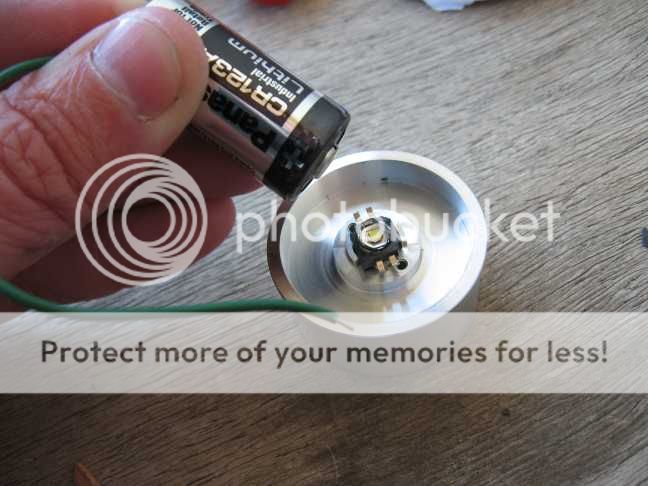
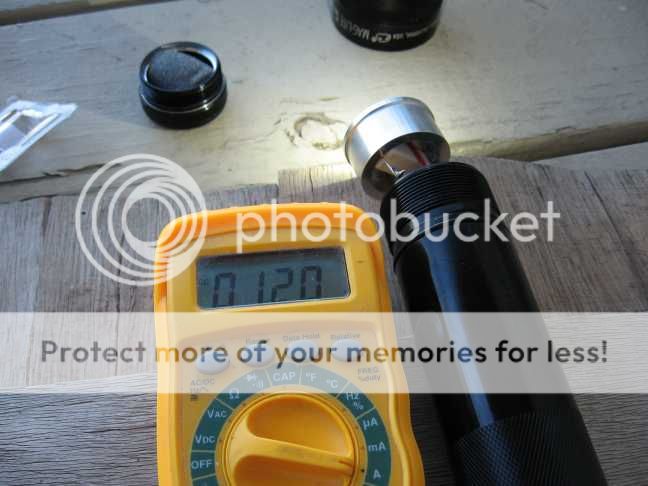
Load the batteries into the tube without the tailcap and measure the current with a dc ampmeter.
1.2 amps looks good for this UWON bin 1.4 amp rated Lumileds K2 led.
It's not overdriven even with fresh batteries.
Now that we know it works, now we can make a mess like this.
This step is necessary for the heatsink to transfer the led's heat to the aluminum body of the flashlight.
Something that a stock Magled can't do very good.
This is why Magleds go dimmer after a few minutes from getting hot.
This flashlight in it's modded state will now, stay at full power far longer without getting too hot.
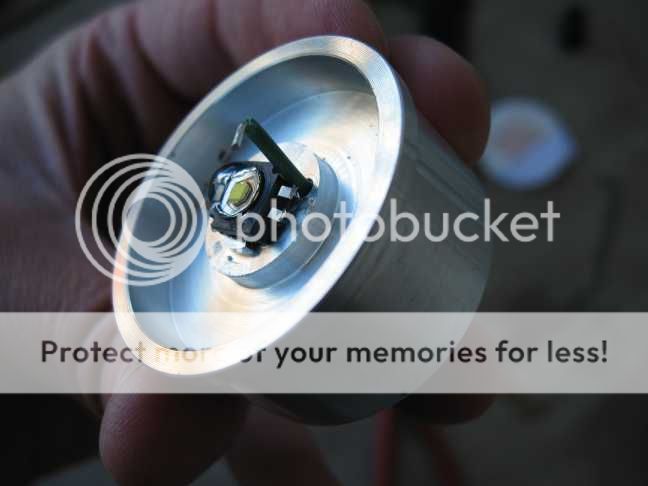
Now bend the wires something like this to get them to squish in.
Push the led heatsink assembly into the barrel as far as you can.
It stopped just 1 millimeter short of where it was supposed to go in this case.
Nice tight fit as it should be.
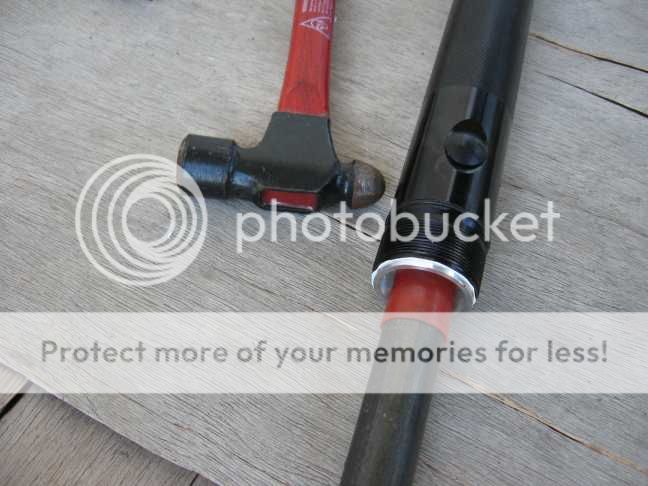
I used a pipe with a hollow plastic end on it to drive the heatsink the rest of the way in.
Notice how some of the heatsink grease squished out once the heatsink was all the way in.
Moment of truth!
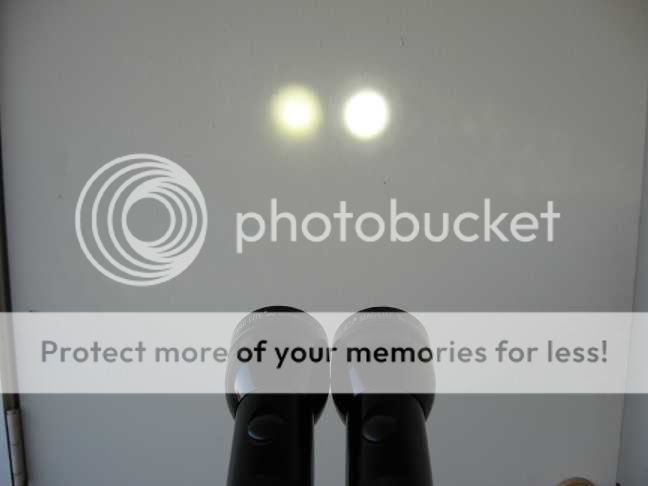
Magled reinstalled into another 4D light on the left with new batteries.
K2 Magmod on the right kicking it's butt!")
The Magled hasn't even gotten warm enough to dim yet and it's still losing!
As you can see, I have been doing this for a while.
See that 4D magled at the top?
That's the one getting modded today.
Time to get some tools out.
You need to make your reflector look like this nice and neat.
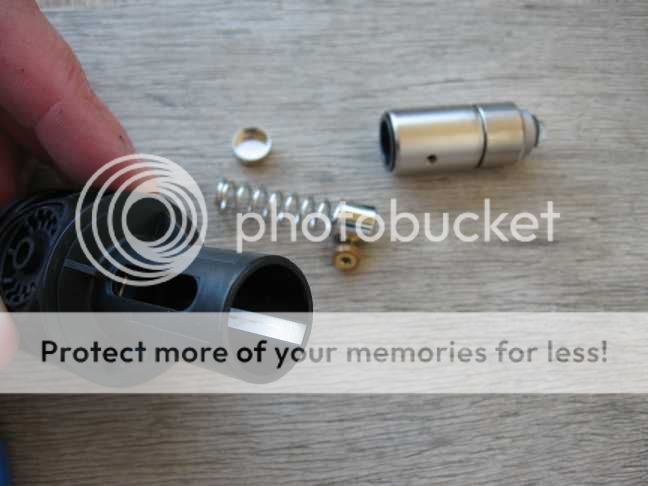
Take off the switch boot without tearing it up.
Use a 5/64rths allen wrench to loosen the switch assembly like this.
Use something long to gently send the loosened switch assembly down and out of the barrel.
Use that 5/64 allen wrench again to take off the switch assembly roller.
The bulb holder guts easily come out now.
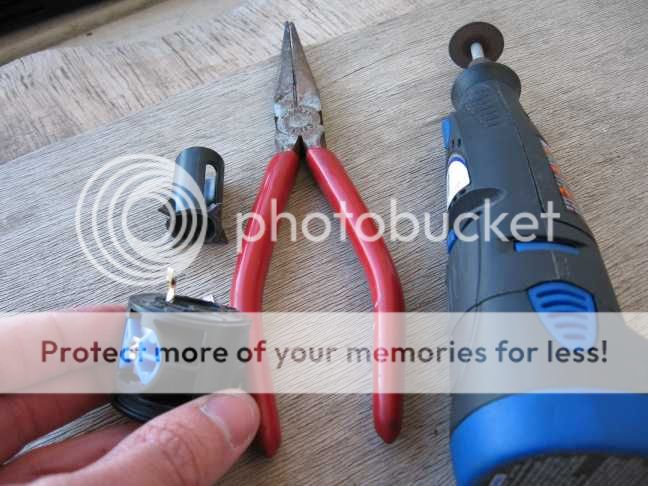
Cut off the top of the plastic bulb tower and bend the (-) tab over like this.
I already pre-soldered it for a later step.
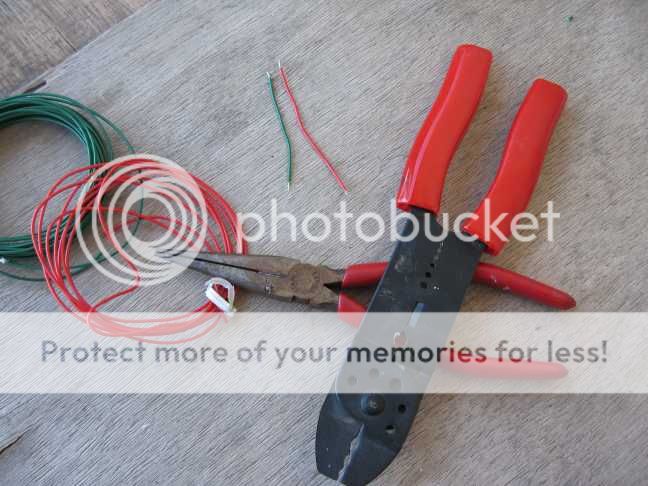
Cut a 4 inch (-) wire and a 5 inch (+) 22-24 guage wires of different colors.
Strip off thier ends leaving about 3-5 millimeters of bare wire.
This is important.
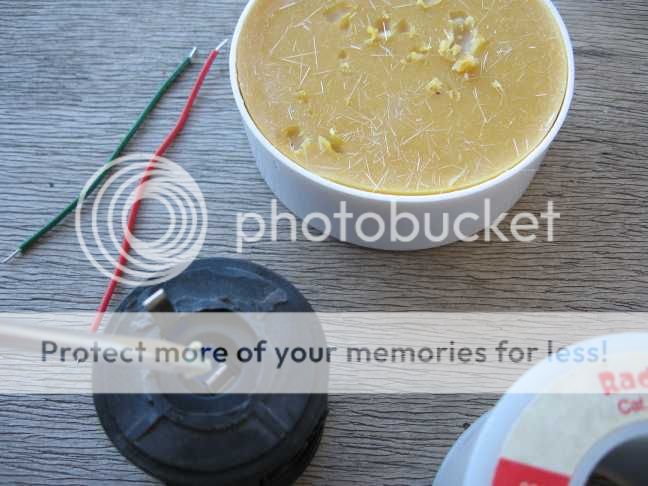
Get some extra rosin flux and and apply it to where the wires are going.
Solder the wires to the chopped switch assembly like this.
These parts now need to come together.
A 5 watt 1 ohm resistor is being used this time around.
The UWON bin K2 led came from member photonfanatic in the dealers' corner.
Here is his home website. www.photonfanatic.com
The heatsink came from here by member H22A.
https://www.candlepowerforums.com/threads/120417
Mix up some Arctic Alumina and apply it to the center of the heatsink where the led is going and stick on the led.
Make sure to "bulls-eye" the led dead center like this when sticking it on and let the adhesive set.
Re-install the wired switch assembly.
Cut another 2 inch piece of 22-24 guage wire and strip off 3-5 millimeters off it's ends.
Bend the led's leads well clear of the heatsink.
Without shorting the battery, use a 3 volt battery to find out the led's polarity if you don't already know it.
Put that 2 inch pice of wire through the heatsink on the (-) side of the led like this.
Watch how the resistor was installed.
Regular 2 part epoxy was used.
The (-) input side is closest to the heatsink.
The (-) going to the led is cautiously away from the heatsink with a piece of paper inserted over there.
The other end of that 2 inch wire then got soldered to the resistor's "output" side leading to the led's (-).
Allow the resistor's adhesive time to set.
Time to put the heatsink assembly into the flashlight.
Put the red wire through the heatsink to be soldered to the led's (+) on top.
Solder the (-) wire to the resistor's (-) input side nearest the heatsink.
Solder the red wire to the led's (+).
"Deep breath"
Load the batteries into the tube without the tailcap and measure the current with a dc ampmeter.
1.2 amps looks good for this UWON bin 1.4 amp rated Lumileds K2 led.
It's not overdriven even with fresh batteries.
Now that we know it works, now we can make a mess like this.
This step is necessary for the heatsink to transfer the led's heat to the aluminum body of the flashlight.
Something that a stock Magled can't do very good.
This is why Magleds go dimmer after a few minutes from getting hot.
This flashlight in it's modded state will now, stay at full power far longer without getting too hot.
Now bend the wires something like this to get them to squish in.
Push the led heatsink assembly into the barrel as far as you can.
It stopped just 1 millimeter short of where it was supposed to go in this case.
Nice tight fit as it should be.
I used a pipe with a hollow plastic end on it to drive the heatsink the rest of the way in.
Notice how some of the heatsink grease squished out once the heatsink was all the way in.
Moment of truth!
Magled reinstalled into another 4D light on the left with new batteries.
K2 Magmod on the right kicking it's butt!
The Magled hasn't even gotten warm enough to dim yet and it's still losing!
As you can see, I have been doing this for a while.
Last edited:
 :wow: :goodjob: