
cryhavok
Enlightened
Hey fellas,
I have had an original Jetbeam MkI w/ cr123 tube on my key chain ever since they became available in the first GB many months ago. This light has served me well but the lack of levels has always bothered me a bit.
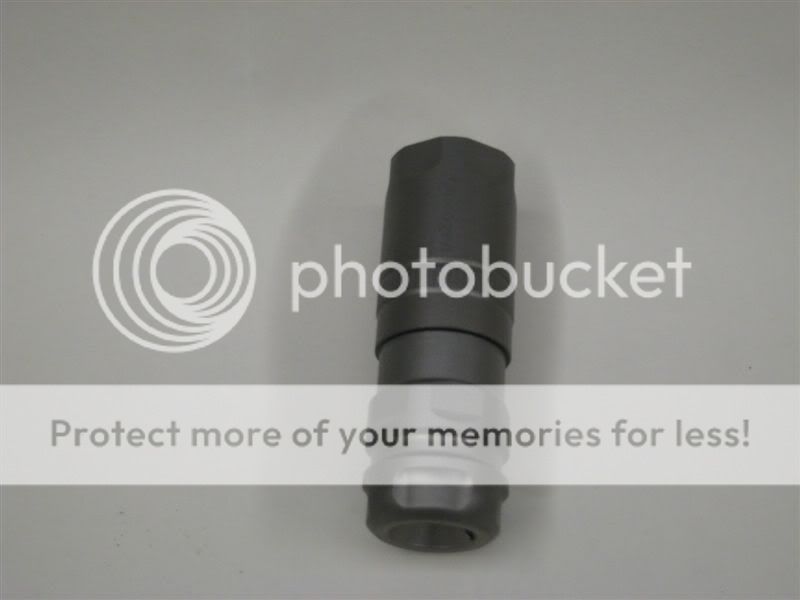
Well, after the release of the Cree XR-E LED's and seeing this thread, I started my search for a Luxogen LR12 to mod. I was fortunate to find a new one not long after. The day I received the light, I broke it
(Please forgive if any blurriness...I didn't use the tripod on all my shots
This project has been on the back burner for a few weeks, but I finally got some time to complete it. I followed the same procedure as the mod by photorob and had pretty good success. The beam wasn't anything to gloat about, though. It was just a medium sized hotspot with no corona/transition from spot to spill. I saw a new McR19 laying in my parts bin, so I once again broke a perfectly fine flashlight :naughty:
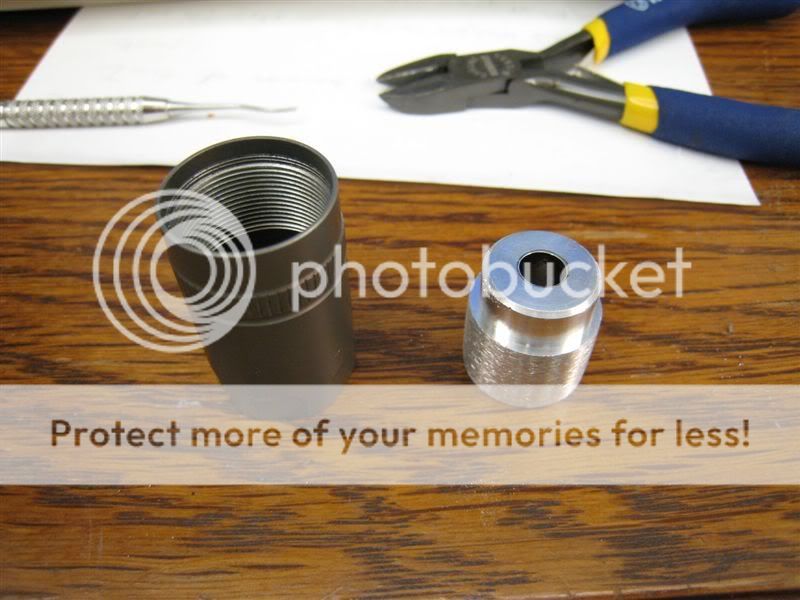
I started sanding down the McR19 until it would fit inside the LR12 host. After an hour, if not more, I finally got it to slide into the host (all done by hand :hairpull::hairpull:
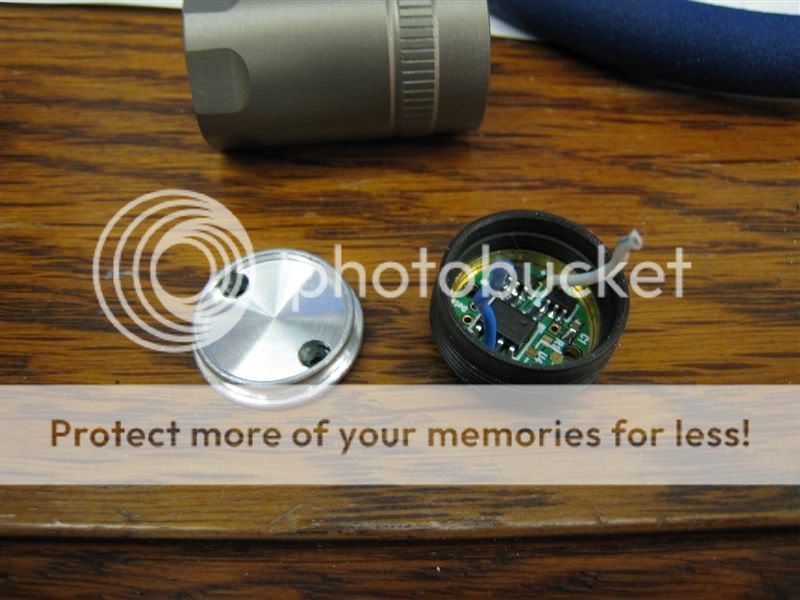
Next, I had to figure out what to do with the electronics. I knew from the beginning that I wanted to use a FluPIC board, so when I was preparing the parts for this mod weeks ago I ordered a Fenix sized FluPIC board. Here is what the LE looks like after disassembly. (already swapped the stock board for a FluPIC)
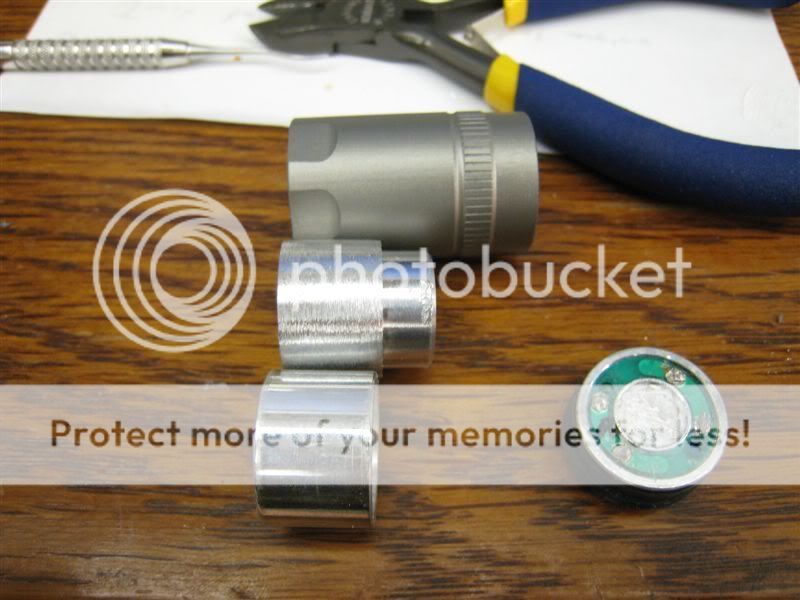
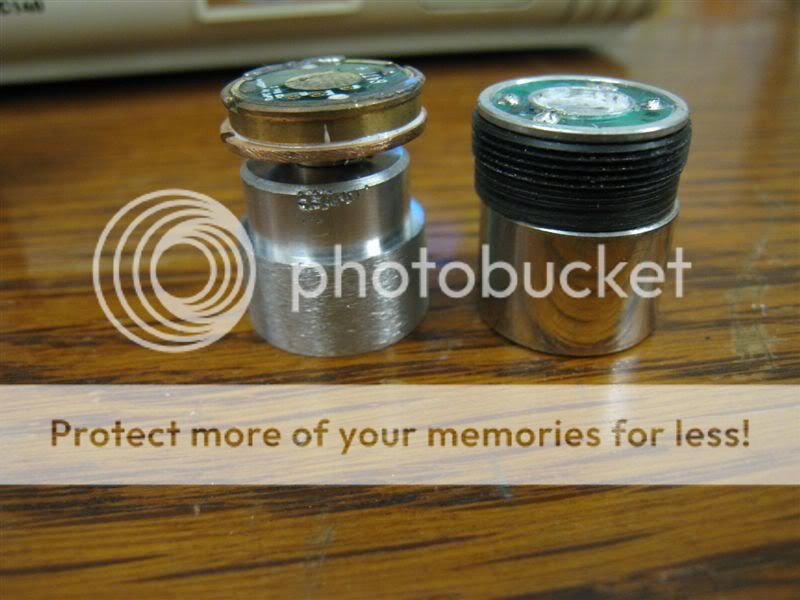
Because I wanted to use the McR19, I needed to conserve as much space as possible so I could use as much of the reflector's length as possible.
Here's showing the different lengths of the stock reflector and the McR19
The stock LE layout takes up way too much space for my application, so it had to go and I had to get creative...
What I ended up doing was getting rid of the plastic part that screws the LE into the head and also the aluminum part that the LED attaches to. In their place, I figured I could put a solid piece of copper and mount the LED directly to it. Now where could I find such a piece of copper?
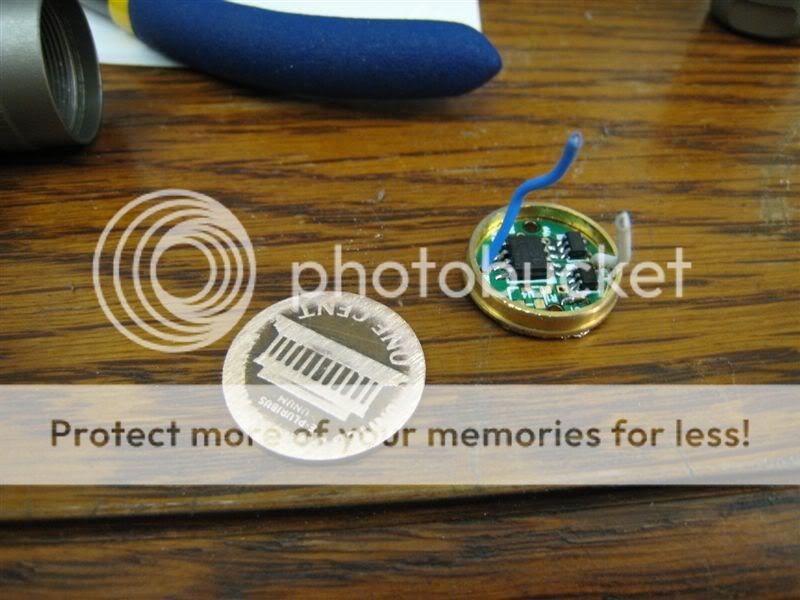
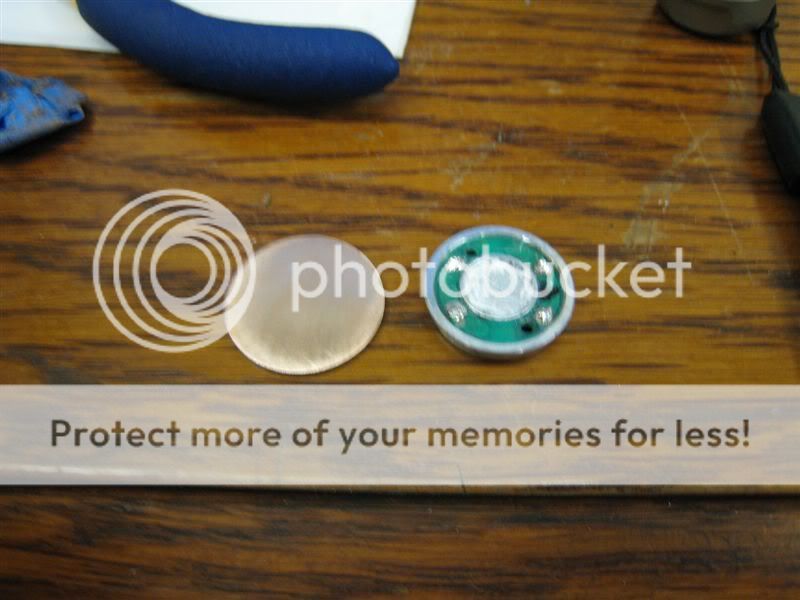
Ahh, of course. Above is a shot mid sanding of the penny. My plan is to AA epoxy the converter board to the bottom of my copper heatsink. The ring that holds the converter board is just about the right height to keep the board off of the backside of the copper penny.
Here is a shot after sanding is completed. the penny is next to the original LED mounting surface.
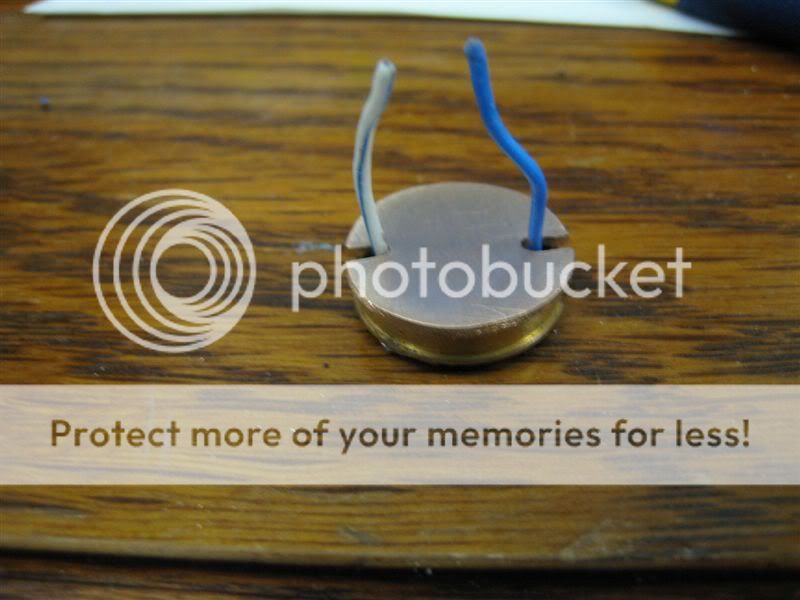
After a little bit more sanding, and cutting two slots for the wires, the following picture shows how I will mount the penny against the converter board.
Here is a shot after I potted the converter board and AA epoxied the LED.
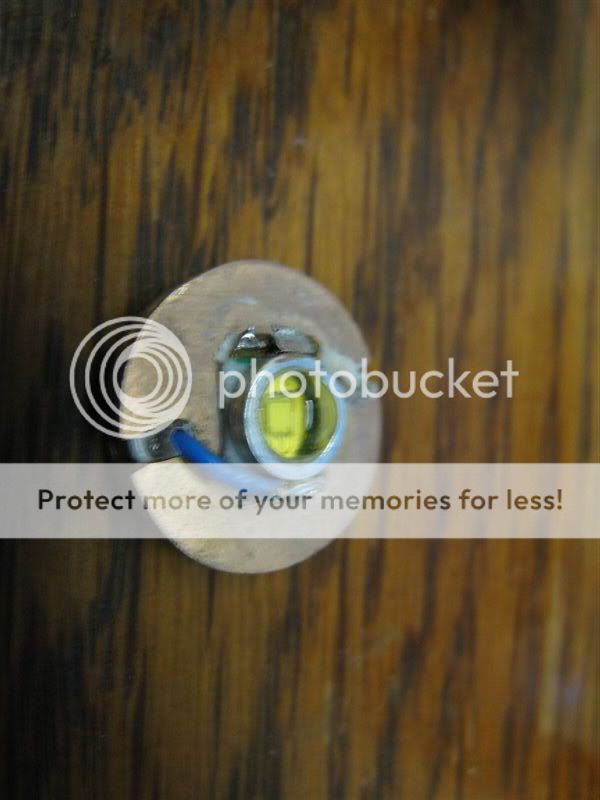
Holding my breath, it works :rock::rock:
Here is a shot showing the difference between the old reflector/sandwich and the new reflector/sandwich. A lot more reflector gets utilized with the new setup.
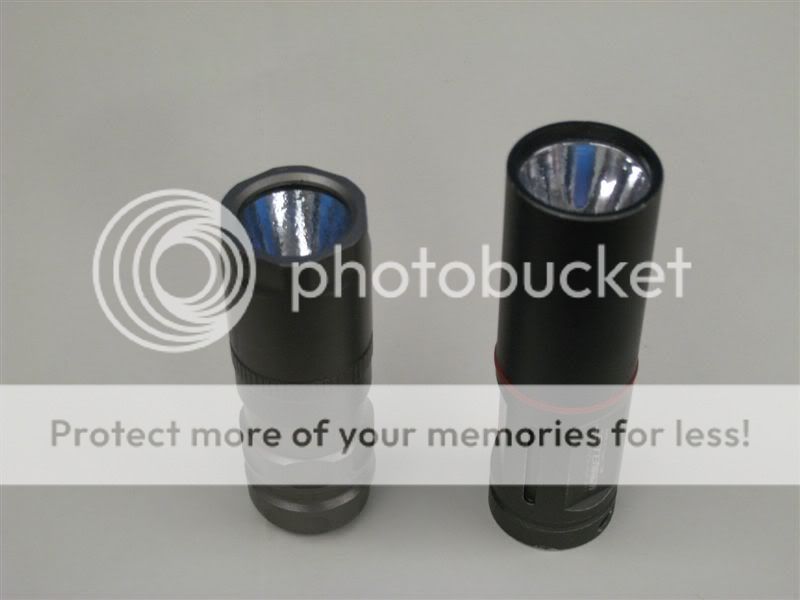
And here are some comparisons between my Jetbeam and the Luxogen. Note how well the HAIII finish on the jetbeam held up to the wear and tear of being on my keychain :twothumbs

(ahem perfectly centered :naughty:
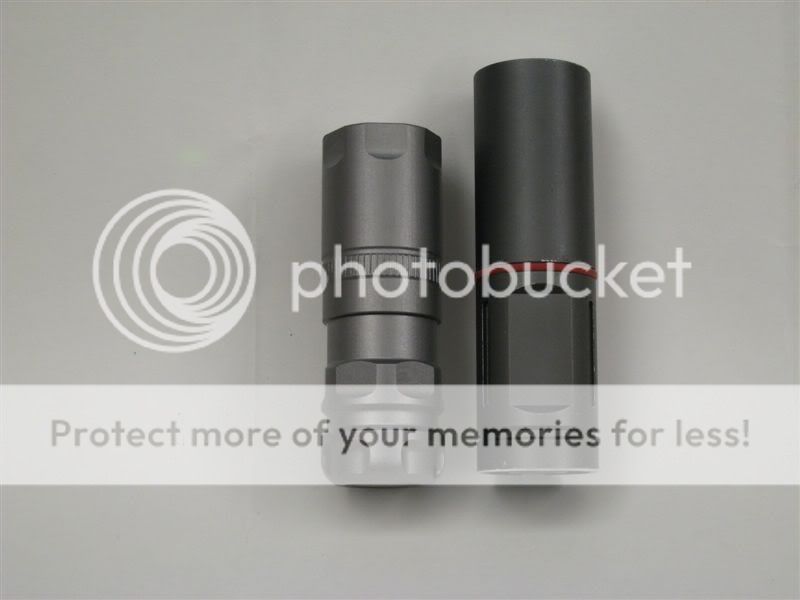
The Jetbeam runs off a RCR123 and the Luxogen runs off a RCR2
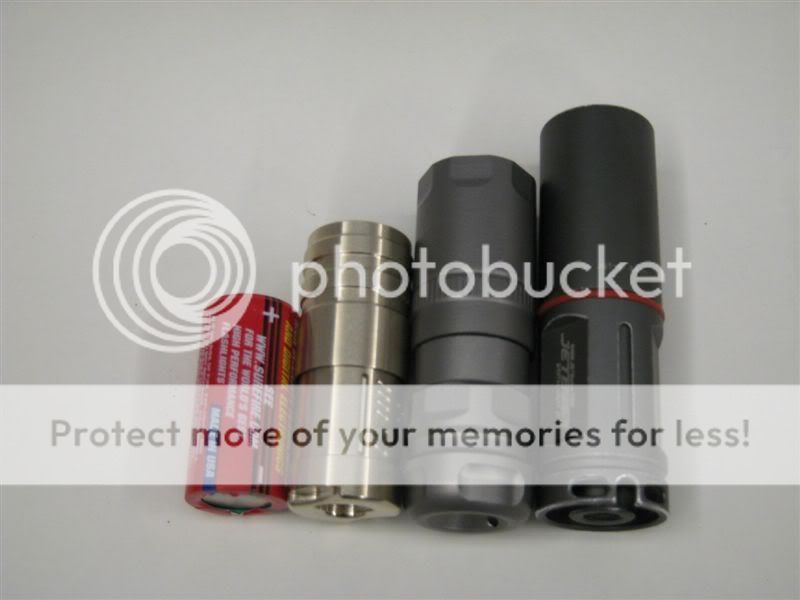
Here's a shot of the size comparison between a CR123, Orb Raw NS, Luxogen, and Jetbeam
The head does not screw down as much as it used to, but it goes over the o-ring, which is what I was aiming for, so it should still be water resistant.
Beamshots!
Here are 2 beamshots against my ceiling. The lights are approximately 9 feet away from the ceiling. FluPIC set to burst. I'm using a Cannon SD800 IS on manual settings.
Here is with exposure set to zero

Here is with exposure set to -2

The jetbeam's spill is actually larger than the Luxogen's, but because the Luxogen dominates it in brightness, you can't see it from the pictures. The FluPIC on burst puts out ~1.2A, and IIRC, the Jetbeam puts also over 1A to the LED
And finally for some Lux readings (FluPIC on burst)
Jetbeam - ~1500 Lux @ 1 meter
Luxogen - ~3400 Lux @ 1 meter
I have had an original Jetbeam MkI w/ cr123 tube on my key chain ever since they became available in the first GB many months ago. This light has served me well but the lack of levels has always bothered me a bit.
Well, after the release of the Cree XR-E LED's and seeing this thread, I started my search for a Luxogen LR12 to mod. I was fortunate to find a new one not long after. The day I received the light, I broke it
(Please forgive if any blurriness...I didn't use the tripod on all my shots
This project has been on the back burner for a few weeks, but I finally got some time to complete it. I followed the same procedure as the mod by photorob and had pretty good success. The beam wasn't anything to gloat about, though. It was just a medium sized hotspot with no corona/transition from spot to spill. I saw a new McR19 laying in my parts bin, so I once again broke a perfectly fine flashlight :naughty:
I started sanding down the McR19 until it would fit inside the LR12 host. After an hour, if not more, I finally got it to slide into the host (all done by hand :hairpull::hairpull:
Next, I had to figure out what to do with the electronics. I knew from the beginning that I wanted to use a FluPIC board, so when I was preparing the parts for this mod weeks ago I ordered a Fenix sized FluPIC board. Here is what the LE looks like after disassembly. (already swapped the stock board for a FluPIC)
Because I wanted to use the McR19, I needed to conserve as much space as possible so I could use as much of the reflector's length as possible.
Here's showing the different lengths of the stock reflector and the McR19
The stock LE layout takes up way too much space for my application, so it had to go and I had to get creative...
What I ended up doing was getting rid of the plastic part that screws the LE into the head and also the aluminum part that the LED attaches to. In their place, I figured I could put a solid piece of copper and mount the LED directly to it. Now where could I find such a piece of copper?
Ahh, of course. Above is a shot mid sanding of the penny. My plan is to AA epoxy the converter board to the bottom of my copper heatsink. The ring that holds the converter board is just about the right height to keep the board off of the backside of the copper penny.
Here is a shot after sanding is completed. the penny is next to the original LED mounting surface.
After a little bit more sanding, and cutting two slots for the wires, the following picture shows how I will mount the penny against the converter board.
Here is a shot after I potted the converter board and AA epoxied the LED.
Holding my breath, it works :rock::rock:
Here is a shot showing the difference between the old reflector/sandwich and the new reflector/sandwich. A lot more reflector gets utilized with the new setup.
And here are some comparisons between my Jetbeam and the Luxogen. Note how well the HAIII finish on the jetbeam held up to the wear and tear of being on my keychain :twothumbs
(ahem perfectly centered :naughty:
The Jetbeam runs off a RCR123 and the Luxogen runs off a RCR2
Here's a shot of the size comparison between a CR123, Orb Raw NS, Luxogen, and Jetbeam
The head does not screw down as much as it used to, but it goes over the o-ring, which is what I was aiming for, so it should still be water resistant.
Beamshots!
Here are 2 beamshots against my ceiling. The lights are approximately 9 feet away from the ceiling. FluPIC set to burst. I'm using a Cannon SD800 IS on manual settings.
Here is with exposure set to zero
Here is with exposure set to -2
The jetbeam's spill is actually larger than the Luxogen's, but because the Luxogen dominates it in brightness, you can't see it from the pictures. The FluPIC on burst puts out ~1.2A, and IIRC, the Jetbeam puts also over 1A to the LED
And finally for some Lux readings (FluPIC on burst)
Jetbeam - ~1500 Lux @ 1 meter
Luxogen - ~3400 Lux @ 1 meter
Last edited:
")