
Everett
Newly Enlightened
- Joined
- Sep 30, 2004
- Messages
- 177
Forgive me if this has been done before, but I couldn't find it anywhere. This is how I turned my G2 into an A2 Aviator-type light.
The SF G2 is a perfect mod host! There is so much room in the head and the parts up there don't need to move, but can if they want to. I tend to avoid incandescent lights, but I got the G2 because I like the package and the price. To ease my nerves about the bulb burning when I might need it, and to add more functionality, I added a set of 5mm LED's in the style of the A2 Aviator. The A2's 3 LED's set into the reflector is such an awesome design, which I think most people here agree with; I wanted to have the A2's functionality for cheap.
All I have here are pictures of the finished product because I didn't have my camera during the process, but I'll explain it.
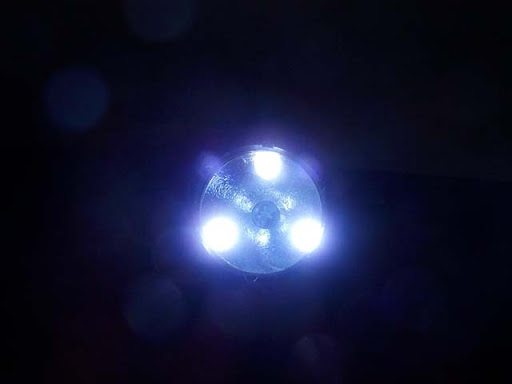
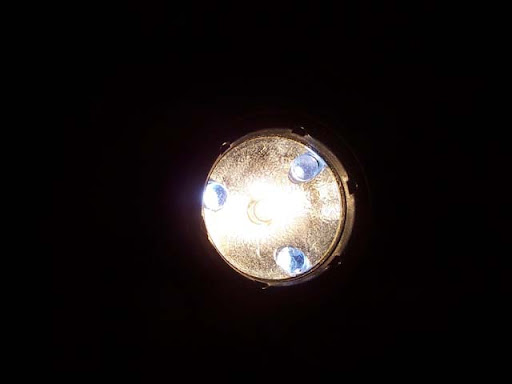
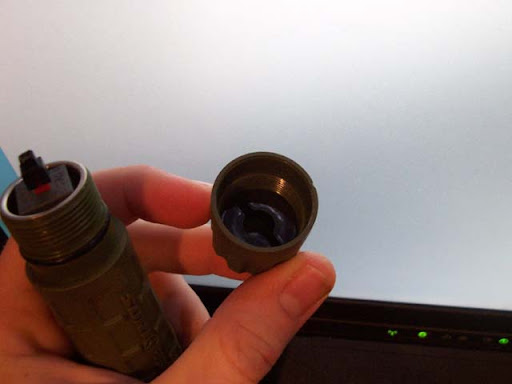
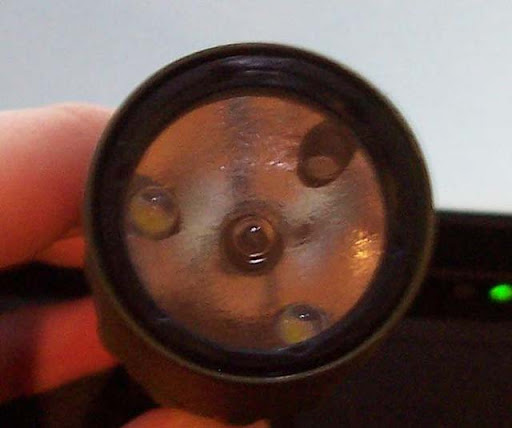
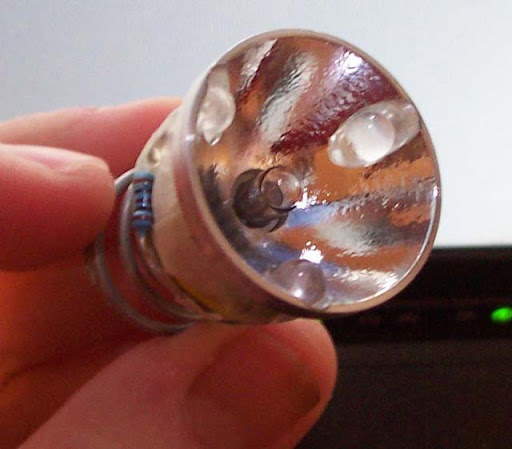
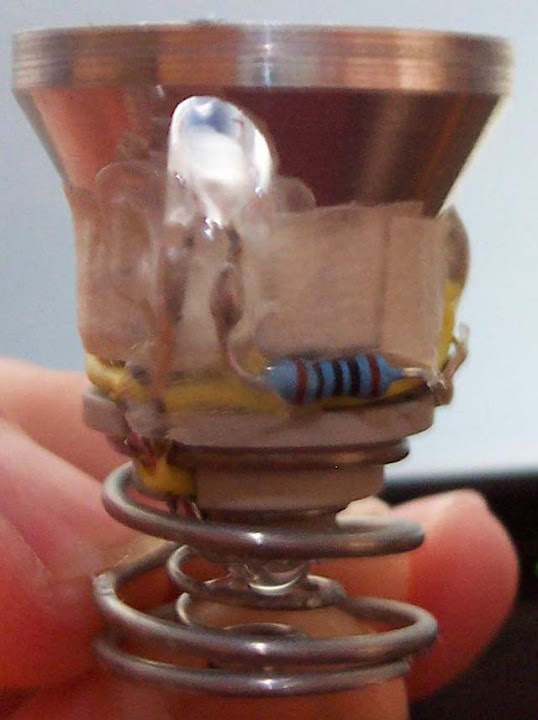
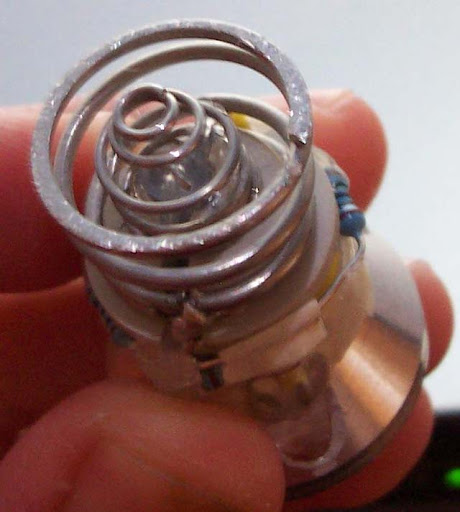
First the holes must be drilled. I chose to use three LED's like the A2, but four could have fit. Drilling through the reflector is tough because of the angle, so one needs to start with the smallest bit available and step up the bit size one by one until 5mm. Put the bulb assembly in a vise and then carefully drill straight down so that the hole is equidistant from the edge of the reflector and the un-sloped portion. Once the holes are drilled, put the LED's in and wire them up. I used a 100 ohm resistor for each, and wired them up to the positive and negative springs. The resistors can be tucked into the groove that runs around the assembly below the aluminum. Use tape to insulate everything from the aluminum (although it is not connected to anything), and glue in place. Use a dremel or a file to angle off the backs of the LED's so they are close to being flush with the aluminum (but they need not be completely flush). To allow mode switching, disconnect the bulb's lead from the inner positive spring. Crimp wire such as a discarded lead onto it (it will not take solder) and bend the lead up to a height you like; mess around with screwing down the head to see where you want it. Then, put hot glue down in the cavity and up into a mound that will support the wire. This can be seen in some of the pictures. The bulb is not connected to the plus spring, unless the spring compresses enough to contact the wire that is sitting in the middle. This makes the bulb able to be switched on by tightening the head, while the LED's are always on. As a final touch, add a clickie switch to the tail and remove all the parts in the tailcap except the rubber cover and retaining ring. Now the light can be turned on with the clickie in back, and set to LED's only or bulb and LED's by twisting the head. The light is still sealed and as waterproof as it was when it left the factory.
I call it the G2A Nitrolon. Pics:

The SF G2 is a perfect mod host! There is so much room in the head and the parts up there don't need to move, but can if they want to. I tend to avoid incandescent lights, but I got the G2 because I like the package and the price. To ease my nerves about the bulb burning when I might need it, and to add more functionality, I added a set of 5mm LED's in the style of the A2 Aviator. The A2's 3 LED's set into the reflector is such an awesome design, which I think most people here agree with; I wanted to have the A2's functionality for cheap.
All I have here are pictures of the finished product because I didn't have my camera during the process, but I'll explain it.
First the holes must be drilled. I chose to use three LED's like the A2, but four could have fit. Drilling through the reflector is tough because of the angle, so one needs to start with the smallest bit available and step up the bit size one by one until 5mm. Put the bulb assembly in a vise and then carefully drill straight down so that the hole is equidistant from the edge of the reflector and the un-sloped portion. Once the holes are drilled, put the LED's in and wire them up. I used a 100 ohm resistor for each, and wired them up to the positive and negative springs. The resistors can be tucked into the groove that runs around the assembly below the aluminum. Use tape to insulate everything from the aluminum (although it is not connected to anything), and glue in place. Use a dremel or a file to angle off the backs of the LED's so they are close to being flush with the aluminum (but they need not be completely flush). To allow mode switching, disconnect the bulb's lead from the inner positive spring. Crimp wire such as a discarded lead onto it (it will not take solder) and bend the lead up to a height you like; mess around with screwing down the head to see where you want it. Then, put hot glue down in the cavity and up into a mound that will support the wire. This can be seen in some of the pictures. The bulb is not connected to the plus spring, unless the spring compresses enough to contact the wire that is sitting in the middle. This makes the bulb able to be switched on by tightening the head, while the LED's are always on. As a final touch, add a clickie switch to the tail and remove all the parts in the tailcap except the rubber cover and retaining ring. Now the light can be turned on with the clickie in back, and set to LED's only or bulb and LED's by twisting the head. The light is still sealed and as waterproof as it was when it left the factory.
I call it the G2A Nitrolon. Pics:
Last edited:
