Help using acrtic silver epoxy

Lighthouse one

Flashlight Enthusiast
Joined
May 4, 2006
Messages
1,237
Location
Ephrata, Pa
I've used the 2 part epoxy a number of times, but I notice that it's more rubber when dried , rather than like a hard epoxy. Think i'm getting the mixture wrong? I just opened my second set...same results. I also can't get a seoul led to mount without shorting out. I've done several before- no problem, but I have a light now that I'm trying to convert, and unless I put on a real thick coat- I still read a connection from the positive to ground.
Anyone use a different product that they can recommend?
 

Gryloc

Enlightened
Joined
Jan 20, 2006
Messages
596
Location
Cincinnati, Ohio & North Lewisburg, Ohio
Wait, do you want isolation of the slug to the heatsink, or not? I am a little confused by what you said in your post. If you want to isolate the slug, then Arctic Silver may not be for you. Arctic Alumina epoxy is better for isolating. Check this out:

https://www.candlepowerforums.com/threads/157064

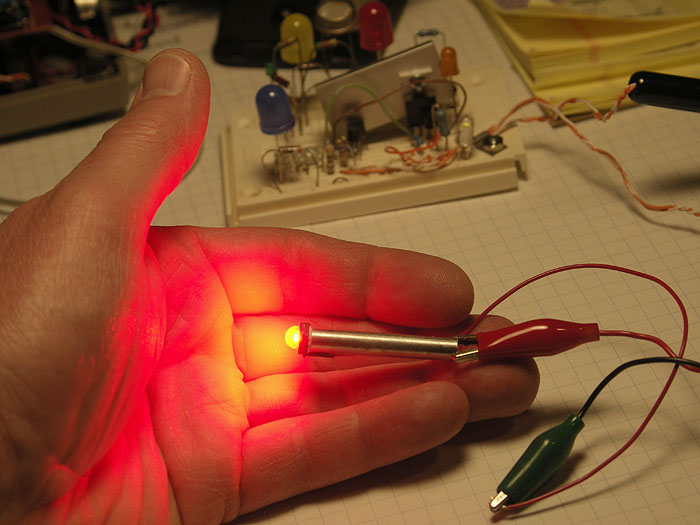
Thanks again NYLYTE! I found this a long time ago and it works great for the Seoul P4 emitter, as well as any other high-flux LED. You do not get a thick layer of epoxy under your emitter that hurts performance, but everything stays isolated. No more shorting out. It is pretty easy to do, and all you have to do is raid the kitchen or the supermarket or deli to find the suitable plastic. I used this process to epoxy 4 of the Seoul P4 emitters to the same aluminum heatsink.

Now, if you need contact between the positive and the heatsink, then you can solder the slug to the heatsink (if it is copper or it is copper coated or similar). The slug of the Seoul P4 is electrically connected to the positive lead (internally). If you cannot solder anything, then use whatever epoxy as thin as possible and find a way to hook the positive lead to the heatsink ground (wire, or some metal contact). I am not sure what else to tell you.

I have always noticed my AA epoxy to be like very hard rubber, almost plasticy. It shouldn't be soft and gummy, but you may be able to leave dents in it with your fingernail after it cures. My stuff works fine and it holds up alright, but I am never quite sure how hard it really supposed to be, either. Good luck!

-Tony
 

VidPro

Flashlight Enthusiast
Joined
Apr 7, 2004
Messages
5,441
Location
Lost In Space
I have always noticed my AA epoxy to be like very hard rubber, almost plasticy. It shouldn't be soft and gummy, but you may be able to leave dents in it with your fingernail after it cures. My stuff works fine and it holds up alright, but I am never quite sure how hard it really supposed to be, either. Good luck!

-Tony

me too, it stays a bit softer because of the special Oils in it, which "wet" surfaces better as opposed to being in any way porus. (think of oil fried foods) . after about a Year it gets harder .

because its mixed in very small quanities, the 50-50 mix is more critical, and can make it take longer to cure, if the mix wasnt perfect.
i always make 2 even sized blobs, before mixing them together, as it is impossible to tell via how much came out of the end of the tube itself.

Heat cures all this stuff faster, Cold cures it slower. one time i put something in the freezer to get more working time.
 
Last edited:

Ra

Flashlight Enthusiast
Joined
Jul 15, 2004
Messages
1,003
Location
The Netherlands
The epoxy should be a bit 'rubberish'.. If you use a different material (then the emitter-slug) as a heatsink, the epoxy must overcome the difference in thermal expansion.


Regards,


Ra.
 

Lighthouse one

Flashlight Enthusiast
Joined
May 4, 2006
Messages
1,237
Location
Ephrata, Pa
Thanks guys for the suggestions....
Nano...How is using an epoxy with the Silver 5 isolating the slug? Where are you putting what?
I'll have to look for the alumina...but I just got 2 sets of the arctic silver.

After sitting all night my slug is behaving now...a bit too thick, but the circuit is only drawing 450 ma....so It's not throwing too much heat. It's the last light I wanted to mod, but couldn't get apart until I bought a strap wrench, and boiled it 10 minutes.
100 meter waterproof design...just needed a seoul to improve it...now it rocks!

Thanks again
 

jeffosborne

Enlightened
Joined
May 15, 2007
Messages
252
Location
southern Indiana
my own method is...

My method is to use a thin layer of ordinary fingernail polish (clear) on the slug or LED, and give it a few minutes to dry. This prevents any shorts.

I like to use Arctic Alumina epoxy, but Artic Silver is non-conductive, too. And the set time is many hours, not a few minutes for sure. It eventually becomes plenty stiff enough, not quite as hard as standard epoxy.

Once I put a red Luxeon K2 on an aluminum post to make a decorative doorknob light. I did not use the fingernail polish, and sure enough the anode did touch the post beneath. So I just used it as the 'wire' down to my circuit:
LED_red%20luxeon_01.jpg


Here's the rear side of the finished light:
Red%20LED%20Doorknob_01.jpg


Cheers!
Jeff
 

silversinksam

Newly Enlightened
Joined
Aug 5, 2007
Messages
14
If your concerned about using the Arctic Silver Adhesive, take jeffosborne's advise and simply use Arctic Alumina Adhesive.

Arctic Silver Adhesive is not conductive, but it is slightly capacitive and Arctic Alumina Adhesive is not conductive nor capacitive.

Interesting timing, just today I was helping out a buddy that bought one of those DX C2's, after looking it over I determined the substance they used was some sort of white glue, (who the heck knows what it really is), so I used a fine dremmel brush and removed that craptastic glue and retrofitted it with Alumina Adhesive about an hour ago. Hey the light may fail, but it won't fail because it wasn't using the appropriate thermal paste :grin2:


Ultrafire_C2.jpg


PS, I know a little bit about thermal interface materials :whistle:


Take care,

Silversinksam\ official silver paste taster
 

yellow

Flashlight Enthusiast
Joined
Oct 31, 2002
Messages
4,634
Location
Baden.at
IIRC Wayne at Sandwich Shoppe once tested Arctic and similar glues to ordinary Epoxy and, when used thin (which is best and should not be done other way), there was no difference at all concerning heat transfer.
--> so skip the unnecessary and expensive Arctic things and use the better method:

thermal paste on the slug
place the emitter,
press in place and
check for correct position (not only it makes way better heat transfer, its some kind of "removable" glue-kind).
When emitter sits right,
use epoxy glue around the emitter/Star to fix it
(btw: now placing it on the room heater and the expoxy finishs good, even not perfectly mied or older one)

If Seoul, try to get Your heatsink anodized. Most any machine shop will do this for a cup of coffee or similar, they just place that part into a running bath. Thats better than any other way to isolate the slug (because all the other ways reduce heat transfer)
 

silversinksam

Newly Enlightened
Joined
Aug 5, 2007
Messages
14
IIRC Wayne at Sandwich Shoppe once tested Arctic and similar glues to ordinary Epoxy and, when used thin (which is best and should not be done other way), there was no difference at all concerning heat transfer.
--> so skip the unnecessary and expensive Arctic things and use the better method:


With all due respect, you muct have misread his findings.
Even a thin layer of non thermal epoxy ~aka (epoxy bond line thickness) will act as an insulator and not a thermal conduit and not perform anywhere close to a thermal epoxy in transfering heat.
That's a fact.... :candle:
 
Top