ARRGH! KL3 Gen 2 dis- and re-assembly!!!

ErickThakrar

Enlightened
Joined
Apr 11, 2004
Messages
581
Location
New Mexico
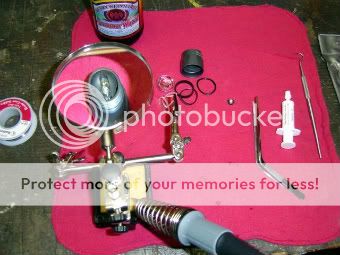
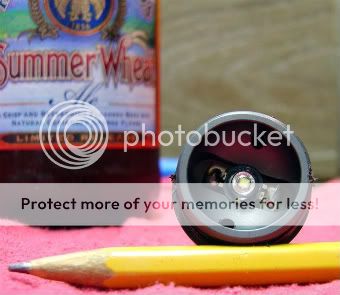
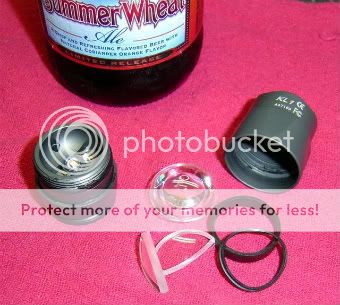
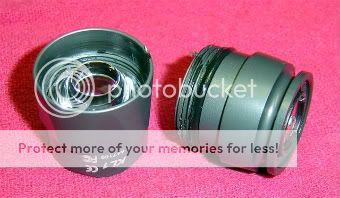
So I managed to take the head apart on a KL3 Gen 2. But now I can't figure out how to get the lens and o-rings back in, in the right order. I'm about ready to shoot myself out of frustration over this!
I've searched on several different things, but it seems like NOBODY has posted pictures of how to take these damn things apart or put them back together again.
Somebody please tell me there's an easy way to do this that I've just missed!!!!
 

shinbone

Newly Enlightened
Joined
Aug 28, 2006
Messages
86
Location
Oregon
Work on it as two separate groups. Start with the main KL3 body and first add the TIR lens, then the thicker plastic ring which makes up the space difference between the TIR lens and the top edge of the KL3 body.

In the lens retaining bezel, first insert the small and thin plastic ring, then the glass lens, then the flat rubber washer. The rubber washer should have enough friction fit to retain the lens long enough to allow the group to be inverted and threaded onto the main KL3 body.
 

nanotech17

Flashlight Enthusiast
Joined
Jul 31, 2006
Messages
2,150
Location
N 03°13.884° / E 101°29.329°
i have some photos to share though it's not mine,i hope the owner doesn't mine me posting it here

KLR1h.jpg

KLR1g.jpg

KLR1f.jpg

KLR1e.jpg

KLR1d.jpg

KLR1c.jpg

KL1Rb.jpg

KL1Ra.jpg

KL1R.jpg
KLR1k.jpg
 

ErickThakrar

Enlightened
Joined
Apr 11, 2004
Messages
581
Location
New Mexico
Interesting. There are some similarities, but they're not identical to the KL3. I may take some shots and show what it looks like on the inside since I haven't really run into any pictures of that yet.
 

shinbone

Newly Enlightened
Joined
Aug 28, 2006
Messages
86
Location
Oregon
No Worries Erick. It's a bit like trying to put together a puzzle with no original image. Happy to help you out.

Did you go as far as trying to separate the lower half of the head from the mid section?
 

ErickThakrar

Enlightened
Joined
Apr 11, 2004
Messages
581
Location
New Mexico
Well, I did take out the four screws that hold in the plastic "post" that goes into the battery tube. But I was reluctant to pull it out too much, in case I tore the wires out. Is that the part you're talking about? I was wondering where the converter board is located in this thing. Hell, I don't even know what kind of voltages I can get away with feeding it.
 

shinbone

Newly Enlightened
Joined
Aug 28, 2006
Messages
86
Location
Oregon
The converter board is located in the plastic tower that is held on with the 4 screws. The board sits very close to the battery end of the plastic tower. Two pairs of wires are connected to it; 2 above to the emitter, 2 below to the battery contacts. I'm not sure of the low voltage limit of the head, but the max is right around 9VDC (such as a C3 or 9P 3-cell light). The output doesn't improve, you simply get a longer run time.

I'd love to know what kind of tools you used to separate the metal base of the head to gain access to the 4 screws without damage. With my KL3 I ultimately ended up applying too much heat to the head and melted the plastic part where it made contact with the heat-sink and screws.
 
Last edited:

ErickThakrar

Enlightened
Joined
Apr 11, 2004
Messages
581
Location
New Mexico
I actually didn't have to use any tools for that part. I just unscrewed it. The bezel on the gripping hand, I had to use two strap wrenches for. That was really hard on there, but I managed to get it off without having to heat it up. No threadlock evident on the threads that connect the bottom part of the head to the top.
 

ErickThakrar

Enlightened
Joined
Apr 11, 2004
Messages
581
Location
New Mexico
Ok, I took some pictures of the KL3 Gen 2 head. These may well be some of the first shots on here of what it looks like taken apart. I certainly haven't been able to find any :D


First, the constituent parts.
kl3parts.JPG


And here's a shot inside the bezel, showing the LED in its pocket. You can see the four screws that hold on the post.
kl3inside.JPG
 
Last edited:

ErickThakrar

Enlightened
Joined
Apr 11, 2004
Messages
581
Location
New Mexico
Oook, so I replaced the LED with a Seoul P4 U-bin from the Shoppe. I had to go in with a carbide bit and widen out the pocket just a little, as it was just a tiny bit too snug. But it fits, it lights up *phew!* and it's definitely brighter than before. Getting the old LED out was a pain though, as I ended up basically tearing it out in pieces. C'est la guerre...
 

Ctechlite

Enlightened
Joined
Dec 7, 2004
Messages
750
Location
Philadelphia, PA
HOw the heck did you get the bottom part off?

And I don't know of any reflectors that drop in. The McR27L is a close fit, but it is just a bit too short to push against the glass and hold it in place. I think a McR38 could be cut down to fit but havent' tried it because I can't get th bottom piece off.
 

ErickThakrar

Enlightened
Joined
Apr 11, 2004
Messages
581
Location
New Mexico
The bottom part was the easiest part to get off! Didn't seem to have any thread-lock on it at all and just unscrewed by hand. The front was much harder and took some real work with a couple of strap wrenches.
 

Ctechlite

Enlightened
Joined
Dec 7, 2004
Messages
750
Location
Philadelphia, PA
Hah! Mine is the complete opposite. Top bezel came off easily and the bottom is fubar from my attempts, i'm about to go grind some flats into it and try with a regular wrench :devil:
 

ErickThakrar

Enlightened
Joined
Apr 11, 2004
Messages
581
Location
New Mexico
Well, looks like an IMS 27 is a pretty close drop-in. I stuck one of those in my KL3 after I remembered I had one laying around. Couple of fat o-rings to help keep it centered and presto. Waaaaay more useful beam profile! And it still throws!
 
Top