
PhotonFanatic
Flashlight Enthusiast
●=●=● Tasklight Two -- A CR2 worklight/flashlight ●=●=●
SOLD OUT: Tasklight Two
Sorry, but these are no longer available.
In stock for immediate delivery.
This was originally made as a custom light for jch79, who wanted a multi-level light to use while soldering, or while assembling lights. Now, I've recreated it with a few variations and produced a small run of 50 pieces.
SPECS:

Price: $160.00, delivered worldwide.
CONUS shipping includes Delivery Confirmation, but no insurance. Please contact me if you need insurance, or other forms of delivery.
PayPal cash to: paycashpal (at) photonfanatic.com
or
PayPal credit card to: fanatic (at) photonfanatic.com
Thanks.
+++++++++++++
Mini FluPIC Modes
+++++++++++++
The Mini FluPIC has 5 modes. Each mode is arrived at by turning the light on that many times. For example, to get to mode 1, just turn the
light on. To get to mode 3, turn the light on-off-on-off-on (i.e. 3rd on = mode 3).
The PIC does have memory--it will restart in whichever mode that you last used, i.e., modes 1 through 3.
Mode 1 is preset to burst mode (approx 650 ma)
Mode 2 is user settable to any of about 10 different levels
Mode 3 is preset to low
Mode 4 is null/blank/not used
Mode 5 is used to set the level of Mode 2 - turn the light on 5 times (no light will show for the 4th on). The light level will ramp all the
way up in steps and then ramp down. When the brightness is at the level you want to set for Mode 2, turn the light off and leave it off
for a couple of seconds. Mode 2 is now set at the level it was when you turned the light off.
Additional Notes:
If you go into Mode 4 and just stay there, the PIC will then move into burst mode after a couple of seconds.
The mini FluPIC will only start in one of the first three modes--if the last adjustment you did was to set the user settable level, i.e., Mode 2,
then the light will resume in Mode 1.
SOLD OUT: Tasklight Two
Sorry, but these are no longer available.
In stock for immediate delivery.
This was originally made as a custom light for jch79, who wanted a multi-level light to use while soldering, or while assembling lights. Now, I've recreated it with a few variations and produced a small run of 50 pieces.
SPECS:
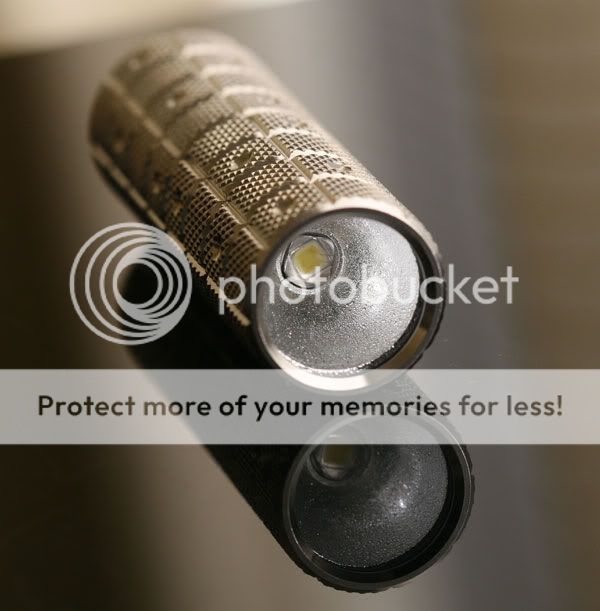
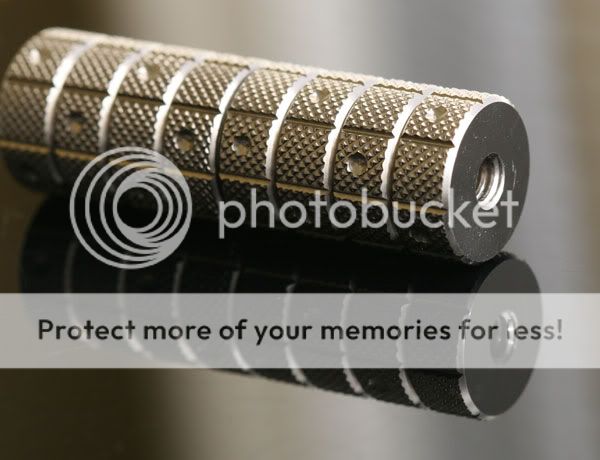
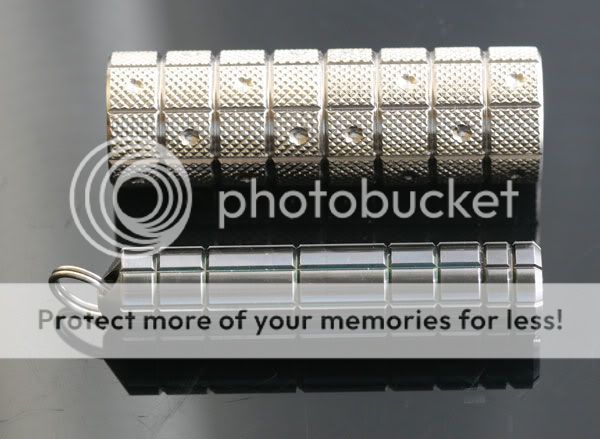
- Twisty--twist the head to turn it on or off. Battery rattle is controlled with silicone washers (installed).
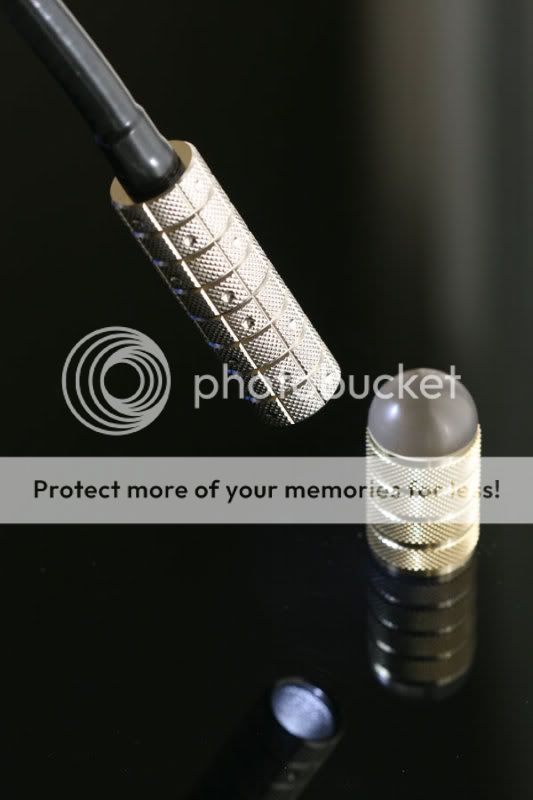
- A 1/4" x 20 tpi socket is built into the tail of the light for use with standard tripod screws, or adjustable arms.
- Mini FluPIC driver provides three brightness levels, plus two other modes--one for setting one of the brightness levels and the other is null.
- Powered by either a RCR2 or a primary CR2. The light is shipped with a primary battery installed. For rechargeable CR2's, I recommend AW's offerings.
- The lens is a 1.5mm mineral glass lens.
- The Khatod reflector is 20mm in diameter and stippled.
- The LED is a Seoul P4, bin U2SV0H
- Length is 2.47", diameter is .80" and the weight is 1.4 ounces.
- Body is 7075AL that has been electroless nickel plated.
- Body styling is cut knurling that was polished prior to EN plating, so it is very smooth to the touch.
Price: $160.00, delivered worldwide.
CONUS shipping includes Delivery Confirmation, but no insurance. Please contact me if you need insurance, or other forms of delivery.
PayPal cash to: paycashpal (at) photonfanatic.com
or
PayPal credit card to: fanatic (at) photonfanatic.com
Thanks.
+++++++++++++
Mini FluPIC Modes
+++++++++++++
The Mini FluPIC has 5 modes. Each mode is arrived at by turning the light on that many times. For example, to get to mode 1, just turn the
light on. To get to mode 3, turn the light on-off-on-off-on (i.e. 3rd on = mode 3).
The PIC does have memory--it will restart in whichever mode that you last used, i.e., modes 1 through 3.
Mode 1 is preset to burst mode (approx 650 ma)
Mode 2 is user settable to any of about 10 different levels
Mode 3 is preset to low
Mode 4 is null/blank/not used
Mode 5 is used to set the level of Mode 2 - turn the light on 5 times (no light will show for the 4th on). The light level will ramp all the
way up in steps and then ramp down. When the brightness is at the level you want to set for Mode 2, turn the light off and leave it off
for a couple of seconds. Mode 2 is now set at the level it was when you turned the light off.
Additional Notes:
If you go into Mode 4 and just stay there, the PIC will then move into burst mode after a couple of seconds.
The mini FluPIC will only start in one of the first three modes--if the last adjustment you did was to set the user settable level, i.e., Mode 2,
then the light will resume in Mode 1.
Last edited:


