SF 8AX Commander rechargable - LED upgrade???

Bushman5

Enlightened
Joined
Sep 8, 2007
Messages
977
SF 8AX Commander rechargable - LED upgrade??? SUCCESS!

Well, once infected with the flashlight virus, it seems it never leaves. Here i am, back again :sick:

I bought a SF 8aX Commander rechargeable. The "claimed" 110 lumens is pretty freaking pathetic, weak and yellow. my $2 Dorcy is brighter, whiter and to be honest the runtime is longer. Not really impressed with the 8AX except for the build. Its an 'ok' light YMMV. So it seems like a good candidate for a mod

So..... i want to ditch the horrible yellow incan bulb and the nicad battery and got with Li-Ion and a LED , prefer 200+ lumens.

is this light mod-able? suggestions?

:green: EDIT sorry sorry, this should be in flashlight mod section....
 
Last edited:

yellow

Flashlight Enthusiast
Joined
Oct 31, 2002
Messages
4,634
Location
Baden.at
Li-Ion: makes no sense, as You gain nothing (and waste space inside the body)

You could build Yourself a good led insert
(if I had not shorted the led with the reflector while testing and thus killed the driver, the mod would be in modded lights already) :rolleyes:
but that is a difficult job,
or
You could buy a led insert from DX, widen the hole in the head a bit, (possibly) bend the springs a bit to fit the battery contacts --> done

Sure You have to be lucky to get a good working insert, but for 10,-- ....
(I have a few, some work good, some bad. The single mode ones were better overall)
 

Policetacteam

Enlightened
Joined
Jun 20, 2006
Messages
420
Location
Iowa
Brother I hope there is an answer to your question...I have been waiting a long time!! The bulb on my 8AX just went out two days ago and I finally decided to just shelf it!!! The light is the perfect size for duty...not too small but not overly big. The minus is it sucks!!! The light output is pathetic and very yellow...even with custom batteries! I decided to go with an EagleTac. By the time I pay for a new bulb and shipping I just spent 1/2 of the needed money for a new EagleTac light. I hate to shelf a Surefire but it is not that impressive of a light! I'm curious about any mods but I have only seen one from Beastmaster. I PM'd him but never heard anything back so I will assume he no longer does any modding for the 8AX. Good luck!
 

Justin Case

Flashlight Enthusiast
Joined
Mar 19, 2008
Messages
3,797
For an 8NX, it looks like it is fairly straightforward to make an LED drop-in. Comparing to Beastmaster's approach, the difference is that I propose to modify slightly the four centering ribs inside of the collar that connects the bezel to the body. I don't have an 8AX, so I can't say how I might build a drop-in for that light. It is my understanding from Beastmaster's posting on his LED mod that the 8AX uses a centering ring in the bezel, not ribs in the collar.

For the 8NX, all you have to do is start with a standard 6P LED drop-in.

First, you have to file back the ribs so that the drop-in fits snugly and is still centered. At the cylindrical section of the drop-in's reflector body (near the pill), I measure 0.856" for a DX6090, 0.849" for a DX11836, and 0.867" for a KD2363. An X80 measures 0.765" at the SureFire foil label. Thus, it looks like you have to take off only about 1mm-1.3mm from each rib, depending on 6P drop-in.

If you ever want to go back to the standard X80 lamp, you probably can wrap some tape around the lamp where the foil SureFire label is to increase the diameter of the reflector by the 1mm-1.3mm that you removed from the ribs.

Next, you can cannibalize the outer spring from a dead X80 and solder it to the ground trace on the drop-in's driver board. You'll probably have to cut and shape the spring to the appropriate length. Unfortunately, the regular outer spring that comes with the usual 6P drop-ins is too large in diameter to make contact with the ground terminal at the top of the B90 battery stick.

I think that's it.

As proof of concept, I took one of my 6P drop-ins and angled it such that the center spring touched the center terminal of the B90 battery stick. I then managed to touch the edge of the pill to the negative terminal ring of the B90 and the drop-in lit up nicely.

If I had an extra X80 outer spring, I'd probably do the mod to my own 8NX.
 
Last edited:

Justin Case

Flashlight Enthusiast
Joined
Mar 19, 2008
Messages
3,797
Here are some photos of the 8NX.

This one shows the light separated into its components. L-R: body tube, collar, bezel (a red filter is fitted over the bezel). The X80 lamp assembly is not shown here.
SureFire8NXdisassembled.jpg


Here is the X80 sitting in the collar.
SureFire8NXcollarwithX80lampinserte.jpg


Here is the X80 from the other end of the collar, showing the outer spring.
SureFire8NXbezelandcollarbottomview.jpg


Here is a shot of the top of the B90 battery stick in the 8NX body tube. The center nipple is +. The shiny ring just inside of the blue wrapper is -.
SureFire8NXbodytubetopviewshowingB9.jpg


This is a top view of the collar showing the centering ribs.
SureFire8NXcollarcenteringribstopvi.jpg


Here is an angled view of the ribs.
SureFire8NXcollarcenteringribstopan.jpg


Finally, a comparison of the X80 lamp to a Deal Extreme 11836 Cree R2 drop-in for a 6P. As I described in my earlier post, the diameter of the DX11836 at the cylindrical section (basically, where the "R2" foil label is) is about 1/10" wider vs the diameter of the X80 at the SureFire foil label. This is where the centering ribs contact the X80. Thus, if you carefully remove some of the material from the ribs (it's all plastic, so removing material is easy), you can fit a standard 6P drop-in. Then the remaining challenge is to replace the outer spring of the DX11836 with a spring that matches the diameter of the X80's outer spring and adjust it for length. From this photo, it looks like you might have to clip off about 2 turns if you use a cannibalized outer spring from a dead X80. Fortunately, this outer spring seems to match the diameter of the 17mm driver board used in the DX11836 pill, and all you have to do is solder the spring to the board's ground trace. You can already see some globs of solder where the board's ground trace is soldered to the brass pill. This outer spring has to contact the negative terminal of the B90 battery stick, which is shown above. The small center spring has to make contact with the center nipple of the B90. This photo also shows that the 6P drop-in reflector is slightly smaller in diameter at the rim vs. the X80. Thus, the rim of the drop-in will sit on the inside face of the bezel's window. But I don't see that as a major issue.
SureFireX80lampandDX11836drop-in.jpg
 
Last edited:

Chrontius

Flashlight Enthusiast
Joined
Oct 11, 2007
Messages
2,150
Location
Orlando, FL
I've been thinking about drilling out my old X80 and putting a P7 in direct-drive in there, but I don't have the tools. Need a good low Vf diode, though.
 

Policetacteam

Enlightened
Joined
Jun 20, 2006
Messages
420
Location
Iowa
The 8AX does not have the ribs like the 8NX but I wonder if you could just drill out the opening of the top of the light (with the bezel unscrewed off). That might allow the Deal Extreme drop-in to fit into the body. I would love try this but I do not have the tools to bore out the body. Anyone have any suggestions or know of anyone on CPF that would do the work?
 

yellow

Flashlight Enthusiast
Joined
Oct 31, 2002
Messages
4,634
Location
Baden.at
exactly what I described above (and that was not the 1st time, wonder why noone did that already and posted the result)

* order the insert, measure how much the hole has to be widened,
* drive to the next machine shop and have the head bored ... might cost You a 5,-- for coffee box (only needs a mill)
* bend the springs provided with insert to fit
* (possibly make a ring from some plastic (transparent) to put into bezel to push the insert from the front, if it rappels without)
done


PS: with that thermoplastic 8X, the insert will ride much higher inside the light.
imho the outer spring only will have to be bent to fit the negative battery contact,
+ possibly those holders inside the head sanded a tiny bit
+ adding the "ring" pushing the insert from the front with the bezel
+ the inside spring considerably shortened
(PPS: I have no clue on how the heatsinking works then, but would doubt it)
 
Last edited:

Justin Case

Flashlight Enthusiast
Joined
Mar 19, 2008
Messages
3,797
I don't see why the 6P drop-in would ride higher vs X80 lamp in an 8NX. In both cases, the front rim of the reflector will contact the inside surface of the glass window. The lamps can't ride any higher than that.

Now, the 6P drop-in can ride LOWER in theory because the rim diameter is smaller than that for the X80. Thus, the 6P drop-in can slide down into the collar. In one of my photos, you can see that the wider X80 lamp sits on top of the collar.

In practice, I don't see the 6P drop-in doing this. If you have the proper length for the outer spring, then the battery stick is going to push the drop-in upward and keep it pressed against the window. The way the 8NX switching works is pure mechanical action. Pushing on the rubber button pushes up the battery stick, compressing the lamp's outer spring even more. The center spring of the lamp is recessed within the outer spring. When you push the button enough, the center nipple of the battery stick finally contacts the center spring of the lamp, completing the circuit and lighting the light.

Regarding heat sinking for the 8NX, there is none. The 8NX is all plastic. I would use a cool-running drop-in and run the light intermittently. Basically, if the drop-in works in a G2 (without the G2L's metal bezel), I'd use that.
 
Last edited:

Justin Case

Flashlight Enthusiast
Joined
Mar 19, 2008
Messages
3,797
The 8AX does not have the ribs like the 8NX but I wonder if you could just drill out the opening of the top of the light (with the bezel unscrewed off). That might allow the Deal Extreme drop-in to fit into the body. I would love try this but I do not have the tools to bore out the body. Anyone have any suggestions or know of anyone on CPF that would do the work?

Can you take some photos so I can see what the 8AX design looks like? Thanks.
 

yellow

Flashlight Enthusiast
Joined
Oct 31, 2002
Messages
4,634
Location
Baden.at
lower, higher ... ;)
correct, the better term would have been more INSIDE, with both heads.

The insert is less diameter than the 8X reflector, it wont even touch the part that centers and fixes it (that outside cutout where the bezel pushes it in)
it will ride much more inside the head (thus the outer springs being at the same position than the original ones, btw)

So the angeled part of the insert has to somehow be pushed against the angeled inside of the heads
(the 4 things at the thermoplastic model, or the angeled shape of the alimunium head).
Thats only possible, if something rides between the reflector and the bezel
--> a homemade "ring" out of acrylic or so ...
else the insert would rattle
Noone wants a rattling aluminium part constantly hitting the glass window inside ones light.


PS: inside shape of the aluminium model, here an 8X.
The 8XN should be the same (?)
b65x8n59qeydzblai.jpg

Sorry, the mod is mounted already, but the black parts are original

depending on the insert, the hole has to be widened to have it go through,
but then it will fall into the head more than the bigger original LA.
imho - a guess - it wont even be in line with the end of the head, so the bezel can not push it in.
One has to fill that few mm gap with something,
or, hopefully, it works, then just the wider hole
 

Justin Case

Flashlight Enthusiast
Joined
Mar 19, 2008
Messages
3,797
If I understand you correctly, you are claiming that there is a centering ring in the bezel that centers the 8X? I assume that the 8X is similar to the 8AX.

But the 8NX does not use a centering ring in the bezel. As my photos show, four ribs located in the collar center the X80 lamp in an 8NX. These ribs are clearly slightly too long to allow a standard 6P drop-in to fit, thus my suggestion to carefully file the ribs a little bit.

The X80 lamp does not rattle against the inside surface of the glass window because the battery stick pushes up on the lamp via the outer spring and this keeps the lamp pressed against the glass. The same would happen with a modified 6P drop-in with the appropriate length outer spring attached.

The angled faces of the ribs do not have to push against the angled sides of the metal reflector of a drop-in to keep it pressed against the bezel's glass window and avoid rattling. The ribs only have to center the drop-in.

I can demonstrate this easily. Look at the first photo in my Post #5, showing the disassembled 8NX. If I drop the X80 lamp into the collar (the middle piece in the photo) and thread the collar into the bezel (the rightmost piece in the photo), the top rim of the X80 lamp gets closer and closer to the inside surface of the bezel's glass window. However, if I don't tighten the collar completely onto the bezel, the lamp is not pressed tightly against the window and it rattles. However, as soon as I screw down the collar onto the flashlight body, I can see the lamp moving upward and pressing firmly against the glass window after only about 1 1/4 turns. After that, the X80 is completely secured against the glass window. Clearly, it is because the battery stick is pushing up on the X80's outer spring.

If you look inside of an 8NX, you can see that the top of the B90 battery stick is essentially at the same level as where the threads begin at the top of the body tube. If you then look at the collar, you can see that the collar slides down onto the body tube almost to where the body o-ring is located. Since the X80 outer spring is at the same level as the bottom of the collar, that means that the outer spring nearly touches the ground terminal of the battery stick even before you start to screw down the collar onto the body tube. Once you screw down the collar a bit, the outer spring clearly will contact the ground terminal of the B90.

As you screw down the collar more and more, the center spring of the X80 gets closer and closer to the center nipple of the B90. This allows the user to adjust the 8NX tailcap button sensitivity. Tighten down the collar more to get a hair trigger light. Tighten it less to require a harder tailcap push to turn on the light. The reason is that you are adjusting the amount of travel that the battery stick hs to move to push upwards to complete the circuit by touching the B90's center nipple to the X80's center spring.

As I've written before, I don't have an 8AX so these modification comments aren't meant to address that light. But it does sound like the same mod concept can be applied. The difference perhaps is that instead of filing four centering ribs to fit the 6P drop-in, you have to wrap some tape around the top rim of the drop-in to increase its diameter by about 2mm so that it fits the centering ring in the 8AX's bezel. Does the 8AX use a different switching method, or does it also use the "battery piston" method? If it also uses the battery piston method, then it would seem to me that the pressure of the battery stick on the lamp's outer spring is what keeps the lamp pressed against the bezel's window, just as with the 8NX. Of course, this is speculation on my part, since I don't have an 8X or 8AX.
 
Last edited:

yellow

Flashlight Enthusiast
Joined
Oct 31, 2002
Messages
4,634
Location
Baden.at
If I understand you correctly, you are claiming that there is a centering ring in the bezel that centers the 8X? I assume that the 8X is similar to the 8AX.
But the 8NX does not use a centering ring in the bezel.

The X80 lamp does not rattle against the inside surface of the glass window because the battery stick pushes up on the lamp via the outer spring and this keeps the lamp pressed against the glass.
another example of the difficulties of typing instead of showing in personal ... ;)

if it happend that the battery ONLY keeps the LA in place, then the LA inside the head would rattle when the body is not screwn on head
- but it does not.
That is, because the 2nd widest diameter of the reflector rests on a cutout of the head, where the bezel fixes it.
This cutout is what I mean with "centering ring".
Sure, those lips (or the angeled part of the alum model) also touch the reflector, but that is only supplemental, the cutout and bezel press makes the important part.
The insert cant be fixed that way alone
try following: take the LA or insert and put it into the head reversed.
The original LA will not even get into the head because the centering cutout (lets call it a "seat") is not wide enough, while the smaller insert will go in till the lips stop it.
Difference: about 5 mm minimum, possibly more.

Now, with a wider hole (or a smaller insert diameter at that part), the bezel does not press the reflector into the seat, the lips or the angeled part --> it will be loose and rattle
When the body is connected to the head, the battery will push the insert out the front, possibly damaging the glass, at least causing scratches. Therefore it is a must to put something in to center the insert and have it pressed in with the bezel.


PS:
battery stick pushes up on the lamp via the outer spring and this keeps the lamp pressed against the glass.
with the old model the LA does not push against the glass, there is a lip inside the bezel where it pushes against.
Would wonder if the newer thermoplastic model does it other (as this would put additional stress on the glass)
Thats how the cheaper lights are constructed ;)
 

Justin Case

Flashlight Enthusiast
Joined
Mar 19, 2008
Messages
3,797
I have absolutely no clue what you are talking about. How about showing some pictures.

You are correct that the X80 does not touch the inside surface of the glass window. The top rim of the X80's reflector presses against a ledge molded into the 8NX's bezel. A 6P drop-in's reflector would fit inside of this ledge and press against the glass window directly.

I was also a little confusing in my statement regarding the battery keeping the "lamp" from rattling. This is certainly true for a 6P drop-in, whose reflector is smaller than the X80 reflector, so that the angled faces of the four ribs do not support the drop-in at the same height in the collar as the X80 (plus the X80 sits on top of the threaded lip of the collar and physically can't drop down inside of the collar any farther). The ribs merely center the 6P drop-in within the collar/bezel assembly. But the drop-in can slide up and down to some degree. However, it isn't going to slide downward in practice because the battery stick is pushing the drop-in upward against the bezel window.

For the X80, if the collar is not fully screwed into the bezel, the X80 lamp will rattle and will be loose in the bezel. But as soon as you screw down the collar onto the flashlight body, the battery stick will also press upward against the X80 and hold it in place against the ledge in the bezel (not against the window directly, which is what I wrote earlier). That was my earlier demonstration as to how the battery stick pushes up against the outer spring of the lamp.

However, if the collar is fully screwed into the bezel, then the X80 is secured in the bezel with no looseness/rattling. The collar presses the top rim of the X80 against the ledge in the bezel, holding the lamp in place. The X80 is also centered in two places -- at the four ribs and at the rim by the inside diameter of the bezel.

But for a 6P drop-in, I don't see by visual inspection that the collar will press the drop-in against anything. Thus, what secures the drop-in from rattling is the upward pressure on the drop-in's outer spring by the battery stick.

The 6P drop-in would be centered only by the ribs, since the reflector diameter is too small to be centered by the bezel (or the ledge). The angled part of the drop-in's reflector is also to small to

Photos to follow later.
 
Last edited:

Justin Case

Flashlight Enthusiast
Joined
Mar 19, 2008
Messages
3,797
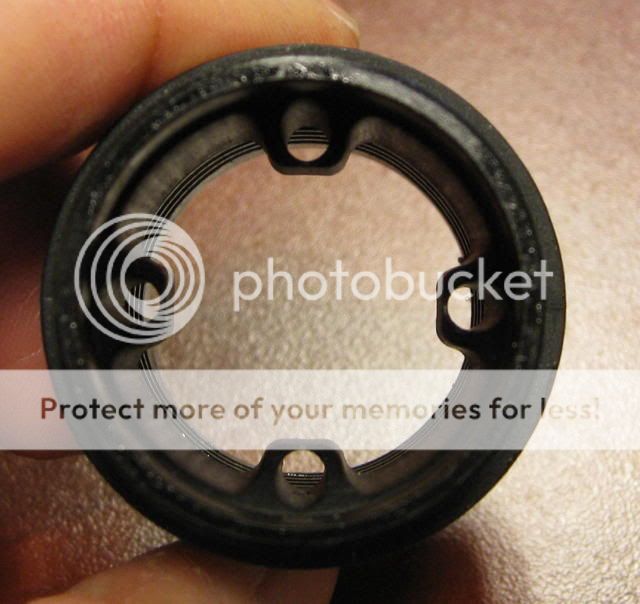
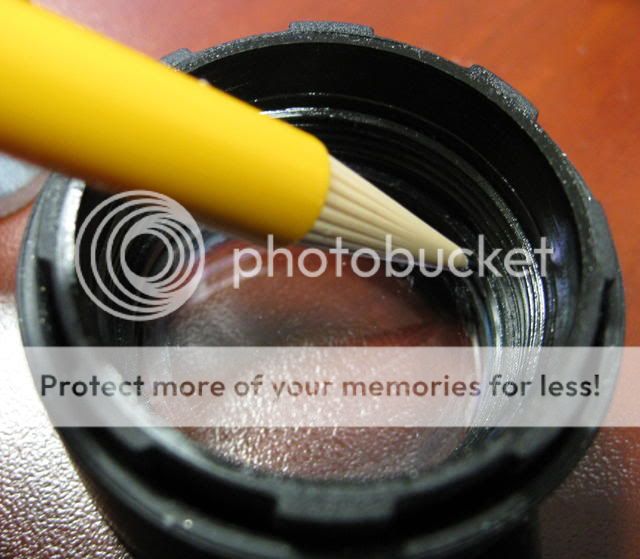
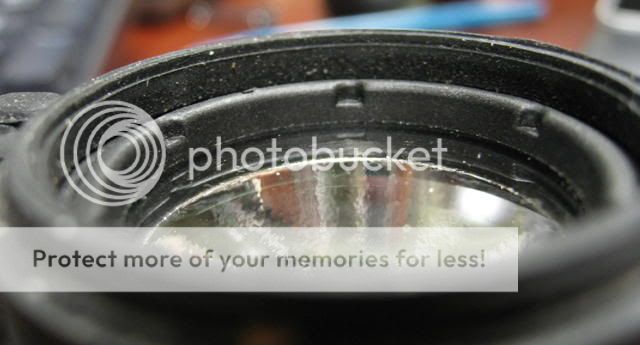
Photo of the "ledge" at the top of the 8NX bezel, on which the top rim of the X80 lamp contacts.
SureFire8NXbezelledge.jpg


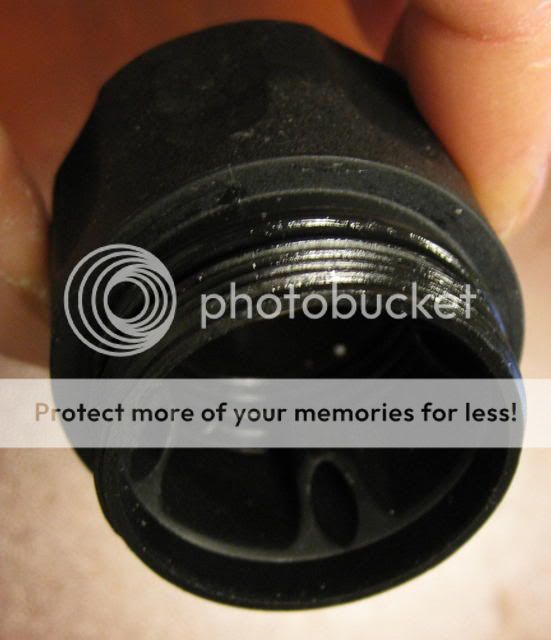
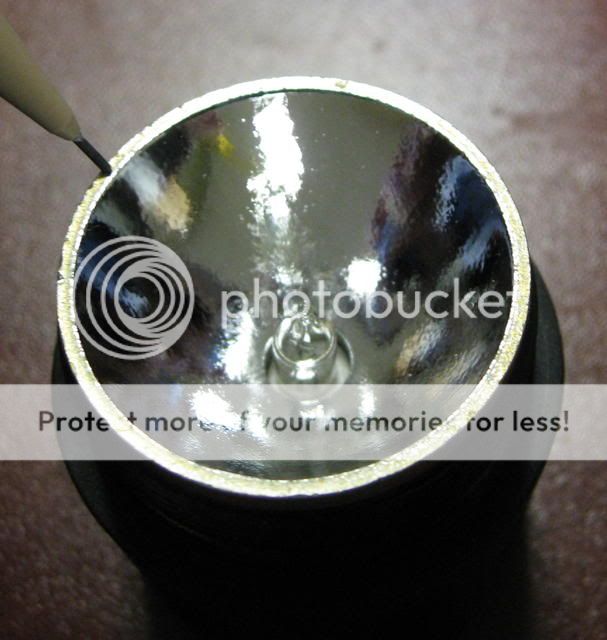
This is the top of the X80 rim that contacts the ledge shown in the previous photo.
SureFireX80lamptoprim.jpg


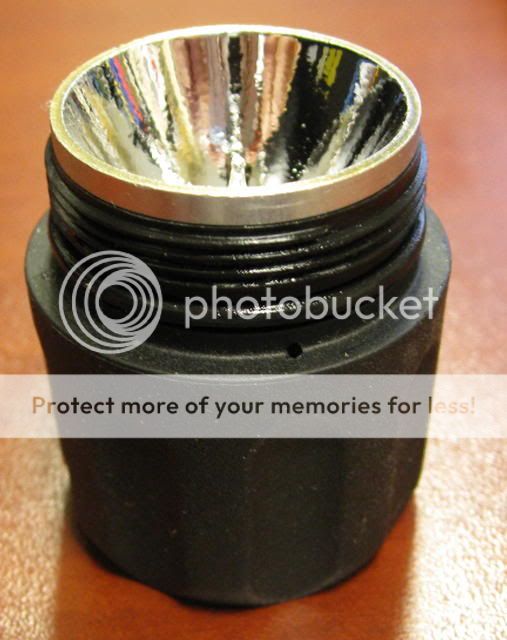
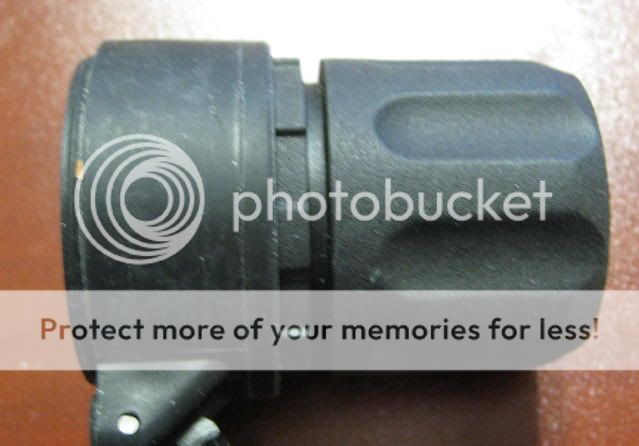
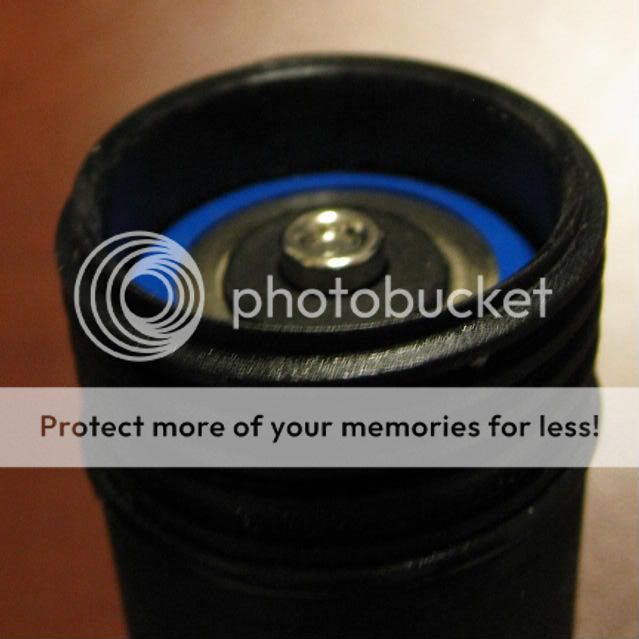
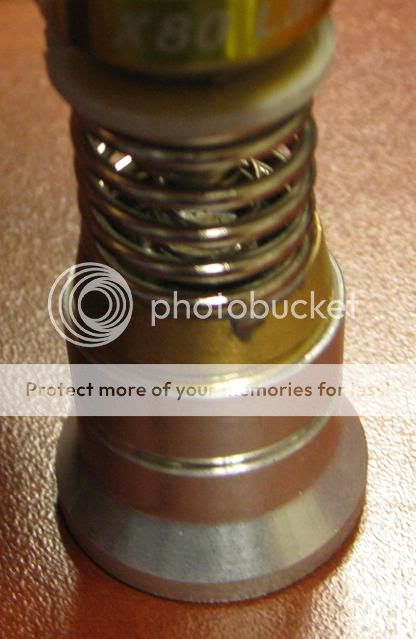
Here is the X80 lamp sitting in the 8NX collar.
SureFire8NXcollarwithX80lampinserte.jpg


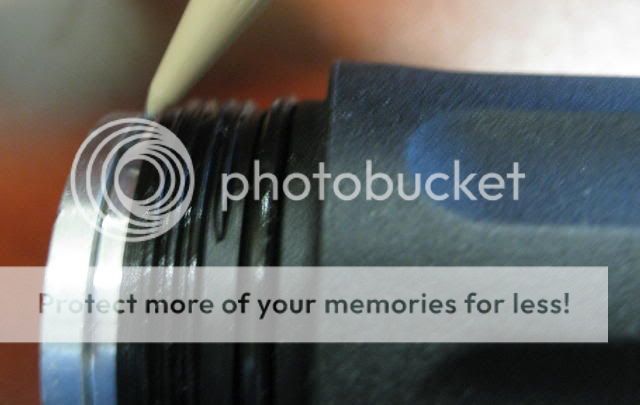
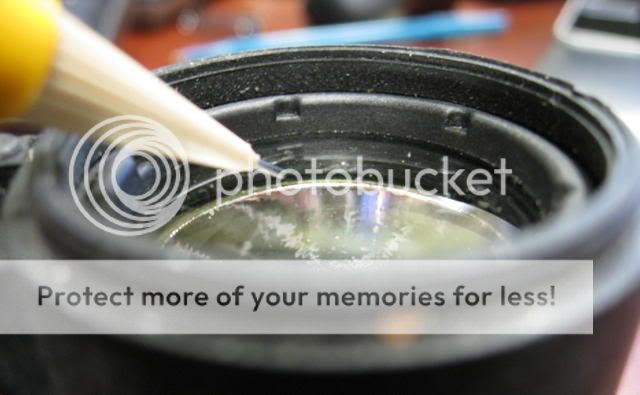
This shows where the X80 lamp contacts the top of the collar.
SureFire8NXX80lamprim.jpg


The overhang shown in the previous photo sits here on the collar.
SureFire8NXcollartoprim.jpg


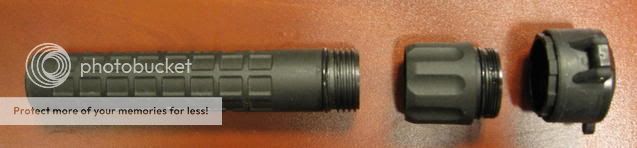
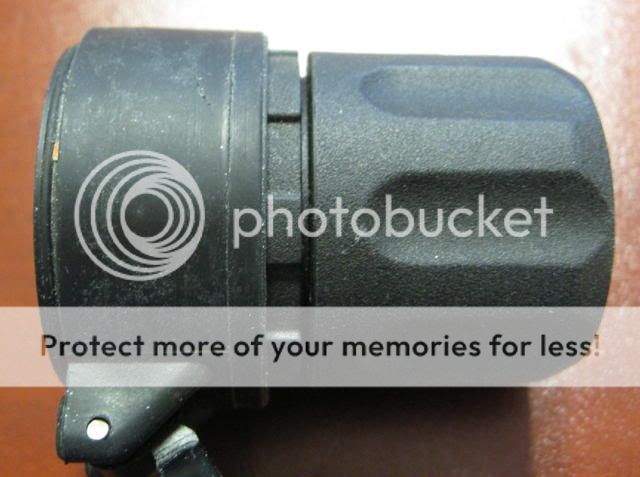
When the collar and the bezel are screwed together completely, they look like this.
SureFire8NXcollarandbezelscreweddow.jpg


When the collar and the bezel are not screwed together completely, they look like this.
SureFire8NXcollarandbezelunscreweds.jpg


Here is a shot of the top rim of the X80 lamp pressed against the 8NX bezel's ledge (also see the first 3 photos above). There is no gap when the collar and bezel are completely screwed together.
SureFire8NXnolamp-bezelgap.jpg


Here is a gap between the ledge and the X80 when the collar and bezel aren't completely screwed down tight. Compare to the previous photo. The point here is that the battery stick, which you'll see in photos below, will push up on the outer spring of the X80 lamp assembly and completely take care of this gap. Similarly, the battery stick will push up on our modified 6P LED drop-in (discussion to follow) so that there is no gap and no rattling.
SureFire8NXlamp-bezelgap.jpg


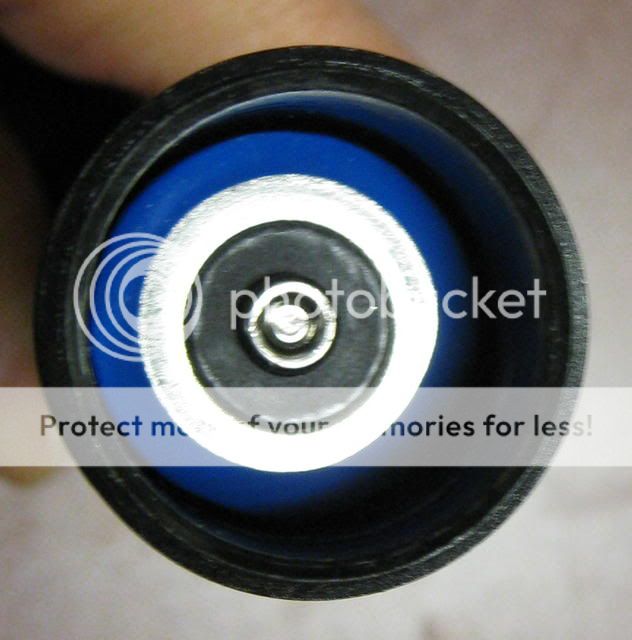
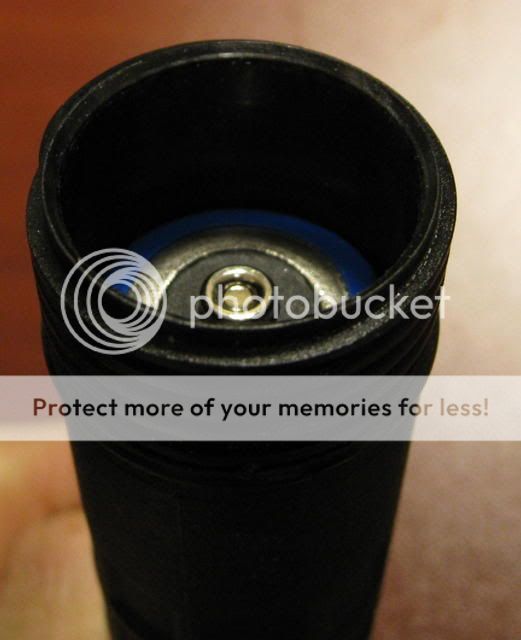
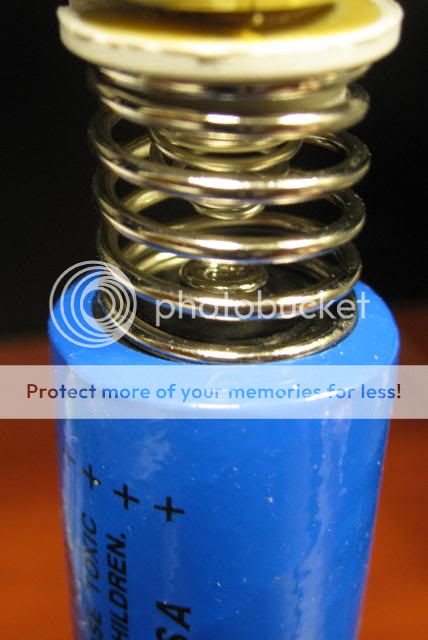
This is the B90 battery stick in the "off" position (tailcap button not pressed). Note the position of the battery within the 8NX's body tube.
SureFireB90batterystickoffposition.jpg


Here is the battery with the tailcap button pressed fully ("on" position). Note how the battery has been pushed upwards.
SureFireB90onposition-1.jpg


This is the relative position of the X80 lamp vs B90 battery stick in the 8NX. The outer spring contacts the negative terminal ring at the top of the stick. The center spring does not make contact with the positive nipple when the light is off. When you press the tailcap button, the B90 stick is pushed upwards, compresses the outer spring, and the nipple makes contact with the center spring. This completes the circuit and the light comes on. You can adjust how much the outer spring is compressed by screwing down the collar on the body tube a lot or not so much. This allows you to adjust the tailcap button actuation from a hair trigger to requiring a long travel to turn on the light.
SureFireX80onB90topterminalcloseup.jpg


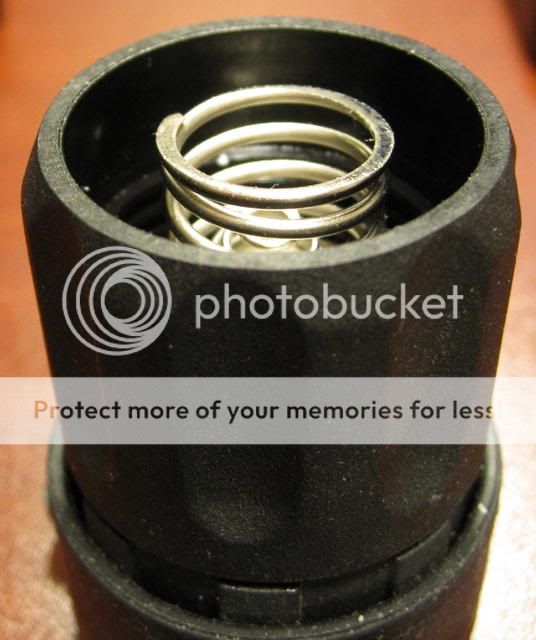
This shows the relative position of the outer spring vs. bottom edge of the collar. They are basically at the same level. When you drop this collar onto the body tube, but don't screw it down, the outer spring already is very close to contacting the negative terminal ring of the B90 battery stick. When you screw down the collar just a little bit onto the 8NX body tube, the outer spring will contact the top negative terminal ring of the battery stick. The more you screw down the collar, the more the outer spring compresses against the battery stick and the closer the center spring of the X80 lamp comes to the center nipple of the B90.
SureFireX80outerspringrelativeheigh.jpg


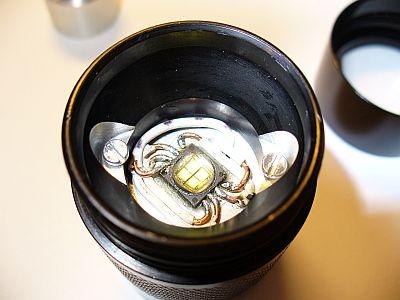
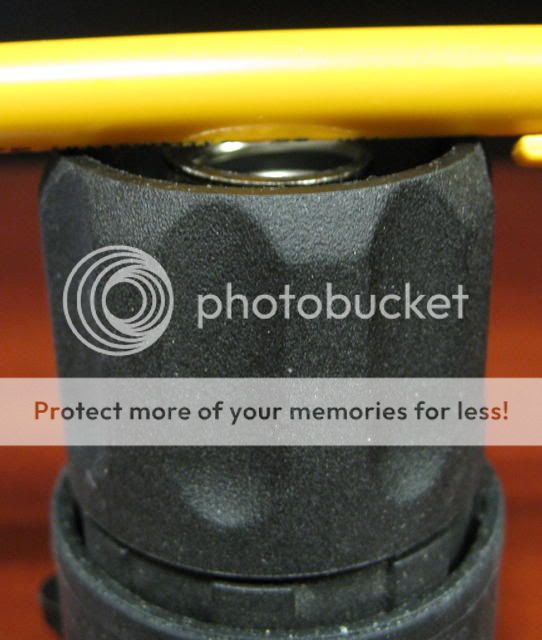
Here is a photo of the X80 in the centering ribs of the collar.
SureFireX80collarcenteringribs.jpg


This shows that the reflector body of a 6P drop-in is a little too big to fit between the centering ribs in the 8NX collar. The ribs basically can fit around the brass pill, but not the reflector body.
SureFireDX6090drop-intoowidefor8NXc.jpg


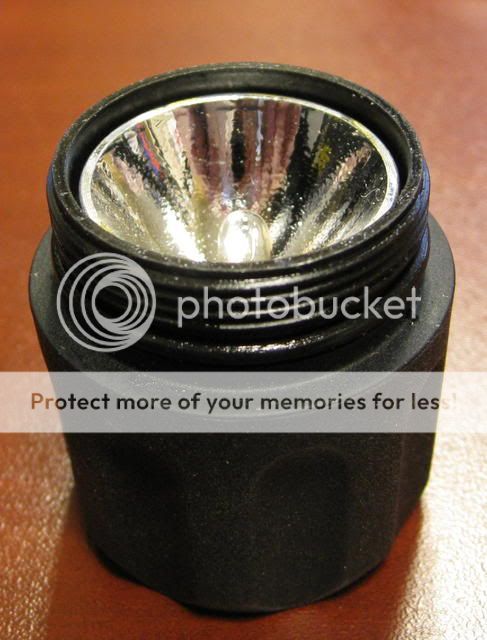
This is what a P60-sized reflector looks like in the 8NX bezel. The P60 is slightly undersized. The top rim of the P60 reflector presses against the glass window since the top rim is too small to sit on the ledge shown in the first photo above.
Surefire6Pdrop-incenteredin8NXbezel.jpg


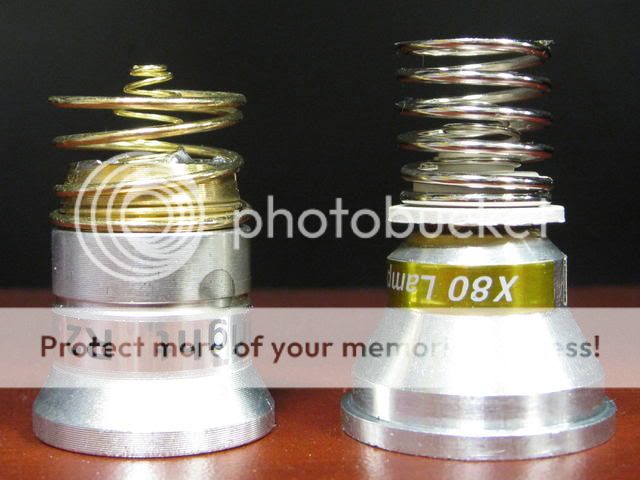
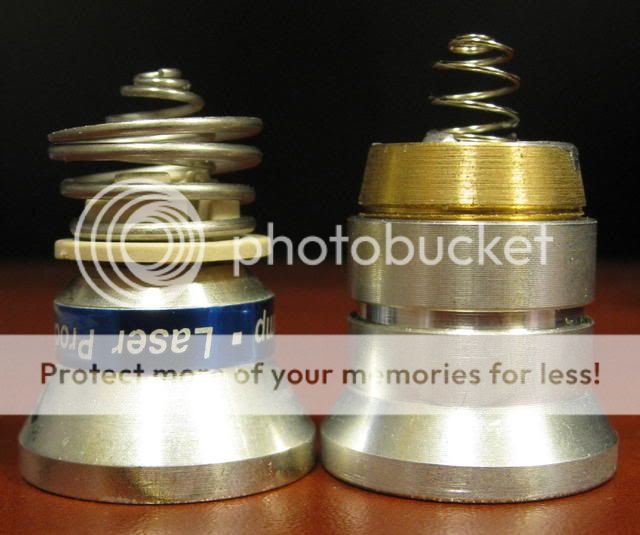
Here is a comparison of a P60 lamp for a 6P vs a DX6090 LED drop-in. If the drop-in's body were the diameter of the P60's, it would fit between the centering ribs with room to spare.
SureFireP60vsDX6090drop-in.jpg


And this is what it would look like. The lamp would sit a little low in the collar. Compare this to the 3rd photo above. Basically, the battery stick has to push up the drop-in by about twice the height of the black rim that you see below for the drop-in to be pressed firmly against the bezel window. That distance is small and there is a lot of thread length on the 8NX body tube (see the photo of the body tube and its threads in post #5) to screw down the collar to push up the drop-in. Plus, you can make the outer spring slightly longer to compensate for this low drop-in position.
SureFireP60lampin8NXcollar.jpg


But, if we solder on the X80's outer spring to the ground trace of the DX6090's driver board, the battery stick should push up on the outer spring and thus also push up on the the drop-in so that it contacts the inside surface of the bezel window. Thus, all you need to do to mod a SureFire 8NX to accept a standard 6P LED drop-in is to file the centering ribs a little bit so that the drop-in fits firmly in the ribs, and solder an X80 outer spring to the ground trace of the drop-in's driver board. This mod seems fairly straightforward. Cost could be as low as $10 for a 6P drop-in plus a free outer spring from a dead X80. If you had to buy an X80, add $34, for a total of $44. But as the 6P drop-ins improve in performance, all you have to do is move the outer spring to the new drop-in and your 8NX stays current with LED technology.
SureFireX80outerspringfitonDX6090dr.jpg
 
Last edited:

Bushman5

Enlightened
Joined
Sep 8, 2007
Messages
977
Can you take some photos so I can see what the 8AX design looks like? Thanks.

if you can give me until the weekend, Dad snagged my camera......

BTW, many thanks for the photos and posts so far! looking at that x80 lamp i do believe it will fit nicely into the 8aX.

EDIT, my bad, it comes stock with that lamp...
 
Last edited:

Policetacteam

Enlightened
Joined
Jun 20, 2006
Messages
420
Location
Iowa
I think the 8AX will need some serious modding but the pictures open up some possibilites. This is an awesome thread! This is hands down the best thread (in terms of pictures and detailed explanations) dealing with the 8NX / 8AX lighting systems.
 
Top