
Hello all. Several months ago, I did a mod to my stainless Ultrafire C-3 by installing a forward clicky switch. This increased it's usefulness to me exponentially. I was showing this mod to a friend of mine at work, and he asked me to mod his for him. I thought I would take a few pics this time, so that everyone can enjoy this useful alteration.
I've also done this to my Romisen RC-F4, and using the same principals, this can be done successfully to many of the cheap Chinese DX type lights.
First, I started with a Fenix forward clicky switch, available from the Fenixstore or Lighthound

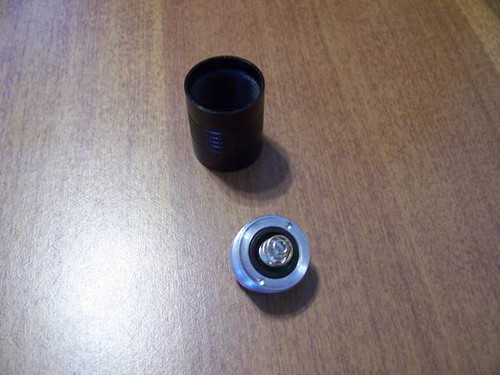
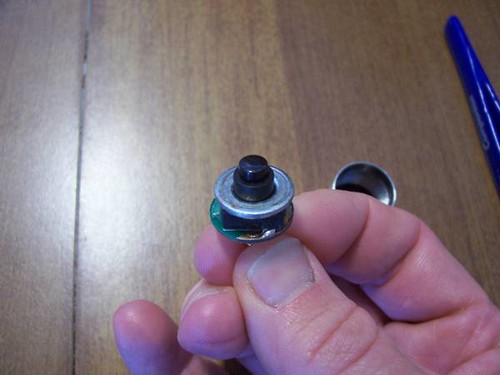
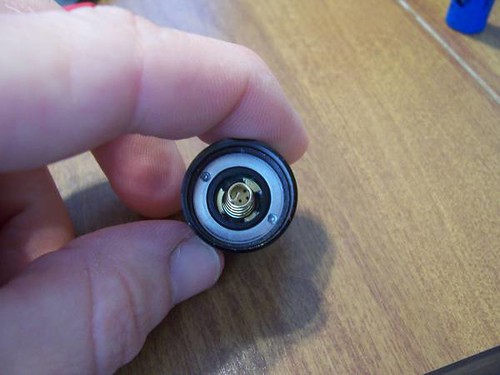
Once you remove the switch pill from the tailcap, it looks like this:
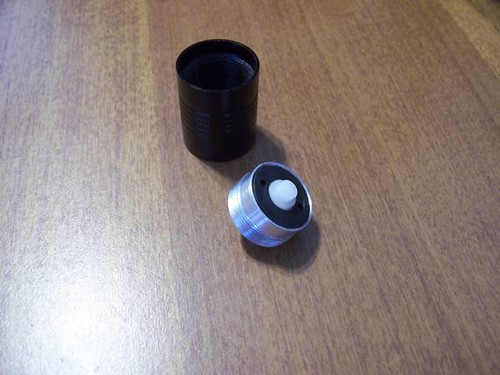
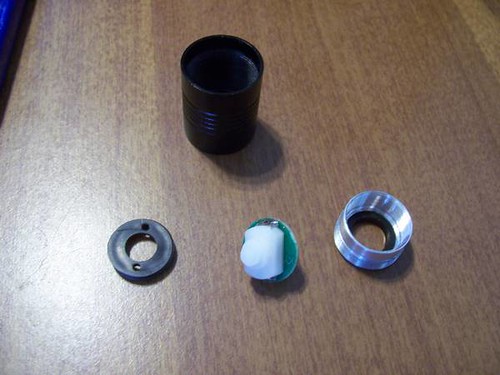
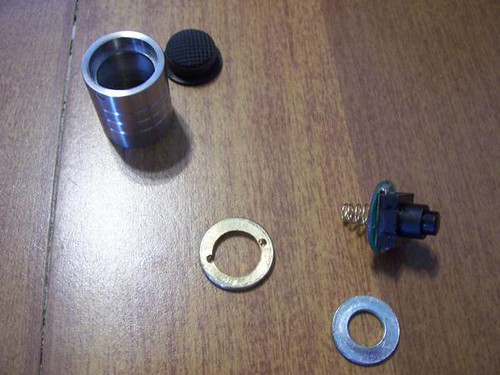
You then want to dissassemble the switch pill to it's individual components:
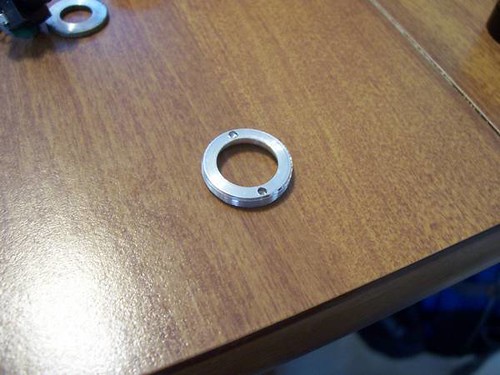
The idea is to take this piece from the assembly:
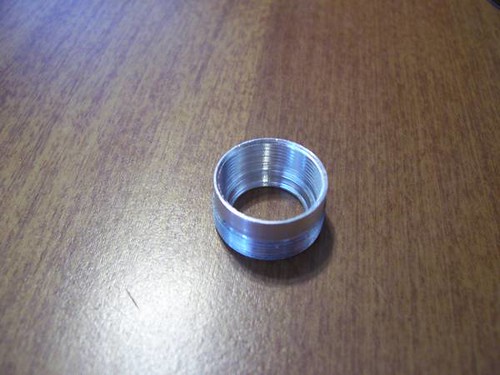
and basically slice off a thin piece to make it into a retaining ring for the forward clicky.
I chucked the piece in my vise, got out the hacksaw, and began cutting
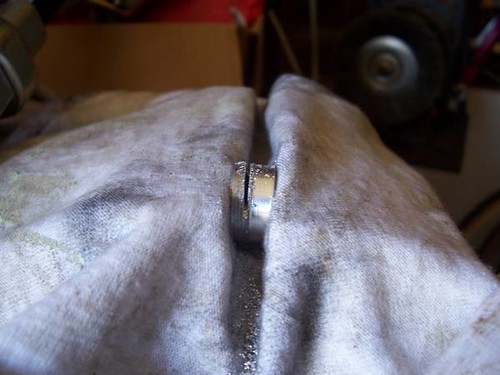
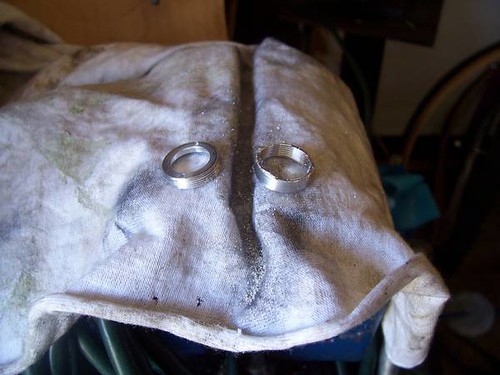
And here it is sawn into two pieces:
Make sure not to saw it too thin initially, as you will need a bit of extra material to sand off so as to have the switch make good contact.
We'll get back to this piece in a bit, but now, on to the switch install.
Depending on what light you install it in, you may need to sand down the diameter of the switch PCB so that it will fit in the tailcap. I needed to on the C-3, but when I did this mod on my Romisen RC-F4, it needed no trimming. Sand accordingly.
Next, you need to find a thin flat washer that fits over the round post on the switch, but will as closely as possible match the I.D of the tailcap. Here's what I mean:
It's okay if it's a bit smaller than the I.D. of the tailcap, but the closer it is to it, the easier it is to center. BTW, the little post on the switch is 5/16" diameter. This washer give the switch a firm place to sit in the tailcap. The washer I used was from a bicycle front wheel")
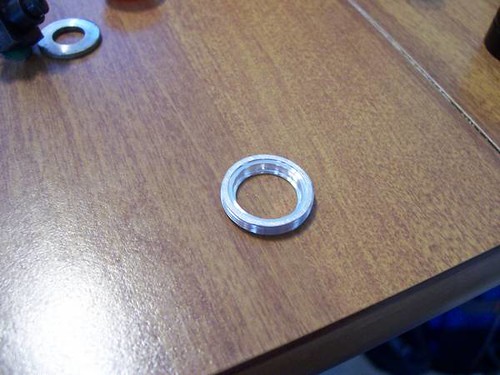
Take the piece you sliced off the switch pill earlier, and sand down and clean up the sawn edge, but don't remove any material yet. Only clean it up. When you are finished, it should look like this:
Depending on what light you're doing this to, you may have to saw off the back side of the pill, in which case you will have to drill two new holes for your pliers to tighten it up. I had to do this to my stainless C-3.
Grab your tailcap, place the rubber switchcap in, then the washer, then the switch. Thread in the retaining ring that you made earlier. It should look like this:
 Begin checking the fit. Continue removing material from the retaining ring until there is just a hair of a gap between the tailcap and the body. You'll need a small gap to ensure good electrical contact. To remove the excess material, I laid a piece of sandpaper down on the table and lapped the ring back and forth until the appropriate amount was removed. Continue to sand, re-assemble and check the fit, going slowly.
Once everything fits well and is working, take it apart, clean all the threads, grease, then re-assemble, and you have a much more functional light.
Here's some pics of my SS C-3 that I did this mod to:
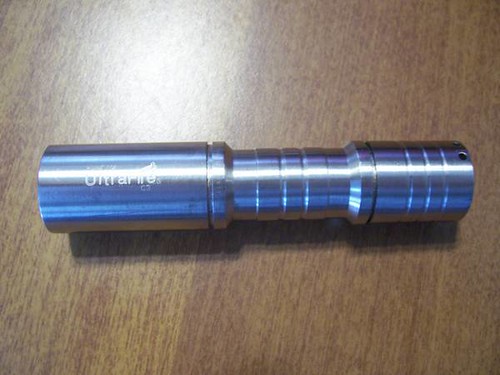
Like I said earlier, with a bit of ingenuity, this can be done to almost any of the cheapy reverse clicky lights. Some of the procedures may need to be changed a bit, but it should work. It's a cheap, fairly easy mod requiring only simple tools that greatly increases the lights utility.
If my post wasn't altogether clear, please fire away any questions and I'll try to answer. Hope this helps you all.
I've also done this to my Romisen RC-F4, and using the same principals, this can be done successfully to many of the cheap Chinese DX type lights.
First, I started with a Fenix forward clicky switch, available from the Fenixstore or Lighthound
Once you remove the switch pill from the tailcap, it looks like this:
You then want to dissassemble the switch pill to it's individual components:
The idea is to take this piece from the assembly:
and basically slice off a thin piece to make it into a retaining ring for the forward clicky.
I chucked the piece in my vise, got out the hacksaw, and began cutting
And here it is sawn into two pieces:
Make sure not to saw it too thin initially, as you will need a bit of extra material to sand off so as to have the switch make good contact.
We'll get back to this piece in a bit, but now, on to the switch install.
Depending on what light you install it in, you may need to sand down the diameter of the switch PCB so that it will fit in the tailcap. I needed to on the C-3, but when I did this mod on my Romisen RC-F4, it needed no trimming. Sand accordingly.
Next, you need to find a thin flat washer that fits over the round post on the switch, but will as closely as possible match the I.D of the tailcap. Here's what I mean:
It's okay if it's a bit smaller than the I.D. of the tailcap, but the closer it is to it, the easier it is to center. BTW, the little post on the switch is 5/16" diameter. This washer give the switch a firm place to sit in the tailcap. The washer I used was from a bicycle front wheel
Take the piece you sliced off the switch pill earlier, and sand down and clean up the sawn edge, but don't remove any material yet. Only clean it up. When you are finished, it should look like this:
Depending on what light you're doing this to, you may have to saw off the back side of the pill, in which case you will have to drill two new holes for your pliers to tighten it up. I had to do this to my stainless C-3.
Grab your tailcap, place the rubber switchcap in, then the washer, then the switch. Thread in the retaining ring that you made earlier. It should look like this:
Once everything fits well and is working, take it apart, clean all the threads, grease, then re-assemble, and you have a much more functional light.
Here's some pics of my SS C-3 that I did this mod to:
Like I said earlier, with a bit of ingenuity, this can be done to almost any of the cheapy reverse clicky lights. Some of the procedures may need to be changed a bit, but it should work. It's a cheap, fairly easy mod requiring only simple tools that greatly increases the lights utility.
If my post wasn't altogether clear, please fire away any questions and I'll try to answer. Hope this helps you all.