Re: Introduction to modyfing flashlights ...
Modifying flashlights - Part 2
by William Quiles
December 2009
LED lights:
To me, LED lights are far more interesting, and that is why I concentrate most all mods on them. My first exposure to LED's were with the Luxeon 1W, 3W, and 5W LED's, that produce about 100-200 Lumens. But today we have single 3W LED's that put out about 200 Lumens, multi-die 8-10 watt LED's that put 600-800 Lumens, and some new, very large die LED's that go into the 1000-1200 Lumen range in the 30 watt range!
A quick (not complete) list of LED's used often today, starting with the older ones:
Luxeon 1w, 3w, 5W (old)
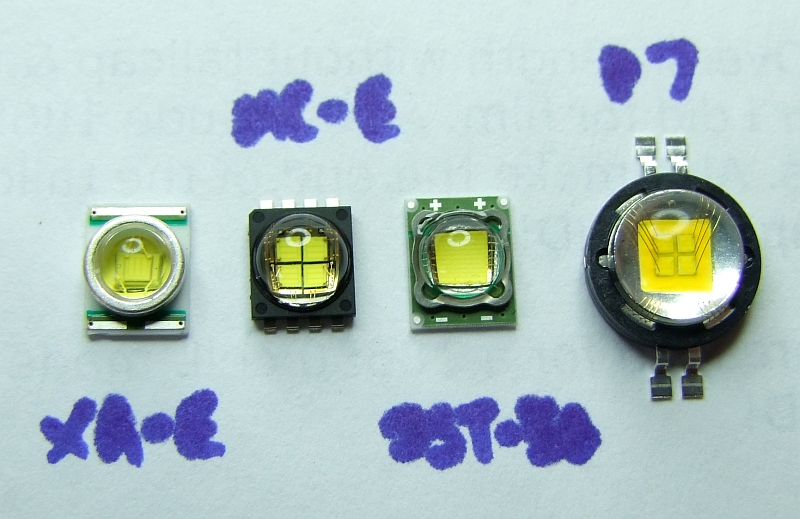
Cree/Seul P4 through R4 (various packages and die sizes; XR-E, XP-G, etc.) - single die - 200-300 approx lumens at 1Amp, vf = 3.5v (varies)
Seul P7 LED - quad die - 700-800 lumens at 2.8Amps
Cree MC-E - quad die - 700-800 lumens at 2.8Amps (individual LED's can be wired individually in either series, parallel, or combinations)
Luminus SST-50 - single die - 800-1000 lumens at 5Amps
Luminus SST-90 - single die - 900-1300 lumens at 9Amps
For reference:
XR-E die is 1mm x1mm
SST-50 is 2.25mmx 2.25mm
SST-90 is 3mmx 3mm
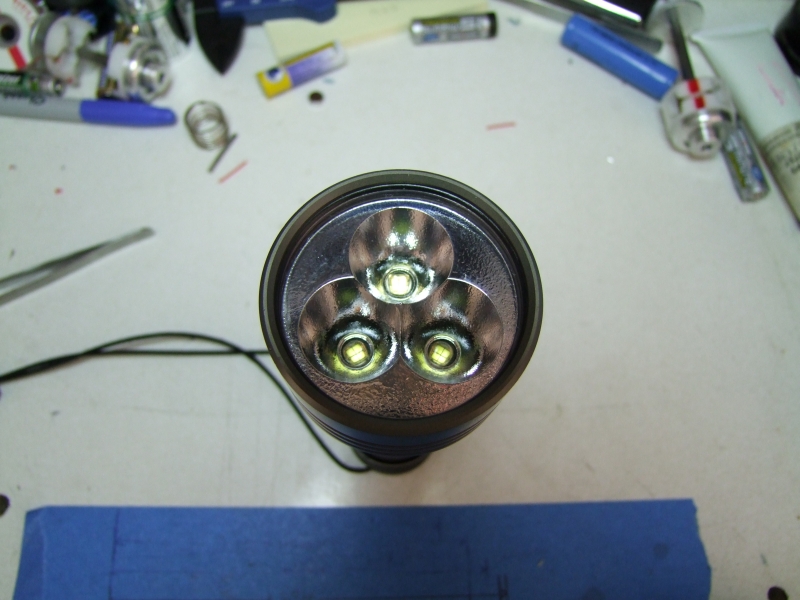
Here is a "group photo" to share. Unfortunately at the time all I had was a broad point permanent marker, but it goes (left to right): XR-E Q-bin, MC-E, SST-50, P7:
LED's are current controlled devices. You don't light them up by using a regular/traditional voltage regulator - you need a regulated current source to drive LED's to their potential, so you need special "drivers" meant for LED's. The current through the LED as a function of the voltage is logarithmic - a small increase in voltage leads to a huge increase in current (more on these below). Good thing is that with the popularity of LED's, there is a good number of companies offering LED drivers, from the low cost Asian vendors:
http://kaidomain.com/SearchResult.aspx?SearchKey=driver&CategoryId=-1&SiteId=1
To the very best quality drivers and my most used, the LED drivers from TaskLED:
http://taskled.com/
The size of the batteries restricts the size of the host, and the bulb/LED being driven dictates what types and how many cells are needed. This is not a complete list, but here is a list of the common cells we use:
- CR123 - Non rechargeable - 3V cells. Used in almost all SureFire flashlights.
- Alkalines - Non rechargeable, low current applications only, due to their relatively high internal resistance. Nominal voltage 1.5V
- NiMH - rechargeables. Capable of high currents 5-10 amps, although cell voltage sags quite a bit at the high currents. Nominal voltage 1.1-1.2 volts
- LiIon - most popular cells, used in almost all laptops. High energy density, possible high currents, relatively dangerous cells unless a protection circuit is used to prevent short circuits, over-discharge and over-charge. Nominal voltage 3.7 volts.
- LiMN - much safer chemistry than LiIon, although not as high energy density. Can handle even higher currents than LiIon. Nominal voltage 3.7 volts.
First, a little nomenclature on batteries. The first two digits refer to the nominal diameter, the next two are the length in mm, and the last is the shape, 0 being a cylinder:
26500 = 26 mm dia, 50mm length
26650 = 26 mm dia, 65mm length
18650 = 18mm dia, 65mm length
Note for reference:
- the "C" Mag body takes C size cells, which are 26mm in dia
- most all of the Surefire lights take the CR123 cell, which is 16mm in dia
Battery capacity is usually stated in mAH, but the voltage of the cell is important when looking at the energy density. For example:
AA NiMH - 2900 mAH (1.2V)
vs.
18650 LiIon - 2200mAH (3.7V)
Available watts:
AA NiMH - 2.9 * 1.2 = 3.4 watts
18650 - 2.2 * 3.7 = 8.1 watts
This wattage is important since it gives an indication of runtime - how long will the particular combination of LED/battery/driver will last.
For example:
LED is rated at 3.7 volts and 1 amp
LED Driver efficiency is 90 %
Batteries: 2x 18650 cells (2200mAH @ 3.7V)
Power required to run LED = 3.7 * 1 = 3.7 watts
Power available at batteries = 2* (2.2 * 3.7) = 16.2 watts
Power available to LED = Power available at batteries - Power lost at driver = Power available at batteries * Driver's efficiency = 16.2 * 0.9 = 14.6 watts
Approximate runtime = Power available to LED / Power required to run LED = 3.9 hours
So a valid question would be, why use a driver if I am "only" getting 90% efficiency? Why not drive the LED straight from the battery, in what is called a "direct drive"? Bacause the LED is a current controlled device - it can't tolerate a high voltage applied directly since. In our case, the voltage of the two 18650 cells is 7.4 volts, which is WAY higher than the rated voltage for that LED of 3.7 volts - basically it would kill the LED instantly!. You can however drive the LED directly from a single 18650 cell, since the nominal voltage for the cell of 3.7 volts is the same as the rated voltage for the LED at 3.7 volts, but a couple of things need to be taken into account:
- the LED's actually have a "range" of voltages that can be as low as 3.1 volts to as high as 3.9-4.0 volts
- a charged 18650 cell actually rests at 4.2volts from the charger, and the higher the capacity, the less it will sag under load to the nominal 3.7 volts
=> if your LED is a low voltage (called vf - or forward voltage) and the cell is a high current, high capacity cell, you could be seriously over-driving or killing the LED. True, since there is no LED driver, the efficiency is by definition 100%, but also keep in mind that the brightness of the LED will decrease as the battery drains.
So basically LED drivers have a couple of advantages:
- you can have much longer runtimes by starting with a voltage much higher than the vf of the LED. The regulator will maintain the rated current to the LED as the batteries drain, to the brightness will remain the same through the whole run.
- by adjusting the current, the driver will provide the right current regardless of the vf of the LED - no risk of over-driving, damaging the LED (unless you set the regulator to a higher current value above the "rated" current for that particular LED).
- regulators offer the ability of having various brightness levels (like low, med, hi, and strobe/SOS).
Besides needing a proper current driver from your LED, you have a special requirement when using them - unlike bulbs that emit/radiate heat into space/air, LED's transmit heat through their mounting base, which means that just like CPU processors, you need a heatsink in order to remove heat from the LED - otherwise the LED will over heat, lower its output, and eventually die. And yes, LED's give you lower output the more they get heated, so temperature control is very important for LED's to give you their maximum rated output.
Now, the size/material of the heatsink in a handheld flashlight is NOT the real problem. The problem is how to remove heat from the body of the flashlight, once the heatsink has done its job (regardless of how efficient/fast) and moved the heat away from the LED. I have done a LOT of overclocking on PC's, and that is the best possible way to learn about heatsinking, and how to remove heat, or more appropriately to exchange heat/energy.
On a flashlight, there is no "forced" method, like a fan, since that would take energy away from the batteries and give us a shorter runtime. So basically we have only convection, through air, or through our blood:
1) The air surrounding the light. Some minor improvements can come from fins, to increase the efficiency of heat transfer to the surrounding air (again a lesson learned from CPU heatsinks), but of the two methods this is still the least efficient way since we don't have a fan blowing through those fins.
2) Convection to the hand holding the light - the blood in your body acts as a cooling system removing heat from the flashlight. This is the most efficient way, for a handheld light that is not under water (like a diving light).
Both methods will remove heat up to a point, and then the temperature will keep increasing since there is only so much the air/blood can remove. Anyone who has used a powerful LED/incandescent flashlight has experienced the flashlight getting warm and eventually hot, to the point that it is no longer comfortable to hold. So what does all of this manbo-jambo means:
- A single MC-E or P7 driven at spec in a handheld Mag body will eventually get too hot to handle, regardless of the heatsink used. It is simply physics: you have approx 3.5Volts at 2.8 Amps for approx. 10 watts of power that have to be dissipated.
- ALL LED's are rated for Lumens at a relatively very low temp, usually lab-controlled, at around 25C/77F (per the many data sheets that I have seen). That is basically room temperature. As soon as you turn ON your LED light, the output will start dropping since the temp on the heatsink will start going above room temperature.
- The temperature will keep increasing until some equilibrium point, depending on the air temperature, or how much pain you can stand while holding the hot light, etc.. - note that in the case of LED's this equilibrium point will almost always be higher than the rated temp at which the LED was giving its "rated" output. Those 700-900 lumens are not possible long term on any handheld light that is convection cooled (air/blood), since the temp of the LED will quickly go over the 25C.
- A light with any multiples of MC-E or P7, HAS TO GET EVEN HOTTER, and will get hotter much quicker than the light that has only one MC-E or P7. You are basically adding roughly 10 watts per each of these high-power LED's. The degrading on LED output happens even quicker when using multiple MC-E/P7 since the "shared" heatsink gets multiple times the heat, so the output gets lower and lower with time.
- The larger the heatsink size/size of the body, the more heat can be absorbed by the body, up to a point. This is why you can hold much longer in your hand a Mag-size P7 light than a single CR123-size light driving the same P7. If the host/heatsink size is the same, you will reach this "darn! - this thing is too hot!" point sooner with more LED's.
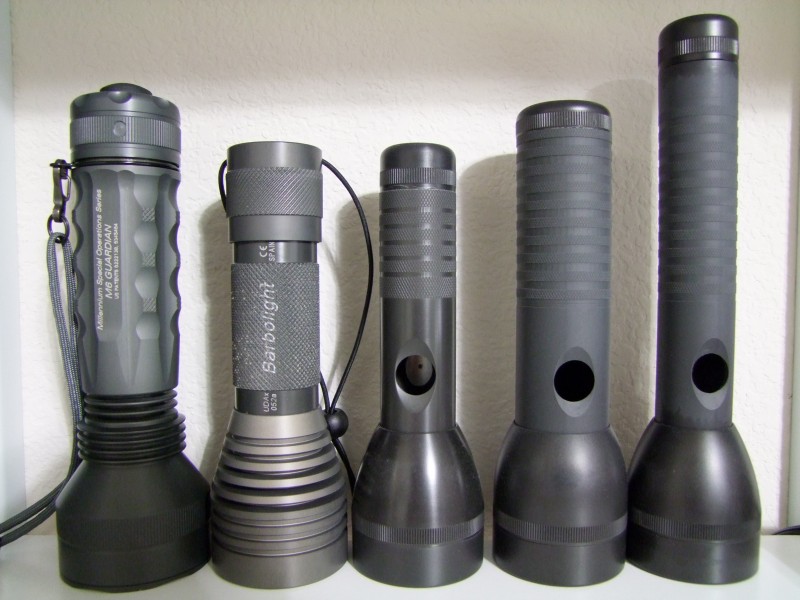
Heatsinks for LED's can be bought, specially for the ubiquitous Maglite platform:
or they can be totally custom to fit the job at hand:
It is important to note that most of the time the heatsink is hollow to allow the LED driver to be housed in there - this saves precious space, and also gives the LED driver a thermal path, as some components on the driver also need proper/adequate heatsinking.
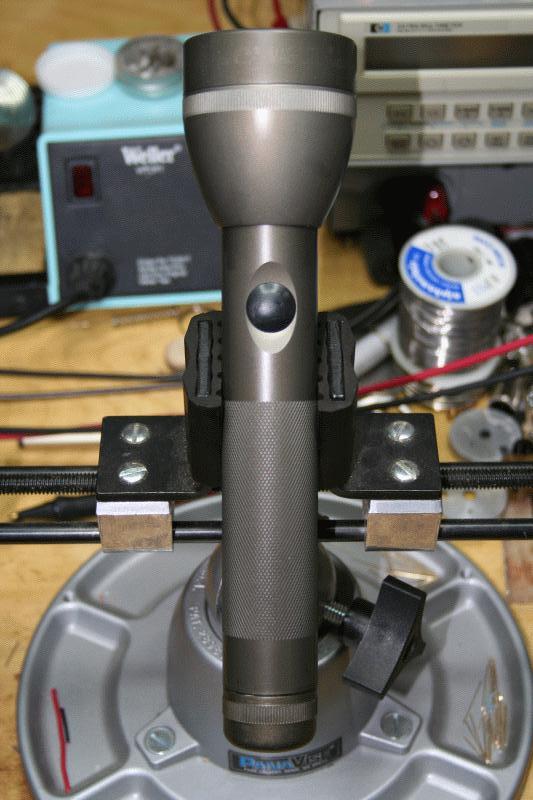
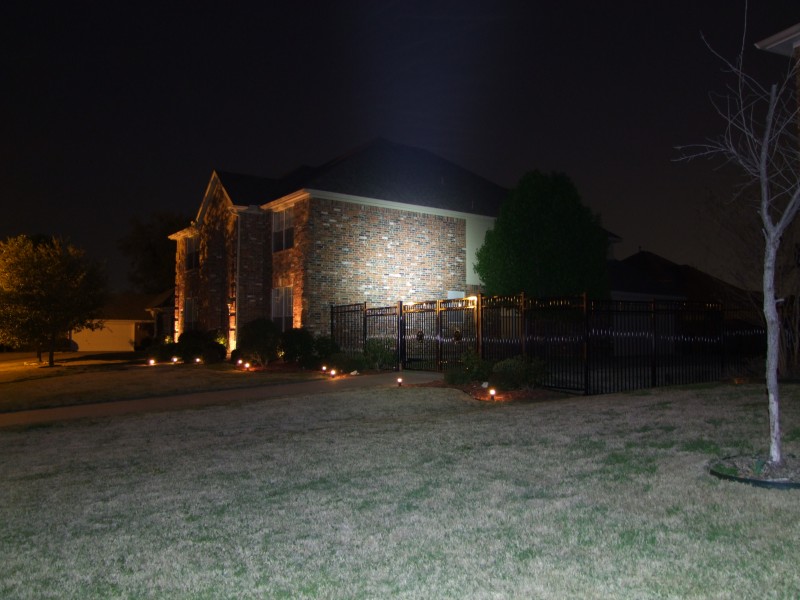
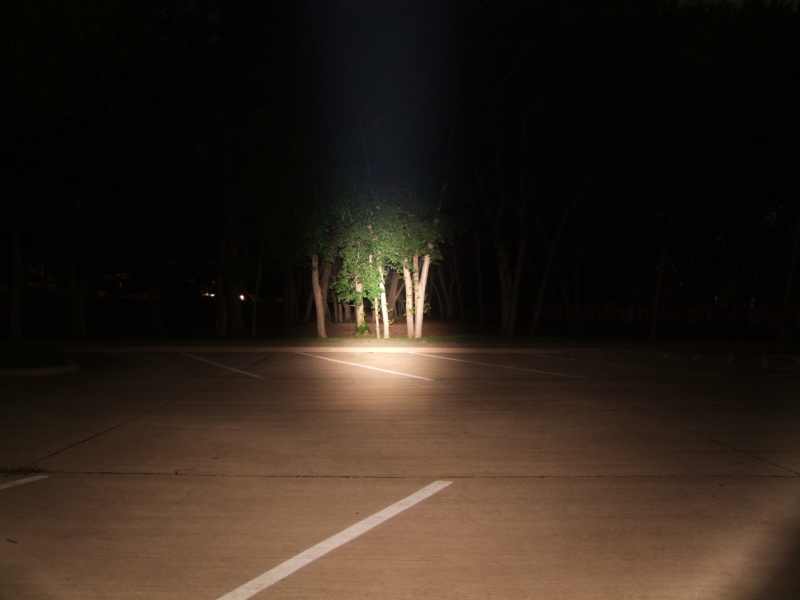
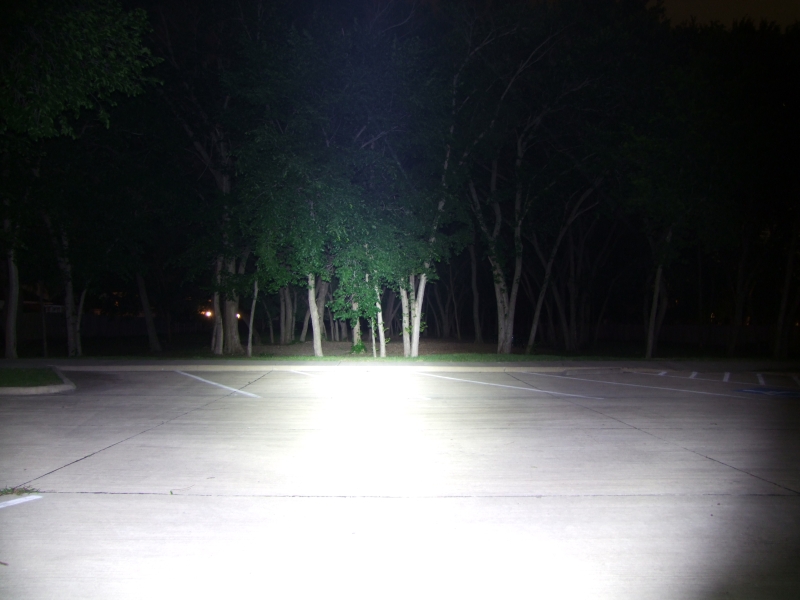
As with bulbs, but even more important with LED's, the choice of reflector has a huge impact on the type and quality of the beam. Here is a comparison of a wider beam, with less throw - less "distance", compared to a narrower beam with better distance:
Here perhaps is an even more dramatic example. The first photo is of an incandescent light with about 600 lumens. The second one is a high power LED with over 2000 lumens, but in a much wider pattern:
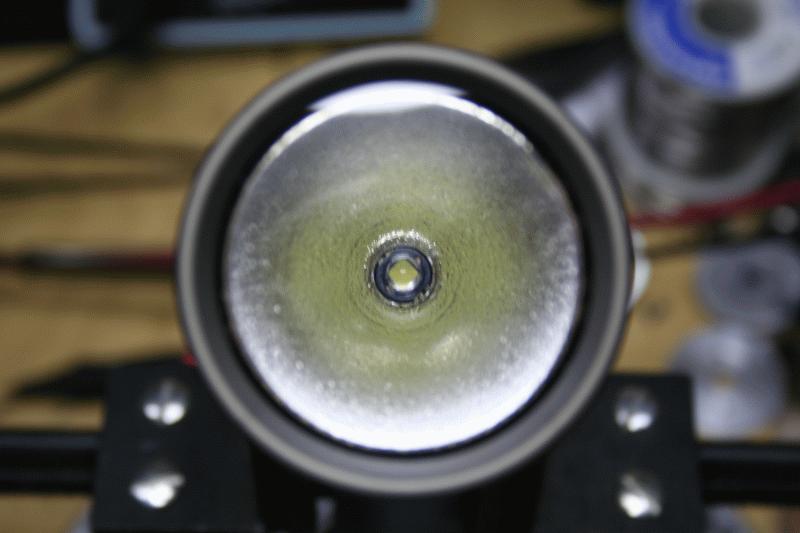
Although LED's tend to be more "bluish" and not show the right colors at night when compared to a well driven bulb (see above), LED's are now becoming available in so called "warm tints", which sacrifice a little output for a nicer and more natural tint. Guess in this picture which LED has the warm tint and which one is the standard cool white tint:
=> The neutral tint is on the left
")
The difference is not night and day, but I do prefer how the natural tint LED's make grass/trees/foliage look more "natural" to me. First the P7 cool white, then the MC-E neutral tint: