Techjunkie
Enlightened
I wanted to build a really bright bike light with lots of runtime, and I wanted to do it with all the parts and batteries I had already purchased for, or salvaged from other projects.
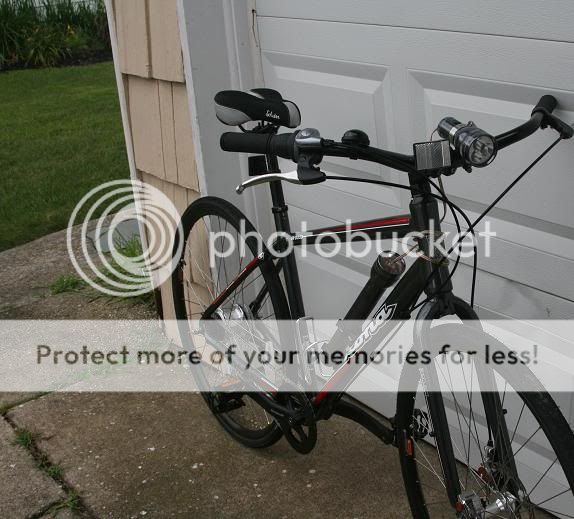
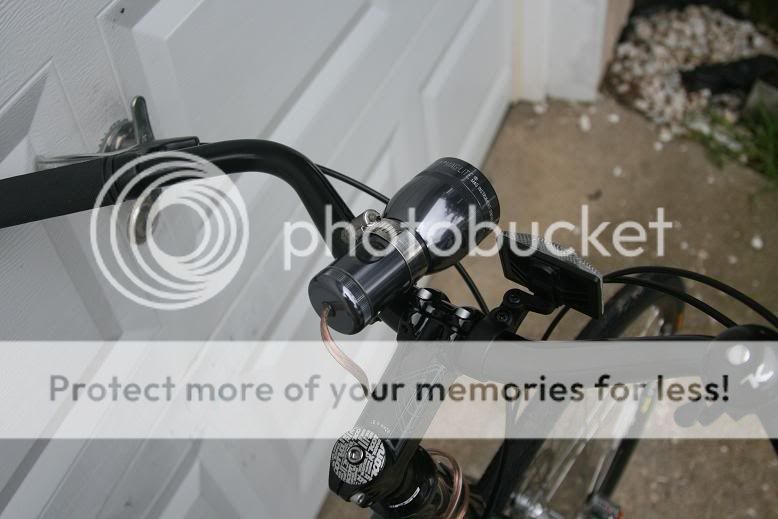
The end result is a Mag 4D host mounted to the frame and used as the battery carrier, and a Mag 0D host housing basically everything else and mounted to the handlebars. Both hosts still have their switches.
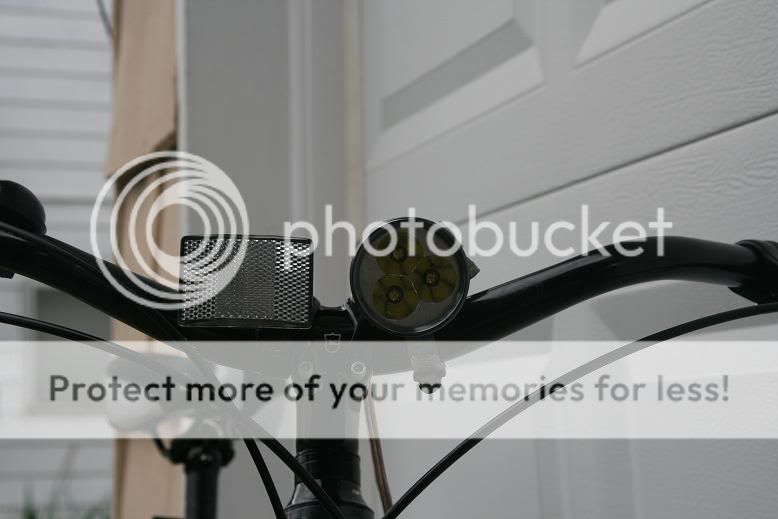
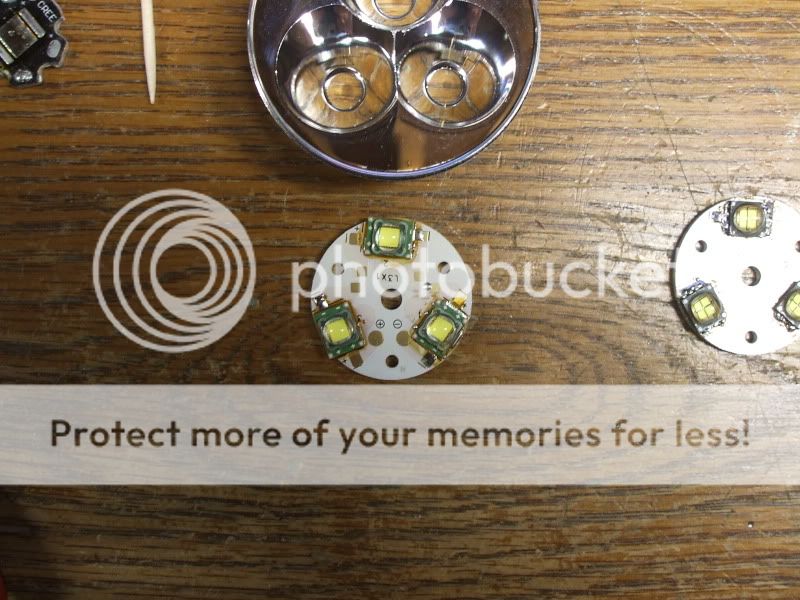
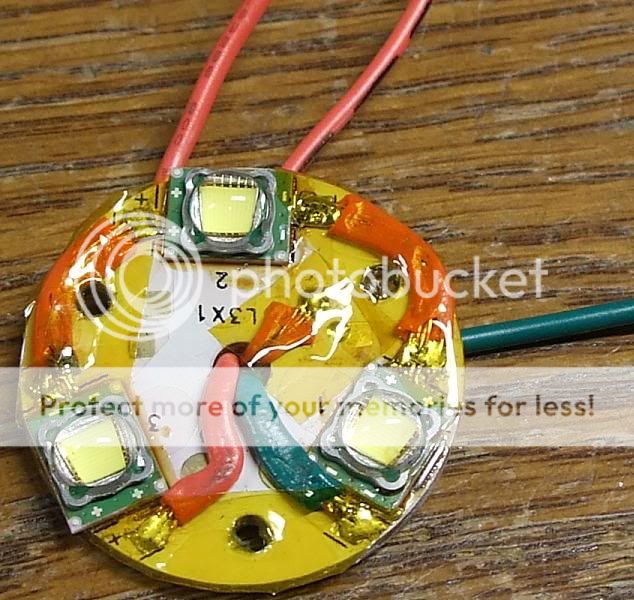
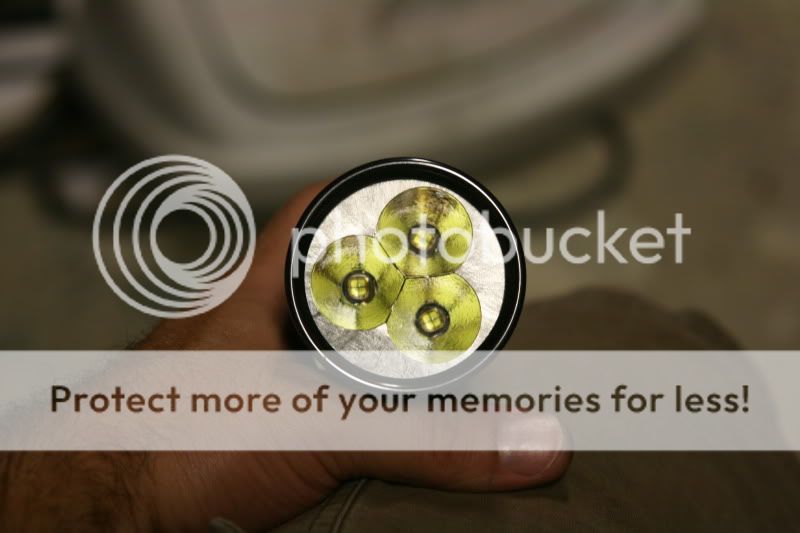
For the LEDs, I had three cool white MC-E that I had pulled from three MC-E modded lights to upgrade them to XM-L. I mounted all three onto a triple XRE star, wired as 4p3s.
Now how to drive 'em like that? I decided to see if the DX 3-mode 3A XML driver, sku 57779, which is capable of up to 18v input could drive three in series. Answer = yes.
Now how to keep 3 MCE at 3A cool? I combined those components with a huge Aluminum heatsink that snugly fits the Mag D neck. I then drilled thru-holes for screws and wires to pass and tapped three holes into the bottom of a DX MOP tri-flector, which I'd already modified the threads on to fit a Mag head. The result is the tri-star sandwiched between the triflector and the heatsink. Thermal grease was applied between the heatsink and star and heatsink and interior of the neck.
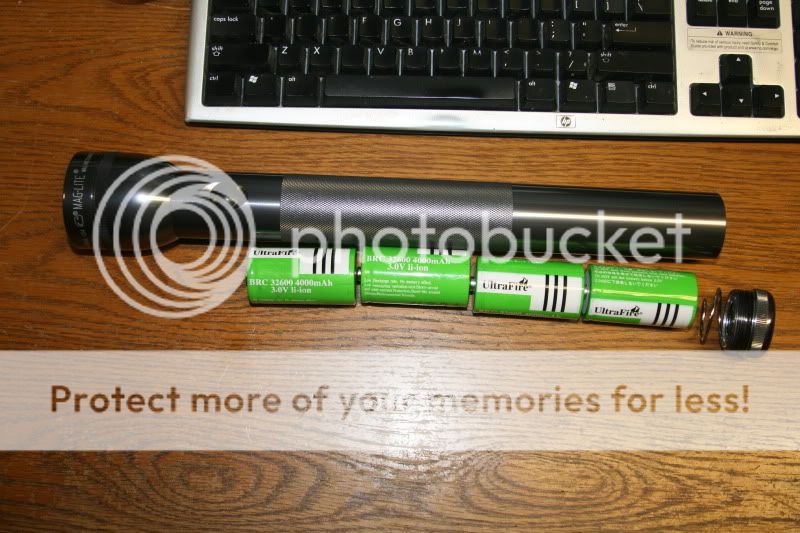
Now, how to drive 3 MC-Es in series at 3A and still have decent run-time? Enter 4 UltraFire 32600 LiFePO4 4AH batteries and a Mag 4D host. The big giant host might not appeal as a hand-held, but here's the cool part...
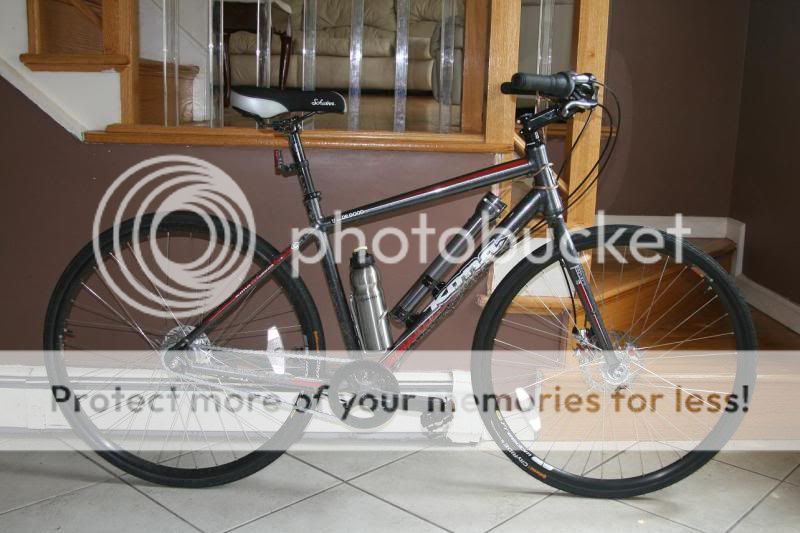
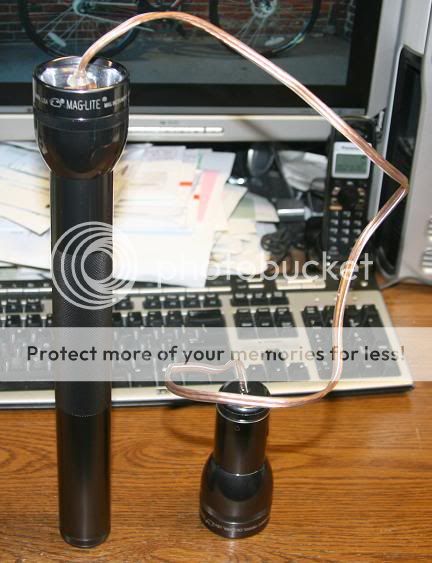
This will be a convertible bike light! My plan is to take a Mag 2D of the same color and cut the top section, including the switch section and install the completed head assembly to that. The 4D body will remain unmodified and will mount to the bicycle's down tube with Maglite's D-cell wall mounting brackets, secured to the frame by the bottle carrier bolts. 16 awg speaker wire with plugs will connect top of the switch of the 4D body to the bottom of the switch in the cut 2D body. The cut 2D body will mount to the handlebars. Both switches will remain operational (both must be on and either can be used to select modes). The point is that the head can be moved from the part of the 2D on the handlebars back to the 4D body at any time with relative ease.
This way, I've got mega runtime on low and car high-beam brightness on high. Not sure I'll ever need strobe unless I feel I'm in danger of being hit and need a driver to take notice of me.
Photo journal of the build...
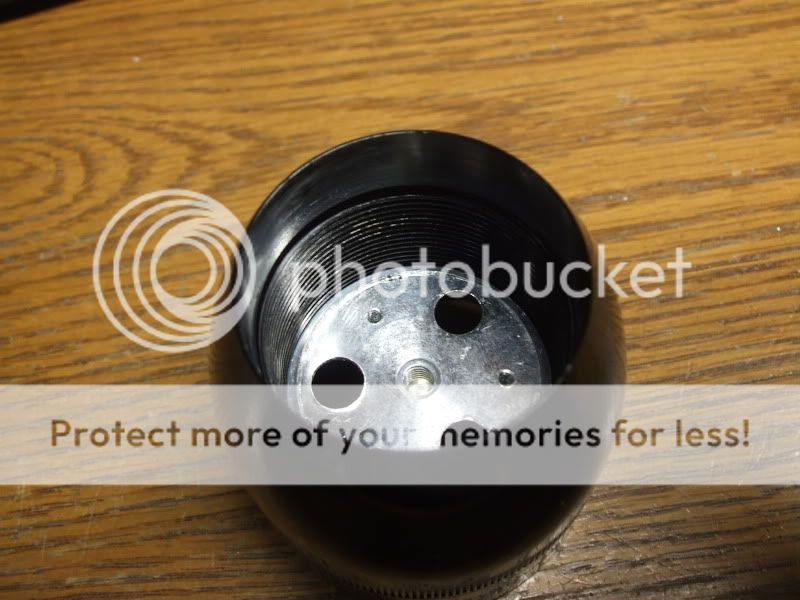
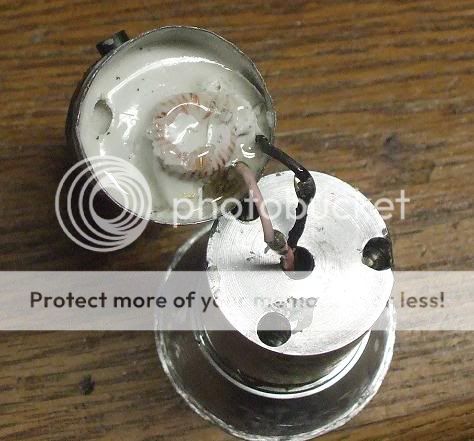
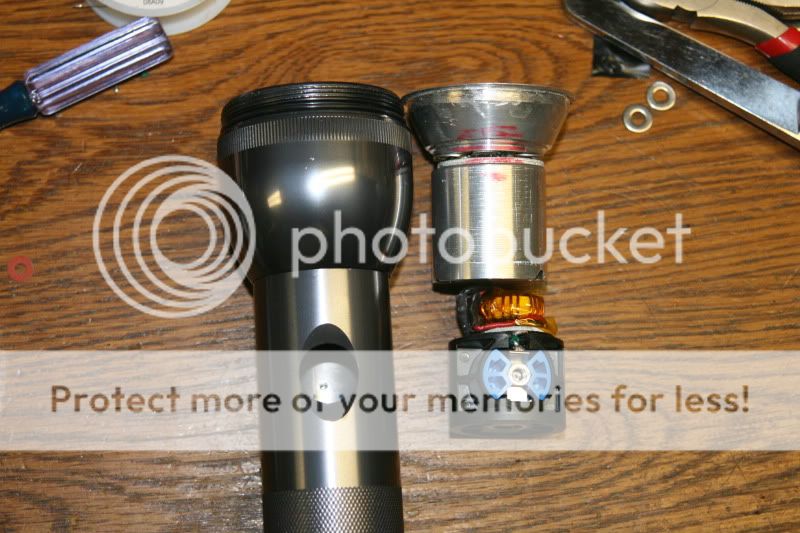
Assembled light engine with giant heatsink
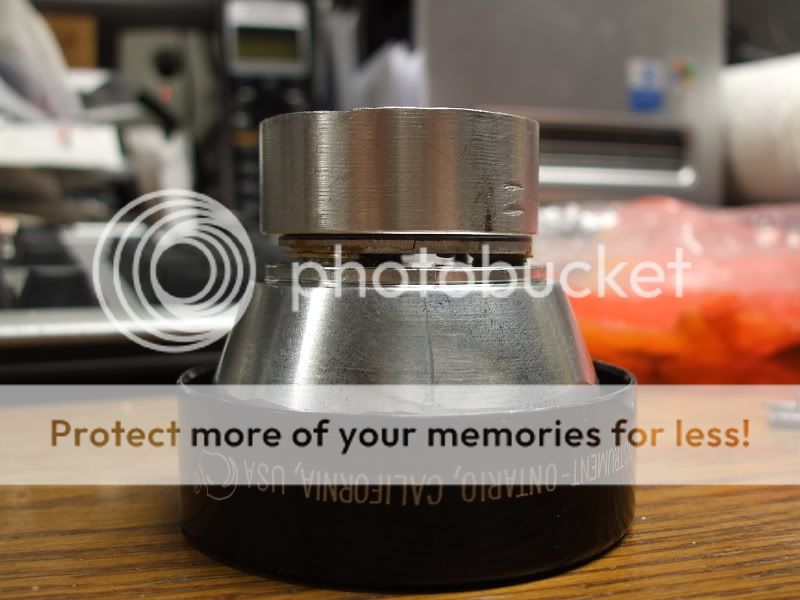
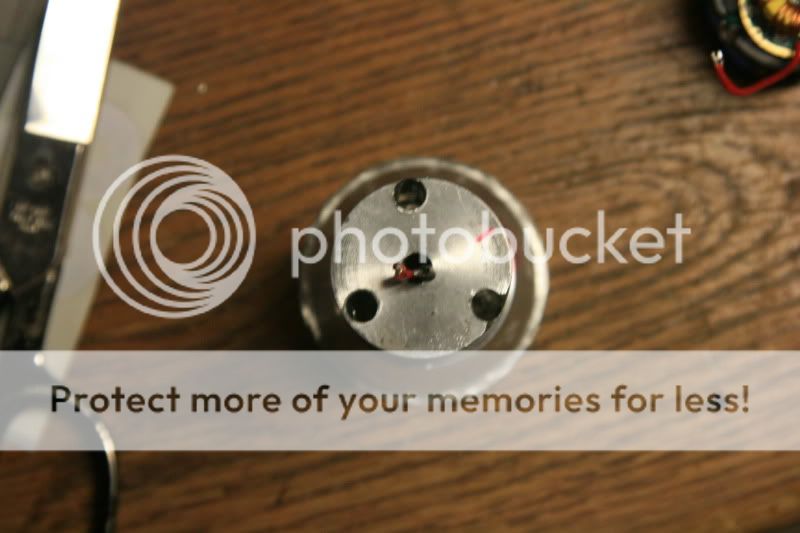
Thru-holes viewed from bottom of heatsink to screw tri-star to triflector thru the heatsink so all three are sandwiched together:
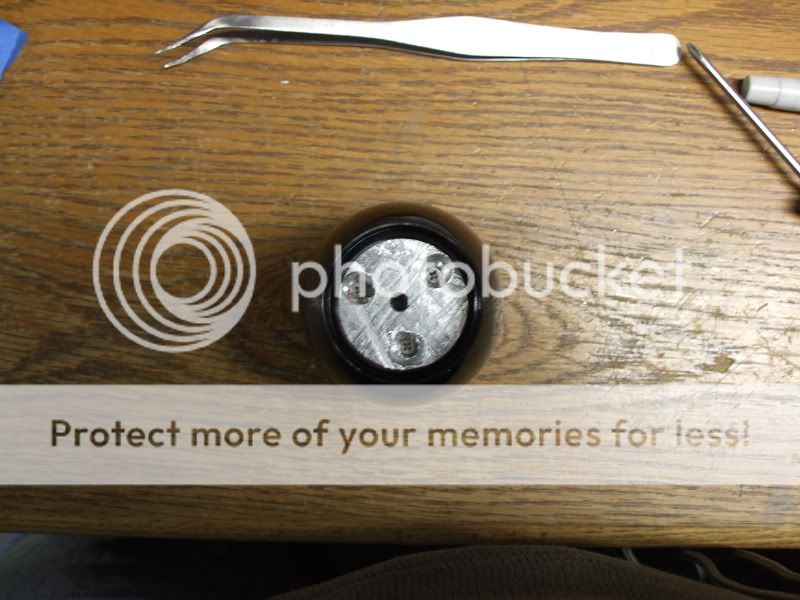
The face after assembly:
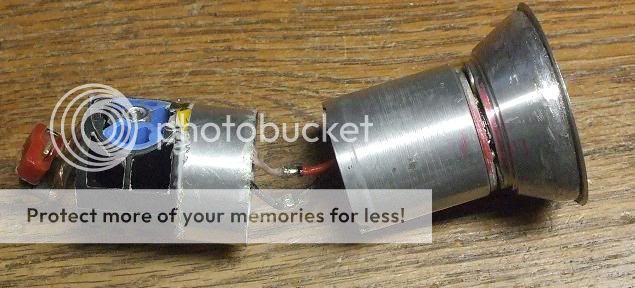
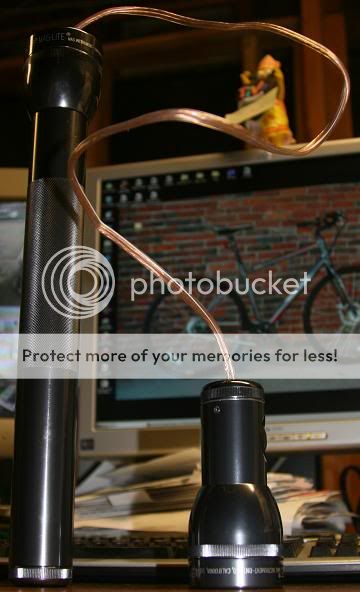
Fully assembled light, for now:

LiFe batteries provide ample power and runtime
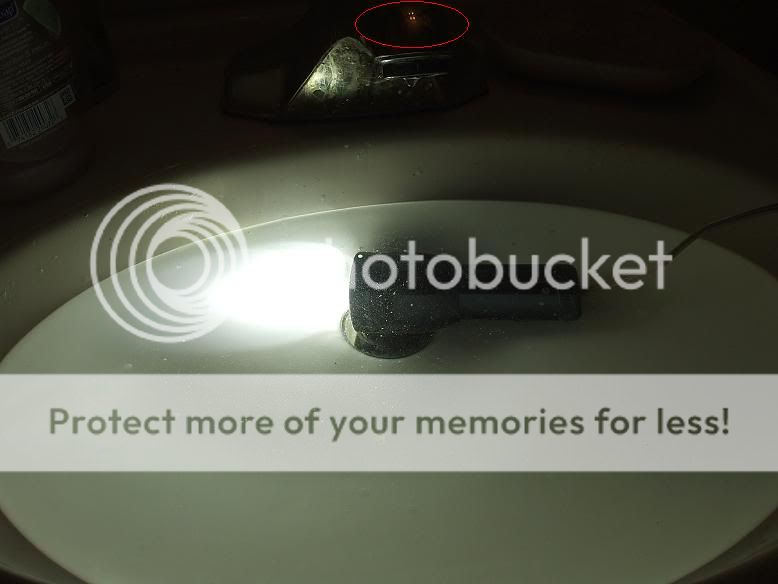
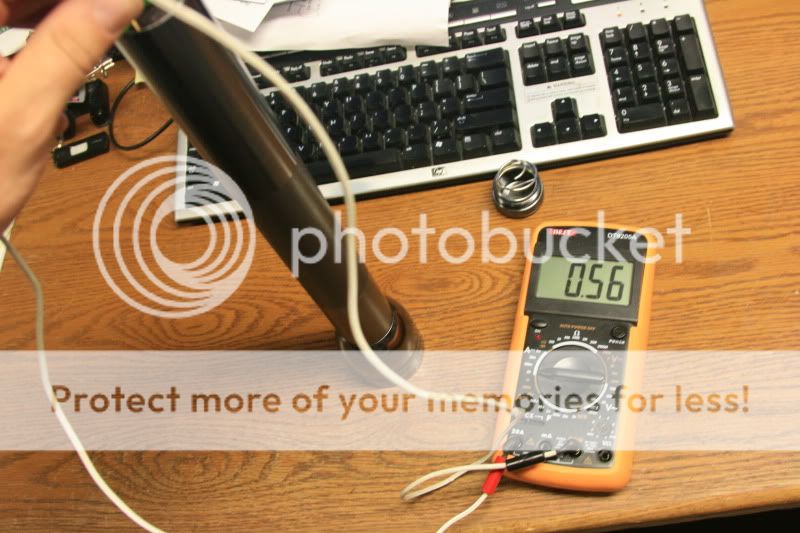
Tailcap draw on low
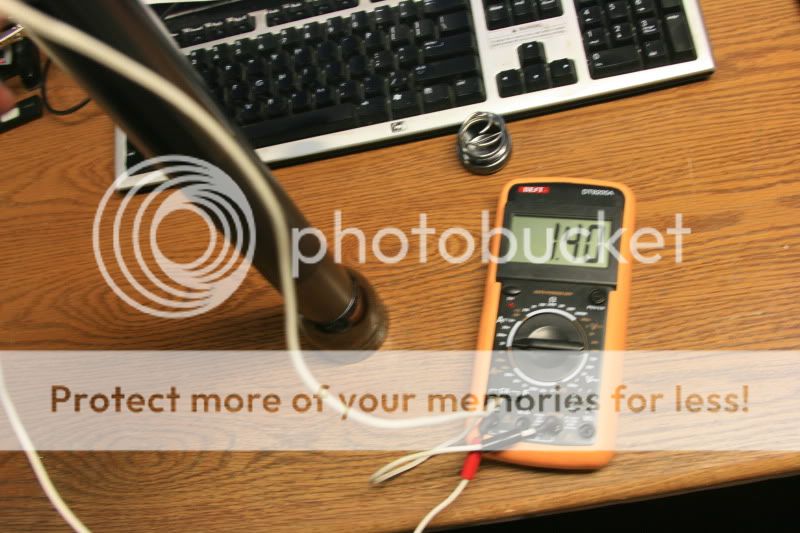
...on strobe
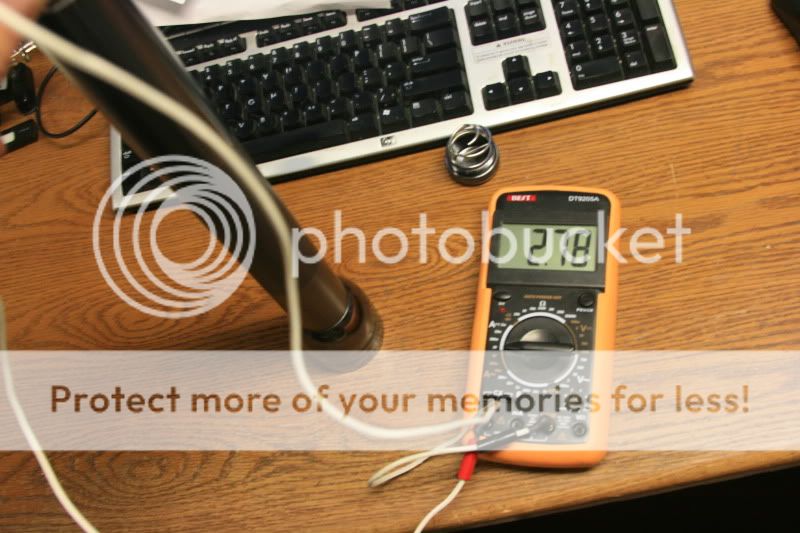
...draw on high
Beamshot comparison with other triple floody buddies:
Triple XML with triple DX optic:

Triple 4500K SST-50 with SMO triflector:

This light - Triple cool white MC-E with MOP tri-flector:

*Edit*
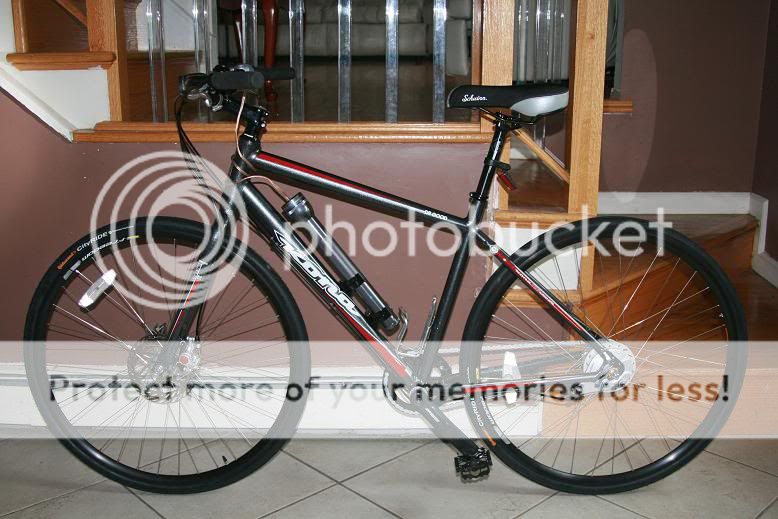
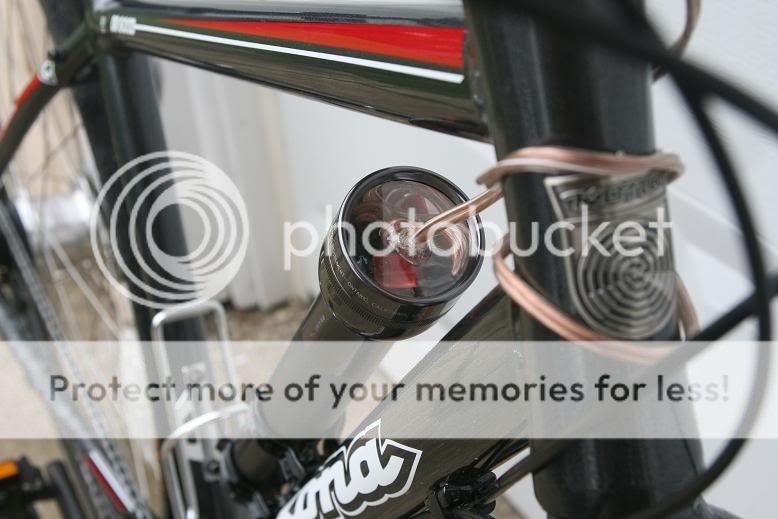
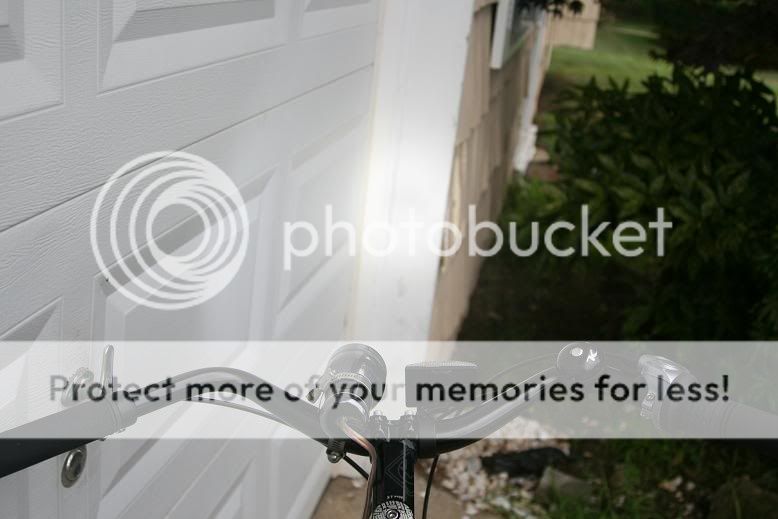
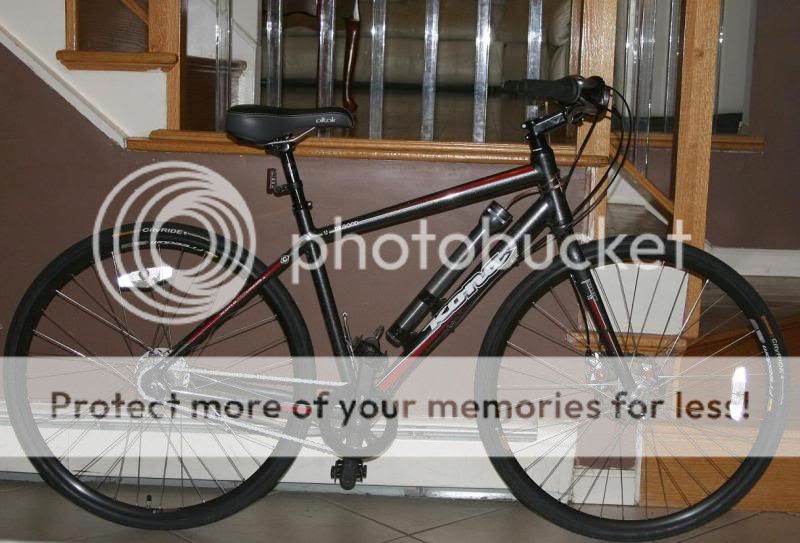
Cut down a 2D to a 0D and did what I planned...
Pics of it installed on the bike are coming up...
The end result is a Mag 4D host mounted to the frame and used as the battery carrier, and a Mag 0D host housing basically everything else and mounted to the handlebars. Both hosts still have their switches.
For the LEDs, I had three cool white MC-E that I had pulled from three MC-E modded lights to upgrade them to XM-L. I mounted all three onto a triple XRE star, wired as 4p3s.
Now how to drive 'em like that? I decided to see if the DX 3-mode 3A XML driver, sku 57779, which is capable of up to 18v input could drive three in series. Answer = yes.
Now how to keep 3 MCE at 3A cool? I combined those components with a huge Aluminum heatsink that snugly fits the Mag D neck. I then drilled thru-holes for screws and wires to pass and tapped three holes into the bottom of a DX MOP tri-flector, which I'd already modified the threads on to fit a Mag head. The result is the tri-star sandwiched between the triflector and the heatsink. Thermal grease was applied between the heatsink and star and heatsink and interior of the neck.
Now, how to drive 3 MC-Es in series at 3A and still have decent run-time? Enter 4 UltraFire 32600 LiFePO4 4AH batteries and a Mag 4D host. The big giant host might not appeal as a hand-held, but here's the cool part...
This will be a convertible bike light! My plan is to take a Mag 2D of the same color and cut the top section, including the switch section and install the completed head assembly to that. The 4D body will remain unmodified and will mount to the bicycle's down tube with Maglite's D-cell wall mounting brackets, secured to the frame by the bottle carrier bolts. 16 awg speaker wire with plugs will connect top of the switch of the 4D body to the bottom of the switch in the cut 2D body. The cut 2D body will mount to the handlebars. Both switches will remain operational (both must be on and either can be used to select modes). The point is that the head can be moved from the part of the 2D on the handlebars back to the 4D body at any time with relative ease.
This way, I've got mega runtime on low and car high-beam brightness on high. Not sure I'll ever need strobe unless I feel I'm in danger of being hit and need a driver to take notice of me.
Photo journal of the build...
Assembled light engine with giant heatsink
Thru-holes viewed from bottom of heatsink to screw tri-star to triflector thru the heatsink so all three are sandwiched together:
The face after assembly:
Fully assembled light, for now:
LiFe batteries provide ample power and runtime
Tailcap draw on low
...on strobe
...draw on high
Beamshot comparison with other triple floody buddies:
Triple XML with triple DX optic:
Triple 4500K SST-50 with SMO triflector:
This light - Triple cool white MC-E with MOP tri-flector:
*Edit*
Cut down a 2D to a 0D and did what I planned...
Pics of it installed on the bike are coming up...
Last edited: