
So I know everyone and their dog has done this sort of thing but I figured I would post mine anyway. Here's my modded 2D maglite.
Parts:
h22a heatsink (P7 flat top)
http://www.candlepowerforums.com/vb/showthread.php?310770-********-H22A-Heatsinks-********
2.8A driver from SB
http://www.shiningbeam.com/servlet/the-132/3-dsh-Mode-Regulated-Circuit-Board/Detail
T6 XM-L (from SB)
3AA to D series batter converters (2 of these in parallel)
http://kaidomain.com/ProductDetails.aspx?ProductId=2723
2D maglite (incandecent, not an LED/rebel reflector)
6 eneloops
Cheap thermal paste from DX
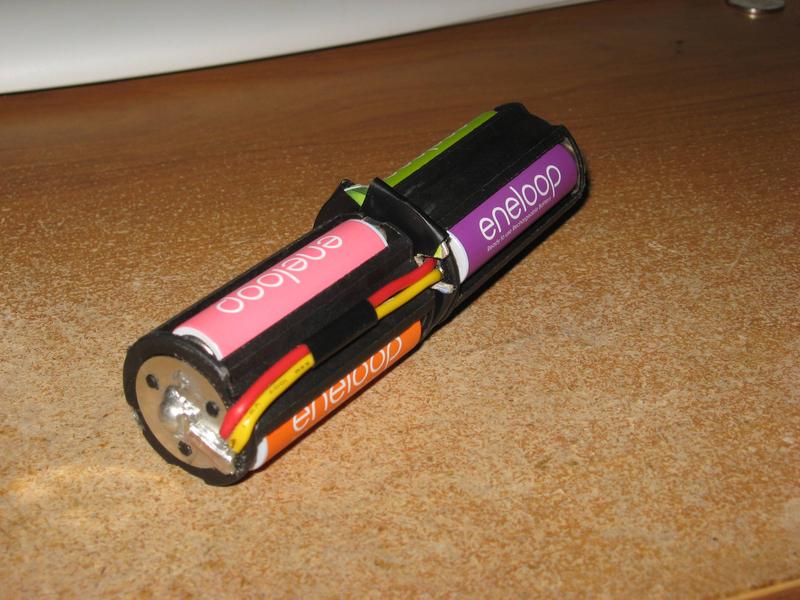
First I modified the battery holders. I put a spacer in between them then ran wires connecting the 2 positive terminals and likewise for the negative terminals so that they were in parallel with each other. Next I put a solder blob on top for a +ve contact and a wire from the negative pad to the negative wire where there was only a very thin strip of metal. I used 2 wires (red/yellow) for the +ve and 2 for the -ve (not pictured) because I felt like it.
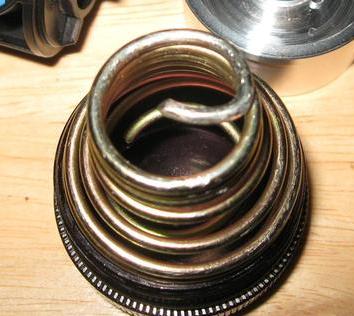
I had to make a small modification to the tail spring so it would play nicer with the battery pack.
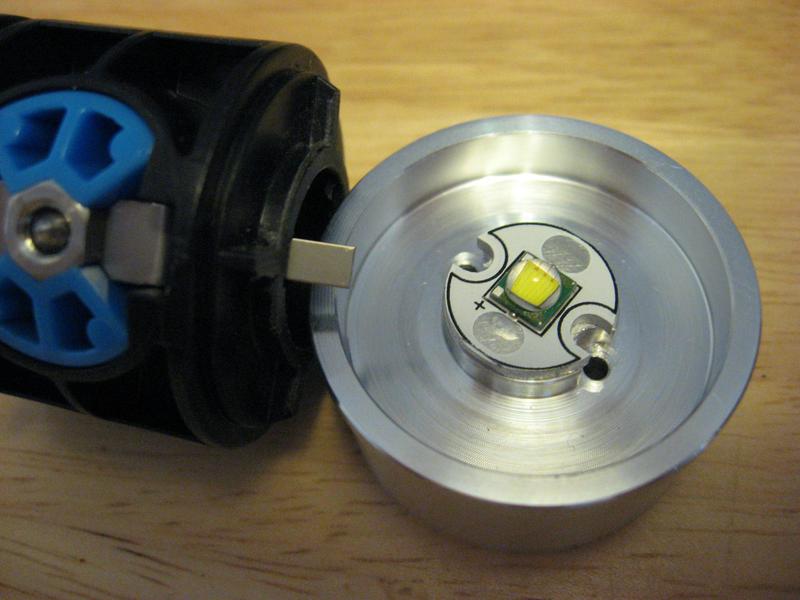
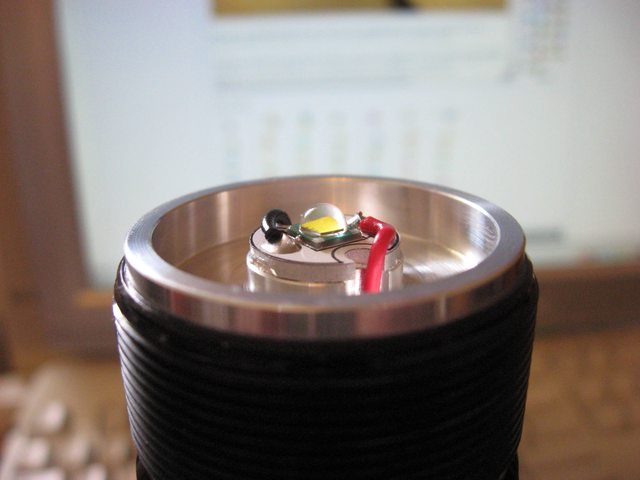
I took the switch out and cut off the stalk, I also cut the metal negative contact a little shorter. You can also see the LED thermal glued on the HS here.
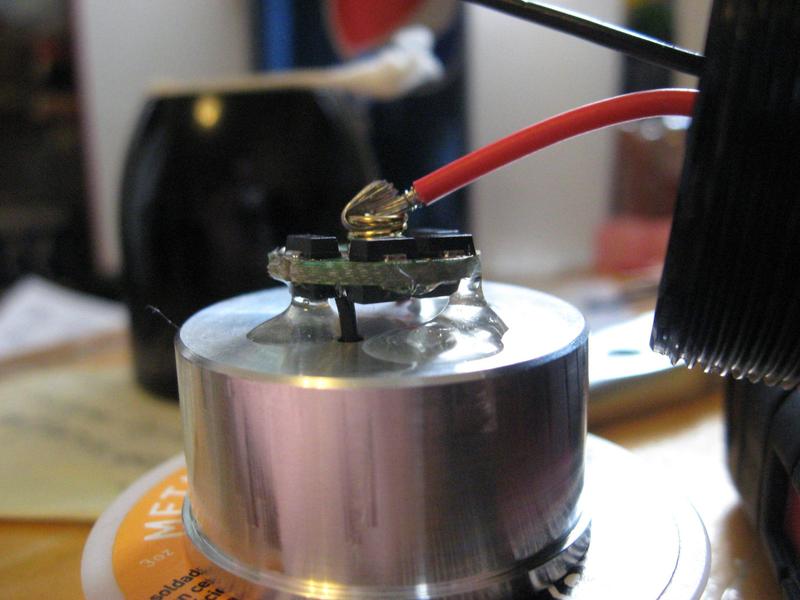
I used a little epoxy on the back side of the HS to secure the driver in place so ir's little wires wouldn't be twisted by the force of the power wires being twisted when it was put together. You might see scratches on the side of the HS, those came from my light. It has a little spot on the inside that drags on the HS.
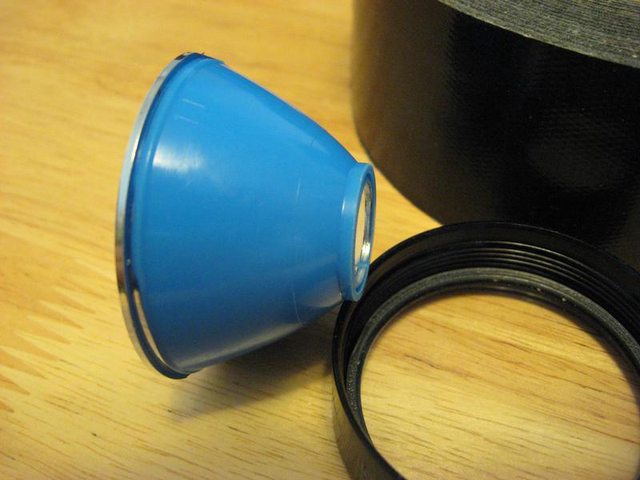
Reflector after I removed the cam. It takes the whole LED inside when screwed on and bottoms out on the HS. I could take off another 1 or 2 mm if I wanted but it isn't need since it will screw on 1.5 turns more than the focus point.
The HS sticks 2.6 mm above the end of the light. I figure the dome of the LED is about 1 mm higher than that. I put thermal grease around the HS before putting it into the tube, it was a very tight fit.
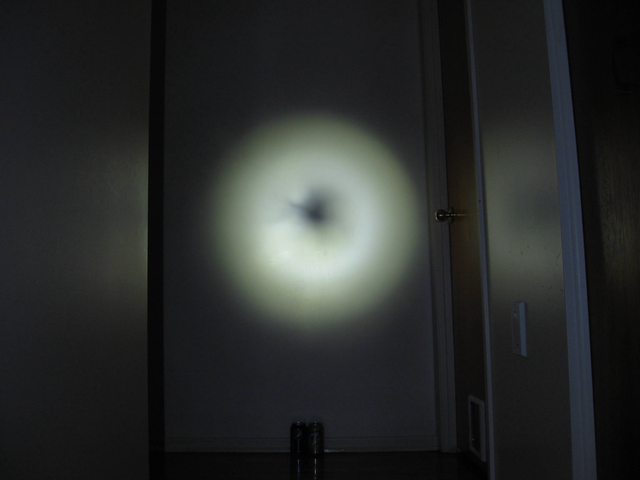
low with the beam as wide as it goes
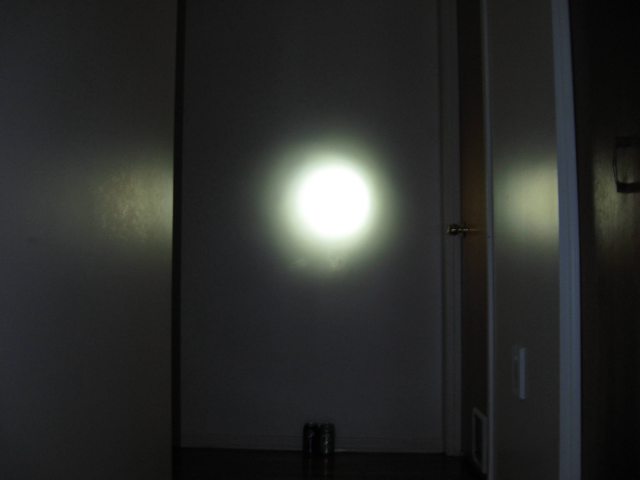
low with focused beam
medium
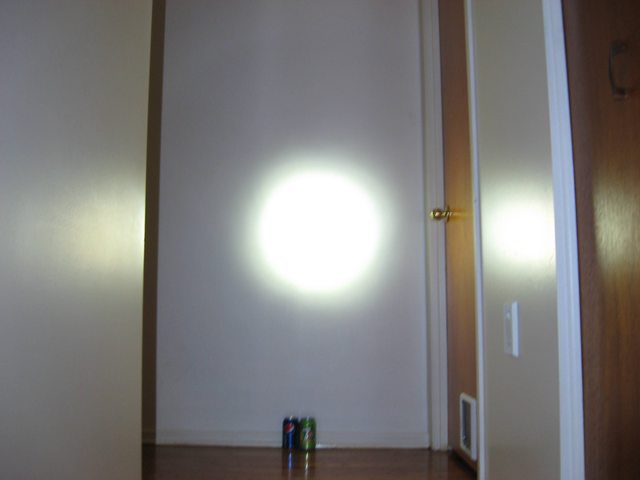
high
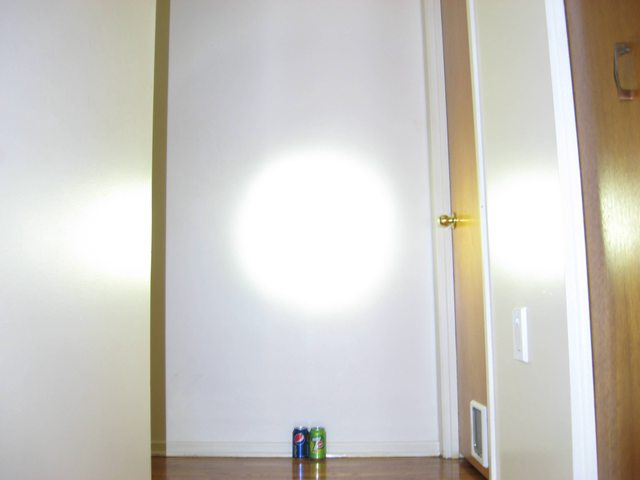
All beam shots are with the same settings as the ones in this ink, incase you wanted to compare.
http://www.candlepowerforums.com/vb/showthread.php?313029-mini-mag-AA-mod-(update-2011-05)
Run time is calculated to be 85 min. I tested it and after 82 min it kicked into low mode. I turned it off for a second and back on at high. It went in to low mode after 10 or 20 seconds again. The calculated run time on low was 28.5 hours. I tested it and it ran for 32 hours. Everyone few hours (after the first 24) I would turn it to high mode for 5 seconds to see if it would kick into low mode, at 32 was the first time it did this so I declared it done then.
Sitting on a chair with a temp probe under it it got up to 45 degree (on the outside of course) after running for 1 hour constantly (it is currently around 27-28 degrees in my room). But I think if I am holding it in my hand or there is a small amount of air movement it should be fine.
The beam is nice, somewhat tight but can be adjusted. Fairly similar to the incan mag before the mod.
I'm thinking of getting a cheap optic for it so I can change it to a range thrower, what are people's thoughts on this?
http://www.dealextreme.com/p/50mm-18mm-2-80-degree-glass-optics-12834
I can't measure anything on it since I don't have a meter but I did put (a pair of AAs in parallel) in series with the battery pack (boosting it's theoretical voltage from 3.6 to 4.8 and there was no difference in brightness).
If I was to do it over I think I would use a T5 instead of a T6 to try and get a slightly nicer colour of light and epoxy the driver to the heatsink better to aid any thermal transfer away from the driver.
Anything else I'm missing or people want to know?
update 2012 03 12:
I used my camera (apperently it has a lux meter function) to measure the output of this light over a discharge cycle. Running 3s2p AAs it ran for about 45 min before the output started to diminish for the remaining 30-40 min.
Running 3 AAs in serise it was dimishing over the whole 45-50 min run time. I'll put some graphs up sometime after I run a few more tests
link for the graphs:
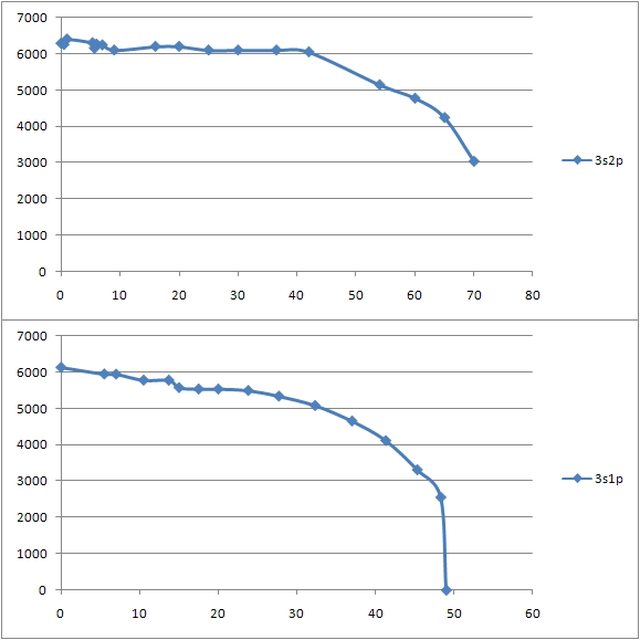
Light output on the y-axis is is not a standard unit but does compare from one test to the next. Unit on the bottom axis is time in min.
update 2014-02-17
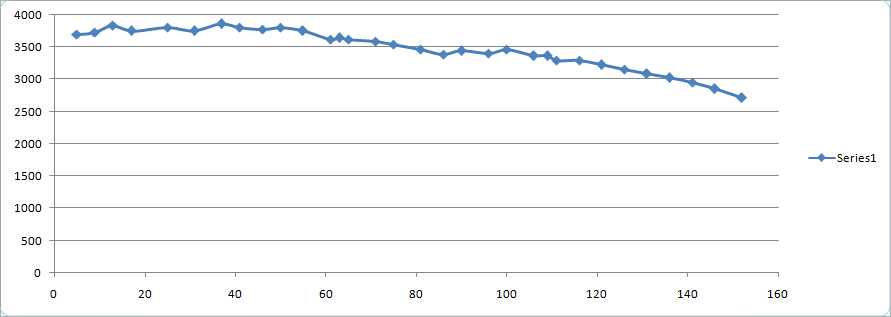
I got a trust fire 32650 from fast tech and tried it in my light. I took the protection circuit off the battery and used a bunch of magnets as spacers to make contact. I did a runtime test to see how it would go. This test was under different conditions than the previous tests so the brightness number on the graphs is not comparable to the previous ones. I started at a full charge (4.26 volts), I went untill the output was falling off and stopped since I didn't want to go too low and hurt the battery, the battery measured 3.443 volts a few minuets afterwards. I put the 3s2p pack of AAs in and tested the brightness of it and found that to be around 3850, so pretty much the same as the max with the lithium and thus I am sure it was running at full 2.8 amps and thus full brightness to start. I was not very careful with these measurments so you'll see some noise in the data but you'll get a decent idea.
Parts:
h22a heatsink (P7 flat top)
http://www.candlepowerforums.com/vb/showthread.php?310770-********-H22A-Heatsinks-********
2.8A driver from SB
http://www.shiningbeam.com/servlet/the-132/3-dsh-Mode-Regulated-Circuit-Board/Detail
T6 XM-L (from SB)
3AA to D series batter converters (2 of these in parallel)
http://kaidomain.com/ProductDetails.aspx?ProductId=2723
2D maglite (incandecent, not an LED/rebel reflector)
6 eneloops
Cheap thermal paste from DX
First I modified the battery holders. I put a spacer in between them then ran wires connecting the 2 positive terminals and likewise for the negative terminals so that they were in parallel with each other. Next I put a solder blob on top for a +ve contact and a wire from the negative pad to the negative wire where there was only a very thin strip of metal. I used 2 wires (red/yellow) for the +ve and 2 for the -ve (not pictured) because I felt like it.
I had to make a small modification to the tail spring so it would play nicer with the battery pack.
I took the switch out and cut off the stalk, I also cut the metal negative contact a little shorter. You can also see the LED thermal glued on the HS here.
I used a little epoxy on the back side of the HS to secure the driver in place so ir's little wires wouldn't be twisted by the force of the power wires being twisted when it was put together. You might see scratches on the side of the HS, those came from my light. It has a little spot on the inside that drags on the HS.
Reflector after I removed the cam. It takes the whole LED inside when screwed on and bottoms out on the HS. I could take off another 1 or 2 mm if I wanted but it isn't need since it will screw on 1.5 turns more than the focus point.
The HS sticks 2.6 mm above the end of the light. I figure the dome of the LED is about 1 mm higher than that. I put thermal grease around the HS before putting it into the tube, it was a very tight fit.
low with the beam as wide as it goes
low with focused beam
medium
high
All beam shots are with the same settings as the ones in this ink, incase you wanted to compare.
http://www.candlepowerforums.com/vb/showthread.php?313029-mini-mag-AA-mod-(update-2011-05)
Run time is calculated to be 85 min. I tested it and after 82 min it kicked into low mode. I turned it off for a second and back on at high. It went in to low mode after 10 or 20 seconds again. The calculated run time on low was 28.5 hours. I tested it and it ran for 32 hours. Everyone few hours (after the first 24) I would turn it to high mode for 5 seconds to see if it would kick into low mode, at 32 was the first time it did this so I declared it done then.
Sitting on a chair with a temp probe under it it got up to 45 degree (on the outside of course) after running for 1 hour constantly (it is currently around 27-28 degrees in my room). But I think if I am holding it in my hand or there is a small amount of air movement it should be fine.
The beam is nice, somewhat tight but can be adjusted. Fairly similar to the incan mag before the mod.
I'm thinking of getting a cheap optic for it so I can change it to a range thrower, what are people's thoughts on this?
http://www.dealextreme.com/p/50mm-18mm-2-80-degree-glass-optics-12834
I can't measure anything on it since I don't have a meter but I did put (a pair of AAs in parallel) in series with the battery pack (boosting it's theoretical voltage from 3.6 to 4.8 and there was no difference in brightness).
If I was to do it over I think I would use a T5 instead of a T6 to try and get a slightly nicer colour of light and epoxy the driver to the heatsink better to aid any thermal transfer away from the driver.
Anything else I'm missing or people want to know?
update 2012 03 12:
I used my camera (apperently it has a lux meter function) to measure the output of this light over a discharge cycle. Running 3s2p AAs it ran for about 45 min before the output started to diminish for the remaining 30-40 min.
Running 3 AAs in serise it was dimishing over the whole 45-50 min run time. I'll put some graphs up sometime after I run a few more tests
link for the graphs:
Light output on the y-axis is is not a standard unit but does compare from one test to the next. Unit on the bottom axis is time in min.
update 2014-02-17
I got a trust fire 32650 from fast tech and tried it in my light. I took the protection circuit off the battery and used a bunch of magnets as spacers to make contact. I did a runtime test to see how it would go. This test was under different conditions than the previous tests so the brightness number on the graphs is not comparable to the previous ones. I started at a full charge (4.26 volts), I went untill the output was falling off and stopped since I didn't want to go too low and hurt the battery, the battery measured 3.443 volts a few minuets afterwards. I put the 3s2p pack of AAs in and tested the brightness of it and found that to be around 3850, so pretty much the same as the max with the lithium and thus I am sure it was running at full 2.8 amps and thus full brightness to start. I was not very careful with these measurments so you'll see some noise in the data but you'll get a decent idea.
Last edited:
")