
I'm very appreciative to Mike for allowing me to 'test' his cool new creation - the multi-mode A2 LED ring. My belief is that Mike listened carefully to the forum members and endeavored to incorporate our ideas and wants into this little product.
I'll spare you photos of the installation of the ring - suffice it to say that, if you follow Mike's very simple instructions and caveats, the installation is SO easy. Probably took me a couple of minutes. I won't bore you with details, but if you want more detailed information, you can visit Calipsoii's sales thread HERE.
Operation is very simple - although I have to thank my buddy Scout24 for giving me a tutorial! My philosophy is "if all else fails, read the instructions" so I had not read any of Mike's instructions, but with a few text messages and a couple of tweaks, everything was working perfectly, so thanks for the instructions, Greg!
And that's the initial 'kudos' to Mike. This is a custom modification to a very old light - I'm very impressed at how easy it is to use right out of the chute.
So to the operation: switching modes is simple - let's assume that we are 'on' in the single LED mode - from 'on', simply "press press press" the button (likewise, you can twist on and off, but I prefer the press method and won't mention the twist again) and the LEDs switch to the next mode, in this case having 2 LEDs lit. Press press press again, and it switches to 3 LEDs. Press press press again, back to 1 LED. Etc., etc., - you get it!
As for what is even more valuable to me, the 'ramping' ability, that's just as easy. From any LED combination, simply press press/hold - you'll see the LED(s) start ramping DOWN - they'll continue to ramp down until they reach the lowest setting, then flash. If you continue to hold the button, the LEDs will jump back to the highest setting, then begin ramping down again. When you've reached the level you like, simply release the button. The next time you depress the button the LED(s) will be in the 'saved' position you just created.
You can set different levels for each of the 3 combinations - single LED, double LEDs, or all three LEDs. I set mine up with the single LED on the lowest level - it's a great uber low glow for moving around the house without disturbing my wife.
The double LEDs are just barely brighter - if I start down the stairs in the middle of the night, they give just enough additional glow to see my way.
I have the 3 LED combination at full brightness - it makes a great flood - much like the single mode ring - and is perfect for those times when you need more light inside, but don't need the center lamp.
So without subjecting you to too much more of my verbosity - let's see some photos!
First, I dropped the level of all three LEDs down to the lowest - it's easy and quick to do so - and I wanted to show you the difference between the Calipsoii single mode ring in warm white, and the multi mode ring (also with all 3 LEDs in warm white, by the way.)
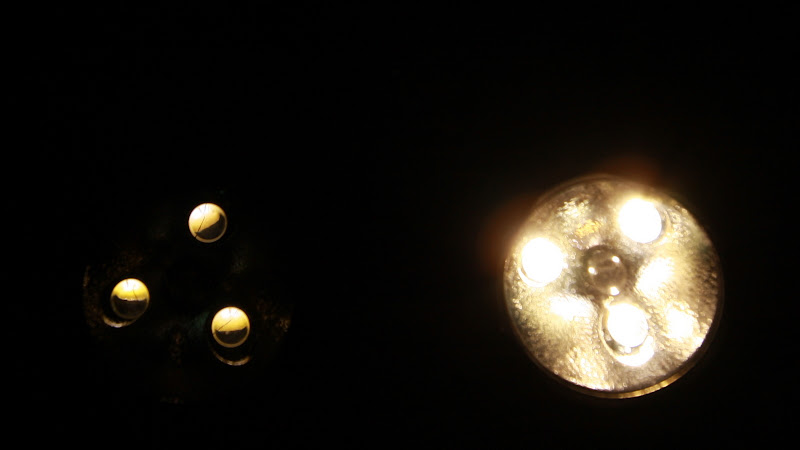
Then I adjusted the multi mode to full brightness...

Here's the single LED at the lowest setting - not an easy photo to capture!

And the subsequent warm glow that you can barely see against the white background

Now for the 2 LED setting - and these are at an output level about 40-50%% higher than the lowest setting

And the resulting white wall shot

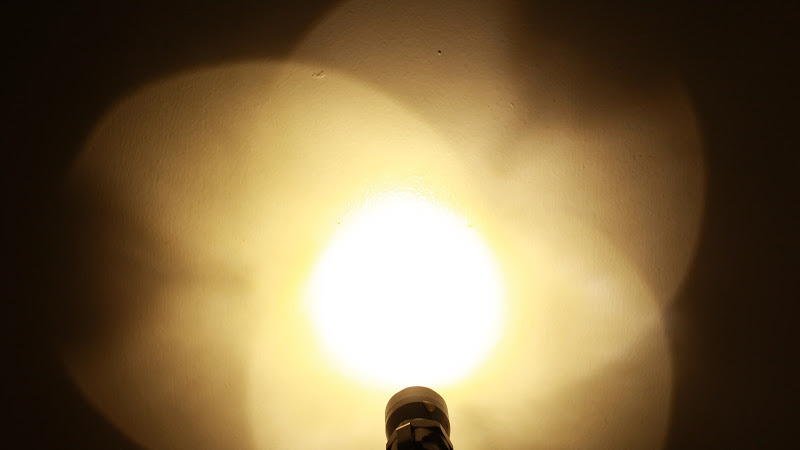
Finally, the 3 LED setting with them running 'wide open

And the obligatory white wall shot....:devil:
Pretty cool, huh?
My honest impressions? Awesome. I've heard some express concerns that the modes are too easy to switch, or that they would prefer to have more than just the 3 presses required to switch modes. I think these concerns speak more to the A2 interface than to the ring itself. The only time I've had any issues with accidental switching was when I was carrying the light in my pocket - odds are that it encountered a few unintended button presses in the pocket. Carrying it via the clip would likely eliminate this problem - I really don't want to have to do any more clicks! Or one could just unscrew the tail cap a bit to lock out the switch completely.
It is very easy and intuitive for me to switch modes, etc., just the way it is. If I am fortunate to be able to hold on to this ring, I'll be happy with it just the way it is.
So the verdict? Outstanding! :twothumbs Thanks, Mike, for breathing new life into the venerable old A2!
I'll spare you photos of the installation of the ring - suffice it to say that, if you follow Mike's very simple instructions and caveats, the installation is SO easy. Probably took me a couple of minutes. I won't bore you with details, but if you want more detailed information, you can visit Calipsoii's sales thread HERE.
Operation is very simple - although I have to thank my buddy Scout24 for giving me a tutorial! My philosophy is "if all else fails, read the instructions" so I had not read any of Mike's instructions, but with a few text messages and a couple of tweaks, everything was working perfectly, so thanks for the instructions, Greg!
And that's the initial 'kudos' to Mike. This is a custom modification to a very old light - I'm very impressed at how easy it is to use right out of the chute.
So to the operation: switching modes is simple - let's assume that we are 'on' in the single LED mode - from 'on', simply "press press press" the button (likewise, you can twist on and off, but I prefer the press method and won't mention the twist again) and the LEDs switch to the next mode, in this case having 2 LEDs lit. Press press press again, and it switches to 3 LEDs. Press press press again, back to 1 LED. Etc., etc., - you get it!
As for what is even more valuable to me, the 'ramping' ability, that's just as easy. From any LED combination, simply press press/hold - you'll see the LED(s) start ramping DOWN - they'll continue to ramp down until they reach the lowest setting, then flash. If you continue to hold the button, the LEDs will jump back to the highest setting, then begin ramping down again. When you've reached the level you like, simply release the button. The next time you depress the button the LED(s) will be in the 'saved' position you just created.
You can set different levels for each of the 3 combinations - single LED, double LEDs, or all three LEDs. I set mine up with the single LED on the lowest level - it's a great uber low glow for moving around the house without disturbing my wife.
The double LEDs are just barely brighter - if I start down the stairs in the middle of the night, they give just enough additional glow to see my way.
I have the 3 LED combination at full brightness - it makes a great flood - much like the single mode ring - and is perfect for those times when you need more light inside, but don't need the center lamp.
So without subjecting you to too much more of my verbosity - let's see some photos!
First, I dropped the level of all three LEDs down to the lowest - it's easy and quick to do so - and I wanted to show you the difference between the Calipsoii single mode ring in warm white, and the multi mode ring (also with all 3 LEDs in warm white, by the way.)
Then I adjusted the multi mode to full brightness...
Here's the single LED at the lowest setting - not an easy photo to capture!
And the subsequent warm glow that you can barely see against the white background
Now for the 2 LED setting - and these are at an output level about 40-50%% higher than the lowest setting
And the resulting white wall shot
Finally, the 3 LED setting with them running 'wide open
And the obligatory white wall shot....:devil:
Pretty cool, huh?
My honest impressions? Awesome. I've heard some express concerns that the modes are too easy to switch, or that they would prefer to have more than just the 3 presses required to switch modes. I think these concerns speak more to the A2 interface than to the ring itself. The only time I've had any issues with accidental switching was when I was carrying the light in my pocket - odds are that it encountered a few unintended button presses in the pocket. Carrying it via the clip would likely eliminate this problem - I really don't want to have to do any more clicks! Or one could just unscrew the tail cap a bit to lock out the switch completely.
It is very easy and intuitive for me to switch modes, etc., just the way it is. If I am fortunate to be able to hold on to this ring, I'll be happy with it just the way it is.
So the verdict? Outstanding! :twothumbs Thanks, Mike, for breathing new life into the venerable old A2!
Last edited:
 For the review, Dan, as well as to Mike for the awesome rings! I've set aside my beloved, go-to low level light for the past week, my Titan, and been using my A2 with the programmable ring exclusively for not only getting ready for work in the morning and midnight refrigerator recon, but for pretty much everything. This has been tough, what with the arrival of new McGizmo Titanium, but I've given the A2 and Mike's ring a serious workout. Need super dim? One LED on low is just a HAIR above Titan low. Want a bit brighter for checking on the kids/pets/ make sure you locked a door without stubbing your toes or blinding yourself? Two LED's around 1/3 power is perfect. Oops, too bright? No problem, press, press hold and ramping down through a whole lot of levels begins. Full blast from the ring? No problem. Just a few presses and a hold away. Oh yeah, the A2's incan main beam is not too shabby, either, giving me decent reach driving around at 4:30 AM...