
I regret that I didn't take photos before this project began. I have a 40 year old house – when we bought it almost 4 years ago it had a new smooth top stove – with a BLACK top – but an 11 year old over-the-stove microwave with 2 anemic little 25 watt bulbs. Not only did they get hot, burn out often, and cost $3 a pop, they did not provide nearly enough light.
Don Mcleish posted details HERE (scroll to the bottom of the page) of a project in which he upgraded a similar situation. That photo essay was an inspiration to me – thus this photo essay on my project.
I'll say up front – it'll take a while to recoup the costs, but I didn't do it to save money – I did it to improve the lighting. Still, at $3 every time a bulb is replaced, and regular replacements, maybe it won't take TOO long after all!
Materials:
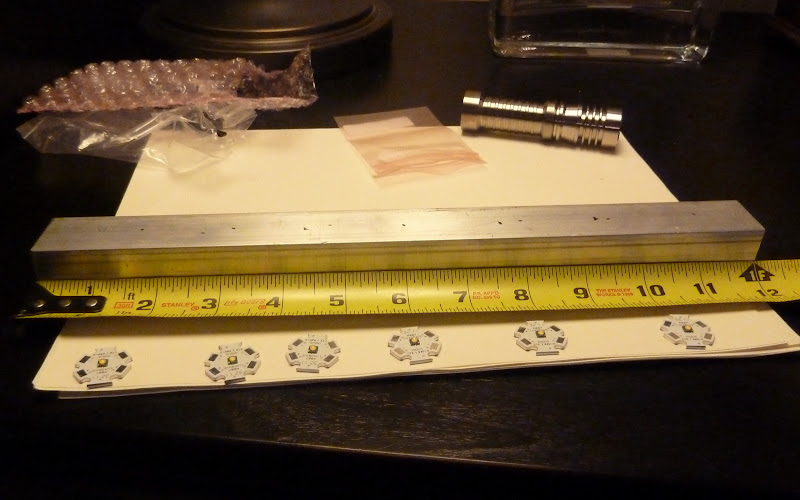
Aluminum Square Tube 1" X 1" 1/8" Thick – 1 foot long – for mounting the LEDs and to provide heat sinking
6 – CREE XPG Q4 Warm LEDs mounted on Indus 20mm stars
Xitanium AC/DC Driver – 700mA – 17 watts
Arctic Alumina Premium Thermal Paste
Various wires, etc. Used 14 gauge solid copper wire
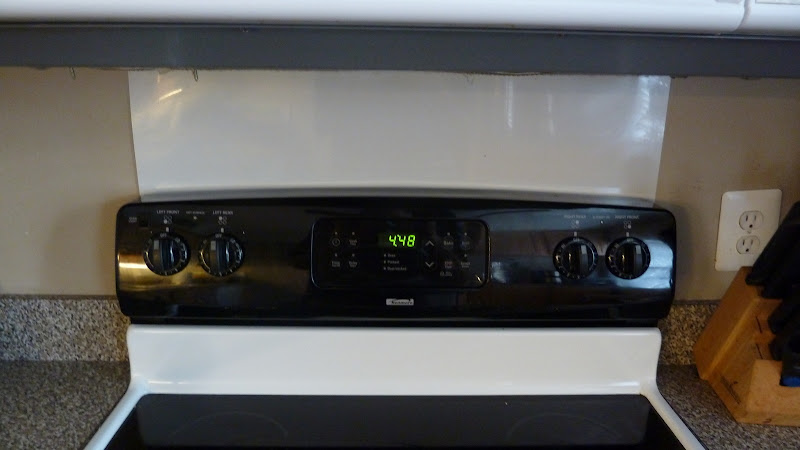
So, although you can't tell much, this is the setting...black - dark - hard to see
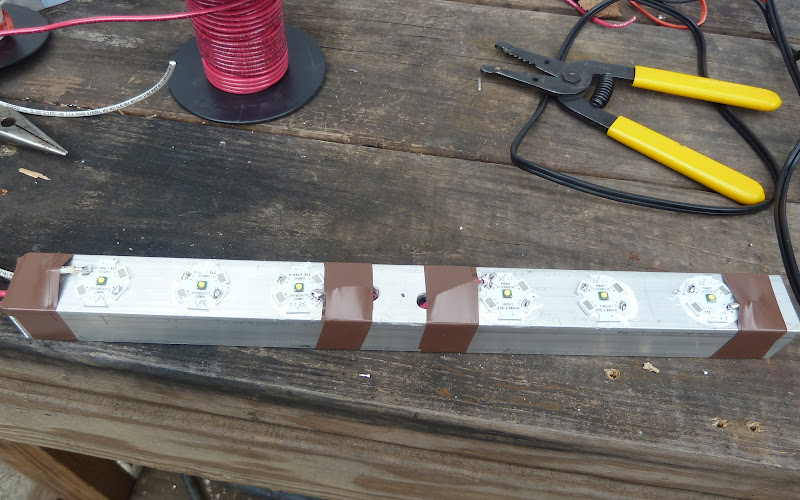
So take a 12 inch aluminum square tube...
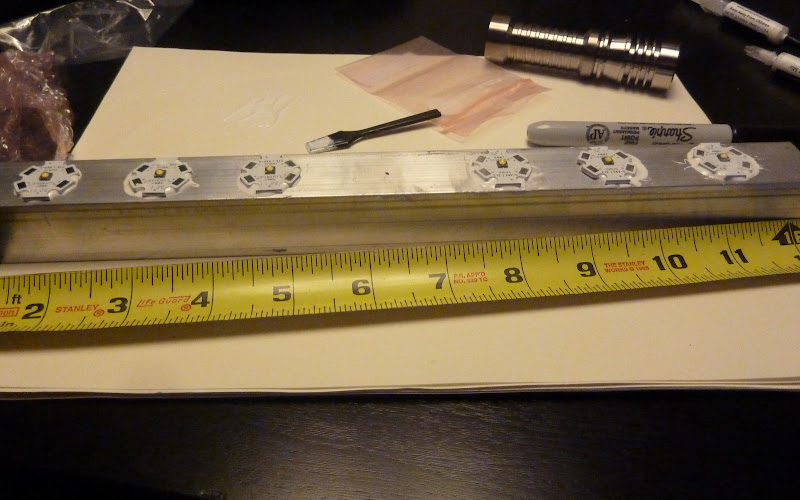
Mount 6 Cree XPG Q4 Warm (3000CCT) LEDs on Indus Star MCPCBs using Arctic Aluminu Premium Thermal Adhesive
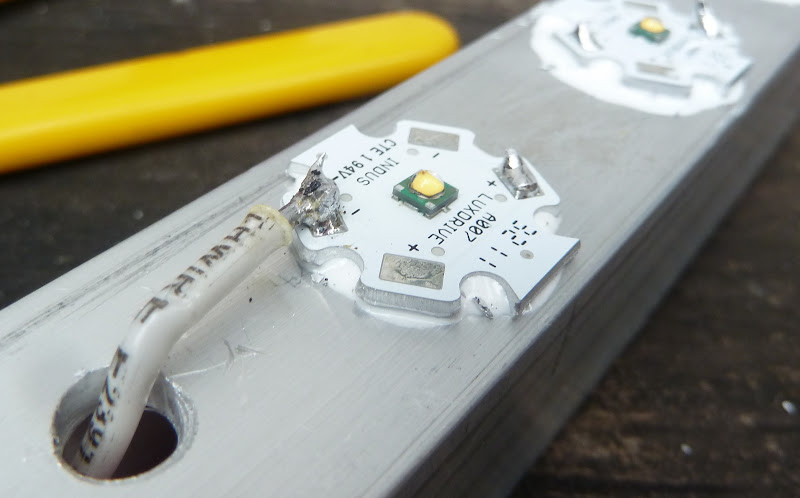
Drill a few strategic holes for wire routing...

My work isn't exactly 'neat', but it gets the job done in a workmanlike sorta way... The setup is 2 banks of 3 LEDs wired in parallel

Joined the negative lead at the end of the string...
Routed the wires out the end of the tube
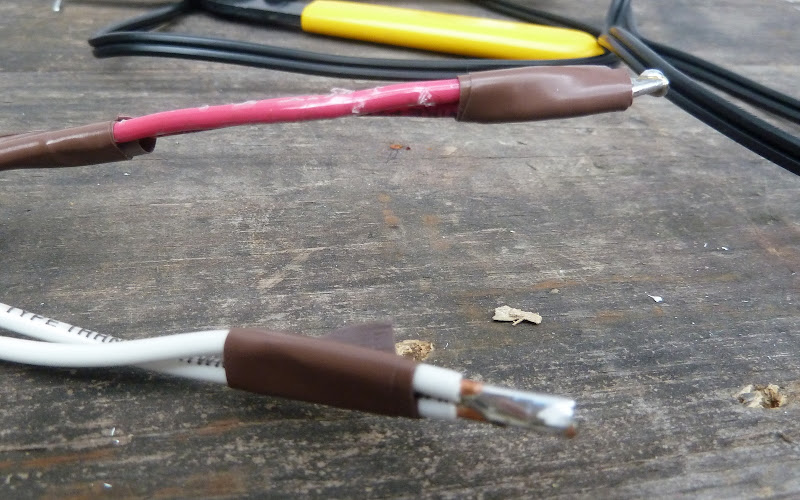
Taped down the main connections
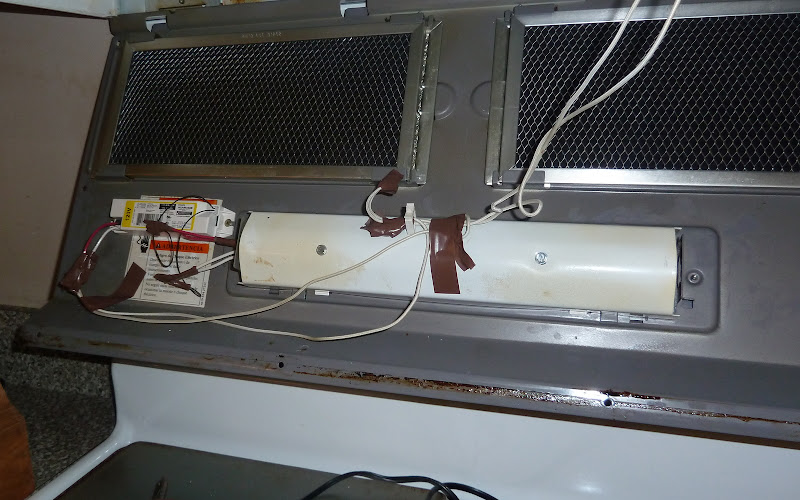
Joined the 2 series and mounted the bar inside the existing reflector
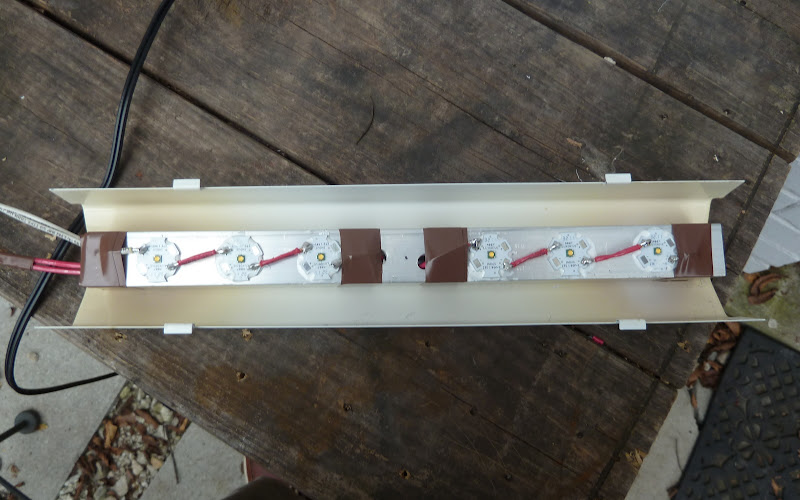
Underside of the old reflector
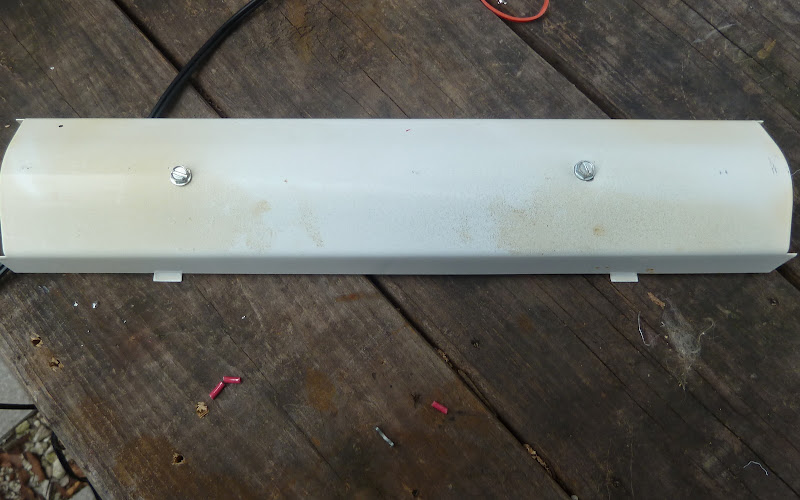
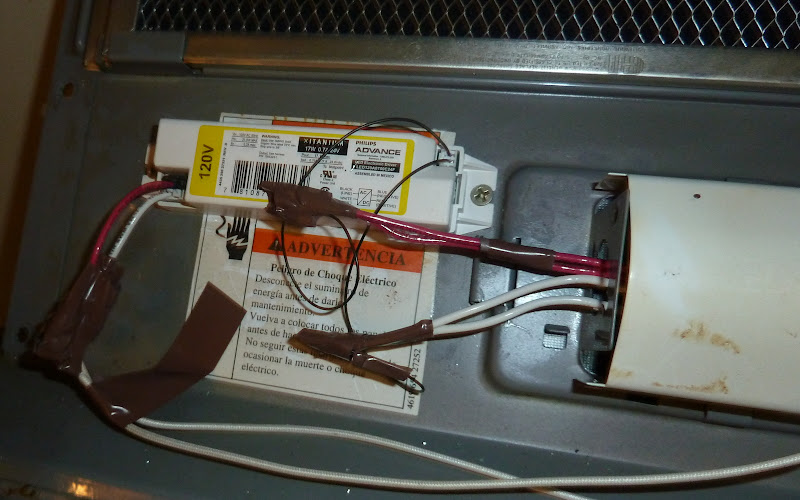
Snapped it back into the exisiting spaces provided - I removed the sockets and hardware from the stock lighting, but did so in such a way as to be able to revert back to the original arrangement very easily if need be

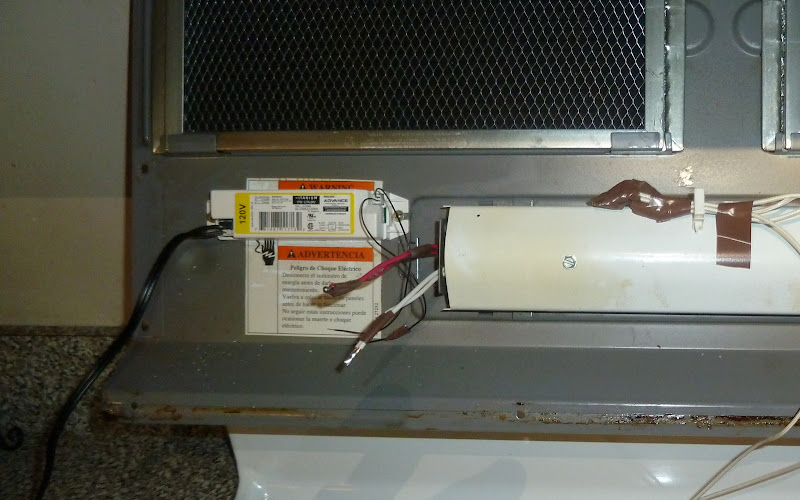
Mounted the Xitanium driver directly to the metal base of the microwave. Plenty of room - and it's a natural heat sink! Used a stock AC cord to plug into an outlet and make certain everything worked before I tied into the microwave's power leads.
Tied everything together. Doesn't look neat, but the original leads were preserved and simple point solder connections tied new wires into old
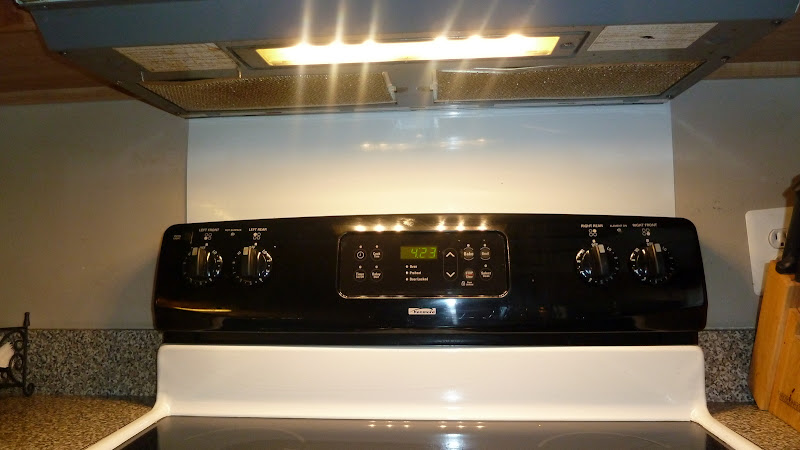
Tied everything together, closed everything up and voila! Let there be light!
6 LEDs all glowing nicely
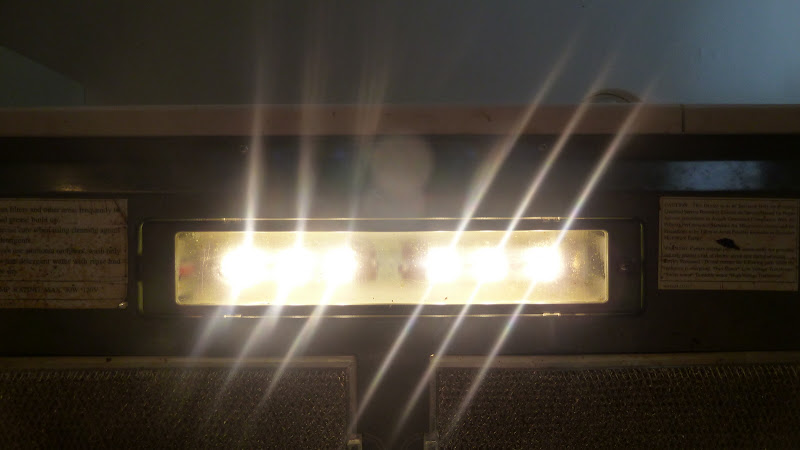
Looks bright and clean
A few interesting notes - the switch is 2 stage. I measured with a multi meter and it puts out 120VAC on high, 64VAC on low. I wondered if it would even light the LEDs on low, but it does - but it has flicker like slowed down PWM. No matter, we switch right through low to off anyway -
I'm no electrician, but I thought it was important to have your hot and neutral defined. However, the leads coming to the lights were unmarked. I tried them both ways and they read 120VAC either way I connected to the leads. And the lights worked connected either way.
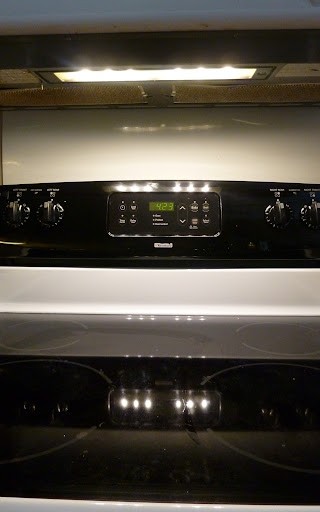
Whatever the case, the stove top is now nicely lit. I doubt that I'll ever have to deal with a burned out lamp. I left the lights on for an hour and measured with my handy dandy infrared thermometer - 80 degrees F at the LED - 78 where the driver makes direct contact with the metal bottom of the oven.
6 LEDs X 3.0Vf X 350mA (driving parallel) = 6.3 watts consumption from a driver rated for 17 - plenty of head room. Prior to the mod, my meter measured 250 lux in the center of the stove - after the mod - 720 lux!
I am very pleased - more so than I was with my laundry room project. Next? Under cabinet lighting!!
:thumbsup:
Don Mcleish posted details HERE (scroll to the bottom of the page) of a project in which he upgraded a similar situation. That photo essay was an inspiration to me – thus this photo essay on my project.
I'll say up front – it'll take a while to recoup the costs, but I didn't do it to save money – I did it to improve the lighting. Still, at $3 every time a bulb is replaced, and regular replacements, maybe it won't take TOO long after all!
Materials:
Aluminum Square Tube 1" X 1" 1/8" Thick – 1 foot long – for mounting the LEDs and to provide heat sinking
6 – CREE XPG Q4 Warm LEDs mounted on Indus 20mm stars
Xitanium AC/DC Driver – 700mA – 17 watts
Arctic Alumina Premium Thermal Paste
Various wires, etc. Used 14 gauge solid copper wire
So, although you can't tell much, this is the setting...black - dark - hard to see
So take a 12 inch aluminum square tube...
Mount 6 Cree XPG Q4 Warm (3000CCT) LEDs on Indus Star MCPCBs using Arctic Aluminu Premium Thermal Adhesive
Drill a few strategic holes for wire routing...
My work isn't exactly 'neat', but it gets the job done in a workmanlike sorta way...
The setup is 2 banks of 3 LEDs wired in parallel
Joined the negative lead at the end of the string...
Routed the wires out the end of the tube
Taped down the main connections
Joined the 2 series and mounted the bar inside the existing reflector
Underside of the old reflector
Snapped it back into the exisiting spaces provided - I removed the sockets and hardware from the stock lighting, but did so in such a way as to be able to revert back to the original arrangement very easily if need be
Mounted the Xitanium driver directly to the metal base of the microwave. Plenty of room - and it's a natural heat sink! Used a stock AC cord to plug into an outlet and make certain everything worked before I tied into the microwave's power leads.
Tied everything together. Doesn't look neat, but the original leads were preserved and simple point solder connections tied new wires into old
Tied everything together, closed everything up and voila! Let there be light!
6 LEDs all glowing nicely
Looks bright and clean
A few interesting notes - the switch is 2 stage. I measured with a multi meter and it puts out 120VAC on high, 64VAC on low. I wondered if it would even light the LEDs on low, but it does - but it has flicker like slowed down PWM. No matter, we switch right through low to off anyway -
I'm no electrician, but I thought it was important to have your hot and neutral defined. However, the leads coming to the lights were unmarked. I tried them both ways and they read 120VAC either way I connected to the leads. And the lights worked connected either way.
Whatever the case, the stove top is now nicely lit. I doubt that I'll ever have to deal with a burned out lamp. I left the lights on for an hour and measured with my handy dandy infrared thermometer - 80 degrees F at the LED - 78 where the driver makes direct contact with the metal bottom of the oven.
6 LEDs X 3.0Vf X 350mA (driving parallel) = 6.3 watts consumption from a driver rated for 17 - plenty of head room. Prior to the mod, my meter measured 250 lux in the center of the stove - after the mod - 720 lux!
I am very pleased - more so than I was with my laundry room project. Next? Under cabinet lighting!!
:thumbsup:
Last edited:
 I'm hoping to have some time this winter to do some in-home lighting upgrades, and will look back to this for some guidance!