
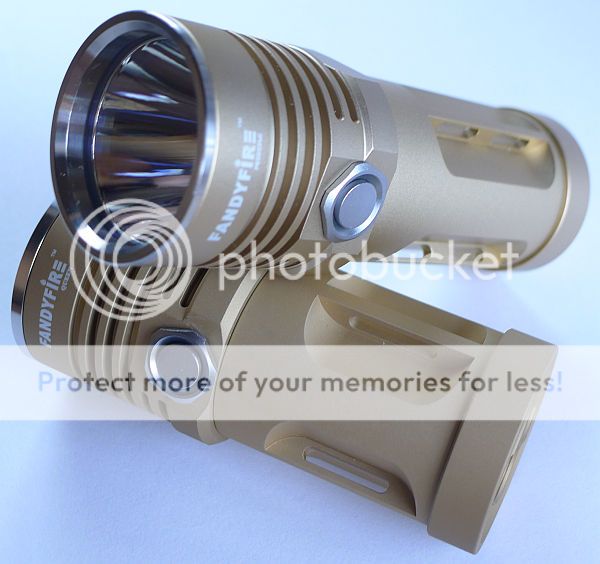
The last of this series of reviews of lights from DX takes a look at the baby brother and sister of lights like the Nitecore TM11, and SkyRay King (or at least they seem inspired by them to me) – The FandyFire Rook and Queen.
Both have XM-L emitters and both use three cells in parallel to power them. Both use a single two mode switch, and both have very similar styling and details, which is why I have grouped them into a single review.
Initial Impressions:
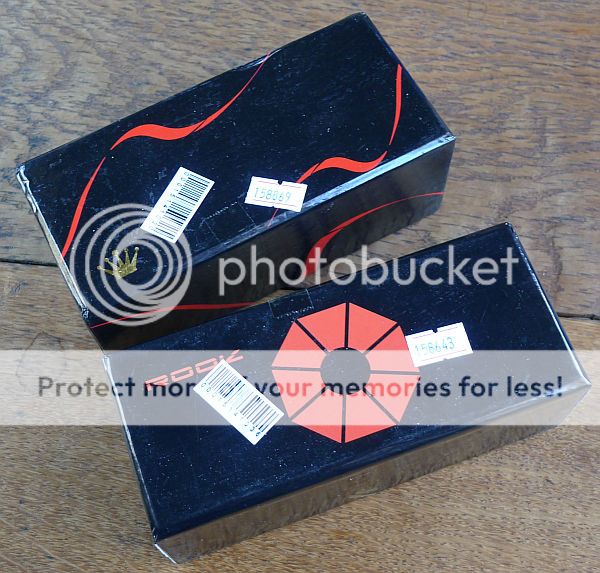
Just as with the FandyFire Raging reviewed here, these FandyFire lights come in similar packaging which helps give a good first impression.
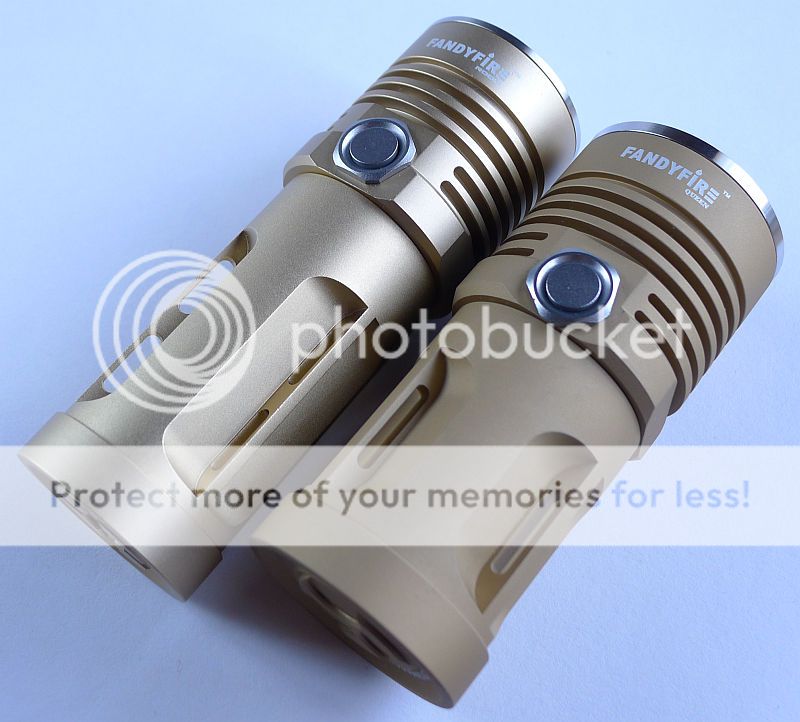
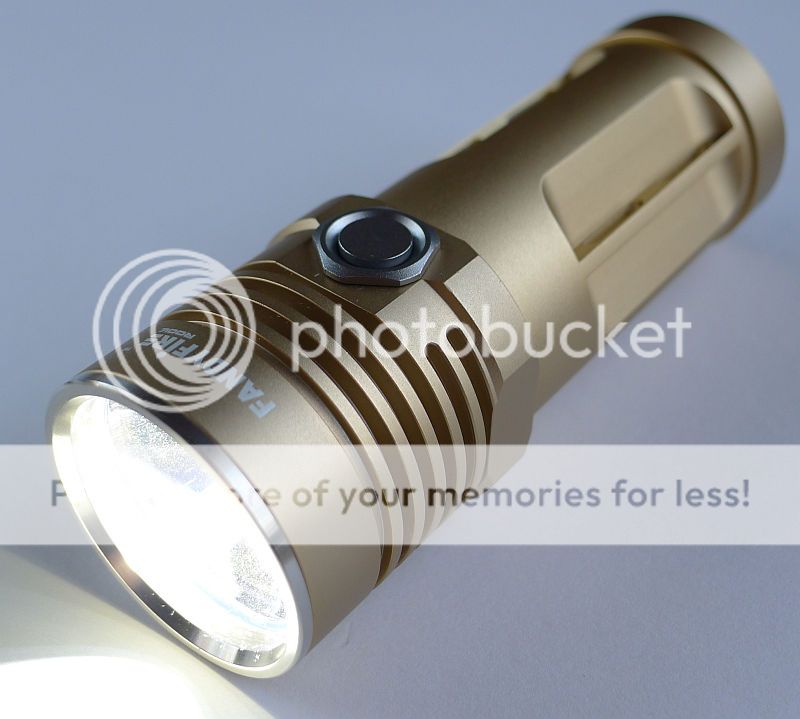
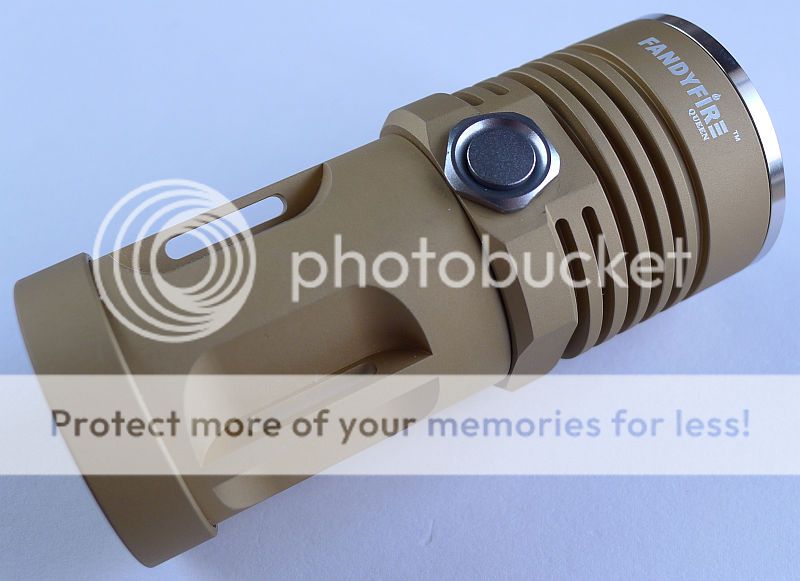
Despite being so similar, I was surprised to find the surface finish was very different. The Rook has a shiny gold anodised finish (though the surface is slightly matt the overall impression is a shiny finish) which does not seem like much to write home about. The Queen however has a finish which feels far superior. The surface is matt, and almost sandy looking, as the anodised gold surface is dull. This just seems deeper and richer than the Rook's finish.
Obviously this is more noticeable when you have both next to each other. Taken individually there are no real issues, but side by side the Queen has the nicer finish.
Each fits around the chosen power cell, so the Queen is shorter and wider than the Rook. Other than that their construction and components are almost identical.

What is in the box:
The sturdy boxes.
Closed cell foam protects the lights.
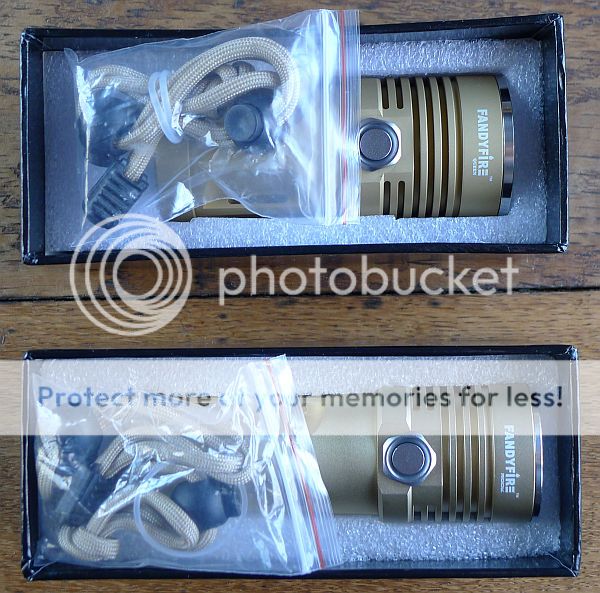
Each light has a lanyard, spare o-ring and an instruction leaflet.
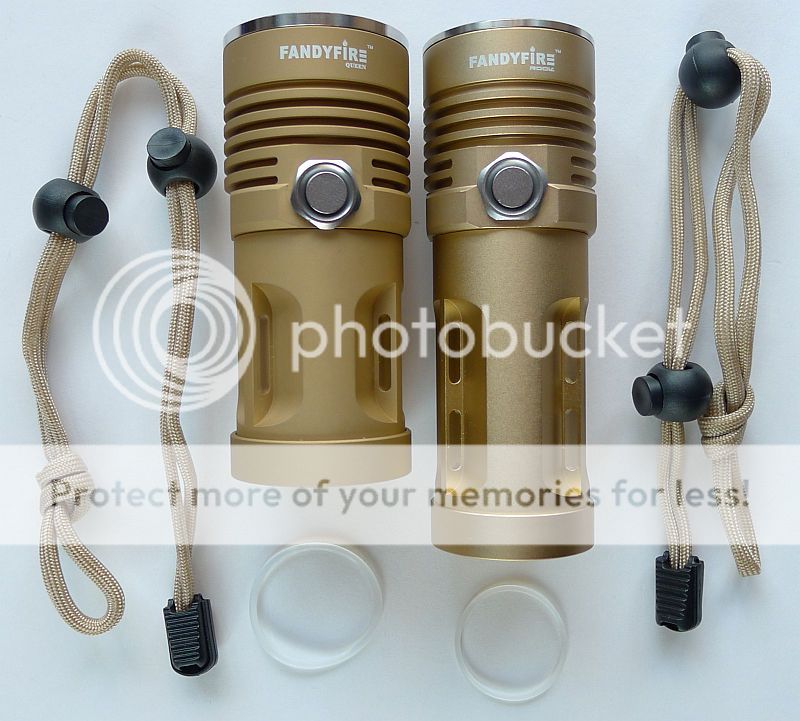
Different surface finish is clearly shown and the relative size to each other.
Taking a closer look and looking inside:
For the closer look I will show the Rook first.
Each of these lights has a different design milled into the base.

Both models use the same switch cover. This unscrews to reveal the electronic click switch. There does not appear to be any waterproofing provided by the switch cover, so this may be a possible point of failure if it gets wet.

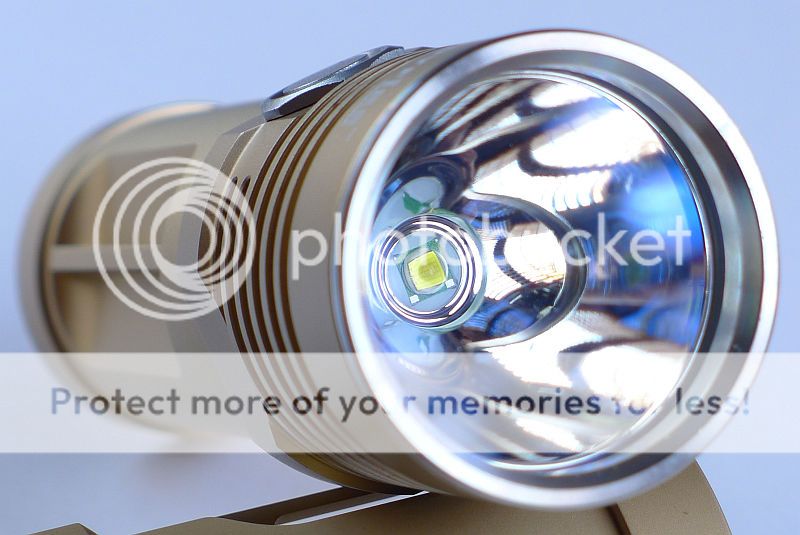
The XM-L LED and reflector
In the battery tube sides there are three slots cut into the tube. These provide a lanyard fixing point and a design feature.

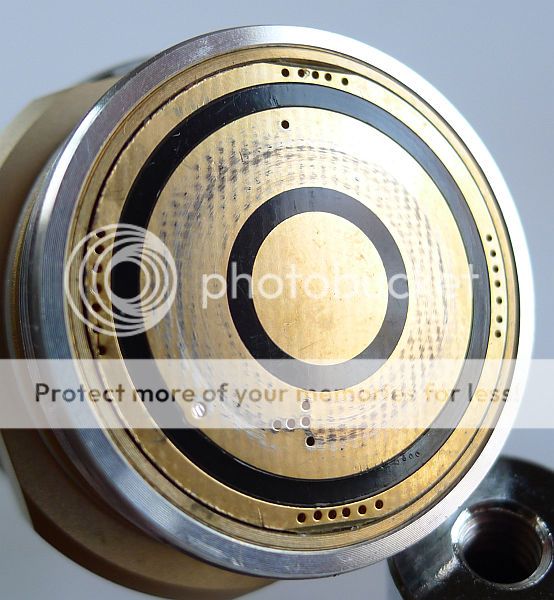
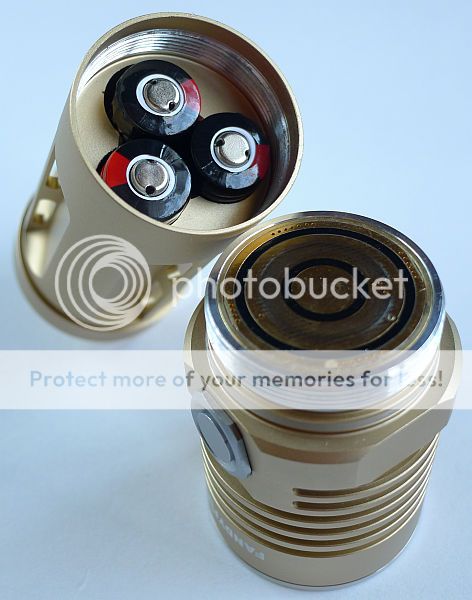
The positive contact, which out of the box had these marks on it, presumably from a final test on the production line (as the light was supplied new in box with seals intact). Despite there being a second contact ring, this in not use to connect to the negative terminal, instead the threads themselves are the negative contact connection between the battery tube and head.
The threads are cut cleanly enough, but there was swarf left in the base of the threads and as supplied the threads and o-ring were dry.


The negative terminals are springs

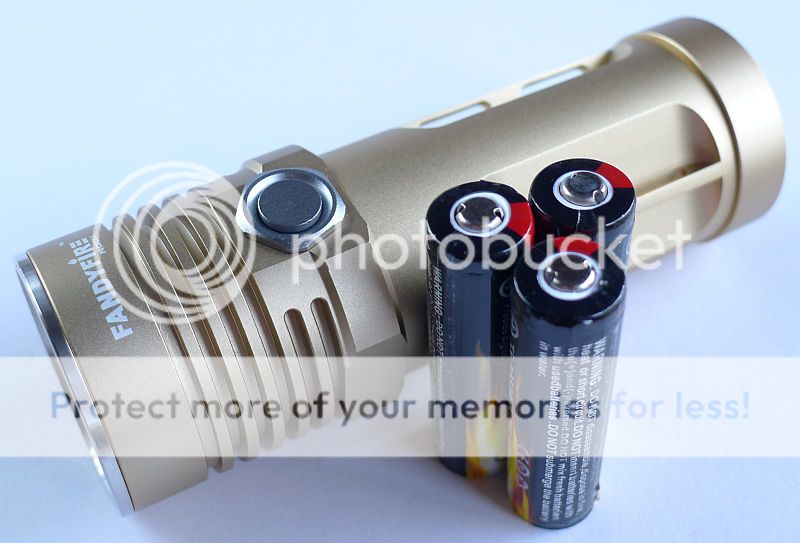
And for scale the batteries next to the Rook
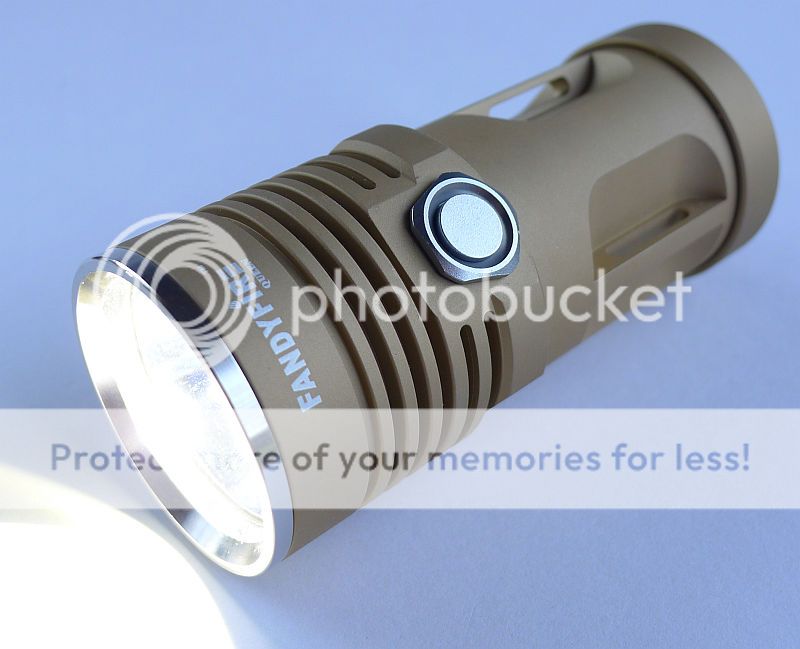
Now, onto the Queen -
The different design in the base.

The Queen also has three slots cut into the battery tube. These provide a lanyard fixing point and a design feature.
The Queen's reflector is wider than the Rook's with a larger white spacer.

The Queen has the same switch cover as the Rook with the same potential point for water to get in. On the Queen, this stood a little proud of the surface as it should screw in a little more, however after removing it to check, there was no way to screw it in further as it was hitting the PCB the electronic switch was mounted on.

Again, a new sealed light, straight out of the box and the positive terminal is marked (I take these photos in the 'as supplied' condition and do no testing until the photos have been taken). Also visible at the top of the photo is a small pin, or the end of a wire, sticking out of the positive contact. This caused the batteries to catch when installing them and screwing the light together.

The threads are cut cleanly enough, but there was swarf left in the base of the threads and as supplied the threads and o-ring were dry.

The negative terminals are springs

Modes and User Interface:
Both the Rook and Queen operate in exactly the same way.
Press and hold the switch for 2s and the light will come on in High. When on, briefly click the switch to change to Low. To switch off, press and hold the switch for 2s.
Nothing more to it.
Batteries and output:
The Rook is the slightly more versatile of the two as it takes 'AA sized' batteries. This means you are good for alkaline, lithium or rechargeable AAs and 14500s.
Shown loaded up with three 14500 cells.
The Queen will run on 16430s and CR123s
The Queen next to a set of protected 16430s (the type sold on DX).

The battery tube cut out for both is shaped to hold even a single battery without allowing it to move, so for both of these lights you could run them on 1, 2 or 3 batteries.
To measure actual output, I built an integrating sphere. See here for more detail. The sensor registers visible light only (so Infra-Red and Ultra-Violet will not be measured).
Please note, all quoted lumen figures are from a DIY integrating sphere, and according to ANSI standards. Although every effort is made to give as accurate a result as possible, they should be taken as an estimate only. The results can be used to compare outputs in this review and others I have published.
Parasitic drain due to the electronic switch is 1.3mA – 72 days to exhaust full batteries.
Parasitic drain due to the electronic switch is 22.4mA – 11 days to exhaust full batteries!!!
Parasitic drain due to the electronic switch is 1.33mA – 85 days to exhaust full batteries.
The parasitic drain figures are the most disappointing feature of these lights. Due to the contact between the battery negative terminal and the head being via the threads, there is no lockout available, you have to completely unscrew the head.
With the Rook completely exhausting a set of new AAs in 11 days with no actual light output, this is not a light you can leave loaded and ready to go. Do not use alkalines as this light will steadily eat through them and due to constantly drawing power will most likely cause them to leak.
This is doubly disappointing as on AAs the Rook is an excellent house light with a nice beam.
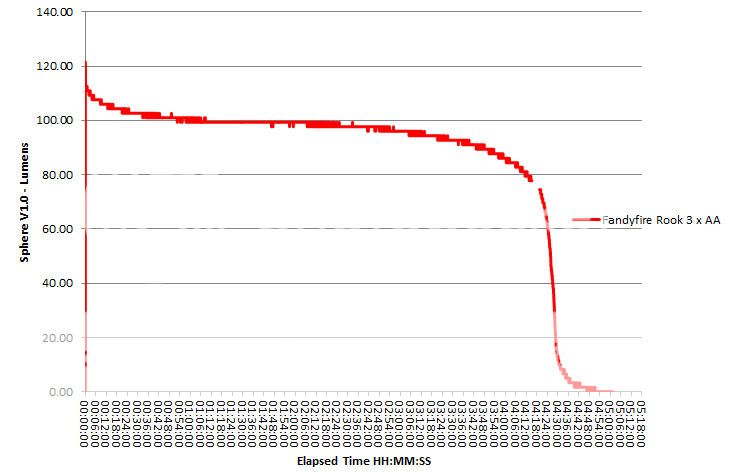
The following runtime was taken with the Rook loaded with a freshly charged set of Eneloops. It exhibits a good consistent output for the majority of the runtime and then gradually declines before dropping sharply at the end.
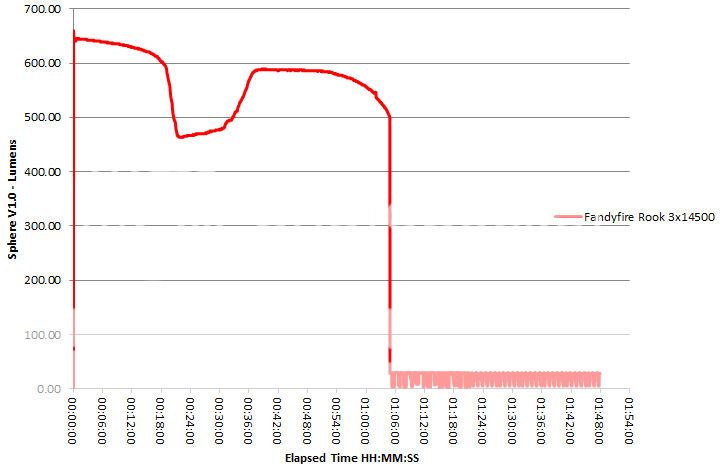
Swapping the Rook over onto 14500s (the protected TrustFire 14500s from DX), gives the following. There is a strange dropping of the output, and then it rises again. I suspect this is due to the driver switching from a buck to boost (not entirely smoothly) as the cell voltage drops. At the end of the trace you can see a fluctuating section where the Rook starts to flash rather than cut out. Once this flashing starts, if you turn off the light, it will not come on again. If you leave it, you have 40mins or more of flashing output.
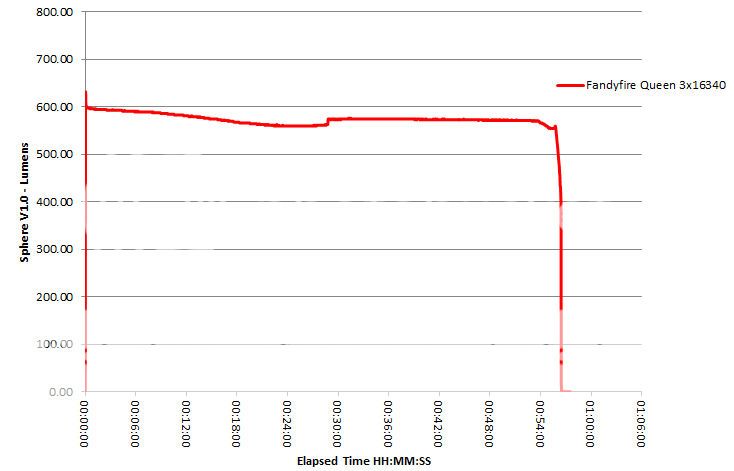
The Queen's output is pretty stable, however it does seem to exhibit a similar trait (though much more subtle) as the Rook, halfway through the runtime test, the output increases after having dropped from the initial output. Again this may be due to the driver changing from buck to boost.
The beam
The Rook has a well formed hotspot and even spill.

And moving outdoors with the Rook

The Queen has a very similar beam to the Rook, but the spill is wider.

The Queen outdoors.

What it is really like to use…
With the 3 cell battery tube, both the Rook and Queen are a very good size to hold, the Rook perhaps more so.
Both achieve 600lm outputs and though impressive, this is far more than you need for general use. It would have been better if these turned on in low and then moved to high if you needed it. For this reason I actually much preferred the Rook running on AAs as the output levels were far more usable. You then have the option to pop in 14500s for a blast if you want to.
Simple interface, good even beams and a comfortable size to hold makes these appealing, however, I find it hard to get past that horrific parasitic drain.
As soon as you fit the batteries, they are being drained. Pop in a set of three AAs, screw on the head of the Rook and leave it for two weeks and you will have completely flat batteries. Parasitic drain is a feature of many lights with electronic switches, but should be in the order of tens of micro amps, not milliamps.
Even the Queen, given a full set of CR123s, will drain then in 67 days.
This coupled with no practical lockout (you have to completely unscrew the head) makes these fine for every-day use with rechargeables, but not good for infrequent use.
What will your move be, the Rook or the Queen?

(anyone recognise this historic game?)
Test sample provided by DX for review.
(Note – prior to posting this review in the main 'flashlight reviews' forum, the CPF site moderators confirmed that this was correct forum)
Both have XM-L emitters and both use three cells in parallel to power them. Both use a single two mode switch, and both have very similar styling and details, which is why I have grouped them into a single review.
Initial Impressions:
Just as with the FandyFire Raging reviewed here, these FandyFire lights come in similar packaging which helps give a good first impression.
Despite being so similar, I was surprised to find the surface finish was very different. The Rook has a shiny gold anodised finish (though the surface is slightly matt the overall impression is a shiny finish) which does not seem like much to write home about. The Queen however has a finish which feels far superior. The surface is matt, and almost sandy looking, as the anodised gold surface is dull. This just seems deeper and richer than the Rook's finish.
Obviously this is more noticeable when you have both next to each other. Taken individually there are no real issues, but side by side the Queen has the nicer finish.
Each fits around the chosen power cell, so the Queen is shorter and wider than the Rook. Other than that their construction and components are almost identical.
What is in the box:
The sturdy boxes.
Closed cell foam protects the lights.
Each light has a lanyard, spare o-ring and an instruction leaflet.
Different surface finish is clearly shown and the relative size to each other.
Taking a closer look and looking inside:
For the closer look I will show the Rook first.
Each of these lights has a different design milled into the base.
Both models use the same switch cover. This unscrews to reveal the electronic click switch. There does not appear to be any waterproofing provided by the switch cover, so this may be a possible point of failure if it gets wet.
The XM-L LED and reflector
In the battery tube sides there are three slots cut into the tube. These provide a lanyard fixing point and a design feature.
The positive contact, which out of the box had these marks on it, presumably from a final test on the production line (as the light was supplied new in box with seals intact). Despite there being a second contact ring, this in not use to connect to the negative terminal, instead the threads themselves are the negative contact connection between the battery tube and head.
The threads are cut cleanly enough, but there was swarf left in the base of the threads and as supplied the threads and o-ring were dry.
The negative terminals are springs
And for scale the batteries next to the Rook
Now, onto the Queen -
The different design in the base.
The Queen also has three slots cut into the battery tube. These provide a lanyard fixing point and a design feature.
The Queen's reflector is wider than the Rook's with a larger white spacer.
The Queen has the same switch cover as the Rook with the same potential point for water to get in. On the Queen, this stood a little proud of the surface as it should screw in a little more, however after removing it to check, there was no way to screw it in further as it was hitting the PCB the electronic switch was mounted on.
Again, a new sealed light, straight out of the box and the positive terminal is marked (I take these photos in the 'as supplied' condition and do no testing until the photos have been taken). Also visible at the top of the photo is a small pin, or the end of a wire, sticking out of the positive contact. This caused the batteries to catch when installing them and screwing the light together.
The threads are cut cleanly enough, but there was swarf left in the base of the threads and as supplied the threads and o-ring were dry.
The negative terminals are springs
Modes and User Interface:
Both the Rook and Queen operate in exactly the same way.
Press and hold the switch for 2s and the light will come on in High. When on, briefly click the switch to change to Low. To switch off, press and hold the switch for 2s.
Nothing more to it.
Batteries and output:
The Rook is the slightly more versatile of the two as it takes 'AA sized' batteries. This means you are good for alkaline, lithium or rechargeable AAs and 14500s.
Shown loaded up with three 14500 cells.
The Queen will run on 16430s and CR123s
The Queen next to a set of protected 16430s (the type sold on DX).
The battery tube cut out for both is shaped to hold even a single battery without allowing it to move, so for both of these lights you could run them on 1, 2 or 3 batteries.
To measure actual output, I built an integrating sphere. See here for more detail. The sensor registers visible light only (so Infra-Red and Ultra-Violet will not be measured).
Please note, all quoted lumen figures are from a DIY integrating sphere, and according to ANSI standards. Although every effort is made to give as accurate a result as possible, they should be taken as an estimate only. The results can be used to compare outputs in this review and others I have published.
| FandyFire Queen output mode (3x16430) | I.S. measured ANSI output Lumens | PWM frequency (Hz) |
|---|---|---|
| High | 598 | 0 |
| Low | 184 | 125 |
Parasitic drain due to the electronic switch is 1.3mA – 72 days to exhaust full batteries.
| FandyFire Rook output mode (3xEneloop AAs) | I.S. measured ANSI output Lumens | PWM frequency (Hz) |
|---|---|---|
| High | 111 | 125 |
| Low | 36 | 125 |
Parasitic drain due to the electronic switch is 22.4mA – 11 days to exhaust full batteries!!!
| FandyFire Rook output mode (3x14500) | I.S. measured ANSI output Lumens | PWM frequency (Hz) |
|---|---|---|
| High | 646 | 0 |
| Low | 197 | 6800 |
Parasitic drain due to the electronic switch is 1.33mA – 85 days to exhaust full batteries.
The parasitic drain figures are the most disappointing feature of these lights. Due to the contact between the battery negative terminal and the head being via the threads, there is no lockout available, you have to completely unscrew the head.
With the Rook completely exhausting a set of new AAs in 11 days with no actual light output, this is not a light you can leave loaded and ready to go. Do not use alkalines as this light will steadily eat through them and due to constantly drawing power will most likely cause them to leak.
This is doubly disappointing as on AAs the Rook is an excellent house light with a nice beam.
The following runtime was taken with the Rook loaded with a freshly charged set of Eneloops. It exhibits a good consistent output for the majority of the runtime and then gradually declines before dropping sharply at the end.
Swapping the Rook over onto 14500s (the protected TrustFire 14500s from DX), gives the following. There is a strange dropping of the output, and then it rises again. I suspect this is due to the driver switching from a buck to boost (not entirely smoothly) as the cell voltage drops. At the end of the trace you can see a fluctuating section where the Rook starts to flash rather than cut out. Once this flashing starts, if you turn off the light, it will not come on again. If you leave it, you have 40mins or more of flashing output.
The Queen's output is pretty stable, however it does seem to exhibit a similar trait (though much more subtle) as the Rook, halfway through the runtime test, the output increases after having dropped from the initial output. Again this may be due to the driver changing from buck to boost.
The beam
The Rook has a well formed hotspot and even spill.
And moving outdoors with the Rook
The Queen has a very similar beam to the Rook, but the spill is wider.
The Queen outdoors.
What it is really like to use…
With the 3 cell battery tube, both the Rook and Queen are a very good size to hold, the Rook perhaps more so.
Both achieve 600lm outputs and though impressive, this is far more than you need for general use. It would have been better if these turned on in low and then moved to high if you needed it. For this reason I actually much preferred the Rook running on AAs as the output levels were far more usable. You then have the option to pop in 14500s for a blast if you want to.
Simple interface, good even beams and a comfortable size to hold makes these appealing, however, I find it hard to get past that horrific parasitic drain.
As soon as you fit the batteries, they are being drained. Pop in a set of three AAs, screw on the head of the Rook and leave it for two weeks and you will have completely flat batteries. Parasitic drain is a feature of many lights with electronic switches, but should be in the order of tens of micro amps, not milliamps.
Even the Queen, given a full set of CR123s, will drain then in 67 days.
This coupled with no practical lockout (you have to completely unscrew the head) makes these fine for every-day use with rechargeables, but not good for infrequent use.
What will your move be, the Rook or the Queen?
(anyone recognise this historic game?)
Test sample provided by DX for review.
(Note – prior to posting this review in the main 'flashlight reviews' forum, the CPF site moderators confirmed that this was correct forum)

