
kosPap
Flashlight Enthusiast
well the story goes as this...
I bought a Solarforce L2D for use in a high daring head.
Measuremnts were dissapointing, i was losing 1/3 of the output and amp draw as equally down.
So I dissasmbled the switch
.
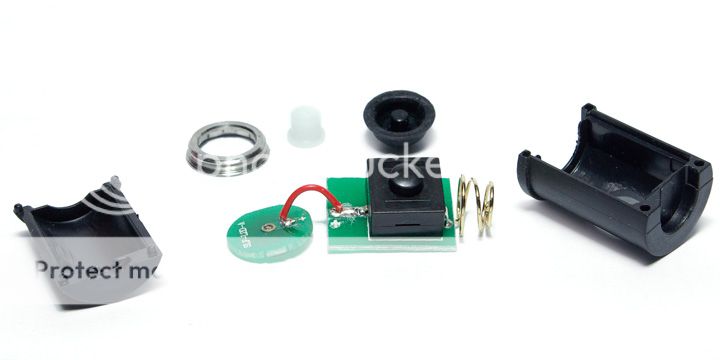
So thin a wire and so many contacts
more can be found in the thread: http://www.candlepowerforums.com/vb...amp-Teardown&p=4496325&highlight=#post4496325
So yesterday I made a resistance fix.
- I took a plastic card and cut a preperly sized rectangle.
- I modified a STRONG, taller spring (one of the Intl-outdoor collection)
- this spring allowed me to remove the tailcap spring altogether
- I made positioning holes
- Checked that a forward switch fits inside the module and in the body as well (you have to keep the switch pressed while inserting it)
- Soldered a new, much thicker wire on the contact plate
- soldered wire and spring directly on the switch
Pics
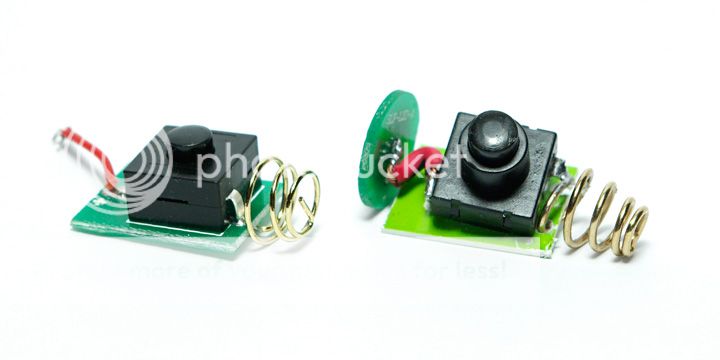
Original switch on the left, new one on the right
Look at how many traces are on the original switch PCB
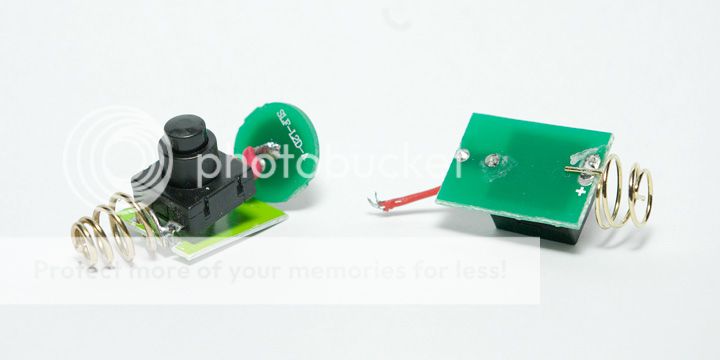
All in all, my solution comes very close to a regular tailcap conctruction contact and solder points.
Results.
Were very good, but not excellent.
With a direct drive dropin in a regular Solarforce body, current draw was 2.75A.
Same dropin with the new swicth on the L2D body drew 2.55A.
Much closer!
I bought a Solarforce L2D for use in a high daring head.
Measuremnts were dissapointing, i was losing 1/3 of the output and amp draw as equally down.
So I dissasmbled the switch
.
So thin a wire and so many contacts
more can be found in the thread: http://www.candlepowerforums.com/vb...amp-Teardown&p=4496325&highlight=#post4496325
So yesterday I made a resistance fix.
- I took a plastic card and cut a preperly sized rectangle.
- I modified a STRONG, taller spring (one of the Intl-outdoor collection)
- this spring allowed me to remove the tailcap spring altogether
- I made positioning holes
- Checked that a forward switch fits inside the module and in the body as well (you have to keep the switch pressed while inserting it)
- Soldered a new, much thicker wire on the contact plate
- soldered wire and spring directly on the switch
Pics
Original switch on the left, new one on the right
Look at how many traces are on the original switch PCB
All in all, my solution comes very close to a regular tailcap conctruction contact and solder points.
Results.
Were very good, but not excellent.
With a direct drive dropin in a regular Solarforce body, current draw was 2.75A.
Same dropin with the new swicth on the L2D body drew 2.55A.
Much closer!
")