
Hoop
Enlightened
Hello all!
I was tasked to get someone a light for their .22 rifle. I ended up choosing a Convoy L4 because of its dual switch format and decently large reflector.
I swapped the stock emitter for a gas de-domed XM-L2 U3 1A on a 16mm Noctigon board. (didn't have any 20mm ones on hand) When the light was back together the stock driver was acting a little finicky so I decided to swap it with a 3 Amp Qlite flashed with STAR Dual Switch firmware.(Thanks JonnyC and crew for the firmware!) Worth noting is that the holes that the stock LED star's screws thread into were not threaded on my light, but they are .089" or thereabouts and as such the perfect size for a 4-40 cut tap; I tapped them and used some 4-40 BHCS. 3/16" is a good length of screw.
The de-dome went well for my first try. None of the phosphor was damaged. The U3 1A makes a fairly pleasant, warm tint after de-dome.
To swap the driver, first I removed all of the components from the stock driver contact board except the switch and then made the necessary connections to the Qlite for the switch and power. One leg of the switch is jumped to ground, the other leg is connected to a wire which wraps around the flat side of the board and makes its way up to star 4. Not having any really tiny wire or bothering to use a single strand of copper, Kapton tape was necessary to prevent the bare switch wire from shorting on the driver retaining ring after the driver was installed. The mode spacing I went with was 12,70,255 which seems pretty good.
If this light were going onto a larger caliber rifle the entire board would need to be potted but since it is only going onto a .22 my solder connection to the switch case should suffice without issue.
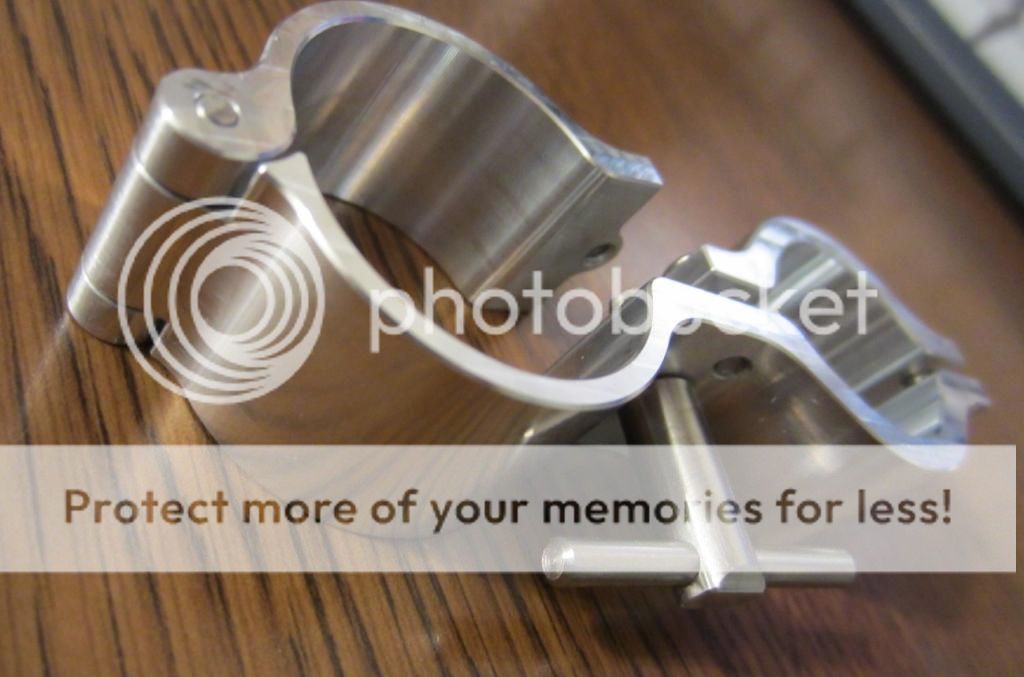
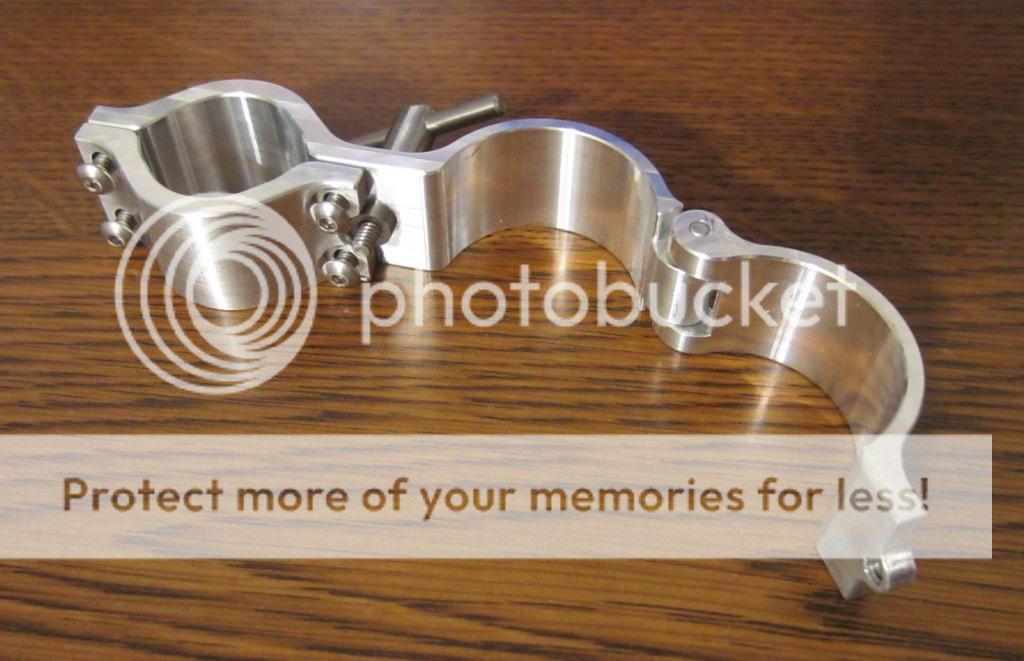
After the driver swap I got to work on the custom mount. The concept behind the mount is that the person I am giving it to does not have enough decent flashlights to warrant leaving it mounted on the rifle all of the time so the light needed to be easily removable. To accomplish this I incorporated a hinge into the flashlight clamp which is engaged by a large T knob. The T knob is retained in place with a nut from the back side. The nut that retains the T knob stays in place on the screw thanks to some non-permanent (adjustable) thread retaining compound.
I modeled it all up in CAD and when satisfied with the design went to work on programming the CNC toolpaths. Quite a few hours later I had myself a pretty handsome little mount. I decided to make the T handle larger than originally drawn in CAD.
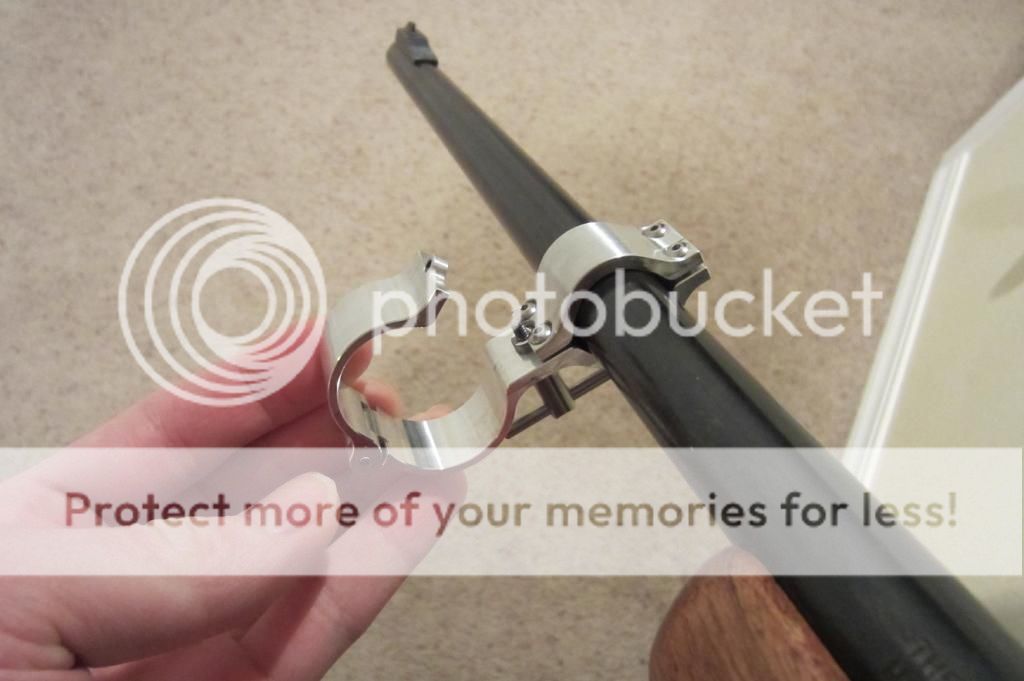
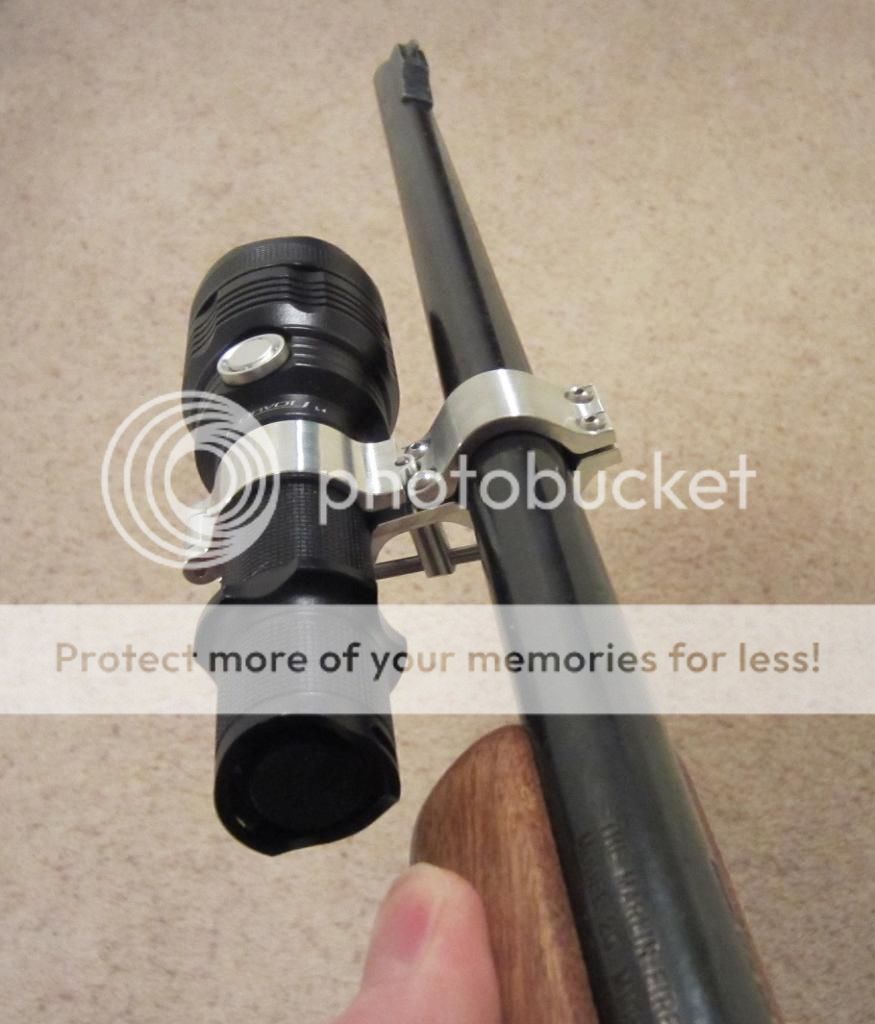
It fit well on the rifle. The mount is angled a bit so that it is easy to turn the light off and on with the thumb of the forward hand.
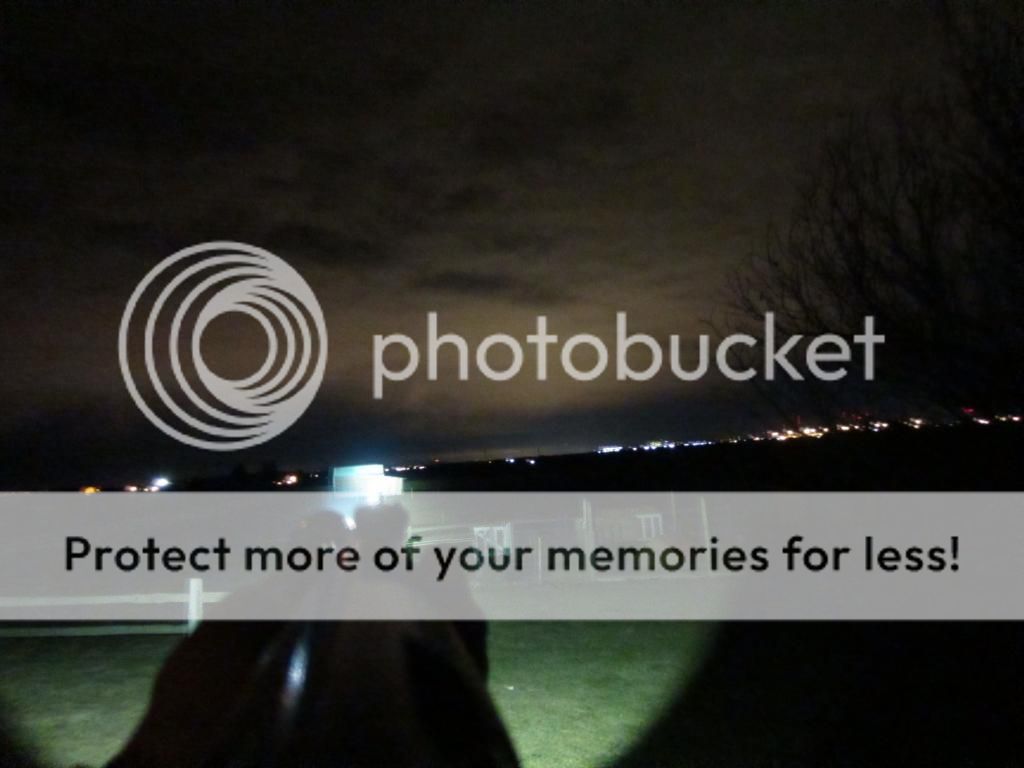
My beamshots were all fairly poor. The barn is about 280 feet away but the image is over exposed. It is usable beyond 100 yards though for sure. I could make it brighter too by using a FET driver or a Qlite with more 7135's on it.
Welp, thanks for looking!
I was tasked to get someone a light for their .22 rifle. I ended up choosing a Convoy L4 because of its dual switch format and decently large reflector.
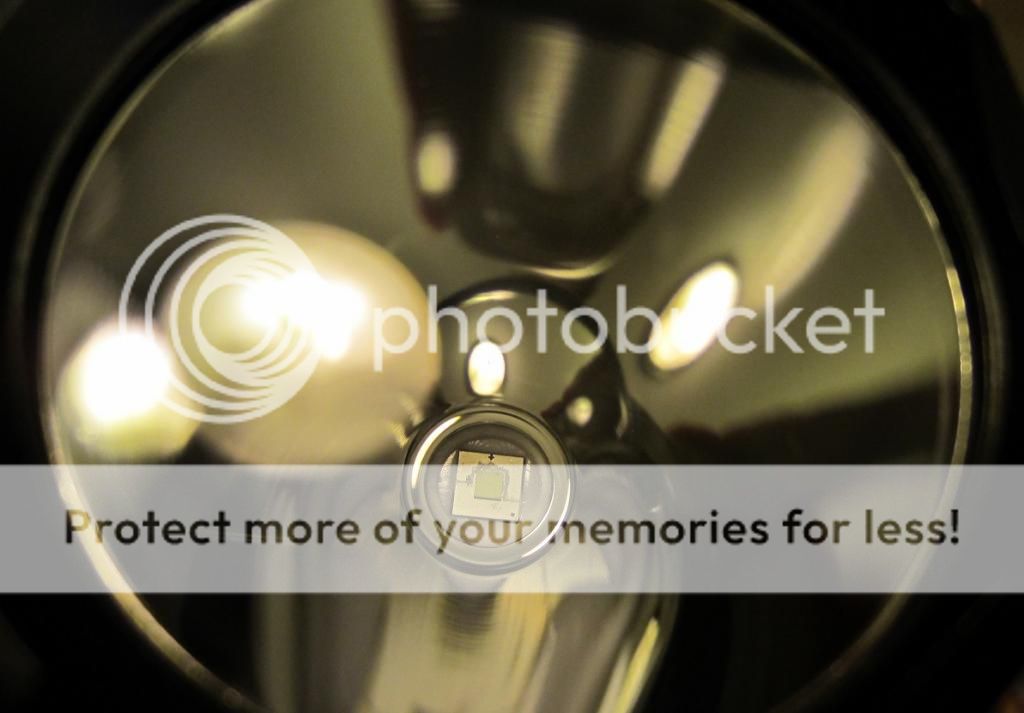
I swapped the stock emitter for a gas de-domed XM-L2 U3 1A on a 16mm Noctigon board. (didn't have any 20mm ones on hand) When the light was back together the stock driver was acting a little finicky so I decided to swap it with a 3 Amp Qlite flashed with STAR Dual Switch firmware.(Thanks JonnyC and crew for the firmware!) Worth noting is that the holes that the stock LED star's screws thread into were not threaded on my light, but they are .089" or thereabouts and as such the perfect size for a 4-40 cut tap; I tapped them and used some 4-40 BHCS. 3/16" is a good length of screw.
The de-dome went well for my first try. None of the phosphor was damaged. The U3 1A makes a fairly pleasant, warm tint after de-dome.
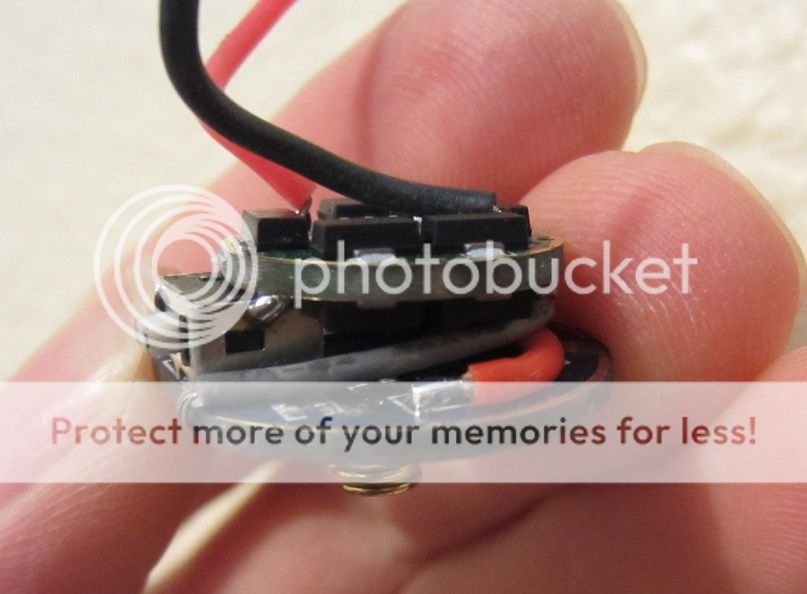
To swap the driver, first I removed all of the components from the stock driver contact board except the switch and then made the necessary connections to the Qlite for the switch and power. One leg of the switch is jumped to ground, the other leg is connected to a wire which wraps around the flat side of the board and makes its way up to star 4. Not having any really tiny wire or bothering to use a single strand of copper, Kapton tape was necessary to prevent the bare switch wire from shorting on the driver retaining ring after the driver was installed. The mode spacing I went with was 12,70,255 which seems pretty good.
If this light were going onto a larger caliber rifle the entire board would need to be potted but since it is only going onto a .22 my solder connection to the switch case should suffice without issue.
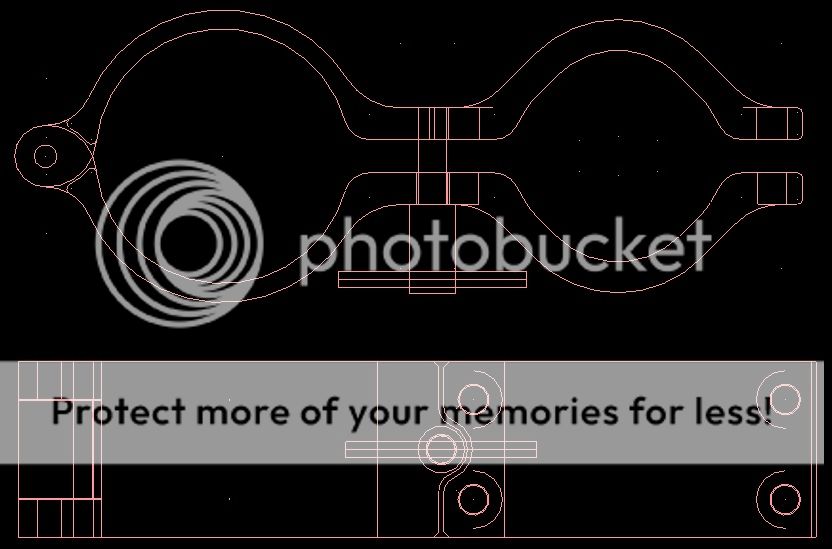
After the driver swap I got to work on the custom mount. The concept behind the mount is that the person I am giving it to does not have enough decent flashlights to warrant leaving it mounted on the rifle all of the time so the light needed to be easily removable. To accomplish this I incorporated a hinge into the flashlight clamp which is engaged by a large T knob. The T knob is retained in place with a nut from the back side. The nut that retains the T knob stays in place on the screw thanks to some non-permanent (adjustable) thread retaining compound.
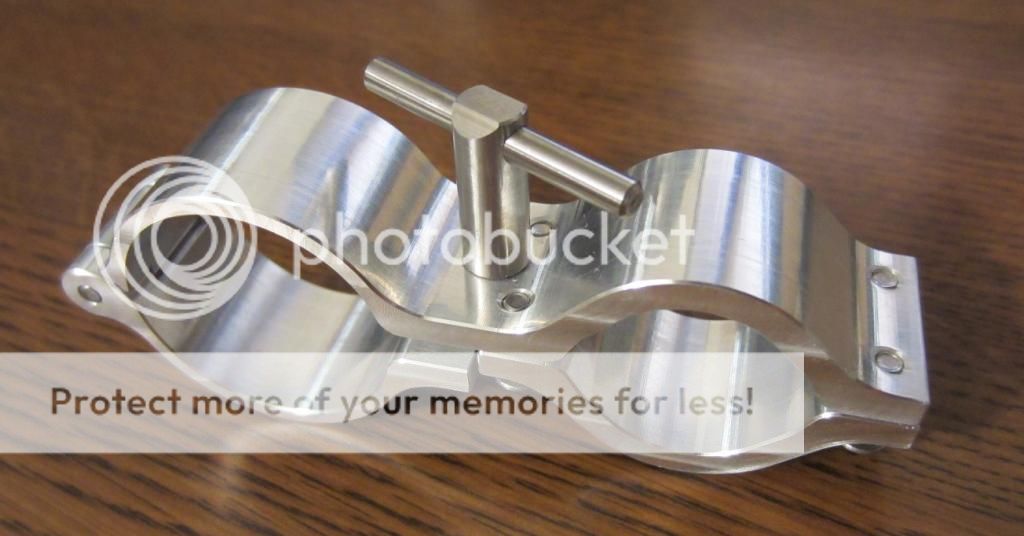
I modeled it all up in CAD and when satisfied with the design went to work on programming the CNC toolpaths. Quite a few hours later I had myself a pretty handsome little mount. I decided to make the T handle larger than originally drawn in CAD.
It fit well on the rifle. The mount is angled a bit so that it is easy to turn the light off and on with the thumb of the forward hand.
My beamshots were all fairly poor. The barn is about 280 feet away but the image is over exposed. It is usable beyond 100 yards though for sure. I could make it brighter too by using a FET driver or a Qlite with more 7135's on it.
Welp, thanks for looking!
Last edited: