
(All photos now added)
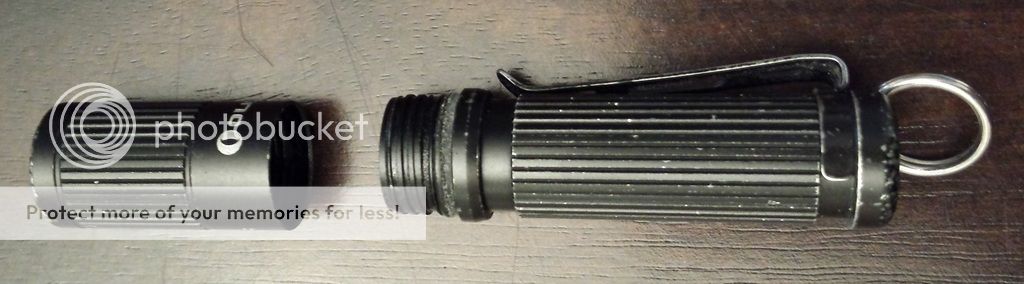
After my Fenix E05 Died, I picked up a Olight i3S EOS, but I never liked the cool tint from the stock XP-G2. In the spirit of my previous budget mod thread with an Olight M21X, and this post with an XP-L mod to an i3S, I decided to open mine up to see what's inside.
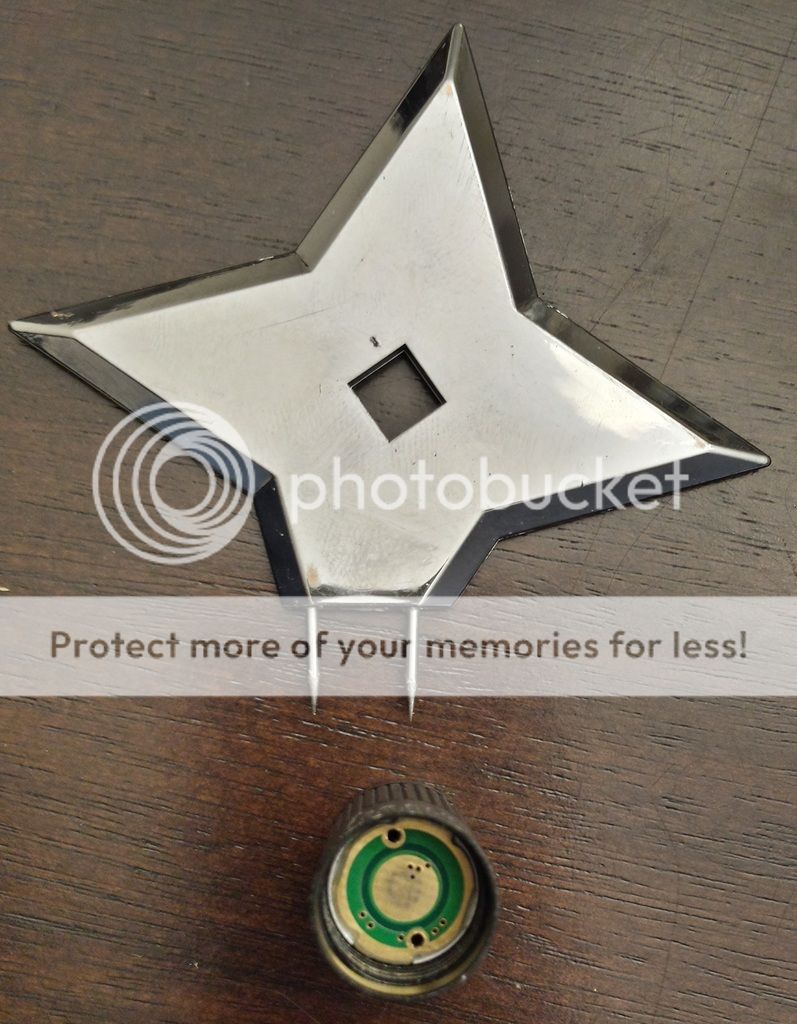
The pill unscrews from the head with an appropriate tool, and there's no epoxy nonsense! I used a push-pin shaped like a ninja star for extra style points.
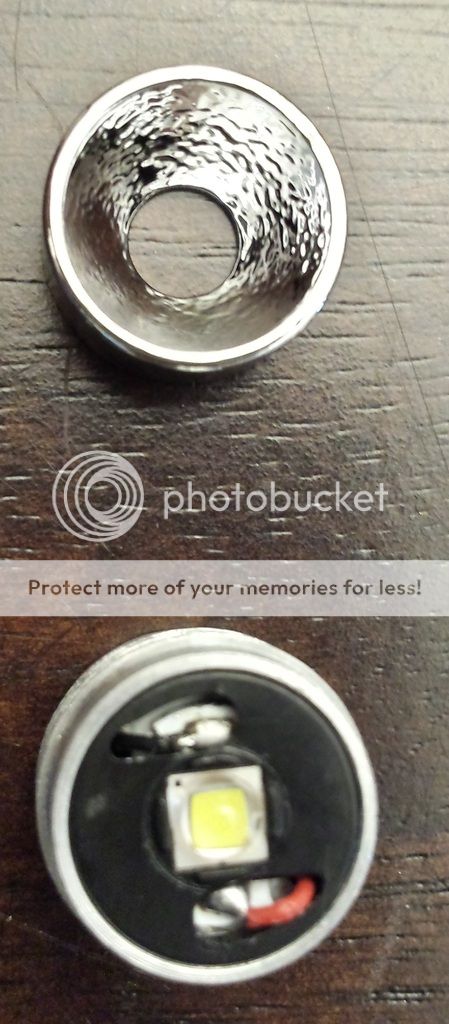
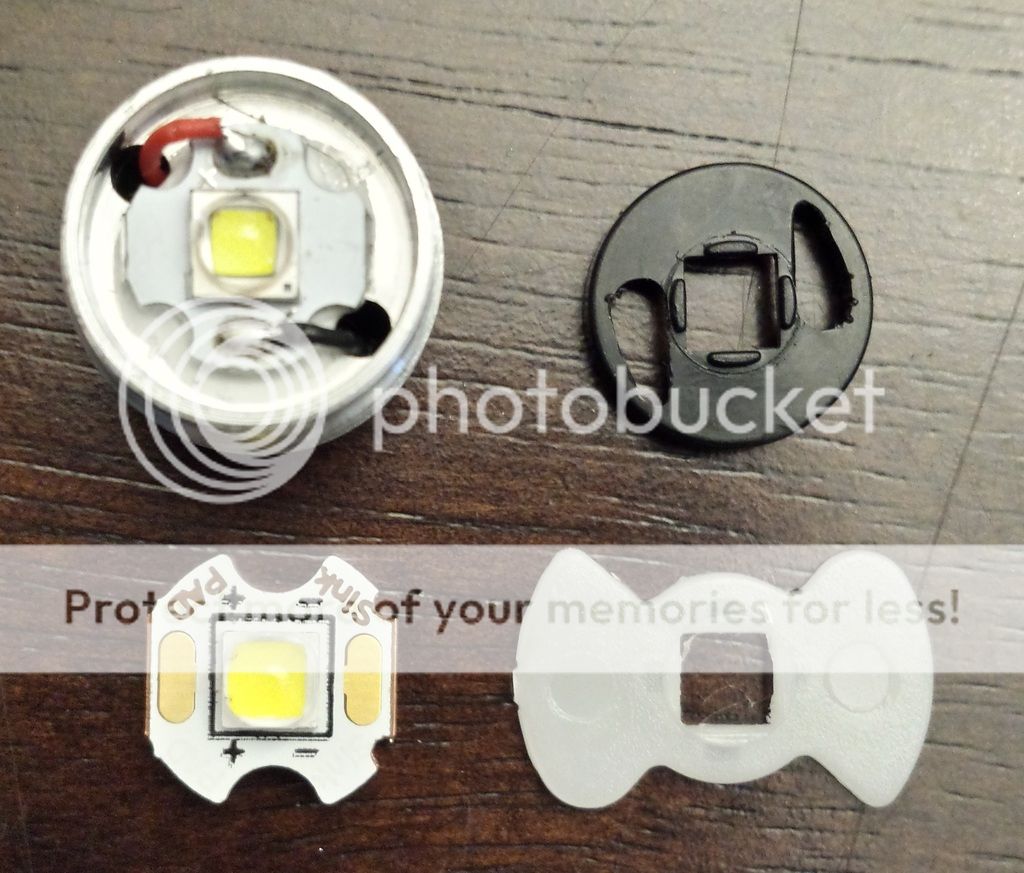
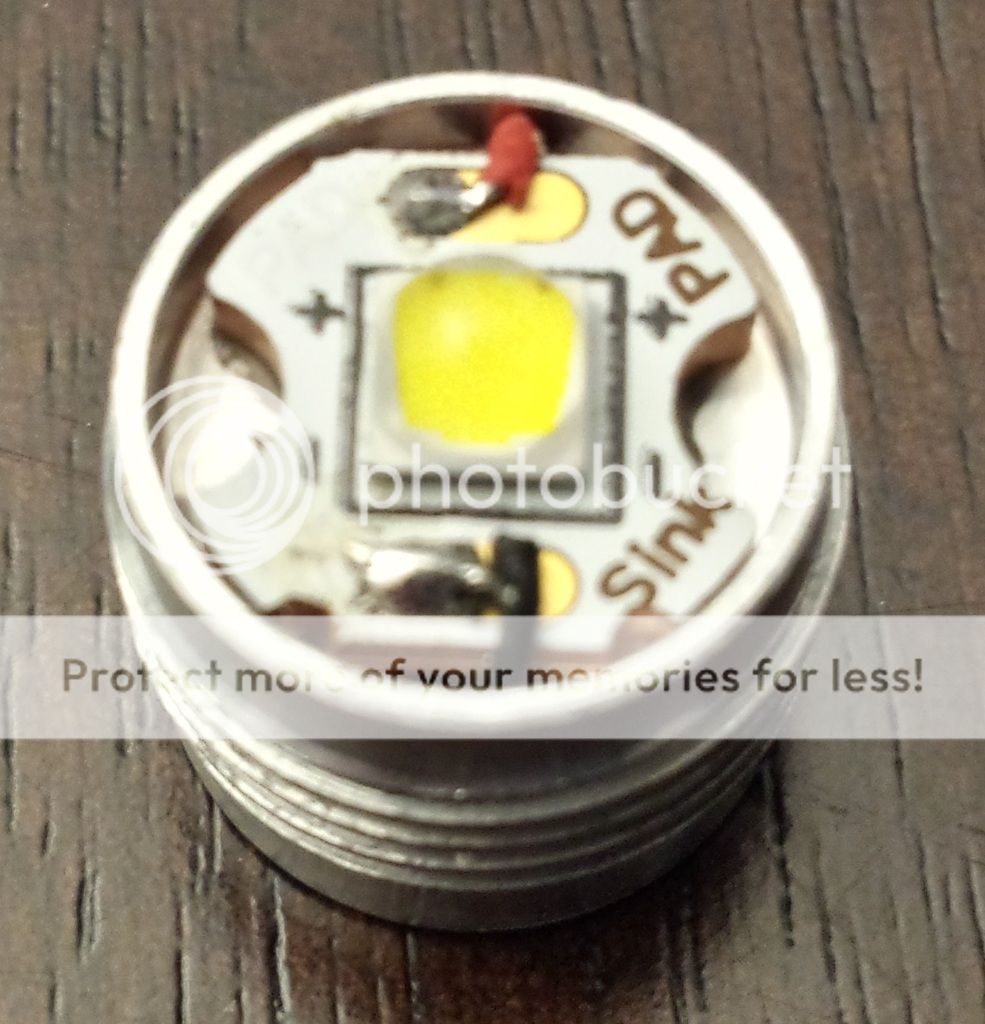
The head assembly is very similar to the M21X, with one or two key differences. Like the M21X, the I3S reflector is sandwiched between the glass window and the plastic insulating shim/spacer/centering ring. The MCPCB and LED sit on top of a metal shelf that's above the driver. The I3S has the shelf as part of the pill, while in the M21X the shelf is part of the head itself.
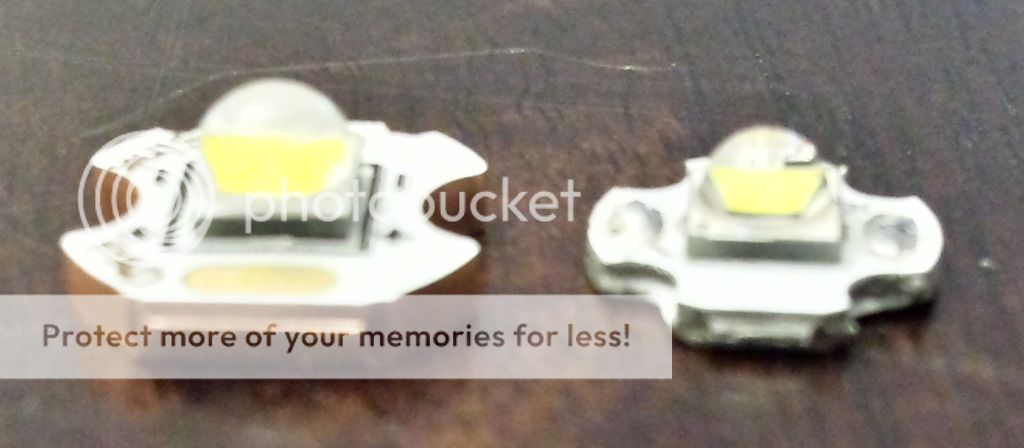
After some research I picked up a XP-L V6 bin with a 3D tint (netural white - ansi LED tint bins). To me, this was a reasonable compromise between tint, CRI, and lumens. Looking at the datasheets, it appears to have similar current and/forward voltage (Vf) characteristics to the stock XP-G2, so the runtimes should remain similar.
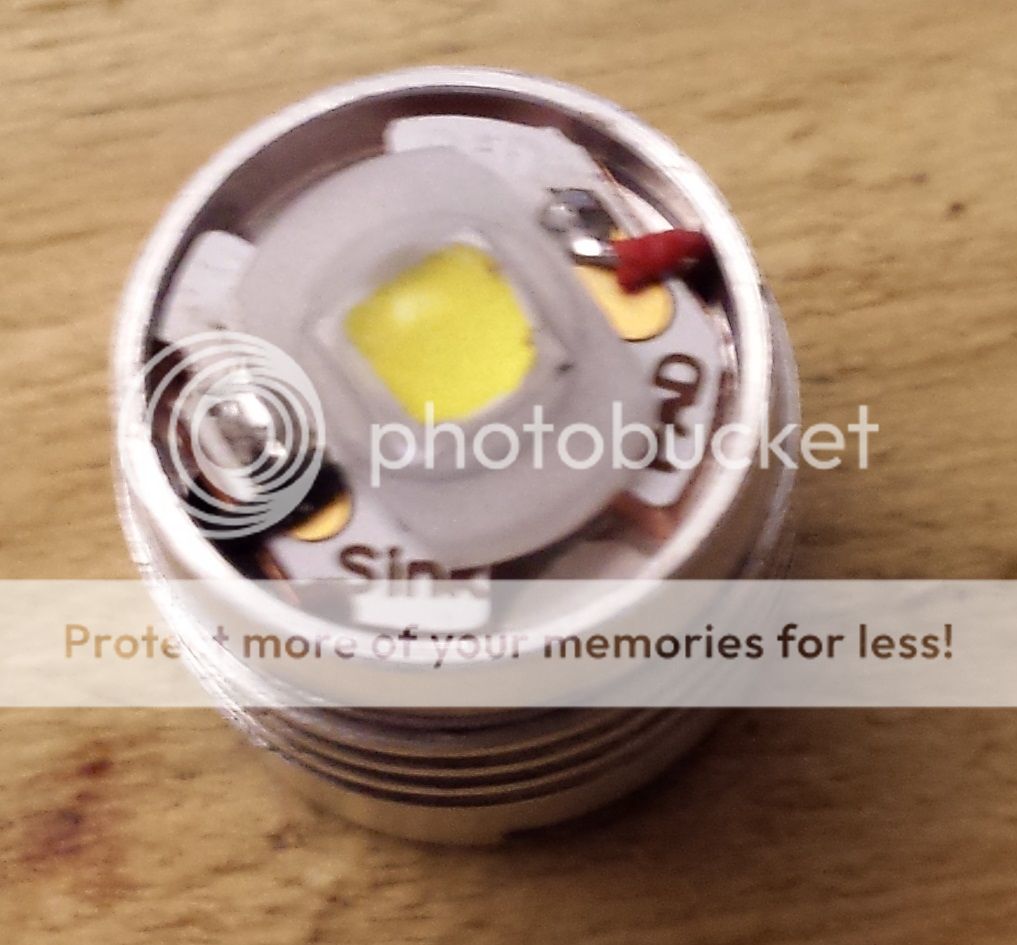
The LED vendor offers reflow soldering of the LED onto a MCPCB or "Sink Pad", so I took advantage of this service since I don't have the means to do reflow soldering. The new "Sink Pad" is about 1mm thicker than the stock MCPCB, which does make the flashlight head stick out slightly more when the head is tight, but the O-ring remains covered, maintaining the existing water resistance.
I also picked up a white shim/spacer, since the stock one was black. My thinking was that that the white shim would help squeeze out a couple extra lumens by helping to reflect any stray light within the head.
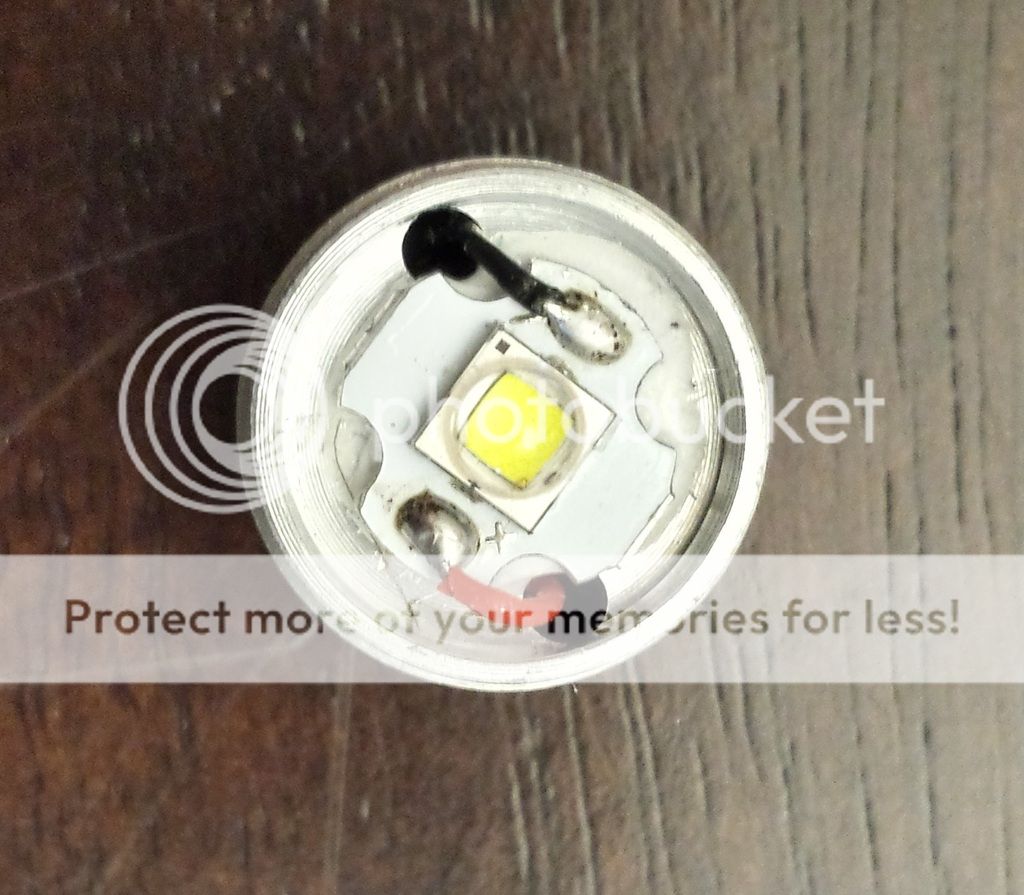
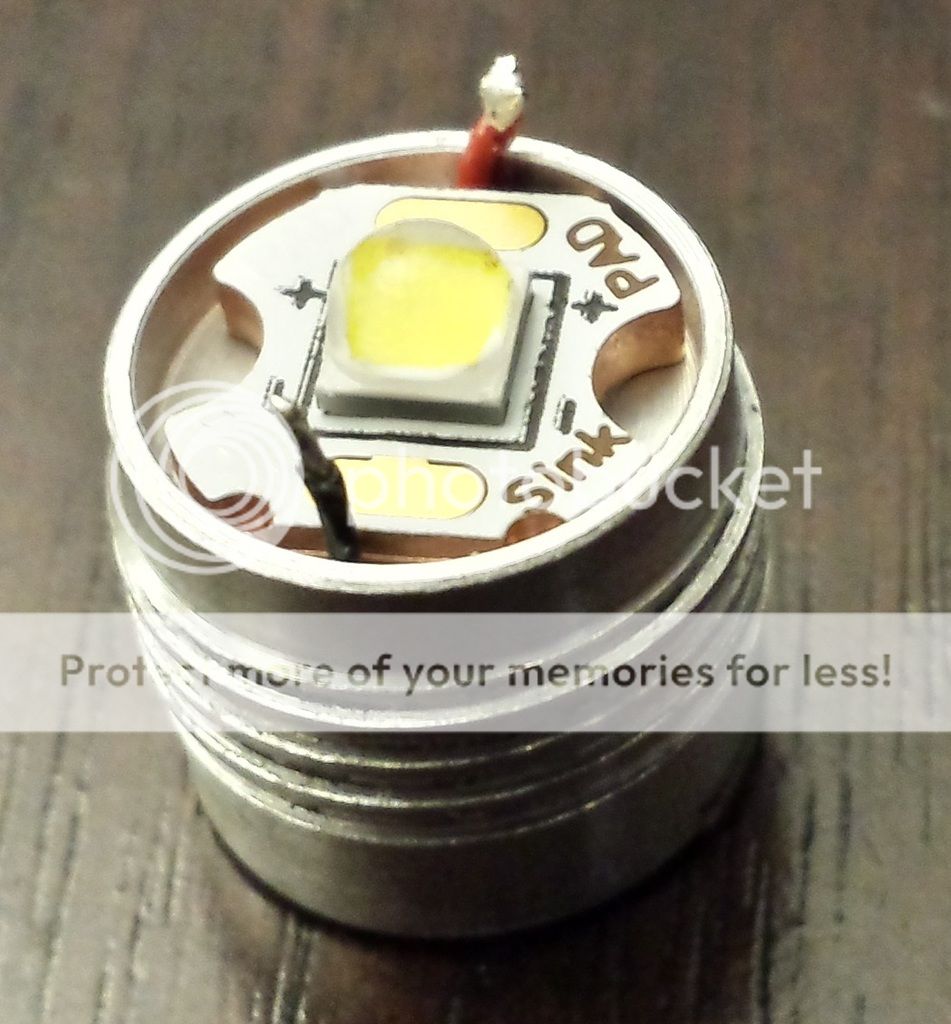
It's time to de-solder the LED, apply some of the famous 10 year old Arctic Silver, and then solder in the new LED. The wires going to the MCPCB are very small, so I had to be careful and work with a set of tweezers in one hand and the soldering iron in the other.

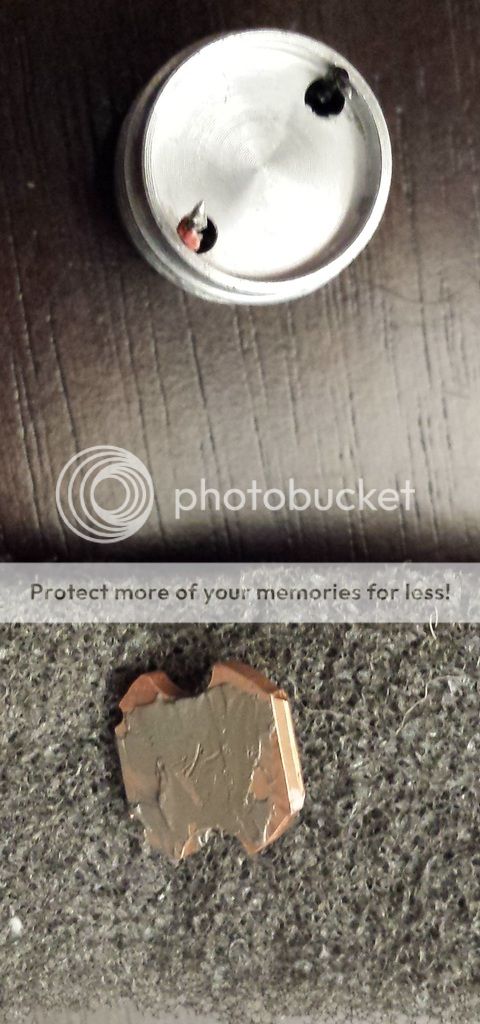
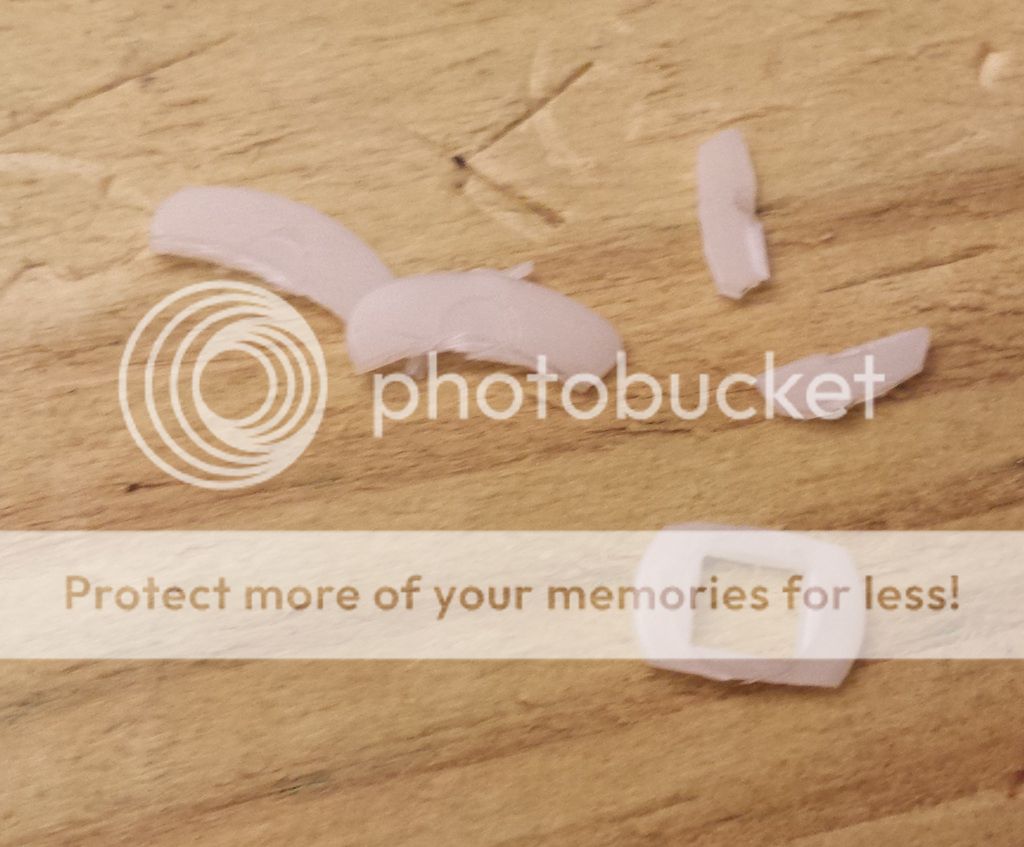
The new shim has to be trimmed to fit within the diameter of the head, avoid crushing the wires, and still separate the metal reflector from the wires.
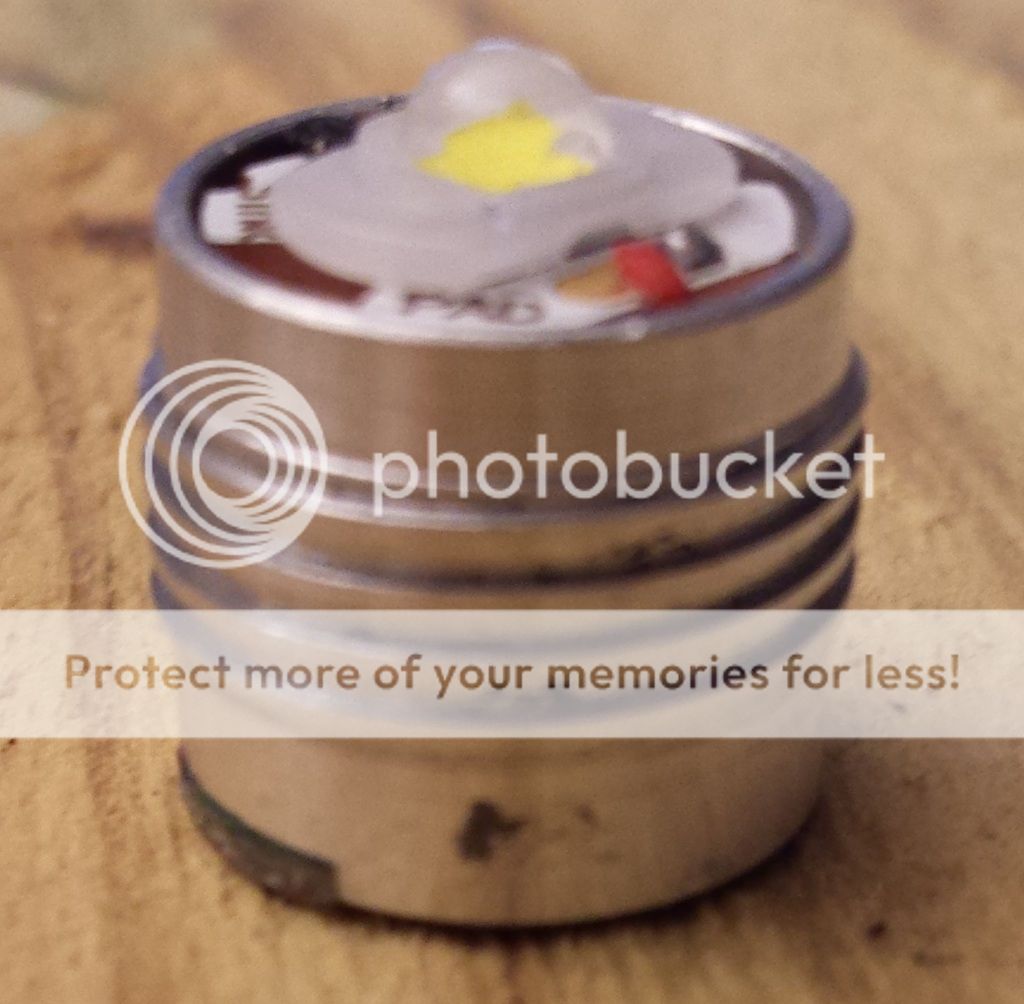
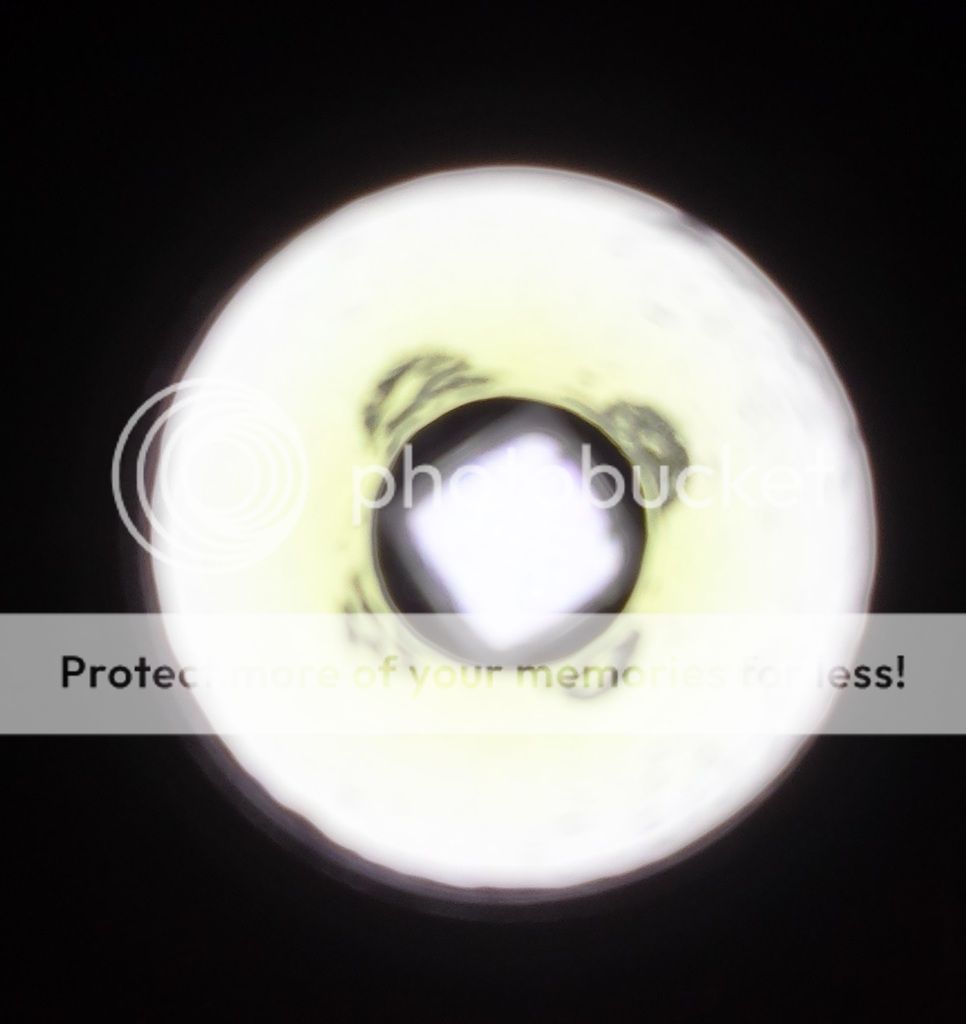
Here's a shot of the XP-L on moonlight mode. Notice the four dark spots in the reflector, which I think are caused by the flat sides of the XP-L dome.
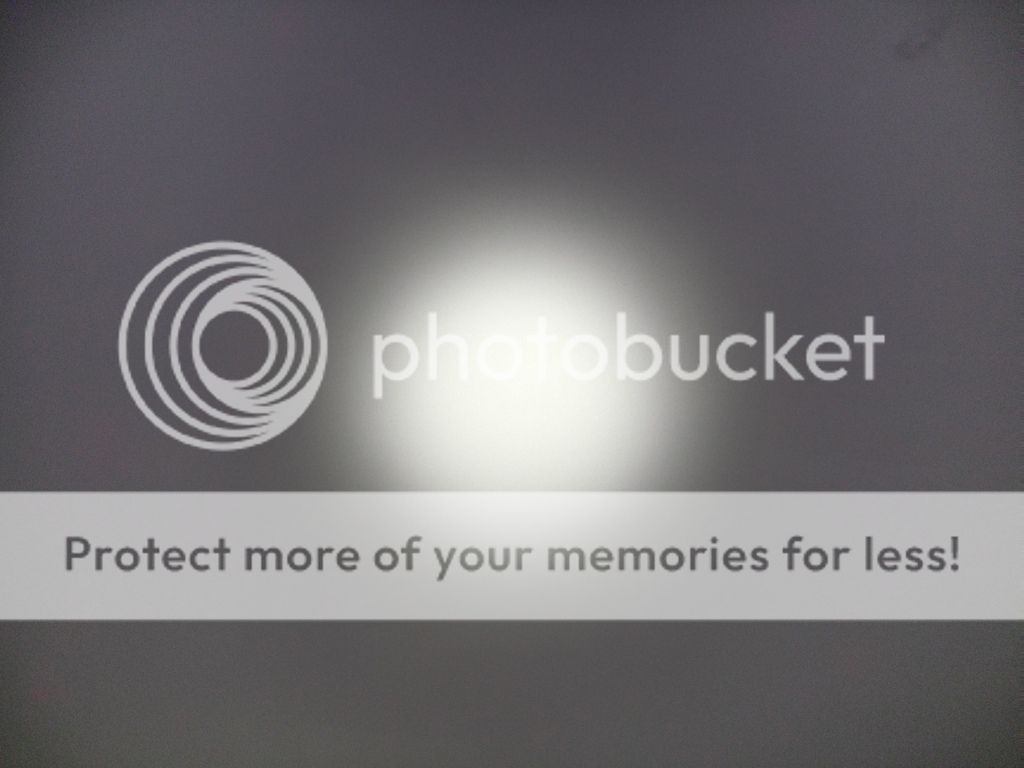
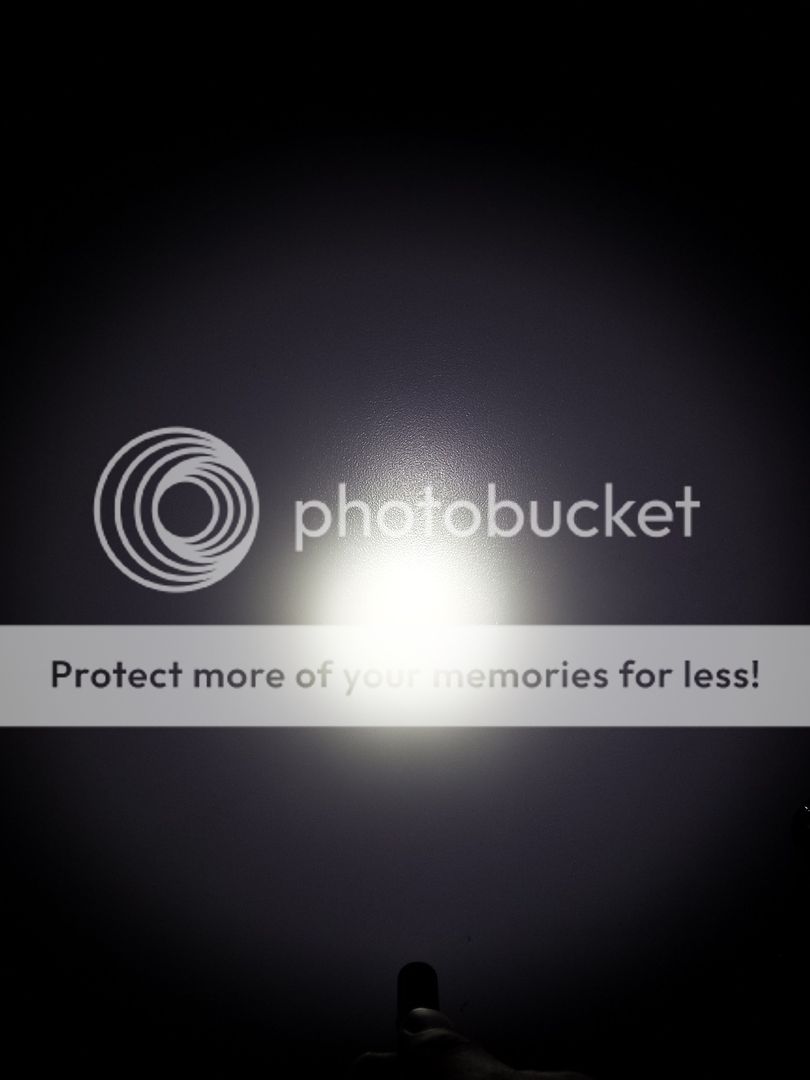
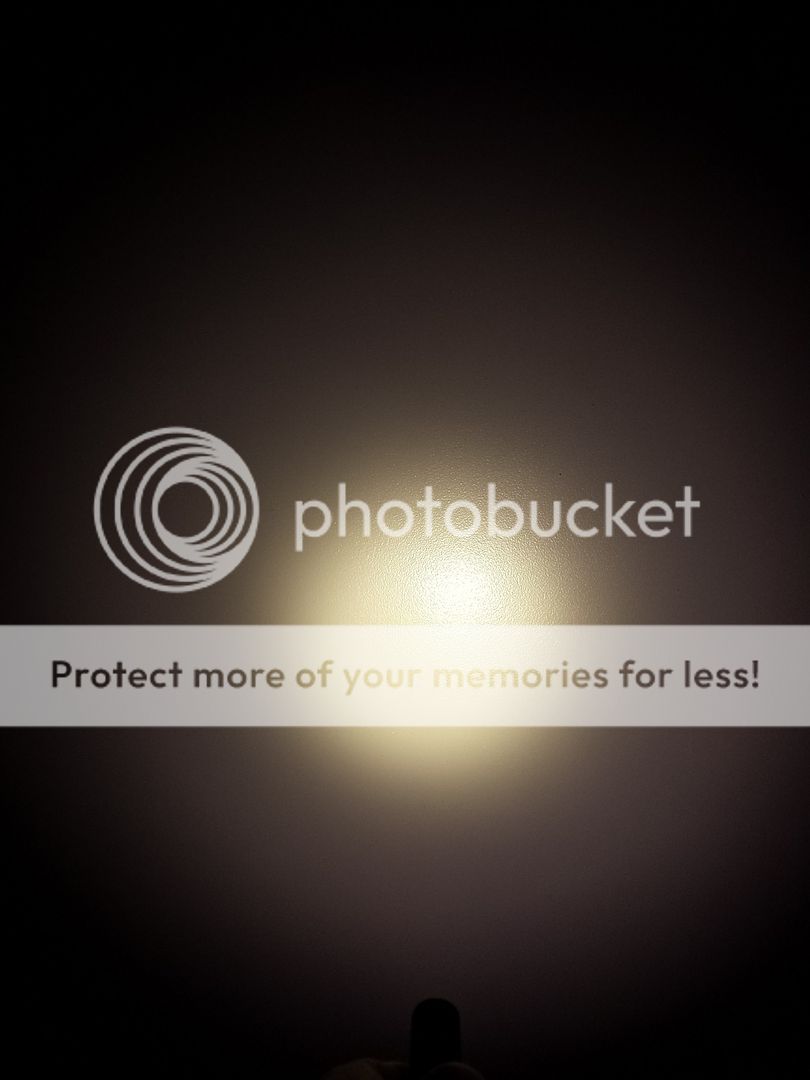
Here are some Beamshots before and after against a white ceiling and a white door (I don't actually have any white walls in my house - what kind of flashaholic am I?). White balance was set to "daylight," with automatic ISO.
Note that the camera shows both tints as warmer than they appear to my eyes. The before shots of the XP-G2 were significantly more blue than the photos show. The XP-L is on the neutral side of "cool," and is more green (weaker red when compared to a Nichia 219).
Celiing Before - XP-G2 Cool
Ceiling After - XP-L Neutral

Door before - XP-G2 Cool
Door after - XP-L Neutral
Overall, I am satisfied with the results. The tint is much more bearable and the beam is more even and smooth. The hotspot is obviously less prominent, but I prefer a diffuse beam for close range work (a light this small isn't ever going to be much of a thrower anyway).
I hope that this thread shows my fellow flashaholics how easy it can be to modify a light using some basic tools (soldering iron and a hobby knife), and that it encourages more people to modify their own lights, or consider buying a light because they can modify it afterwards!
Now if I could only rip apart my Zebralight SC52w this easily...
After my Fenix E05 Died, I picked up a Olight i3S EOS, but I never liked the cool tint from the stock XP-G2. In the spirit of my previous budget mod thread with an Olight M21X, and this post with an XP-L mod to an i3S, I decided to open mine up to see what's inside.
The pill unscrews from the head with an appropriate tool, and there's no epoxy nonsense! I used a push-pin shaped like a ninja star for extra style points.
The head assembly is very similar to the M21X, with one or two key differences. Like the M21X, the I3S reflector is sandwiched between the glass window and the plastic insulating shim/spacer/centering ring. The MCPCB and LED sit on top of a metal shelf that's above the driver. The I3S has the shelf as part of the pill, while in the M21X the shelf is part of the head itself.
After some research I picked up a XP-L V6 bin with a 3D tint (netural white - ansi LED tint bins). To me, this was a reasonable compromise between tint, CRI, and lumens. Looking at the datasheets, it appears to have similar current and/forward voltage (Vf) characteristics to the stock XP-G2, so the runtimes should remain similar.
The LED vendor offers reflow soldering of the LED onto a MCPCB or "Sink Pad", so I took advantage of this service since I don't have the means to do reflow soldering. The new "Sink Pad" is about 1mm thicker than the stock MCPCB, which does make the flashlight head stick out slightly more when the head is tight, but the O-ring remains covered, maintaining the existing water resistance.
I also picked up a white shim/spacer, since the stock one was black. My thinking was that that the white shim would help squeeze out a couple extra lumens by helping to reflect any stray light within the head.
It's time to de-solder the LED, apply some of the famous 10 year old Arctic Silver, and then solder in the new LED. The wires going to the MCPCB are very small, so I had to be careful and work with a set of tweezers in one hand and the soldering iron in the other.
The new shim has to be trimmed to fit within the diameter of the head, avoid crushing the wires, and still separate the metal reflector from the wires.
Here's a shot of the XP-L on moonlight mode. Notice the four dark spots in the reflector, which I think are caused by the flat sides of the XP-L dome.
Here are some Beamshots before and after against a white ceiling and a white door (I don't actually have any white walls in my house - what kind of flashaholic am I?). White balance was set to "daylight," with automatic ISO.
Note that the camera shows both tints as warmer than they appear to my eyes. The before shots of the XP-G2 were significantly more blue than the photos show. The XP-L is on the neutral side of "cool," and is more green (weaker red when compared to a Nichia 219).
Celiing Before - XP-G2 Cool
Ceiling After - XP-L Neutral
Door before - XP-G2 Cool
Door after - XP-L Neutral
Overall, I am satisfied with the results. The tint is much more bearable and the beam is more even and smooth. The hotspot is obviously less prominent, but I prefer a diffuse beam for close range work (a light this small isn't ever going to be much of a thrower anyway).
I hope that this thread shows my fellow flashaholics how easy it can be to modify a light using some basic tools (soldering iron and a hobby knife), and that it encourages more people to modify their own lights, or consider buying a light because they can modify it afterwards!
Now if I could only rip apart my Zebralight SC52w this easily...
Last edited: