milkyspit
Flashlight Enthusiast
Okay, we've all been through the drill around here. So apologies for that.
/ubbthreads/images/graemlins/dedhorse.gif
With that out of the way, I'll say that I was up late soldering one night, and had a good mod in mind for my Blaster Jr. But I wasn't happy with the current flow coming from 3AA NiMH cells, and suspected that excessive resistance in the now-infamous EL 3-to-D holder was the culprit. (Yes, I know there's a new version coming out real soon now, but I got impatient.)
The thing I didn't like about the other mods I'd seen was that they seemed really involved, or required cutting the holder in half, or just went over my head as far as how to do the mod. So I improvised. /ubbthreads/images/graemlins/wink.gif
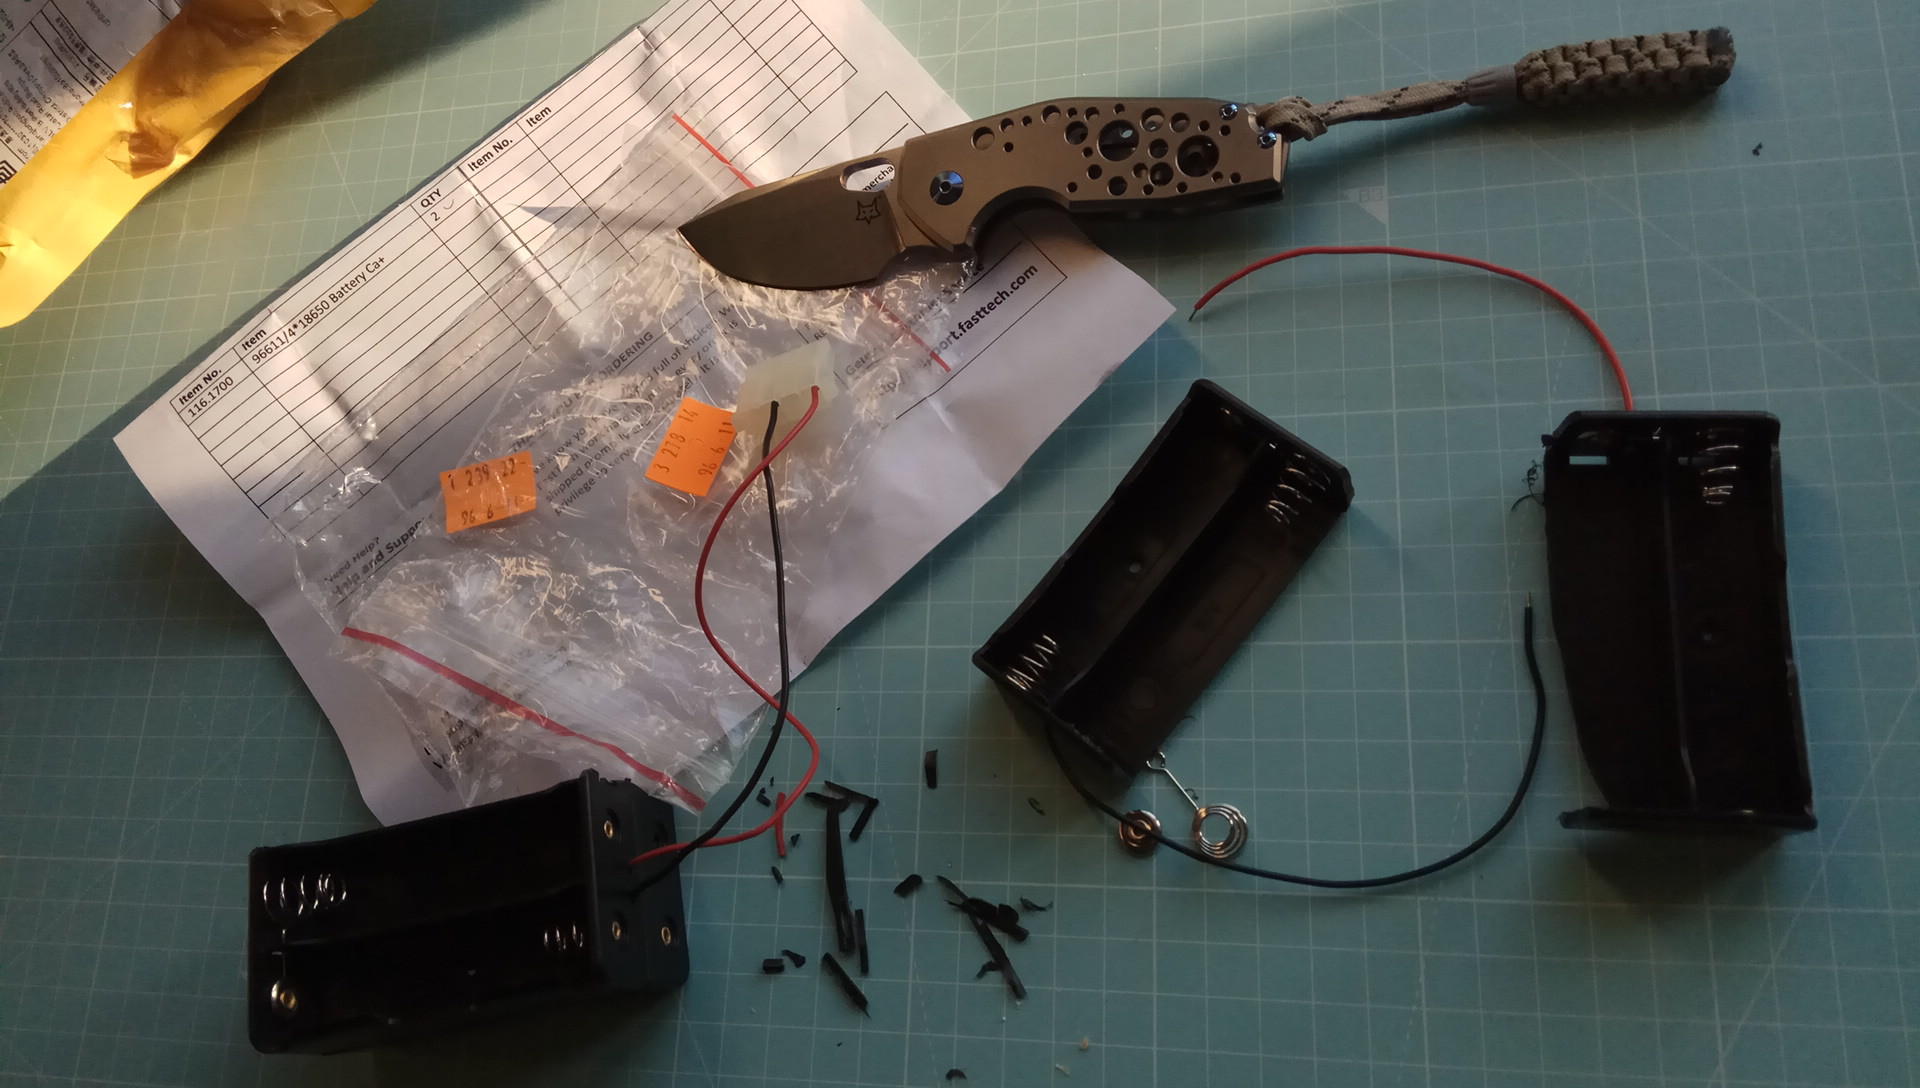
First, all good mod projects involve a little scavenging, right? So I snagged some nifty springs out of a Radio Shavk 8AA holder. I could have used a less expensive holder, but this one was all I had at the time, so out came the cutters, heh heh. /ubbthreads/images/graemlins/crazy.gif
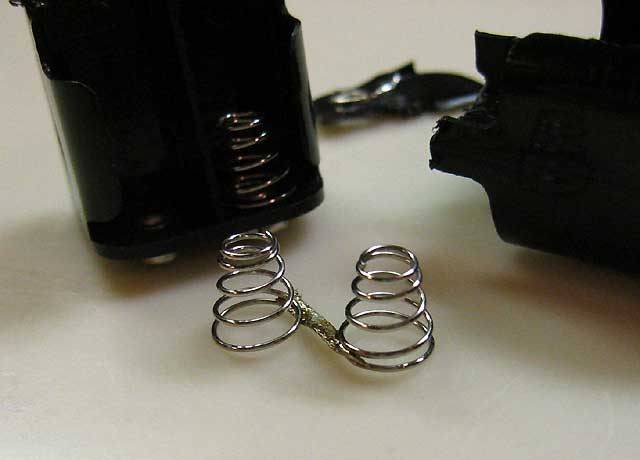
(Trashed Radio Shack 8AA holder in background, with newly fashioned dual spring in the foreground, like a phoenix rising from the ashes.)
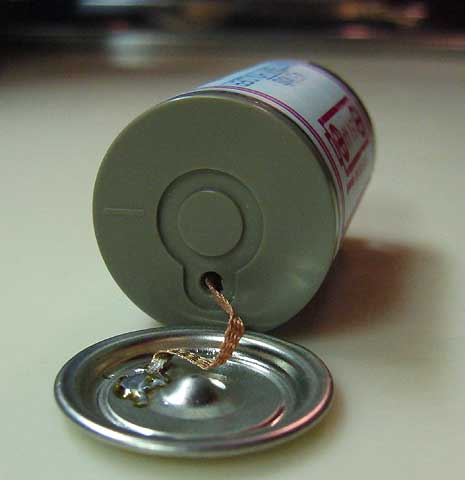
I put two of the individual springs together to replace the connected pair in the bottom of the stock 3-to-D holder. To connect them, I tucked a short length of desoldering braid between coil turns on each, pointed the stiff wire extentions toward each other (they're underneath the braid), then applied a considerable amount of solder. The desoldering braid, of course, took the solder like a sponge, then when all had cooled to room temperature, the result was a very stiff, very sure connection with essentially no resistance.
(Closeup of springs connected by desoldering braid.)

Next, I removed the internals of the 3-to-D holder without damaging the physical holder itself. In general the bits inside came out easily once a couple solder welds were snapped off using a pair of needlenose pliers. I also removed the metal contacts on the outside by gently drilling through the rivet; once finished, the contacts simply fell off.
After attaching another piece of desoldering braid to a htird scavenged spring (not shown), I ran it out the hole left by the now-vacant rivet, and soldered the other end to a scavenged negative endcap from a heavy duty D cell. I was pretty generous on the solder to make sure it stayed put, heh heh. /ubbthreads/images/graemlins/ooo.gif
(Bottom of 3-to-D holder with braid and D cell endcap, ready for permanent attachment.)
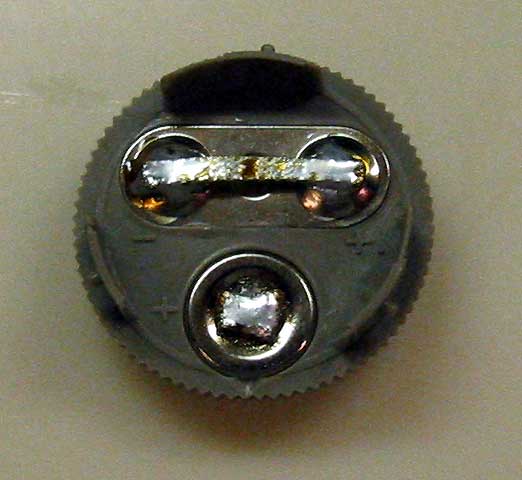
With the above work finished, the bottom of the 3-to-D holder had effectively been rebuilt. Now only the lid remained. Taking the simple approach, I soldered a short strip of braid across the existing metal bridge to ensure good contact, and tinned the portions that would make actual connection with the cells. As for the third, individual contact, I ran some desoldering braid through the existing rivet hole, folded and tinned (heavily) the end left inside to contact the cell.
(Closeup of modded 3-to-D lid.)
The other end of desoldering braid, the one extending out the rivet hole on the lid, was soldered to a positive endcap scavenged from a heavy duty D cell, then the endcap was permanently attached to the lid of the 3-to-D holder.
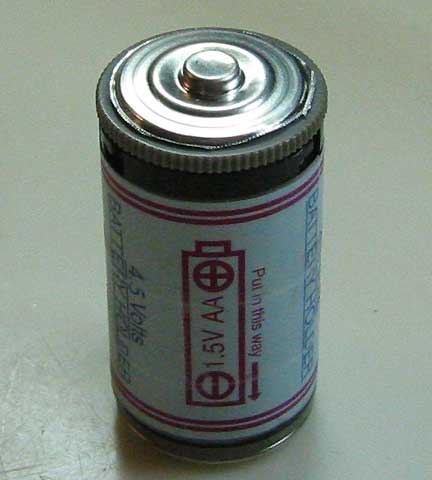
(Finished! Upright view.)
The rebuilt holder worked well! It had the desired improvement as far as achieving very low resistance throughout. The new endcaps did make the holder marginally taller, but in most lights the spring will flex the extra millimeter or so to allow a good fit anyway. I will say that inside things got tighter as well, but the holder still closed, barely.
Bottom line: SUCCESS! /ubbthreads/images/graemlins/grinser2.gif I like the minimally intrusive nature of this mod, meaning the physical holder itself wasn't cut or mutilated. It also just "feels" right with those actual D cell endcaps in place. However, the mod took a fair amount of work, so whenever Elektrolumens has those revised holders, I think I'll be a buyer, assuming they work as advertised. /ubbthreads/images/graemlins/grin.gif
/ubbthreads/images/graemlins/dedhorse.gif
With that out of the way, I'll say that I was up late soldering one night, and had a good mod in mind for my Blaster Jr. But I wasn't happy with the current flow coming from 3AA NiMH cells, and suspected that excessive resistance in the now-infamous EL 3-to-D holder was the culprit. (Yes, I know there's a new version coming out real soon now, but I got impatient.)
The thing I didn't like about the other mods I'd seen was that they seemed really involved, or required cutting the holder in half, or just went over my head as far as how to do the mod. So I improvised. /ubbthreads/images/graemlins/wink.gif
First, all good mod projects involve a little scavenging, right? So I snagged some nifty springs out of a Radio Shavk 8AA holder. I could have used a less expensive holder, but this one was all I had at the time, so out came the cutters, heh heh. /ubbthreads/images/graemlins/crazy.gif
(Trashed Radio Shack 8AA holder in background, with newly fashioned dual spring in the foreground, like a phoenix rising from the ashes.)
I put two of the individual springs together to replace the connected pair in the bottom of the stock 3-to-D holder. To connect them, I tucked a short length of desoldering braid between coil turns on each, pointed the stiff wire extentions toward each other (they're underneath the braid), then applied a considerable amount of solder. The desoldering braid, of course, took the solder like a sponge, then when all had cooled to room temperature, the result was a very stiff, very sure connection with essentially no resistance.
(Closeup of springs connected by desoldering braid.)
Next, I removed the internals of the 3-to-D holder without damaging the physical holder itself. In general the bits inside came out easily once a couple solder welds were snapped off using a pair of needlenose pliers. I also removed the metal contacts on the outside by gently drilling through the rivet; once finished, the contacts simply fell off.
After attaching another piece of desoldering braid to a htird scavenged spring (not shown), I ran it out the hole left by the now-vacant rivet, and soldered the other end to a scavenged negative endcap from a heavy duty D cell. I was pretty generous on the solder to make sure it stayed put, heh heh. /ubbthreads/images/graemlins/ooo.gif
(Bottom of 3-to-D holder with braid and D cell endcap, ready for permanent attachment.)
With the above work finished, the bottom of the 3-to-D holder had effectively been rebuilt. Now only the lid remained. Taking the simple approach, I soldered a short strip of braid across the existing metal bridge to ensure good contact, and tinned the portions that would make actual connection with the cells. As for the third, individual contact, I ran some desoldering braid through the existing rivet hole, folded and tinned (heavily) the end left inside to contact the cell.
(Closeup of modded 3-to-D lid.)
The other end of desoldering braid, the one extending out the rivet hole on the lid, was soldered to a positive endcap scavenged from a heavy duty D cell, then the endcap was permanently attached to the lid of the 3-to-D holder.
(Finished! Upright view.)
The rebuilt holder worked well! It had the desired improvement as far as achieving very low resistance throughout. The new endcaps did make the holder marginally taller, but in most lights the spring will flex the extra millimeter or so to allow a good fit anyway. I will say that inside things got tighter as well, but the holder still closed, barely.
Bottom line: SUCCESS! /ubbthreads/images/graemlins/grinser2.gif I like the minimally intrusive nature of this mod, meaning the physical holder itself wasn't cut or mutilated. It also just "feels" right with those actual D cell endcaps in place. However, the mod took a fair amount of work, so whenever Elektrolumens has those revised holders, I think I'll be a buyer, assuming they work as advertised. /ubbthreads/images/graemlins/grin.gif