Cheap Tricks Used to Modify Beams--Minimizing Spill Light

Genzod

Banned
Joined
Apr 25, 2017
Messages
392
I'm curious about cheap tricks used to modify light beams on flashlights and how well they work.

I'm familiar with DC-Fix or Magic Tape solutions to creating diffused light, and I've seen pictures of the difference it makes.

Not to long ago, I read someone talking about sticking a half diameter wide dot centered on the lens to reduce spill light for creating a more effective narrow beam in fog. I'm wondering if that diminishes throw output any. Anyone know anything at all about this?

Does anyone know of any before and after beam shot examples using the sticky dot technique?

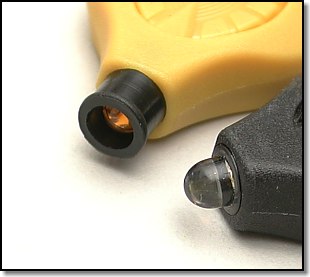
What would happen if a tube with a flat back interior were placed in front of a circular lens? Would it block the spill and allow mostly just spot?
 

Genzod

Banned
Joined
Apr 25, 2017
Messages
392
Make a snoot from a toilet paper roll and some duct tape.

Now that I know it can work, I'll apply your toiletry wisdom to a more appropriate size for the flashlights I'm looking at--compact handhelds like the Manker T01 II.

Anyone have a link to pics of this or the sticky dot technique? Seeing is believing in some cases. ;)
 

archimedes

Flashaholic
Joined
Nov 12, 2010
Messages
15,780
Location
CONUS, top left
I'm thinking in terms of minimizing the spill light of a relatively high power compact hand held so that the spill light doesn't impede long range visibility.

Yes, I don't think a Photon Freedom (covert or not) will be optimal for spotting blazes at 100m ... ;)
 

Genzod

Banned
Joined
Apr 25, 2017
Messages
392
Yes, I don't think a Photon Freedom (covert or not) will be optimal for spotting blazes at 100m ... ;)

I have to admit though, that is a great example of the principle of "tubing" at work to minimize spill light! Plus, it led me to a photo of the change. "Excellent!" said Mr. Burns.

dr_photon_compare_closeup2.jpg


covert%20vs%20normal%20freedom.jpg


Genzod

Banned
Joined
Apr 25, 2017
Messages
392
At this point I'm wondering if there might be an even better design for this kind of anti-spill tube. It seems like light still reflects off the internal sides of the tube, creating some wide angle spill (see photo in my last post).

What if the tube is widened a bit, and the end is capped with a narrow opening that allows all the spot to emerge? I'm thinking some of the photons might be redirected back to the emitter for "recycling", and that might be advantageous to increasing LED surface brightness. But I don't understand the physics all that well beyond some reading, and perhaps that idea is completely "insane". I'd be interested to hear what someone with a little knowledge might have to say about that.
 
Last edited:

bykfixer

Flashaholic
Joined
Aug 9, 2015
Messages
20,445
Location
Dust in the Wind
Now that I know it can work, I'll apply your toiletry wisdom to a more appropriate size for the flashlights I'm looking at--compact handhelds like the Manker T01 II.

Anyone have a link to pics of this or the sticky dot technique? Seeing is believing in some cases. ;)

Just slice the tube, cut the amount you need and wrap it around the light. Place duct tape over the new sleeve and viola! Scotch tape, electrical... what ever works best for you.


Instant thrower.

If you really wanna get all fancy you can paint the inside white.
 
Last edited:

archimedes

Flashaholic
Joined
Nov 12, 2010
Messages
15,780
Location
CONUS, top left
....
What if the tube is widened a bit, and the end is capped with a narrow opening that allows all the spot to emerge? I'm thinking some of the photons might be redirected back to the emitter for "recycling", and that might be advantageous to increasing LED surface brightness. But I don't understand the physics all that well beyond some reading, and perhaps that idea is completely "insane". I'd be interested to hear what someone with a little knowledge might have to say about that.

You are "sorta" describing a wavien collar ....

You may want to browse threads, here -

http://www.candlepowerforums.com/vb/forumdisplay.php?138-OMG-Lumens-OneStopThrowShop

CPF member @saabluster is an expert in these issues, with ongoing active R & D in this area.
 
Last edited:

Genzod

Banned
Joined
Apr 25, 2017
Messages
392
Just slice the tube, cut the amount you need and wrap it around the light. Place duct tape over the new sleeve and viola! Scotch tape, electrical... what ever works best for you.


Instant thrower.

If you really wanna get all fancy you can paint the inside white.

Ah, I see. A perfect fit for any occasion! Thanks for the pics.
 

Genzod

Banned
Joined
Apr 25, 2017
Messages
392

jorn

Flashlight Enthusiast
Joined
Nov 8, 2008
Messages
2,499
Location
Norway
The collar is designed to be used on asperic lights. The asperic lights only make use of the light that hits the lense directly, the rest of the light from the led is lost inside the head. And a asperic light tuned for throw has a lot of lumens lost. Normally around 50%. So the collar will gather up all the light that normally wont hit the lense itself, and focus it back to the led die. Making the surface brightness better. And that will again increase throw. Asperics and zoom light got no spill at all when focused for throw. So this collar will not block out spill, it just recycles the lumens that normally is lost in this type of setup.
 

Genzod

Banned
Joined
Apr 25, 2017
Messages
392
The collar is designed to be used on asperic lights. The asperic lights only make use of the light that hits the lense directly, the rest of the light from the led is lost inside the head. And a asperic light tuned for throw has a lot of lumens lost. Normally around 50%. So the collar will gather up all the light that normally wont hit the lense itself, and focus it back to the led die. Making the surface brightness better. And that will again increase throw. Asperics and zoom light got no spill at all when focused for throw. So this collar will not block out spill, it just recycles the lumens that normally is lost in this type of setup.

I appreciate the in depth explanation. :)
 

Genzod

Banned
Joined
Apr 25, 2017
Messages
392
Just slice the tube, cut the amount you need and wrap it around the light. Place duct tape over the new sleeve and viola! Scotch tape, electrical... what ever works best for you.


Instant thrower.

If you really wanna get all fancy you can paint the inside white.

If anyone has a flux meter, I think it would be interesting to learn how much the central lux intensity increases as a percentage of original after adding a spill tube (of course I realize this varies from F/L to F/L with the geometry of the beams). I think the maximum effect would be realized at a maximum extension that is just on the cuff of reducing the spot diameter (a length that just allows the spot angle to touch the tip of the tube.)

I imagine distance from lamp to meter is irrelevant so long as it is consistent and at least a meter or two from the lamp. The flux meter would only have the requirement of being centered at maximum flux in either case.
 

StarHalo

Flashaholic
Joined
Dec 4, 2007
Messages
10,927
Location
California Republic
- A grid on the end of your snoot further reduces stray spill, this is a technique from photography lighting.

- A magnifying glass works as an impromptu collimator when held at the right distance; you could find the distance, then cut a snoot to length with the glass on the end.

- You might like TIR collimator lensed flashlights, these feature a "fat spot" beam which has no spill whatsoever, it's just a broad, even spotlight.
 
Top