There is a fix for the PMR/MagC/Hotlips issue where it does not focus tight. As advised by Paul, a section of inside the head must be machined allowing the head to screw down farther.
For removing emitters from stars, look
here. Make sure you skip step 2 and making the bend parallel to the emitter's leads works better than where the bend was made in the pics.
There is yet another recipe for applying glowpowder. I get the best results using slow curing epoxy over the other two methods. Painting the surface white also gives a better glow IMO. With blue, make sure you mix in enough GP otherwise it won't glow very bright or long. Of course it still won't glow as good as green though.
I've tried this method also but I don't use it & personally I like the epoxy method best. I still think the epoxy way works best. I forget who posted this but here it is:
Firstly, helpful materials:
1. a 1/2 oz. bottle of lacquer-based CLEAR fingernail finish.
2. a 1/4 oz. bottle of clean unleaded paint thinner.
3. small bottle of "white out" -like typewriter "correction" fluid -to be used as a base (primer) coat.
4. 3-4" stirring stick (not plastic)
5. a 1/4 teaspoon plastic kitchen measuring spoon
6. cheap medicine dropper (for thinner)
7. piece of folded cardboard or small piece of paper for small funnel.
8. clean, empty, sealable small bottle 1/2 oz. or larger.
EZ recipe for a DAZZLING paint after-glow result:
A. pour out 3/4 (75%) of the 1/2 oz. fingernail fingernail finish into the other little empty bottle and cap it tight, so it doesn't evaporate.
B. carefully fill the plastic measuring 1/4 teaspoon of the glow mix to a little more than the level mark, and gently pour it into the fingernail liquid. FYI-that 1/4 teaspoon of pigment weighs about 2.25 gm.
C. stir the powder into the liquid thoroughly.!
D. Screw the cap (with built-in applicator brush) tightly down to prevent the mix from drying out.
-There..., now you've mixed some great paint!
I suggest keeping that little bottle of paint in motion every minute or so to prevent the pigment from settling,-and you having to re-stir.
Simple and quick application:
A. on a clean, dry surface, quickly paint a base coat of the "white out" (or other oil-based flat White paint).
B. After it dries (2-3 min)., apply a thin coat of your newly mixed Glow paint-and as soon as you have applied it, put the cap back on Quickly -to minimize evaporation. It's a very good idea to keep that bottle of new Glow-paint moving in your hand a little -to keep it well mixed.
C. All you need to do then is to apply 3-4 more thin coats (letting each one dry thoroughly -usually 5-10 minutes under average conditions, and a properly dried surface will look FLAT, not shiny), and if you're in a hurry you can use a squeeze air-bulb or even a small fan to speed the drying process.
Tip: if the paint mixture does become too thick, making it hard to apply evenly, just add 3-5 drops of the paint thinner with the dropper to thin it out very nicely....-not too much!
-And stir it in well before re-applying.
FYI-if you've stuck with my recommendations as far as proportions, you have a pigment to base liquid ratio of 30-35% by weight.
Don't do the following!:--------
1. dilute with lacquer thinner or acetone-you'll wreck the mix.
2. don't add bird or buckshot into the mix to facilitate mixing-the lead will leach into the mix!
You can do the above procedure from start to completion in an hour or so, -with decent ventilation for each coat to dry, but don't expect the painted surface to glow brightly, until the paint is dry.-that's how it works folks
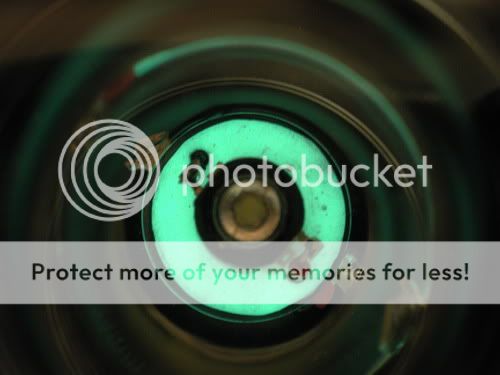
When drying is complete, using the blue/green pigment, you will have a glow surface that is 4-5 times as bright and lasts 2-3 times longer than the green glow sheeting, and is 40% brighter (IMO) than Alien Skin -especially after 2 hours in darkness.
A final touch:------------------
The painted surface can easily be given a thin coat of protective clear lacquer from that second little bottle that was left over.
General Info:-------------------
The Regular green pigment glows brightly for about 8-10 hours and only need 30 seconds exposure to strong light to charge up.
The more powerful blue/green paint glows very well for 16-24 hours and requires at LEAST a full minute to properly charge, -and by strong light I mean the surface should be held 3-4" under a cool white fluorescent if possible......
The glowing surfaces will have a lifespan rivaling that of the LED, I would guess. Hoop-de-doo!
The entire procedure described above takes less time to do than the time it took to write this little article -about 70min.
p.s.-short exposure to UV light on a 2" x 3½" painted business card gave enough light storage to allow me to find my way around a house full of dark rooms for about 40 minutes, and to easily read average sized printed copy in a TV Guide for almost half an hour....
Edit-4/5/02:
One really good way to tell if you've mixed your new paint in the proper proportion is to stir the paint thoroughly and then set the jar down on a flat surface in a dark area for 2-3 hours.
Then, holding the bottle level under a strong light to charge up the mixture, note the level of the settled pigment at the bottom compared to the total fluid level. It should be no more than about 1/3 of the whole liquid.
*Edit-4/5-a last final way to tell if you've got the right mix ratio is that the Dried painted surface should feel very slightly gritty-like emery paper.
Also, the mixed paint should flow a little,-if it doesn't, then just add 2-3 drops (+) of the thinner. -If it's too "gooey", it won't go on smooothly and give you a nice Even coat..
Edit-4/20/02:
To test to see if you have picked the best base liquid to use, it would be great if you could hold a small swatch of just the Clear base painted on a White business card under a blacklight. If you see little or no discoloration, you've got a good one! I tried 5 or 6 different brands under a black light and 4 of them looked a little "blackish" under that light. It WILL make a difference in ultimate brightness.
Addition-5/14/02
It's also best to try to mix up just a little more paint than you will need for the particular job you're doing. Over time, the lacquer medium will darken the pigment a little. So the absolute best possible results come from a fresh mixture. However, the finished painted surface will
not deteriorate over a period of time-especially if it's lightly lacquered.