Link to previous post -
Light Coverage - spill-diameter
I combined two (CPF members') brilliant ideas together to get these shots -
[Note: these are Redone photos attempting to align the protractor better as suggested in 2 responses]
The actual measurements I got from the previous post were:
____________________________________________________________
All lights with front bezel 12" away from wall
Light/ Diameter/ Angle/ Lens equiv on 35mm camera
Ray-O-Vac Lantern/ 43"/ 122deg/ 12mm (extremeWide - almost fisheye)
Streamlight Scorpion/ 36"/ 113deg/ 14mm (extremeWide)
SureFire 9P/ 26"/ 95deg/ 20mm (ultraWide)
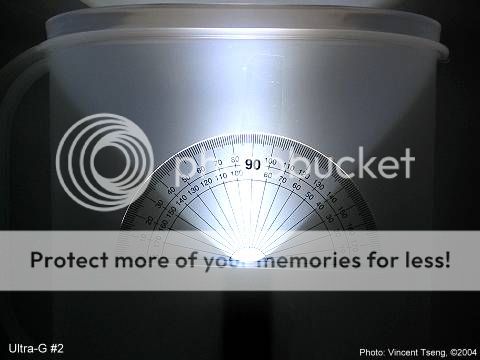
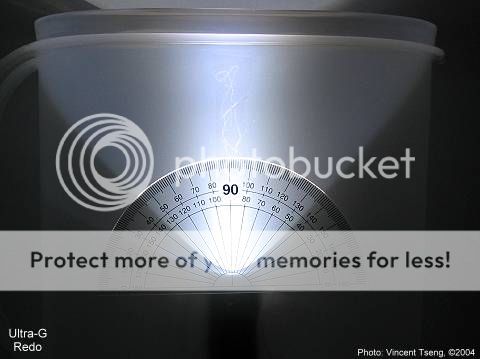
Ultra-G/ 22"/ 85deg/ 24mm (very wide)
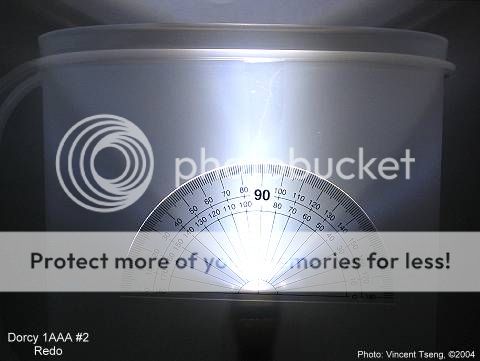
Dorcy 1AAA/ 21"/ 82deg/ 25mm (very wide)
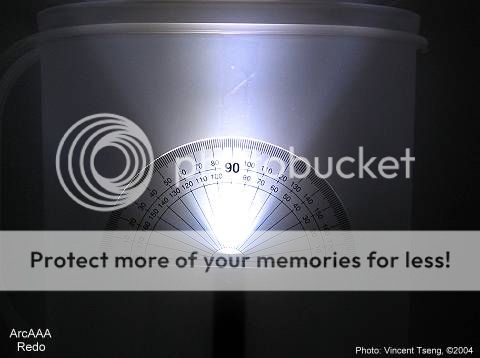
ArcAAA/ 15"/ 64deg/ 35mm (semi-wide to normal)
____________________________________________________________
Set Up -
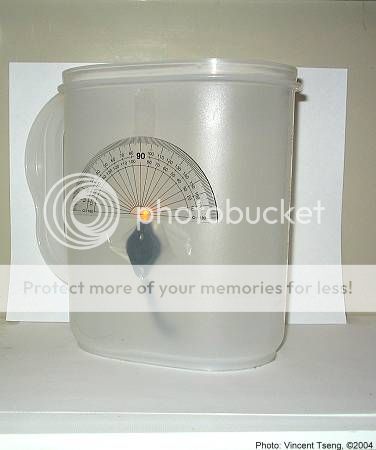
I used tape to stick the lights to the inside front of the jug then tried to align the protractor on the front face - which was difficult for the photo - later I found leaving the protractor taped to the front and then taping/aligning the light to the inside of the jug was somewhat better.
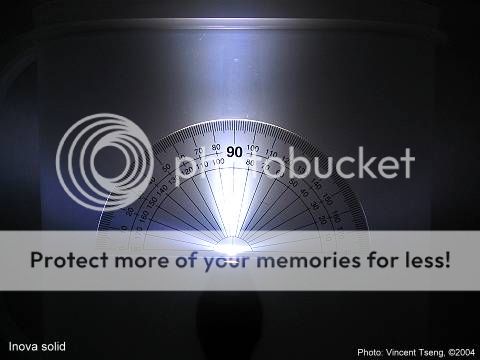
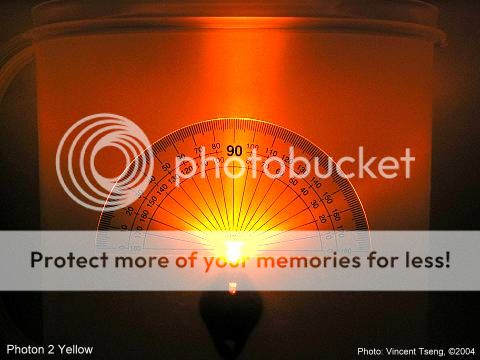
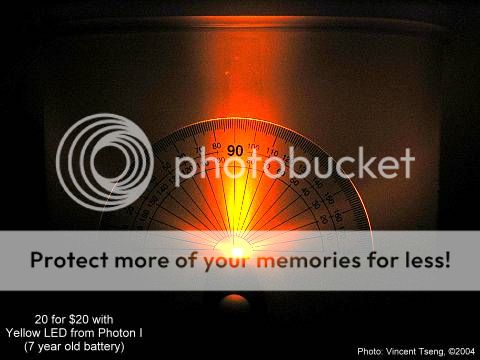
More lights:
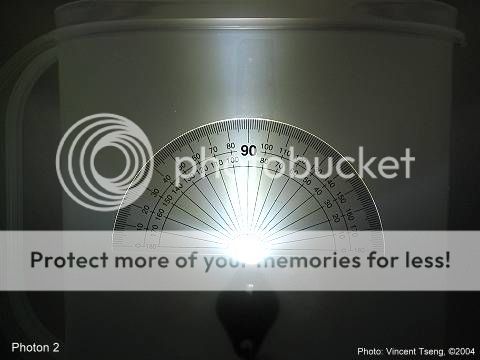
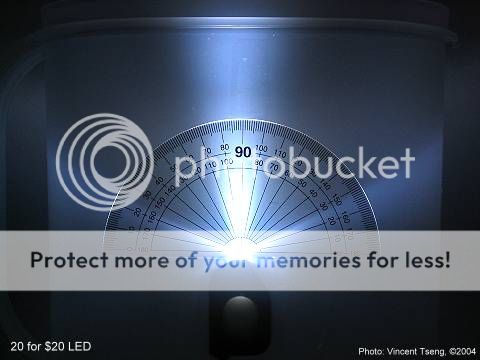
and finally a Photon 2 Yellow and a 20 for $20 body with an old Photon I Yellow LED and 7 year old battery....
Comments please?
[edit - to replace first 3 photos for better protractor alignment]
Light Coverage - spill-diameter
I combined two (CPF members') brilliant ideas together to get these shots -
[Note: these are Redone photos attempting to align the protractor better as suggested in 2 responses]
The actual measurements I got from the previous post were:
____________________________________________________________
All lights with front bezel 12" away from wall
Light/ Diameter/ Angle/ Lens equiv on 35mm camera
Ray-O-Vac Lantern/ 43"/ 122deg/ 12mm (extremeWide - almost fisheye)
Streamlight Scorpion/ 36"/ 113deg/ 14mm (extremeWide)
SureFire 9P/ 26"/ 95deg/ 20mm (ultraWide)
Ultra-G/ 22"/ 85deg/ 24mm (very wide)
Dorcy 1AAA/ 21"/ 82deg/ 25mm (very wide)
ArcAAA/ 15"/ 64deg/ 35mm (semi-wide to normal)
____________________________________________________________
Set Up -
I used tape to stick the lights to the inside front of the jug then tried to align the protractor on the front face - which was difficult for the photo - later I found leaving the protractor taped to the front and then taping/aligning the light to the inside of the jug was somewhat better.
More lights:
and finally a Photon 2 Yellow and a 20 for $20 body with an old Photon I Yellow LED and 7 year old battery....
Comments please?
[edit - to replace first 3 photos for better protractor alignment]